🕷️ Spooky Spider Cookies: Your New Halloween Baking Obsession!
Hey there, my spooky-sweet friends! Chef Emily here, dusted in powdered sugar and wielding a piping bag like a magic wand. Can you feel it? That crisp October air carrying whispers of rustling leaves and the promise of costume-clad mischief? Halloween isn’t just about tricks—it’s about edible magic that makes both kids and adults squeal with delight. And let me tell you, these Spooky Spider Cookies are about to become your new Halloween tradition!
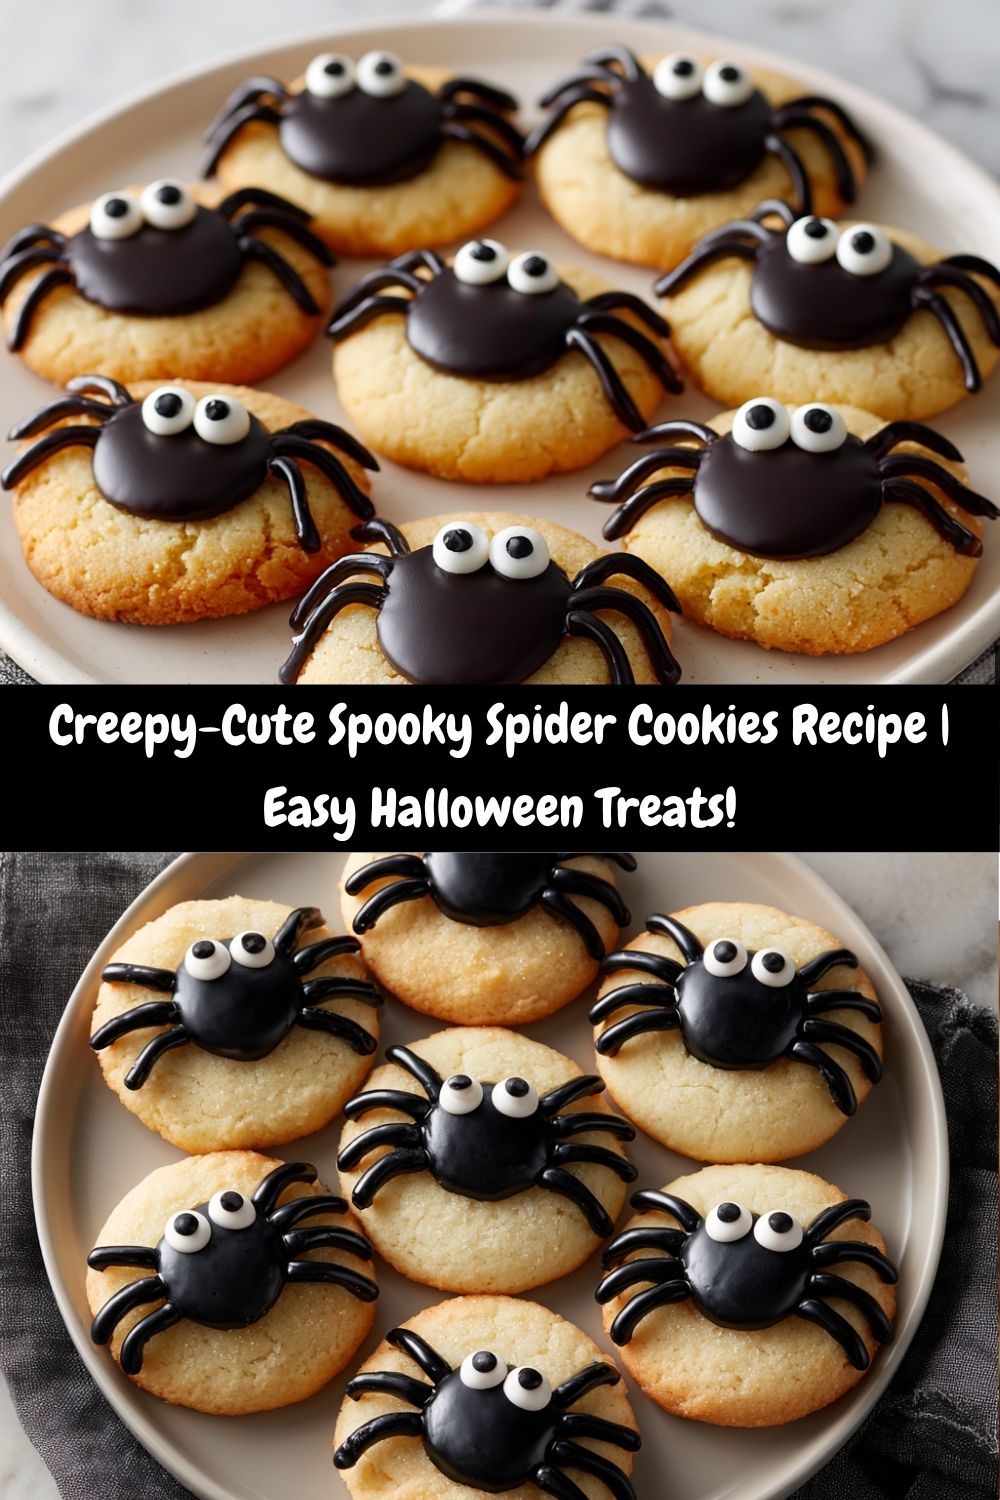
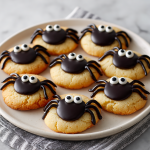
Picture this: soft, buttery cookies that melt on your tongue, transformed into adorable arachnids with jet-black legs and googly candy eyes. They’re equal parts creepy and cuddly—like a plush tarantula you actually want to hug (then devour!). Perfect for classroom parties, haunted house gatherings, or just giggling in the kitchen with your mini monsters. The best part? They’re shockingly simple. No fancy skills needed—just butter, sugar, and a dash of playful spookiness. Ready to make your kitchen the happiest haunted house on the block? Let’s bake some magic!
When Grandma’s Cookies Grew Legs: A Halloween Memory
You know that warm, cinnamon-scented kitchen I told you about in my story? Well, one blustery Halloween when I was seven, my grandma decided our usual snickerdoodles needed a dose of drama. She handed me a tube of black icing and whispered, “Let’s make these cookies crawl, Emmy!” With shaky hands, I piped wobbly legs onto every cookie while she strategically placed candy eyes. When my cousins arrived, they froze mid-monster-march, staring at the plate. “Real spiders?!” shrieked my brave-but-bug-phobic cousin Timmy. The collective gasp turned into roars of laughter when he took a tentative bite… then grabbed three more. That moment—the shared shrieks and sticky-fingered joy—is why I still make these every October. Food isn’t just fuel; it’s a time machine to the moments that stitch our hearts together.
🧪 Your Spider Cookie Lab Ingredients
Makes 24 cookies
- 2¼ cups all-purpose flour – The cozy blanket for our cookie dough! Chef’s Tip: Spoon flour into measuring cups to avoid dense cookies.
- ½ tsp baking soda – Our lift agent! Makes cookies puff just enough for plush spider bodies.
- ¼ tsp salt – The flavor enhancer! Balances sweetness like a pro.
- 1 cup unsalted butter, softened – The soul of tenderness! Swap: Salted butter works (just skip added salt).
- ¾ cup granulated sugar – For that classic crisp edge.
- ¾ cup brown sugar – Hello, moisture and caramel notes! Insight: Dark brown sugar = chewier spiders.
- 2 tsp vanilla extract – The aromatic hug! Use real vanilla for depth.
- 2 large eggs – Our binding glue! Room temp blends smoother.
- Black decorating icing – The spider-maker! Hack: Melt chocolate chips + 1 tsp coconut oil for DIY “icing.”
- Candy eyes – The personality! Find jumbo ones for extra silliness.
Why this works: Butter + brown sugar = chewy centers, while granulated sugar creates lightly crisp feet. It’s textural magic!
👩🍳 Weaving the Web: Baking Your Spiders Step-by-Step
- Preheat & Prep: “Crank that oven to 350°F (175°C)! Line baking sheets with parchment paper—no sticking, no stress. Pro Tip: If baking multiple trays, position oven racks in upper/middle thirds.”
- Dry Team Unite: “Whisk flour, baking soda, and salt in a bowl. No lumps allowed! Why? Even distribution = no bitter soda pockets.”
- Butter Party: “In a large bowl, cream softened butter, granulated sugar, and brown sugar until fluffy (2-3 mins). Watch: Stop to scrape the bowl! This incorporates air for lift.”
- Wet Ingredients Waltz In: “Beat in eggs one at a time, then vanilla. Mix until silky—about 1 min. Fun Fact: Vanilla tempers eggy flavor!”
- Marry Wet & Dry: “Gradually add dry ingredients to wet. Mix until just combined. ⚠️ Warning: Overmixing = tough spiders!”
- Scoop & Squish: “Roll dough into 1-inch balls (I use a cookie scoop!). Place 2 inches apart on sheets. Gently flatten to ½-inch thick discs—spiders need landing pads! Hack: Dip fingers in flour to prevent sticking.”
- Bake to Golden Perfection: “Bake 10-12 mins until edges blush gold. Centers will look soft—they firm up! Secret: Rotate pans halfway for even bakes.”
- Cooling Zen: “Let cookies cool 5 mins on sheets, then transfer to racks. Patience, Padawan: Decorating warm cookies = icing puddles!”
- Create Crawlers: “Pipe 4 legs per cookie side with black icing. Work outward from the body—like sunrays! Add 2 eyes while icing’s tacky. Artistry Tip: Slightly curved legs look creepily alive!”
🕸️ Setting the Scene: Serving Your Spider Squad
Presentation is half the fun! Pile these leggy guys onto a cake stand draped with fake cobwebs or a slate board dusted with powdered “spooky mist.” For parties, stick paper googly eyes onto clear cups and nestle cookies inside—mini spider terrariums! Pair with “bug juice” (berry punch) or a steaming cauldron of hot chocolate. Kids adore finding them “hidden” in a bowl of candy-covered “dirt” (crushed Oreos). Warning: They’ll disappear faster than ghosts at sunrise!
🕷️ Spin Your Own Web: Delicious Twists!
- Peanut Butter Spiders: Swap ½ cup flour for ½ cup peanut butter powder. Pipe legs with melted chocolate!
- Gluten-Free Ghosts: Use 1:1 GF flour. Skip legs, pipe white icing swirls + eyes for friendly ghosts!
- Chocolate Vampires: Add ⅓ cup cocoa powder to dry ingredients. Pipe red icing “blood” dribbles!
- Zombie Edition: Tint dough green with gel food coloring. Pipe wonky legs and “X” eyes!
- Mummy Wrap: Pipe white icing in crisscrosses over entire cookie—add two eyes peeking out!
🧑🍳 Emily’s Corner: Behind the Cookie Curtain
Confession: My first batch looked less like spiders and more like squished beetles! The trick? Chill dough 20 mins before scooping for thicker bodies. Over years, I’ve learned: slightly underbaked cookies = extra soft “spider bellies,” and adding a pinch of cinnamon to the dough whispers “autumn.” One Halloween, my dog Buster snatched a cookie mid-decoration dash. He pranced around with black-iced paws for days—my living room looked like a crime scene! Now I guard cookies like Smaug guards treasure. These aren’t just cookies; they’re joy factories. Send me pics of your creepy creations @TastyChow—I’ll feature my faves!
❓ Spider Cookie SOS: Your Questions, Solved!
Q: My icing legs smear! Help?
A: Ensure cookies are COMPLETELY cool. If using melted chocolate, thicken it with powdered sugar. Pipe quickly before it sets!
Q: Cookies spread into pancake-spiders?
A: Butter was likely too warm! Chill dough 30 mins pre-baking. Also, check baking soda freshness—expired soda won’t lift.
Q: Can I make dough ahead?
A: Absolutely! Freeze scooped dough balls up to 3 months. Bake straight from frozen—add 2 extra mins.
Q: Candy eyes won’t stick?
A: Pipe a tiny icing dot first as “glue.” Or attach pre-icing while dough is slightly warm (they’ll melt slightly and adhere).
Spooky Spider Cookies
- Total Time: ~45 mins
- Yield: 24 cookies 1x
Description
These creepy-cute cookies will crawl their way into everyone’s heart this Halloween! Soft, buttery, and sweet, they’re transformed into eight-legged treats with rich black icing and candy eyes. Whether you’re hosting a party or whipping up a Halloween night snack, these spider cookies spin just the right amount of spooky fun.
Ingredients
2¼ cups all-purpose flour
½ tsp baking soda
¼ tsp salt
1 cup unsalted butter, softened
¾ cup granulated sugar
¾ cup brown sugar
2 tsp vanilla extract
2 large eggs
Black decorating icing or melted chocolate
Candy eyes
Instructions
Preheat oven to 350°F (175°C). Line a baking sheet with parchment paper.
Whisk flour, baking soda, and salt in a bowl.
Cream butter and both sugars until fluffy. Add eggs and vanilla; beat well.
Mix in dry ingredients until combined.
Roll dough into 1-inch balls and place on baking sheet. Flatten slightly.
Bake for 10–12 minutes or until golden. Cool completely.
Decorate using black icing to pipe 8 legs on each cookie. Add candy eyes on top for that spooky spider look!
- Prep Time: 15 minutes
- Cool & Decorate: 20 mins
- Cook Time: 12 minutes
Nutrition
- Calories: 180 / Cookie
- Sugar: 15g / Cookie
- Fat: 8g / Cookie
- Carbohydrates: 25g / Cookie
- Protein: 2g / Cookie
🍪 Nutrition Facts (Per Cookie)
Calories: ~180 | Fat: 8g | Carbs: 25g | Sugar: 15g | Protein: 2g
Note: Values vary based on icing/candy eyes used. For lower sugar, try sugar-free icing!
Final Thoughts: Cookies That’ll Crawl Right Into Your Heart 🕷️💛
And there you have it—soft, buttery little critters that look like they scuttled straight out of a haunted cookie jar. These Spooky Spider Cookies prove that Halloween treats can be equal parts adorable and delicious, without demanding a pastry chef’s toolkit. They’re the kind of bake that invites giggles, sticky fingers, and “just one more” moments, whether you’re making them solo with a horror movie on in the background or surrounded by a crew of mini decorators armed with icing tubes.
The best part? You can dress them up or down for your crowd—go cutesy with big googly eyes, make them gory with red “venom” drizzle, or add a glittery touch for glam-spiders. Every batch tells its own story, and every slightly wonky leg just adds personality.
So go ahead—preheat that oven, cue up your Halloween playlist, and let your kitchen become a cookie crawl space. Because in the end, it’s not just about the cookies—it’s about the laughter, the memories, and that moment when someone takes a bite and says, “This is the best kind of creepy.” 🎃🍪