Spooky Sweetness That’ll Haunt Your Taste Buds!
Hey there, kitchen adventurers! 👋 Emily here, apron dusted with flour and heart full of Halloween spirit. Is there anything more magical than October? The crisp air, pumpkin patches, and that giddy excitement as spooky season rolls in. And let me tell you—nothing steals the show at a Halloween bash quite like cookies that look like they crawled out of a tomb but taste like a peanut butter hug! These Mummy Peanut Butter Cookies are my edible love letter to autumn’s playful side. They’re absurdly easy (we’re talking 30-minutes-from-bowl-to-boo easy), irresistibly cute, and guaranteed to make both kids and adults do that happy cookie dance. Forget store-bought treats—this year, we’re conjuring sweetness with our own sticky fingers. Ready to make your kitchen smell like nutty nostalgia and sugar spells? Let’s wrap some mummies!
Grandma’s Spoon & Ghostly Laughter
Picture this: 1998. Me, age 9, standing on a wobbly stool in Grandma June’s kitchen. Outside, Midwestern winds rattled skeleton trees, but inside? Warmth. Laughter. And peanut butter smudges on her vintage wallpaper. Grandma always made “Monster Cookies” every October—chunky, raisin-studded beasts I pretended to fear. One rainy Saturday, we ran out of oats mid-batch. “Well, butter my biscuits,” she chuckled, grabbing peanut butter instead. What emerged from the oven were flat, crinkly cookies that looked… eerily pale. “They’re ghosts!” I squealed. With a wink, Grandma melted white chocolate (her “magic glue”), zig-zagged it wildly, and stuck on candy eyes. Suddenly, our “mistake” became mummies. We giggled as they “haunted” the cooling rack. Decades later, that messy joy lives on in every bandage-drizzled cookie I make. Some traditions? They just stick to your ribs—and your heart.
Your Mummy-Making Toolkit 🧪
For the cookies:
- ½ cup unsalted butter, softened – Creates that melt-in-your-mouth texture! Chef’s hack: Leave it on the counter for 1 hour—or microwave cold butter for 7 seconds (flip halfway!).
- ½ cup creamy peanut butter – Use conventional (like Jif) for perfect binding. Natural PB? Add 1 extra tbsp flour to avoid crumbles.
- ½ cup granulated sugar – Sweetens without moisture. Swap with coconut sugar for caramel notes!
- ½ cup brown sugar – Molasses = chewiness. Light or dark works—dark adds deeper flavor.
- 1 egg – Binds our mummy souls! Room temp blends smoother.
- 1 tsp vanilla extract – Elevates nuttiness. Try almond extract for eerie twist!
- 1 ¼ cups all-purpose flour – Structure queen! Gluten-free? Use 1:1 GF flour + ½ tsp xanthan gum.
- ½ tsp baking soda – Lift agent for crackly tops. Check expiration—flat mummies are sad mummies.
- ¼ tsp salt – Balances sweetness. Sea salt flakes? Sprinkle atop dough balls pre-bake!
For decoration:
- 1 cup white chocolate chips or melting wafers – Wafers set faster, but chips work! Chef’s secret: Add 1 tsp coconut oil when melting for silkier drizzles.
- Candy eyes – Find edible eyes in baking aisles. No eyes? Mini chocolate chips or M&M’s work in a pinch!
Let’s Bandage Some Cookies! 🏺
- Preheat oven to 350°F (175°C). Line a baking sheet with parchment paper. → Why parchment? No sticking AND easy cleanup. (Busy parent win!)
- Cream butter, peanut butter, and both sugars until fluffy. → Use a hand mixer for 2 minutes! Fluff = tender cookies. Scrape bowl halfway—no hidden butter lumps!
- Add egg and vanilla. Mix until just combined. → Overmixing eggs = tough mummies. Stir until yolk vanishes!
- Mix in flour, baking soda, and salt until dough forms. → Dough will be soft but not sticky. If it clings to fingers, chill 15 minutes.
- Roll dough into 1-inch balls. → Cookie scoop = uniform cuties! No scoop? Use a tablespoon.
- Place on baking sheet. Flatten slightly with a fork or glass bottom. → Criss-cross fork marks? Perfect peanut butter cookie homage!
- Bake 8–10 minutes until golden edges appear. → They’ll look underdone—that’s GOOD! They firm up cooling. Overbaked = crunchy mummies (boo!).
- Cool completely on a wire rack. → RUSHING = melted chocolate mess. Patience, padawan!
- Melt white chocolate in 30-second bursts, stirring until smooth. → Microwave power varies! Stir every 15 secs after first burst to avoid scorching.
- Use a spoon or piping bag to drizzle chocolate back and forth. → Chef’s fun hack: Pour chocolate into a ziplock, snip tiny corner, and “draw” bandages! Messy = spookier.
- Add candy eyes while chocolate is soft. → Press gently so they stick. Let eyes peek through “bandage” gaps—personality matters!
How to Serve Your Edible Art 👻
Pile these cuties on a slate board or vintage tray for maximum “oohs!” Add fake cobwebs (food-safe!) and plastic spiders for drama. Kids adore finding them “hidden” in lunchboxes—wrap pairs in cellophane tied with black ribbon. Coffee pairing? Dunk ’em in hot cocoa! For parties, set up a DIY decorating station with extra chocolate, eyes, and sprinkles. Pro tip: Store in an airtight container with parchment between layers—they vanish faster than ghosts at sunrise!
Switch Up the Spook! 🔮
- Chocolate Mummies: Swap peanut butter dough with chocolate cookie dough! Drizzle with orange candy melts.
- Zombie Bites: Add red icing “blood” splatters after bandages dry! Use a toothpick for drips.
- Vampire Cookies: Press mini pretzel sticks as “fangs” before baking! Use strawberry jam “blood” at base.
- Nut-Free Mummies: Replace PB with sunflower seed butter. Check candy eyes for nut traces!
- Spicy Ghouls: Add ¼ tsp cayenne to dough—sweet heat haunts the aftertaste!
Confessions from a Messy Apron 🥄
Okay, real talk: my first batch looked like they’d survived a zombie apocalypse! Bandages too thick, eyes sliding off… my husband called them “cookie casualties.” But that’s the joy—perfection is overrated! Over years, I learned: thinner drizzles = better mummy texture, and chilling dough prevents eye slippage. Now, my daughter and I make these annually. Last year, she declared, “Mummy cookies need BOO-berries!” So we tossed in dried blueberries—genius! Food evolves with memories. So if your mummies look wonky? They’re not mistakes; they’re “personality-packed.” (And hey, taste buds don’t see aesthetics!)
Your Mummy SOS Guide 🚑
Q: Why are my cookies spreading into pancake mummies?
A: Butter was too warm! Chill dough 20 mins pre-baking. Also, check your baking soda’s freshness—expired soda won’t lift.
Q: Help! My white chocolate seized into clumps!
A> Water is chocolate’s nemesis! Ensure bowls/spoons are bone-dry. Rescue seized chocolate: stir in ½ tsp vegetable oil at a time until smooth.
Q: Can I freeze these little wrappers?
A> Absolutely! Freeze undecorated baked cookies for 3 months. Decorate after thawing. Undecorated dough balls freeze 2 months—bake straight from freezer (+1 min bake time).
Q: Candy eyes keep falling off. Witchcraft?
A> Chocolate may have hardened too fast! Work in small batches. Still trouble? Dab eyes with corn syrup before placing—it’s edible glue!
Mummy Peanut Butter Cookies
- Total Time: 30 minutes
- Yield: 24 Cookies 1x
Description
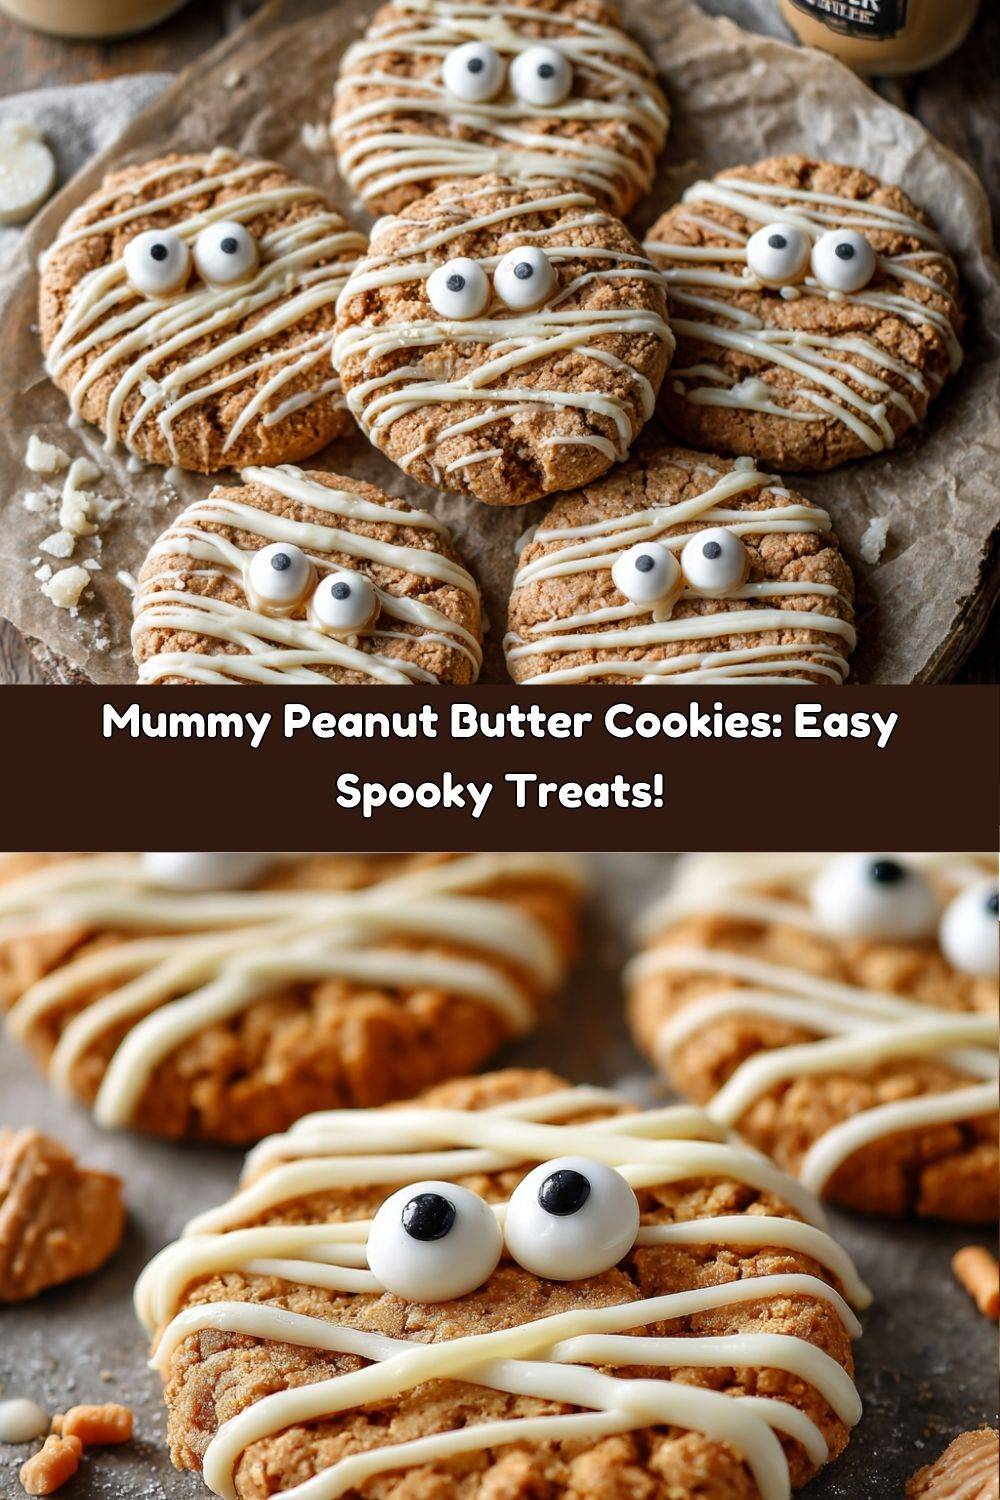
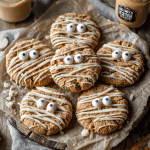
These sweet little mummies are wrapped and ready for haunting! Soft, nutty peanut butter cookies get a spooky makeover with drizzled white chocolate “bandages” and candy eyes that peek through the cracks. They’re fun to make, even more fun to eat—and they disappear fast!
Ingredients
For the cookies:
½ cup unsalted butter, softened
½ cup creamy peanut butter
½ cup granulated sugar
½ cup brown sugar
1 egg
1 tsp vanilla extract
1 ¼ cups all-purpose flour
½ tsp baking soda
¼ tsp salt
For decoration:
1 cup white chocolate chips or melting wafers
Candy eyes
Instructions
Preheat oven to 350°F (175°C). Line a baking sheet with parchment paper.
Cream butter, peanut butter, and both sugars until fluffy. Add egg and vanilla.
Mix in flour, baking soda, and salt until dough forms.
Roll dough into 1-inch balls and place on baking sheet. Flatten slightly with a fork or the bottom of a glass.
Bake 8–10 minutes until golden. Cool completely.
Melt white chocolate in 30-second bursts, stirring until smooth.
Use a spoon or piping bag to drizzle chocolate back and forth over cookies for a “bandaged” look.
Add candy eyes while the chocolate is still soft.
- Prep Time: 20 minutes
- Cook Time: 10 minutes
Nutrition
- Calories: 190 / Cookie
- Sugar: 13g / Cookie
- Fat: 11g / Cookie
- Carbohydrates: 20g / Cookie
- Protein: 4g / Cookie
Nutritional Boo-st (per cookie!)
Approx. 190 calories | 11g fat | 20g carbs | 4g protein | 13g sugar
Note: Using sugar-free chocolate chips reduces sugar to 8g. For protein boost, add 2 tbsp collagen powder to dough!
🕸️ Final Thoughts: Sweet, Silly & Scarily Easy
These Mummy Peanut Butter Cookies prove that spooky doesn’t have to mean complicated. With their soft, chewy centers, nutty flavor, and playful bandage drizzles, they’re the kind of treat that makes everyone—from kids in costumes to grown-ups sneaking extras—grin from ear to ear. And honestly? That’s what Halloween baking is all about: joy, laughter, and a little delicious chaos.
So the next time October rolls around, skip the store-bought bags and whip up a batch of these edible mummies. Let the drizzle go wild, let the candy eyes land crooked, and remember: personality makes them perfect. Whether you’re serving them at a monster bash, packing them into lunchboxes, or dunking them in cocoa by candlelight, these cookies will keep the spooky season sweet.
Happy haunting, bakers! 🎃👻🍪
– Emily