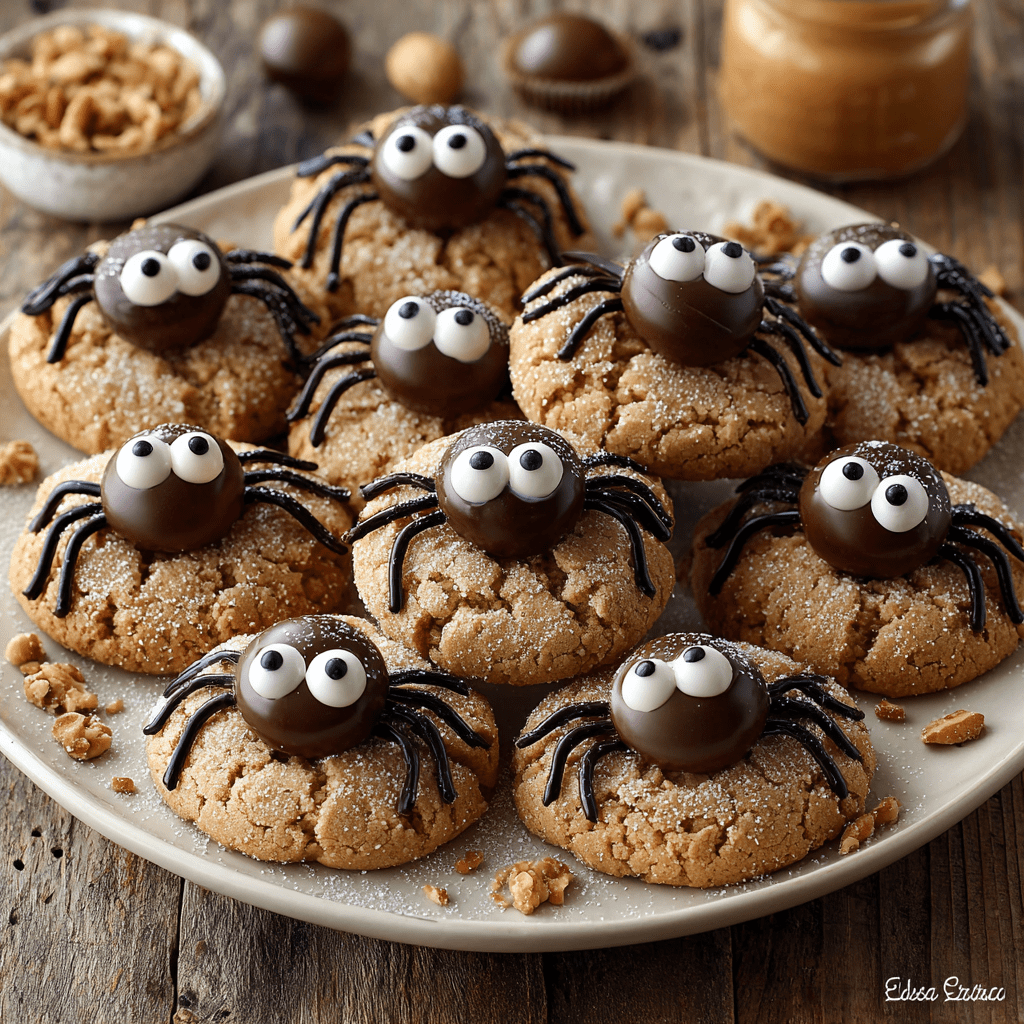
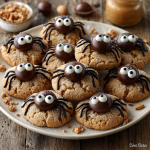
Why These Cookies Will Haunt Your Dreams (In the Best Way!)
Hey, my fellow kitchen adventurers! 👋 Emily here, apron dusted with cocoa powder and probably a stray candy eyeball stuck to my elbow (true story). Is there anything more magical than that moment when Halloween baking transforms your kitchen into a spooky laboratory? Today, we’re whipping up something that perfectly blends cozy nostalgia with playful fright: **Peanut Butter Spider Cookies**! 🕷️🍫 Imagine this: your favorite melt-in-your-mouth peanut butter cookie, still warm from the oven, cradling a smooth, cool chocolate truffle “body.” Then, we give it life with eight chocolatey legs and big, googly candy eyes that seem to follow you around the room. These aren’t just cookies; they’re edible characters begging to star on your Halloween party platter or trick-or-treat trays. I promise you, the first time you pull a batch of these little critters out of the oven, you’ll hear gasps, giggles, and “OMG, can I eat one NOW?!” They capture that perfect Halloween spirit – a little creepy, totally charming, and utterly delicious. Plus, my secret twists (a cocoa-sugar roll for a “dirt” effect and chopped peanuts for surprise crunch) take them from cute to unforgettable. So grab your mixing bowls, channel your inner mad scientist, and let’s bake some memories that are sure to become a yearly tradition!
Grandma’s Spoon and the Great Candy Eyeball Caper
This recipe takes me right back to my tiny childhood kitchen, standing on a wobbly stool next to my grandma. She was the queen of simple, soul-warming treats, especially her legendary peanut butter cookies. One blustery October afternoon, we decided to “spookify” them for my school’s Halloween bake sale. We raided the pantry, landing on chocolate kisses for bodies and broken pretzel sticks for legs. They were… *interesting*. Let’s just say our spiders looked more like they’d survived a harrowing journey through the garbage disposal! 😂 But oh, the joy! We laughed until tears streamed down our faces, flour in our hair, as those lopsided, slightly terrifying creations emerged from the oven. The bake sale was a hit, not because they were pretty (they weren’t!), but because they were made with pure, unadulterated fun. That messy, giggly afternoon is baked right into this recipe. I’ve upgraded our original wonky spiders (goodbye, broken pretzels!) with luxurious truffle centers and sleek chocolate frosting legs, but the heart of it – that spark of kitchen magic and shared laughter – is exactly the same. Every time I pipe those legs, I can practically smell grandma’s cinnamon rolls and hear her chuckle. That’s the real secret ingredient, you know?

Gathering Your Spider Cookie Squad: Ingredients & Smart Swaps
Here’s your double-batch grocery list (because 48 spiders are WAY more fun than 24!). Don’t stress about perfection – baking should be joyful, not rigid! My insights and swaps are here to help:
- 1 cup shortening: Creates that classic, tender crumb peanut butter cookies are famous for. Chef’s Insight: Butter (1:1 swap) works but spreads more, making flatter spiders. Shortening = puffier bodies!
- 1 cup creamy peanut butter: Use standard shelf-stable (like Jif or Skippy) for best texture and sweetness balance. Swap Alert: Natural PB (stirred well) works but cookies may be denser and less sweet.
- 1 cup packed brown sugar & 1 cup white sugar: Brown sugar = moisture + deep flavor. White sugar = sweetness + crisp edge. Pack that brown sugar tight!
- 2 large eggs, beaten: Binds everything. Beat them first in a small bowl – it makes mixing smoother.
- ¼ cup milk: Adds tenderness. Any milk works! Even almond or oat milk in a pinch.
- 2 tsp vanilla extract: The flavor enhancer. Pure vanilla makes a difference here!
- 3 ½ cups all-purpose flour: The backbone. Pro Tip: Fluff it in the bag, spoon into the cup, then level. Don’t scoop!
- 2 tsp baking soda: Our leavening lift-off! Ensure it’s fresh (test with vinegar if unsure).
- 1 tsp salt: Balances the sweetness. Crucial!
- ½ cup white sugar + 2 tbsp cocoa powder (for rolling): My Twist! This creates a “dirt” coating. Dutch-process or natural cocoa both work.
- ½ cup chopped roasted peanuts: My Twist! Adds fantastic crunch! Salted peanuts add a lovely contrast. Swap: Omit for nut-free, or use crushed pretzels.
- 48 chocolate candy truffles (e.g., Lindt Lindor): Keep ’em COLD! The cold center is magic. Budget Swap: Hershey’s Kisses or even Rolo caramels work!
- 96 candy eyeballs: The personality! Find them in baking aisles or online.
- 1 cup chocolate frosting: For legs & eye glue. Canned is fine! Or make a quick ganache (heat 1 cup cream, pour over 1.5 cups chocolate chips, stir smooth).
Weaving the Web: Baking Your Spider Crew Step-by-Step
Ready to create your eight-legged masterpieces? Follow these steps, and lean in for my best kitchen hacks along the way!
- Preheat & Prep: Fire up your oven to 350°F (175°C). Line baking sheets with parchment paper – non-negotiable for easy removal! Chef’s Hack: Keep that truffle stash IN THE FRIDGE until the very last second. Cold truffles won’t melt into puddles on your warm cookies!
- Creamy Dream Base: In a large bowl, beat the shortening, peanut butter, brown sugar, and white sugar together using an electric mixer. Go for 2-3 minutes until it’s light, fluffy, and almost looks like peanut butter cloud. Why? This incorporates air = lighter cookies! Scrape the bowl sides halfway.
- Wet Team Assemble: Add the beaten eggs, milk, and vanilla extract to the fluffy mixture. Mix on medium just until fully combined – don’t overbeat here. It might look slightly curdled; that’s A-OK!
- Dry Team Unite: In a separate bowl, whisk together the flour, baking soda, and salt. Chef’s Must-Do: Whisking ensures the baking soda is evenly distributed, preventing bitter bites. Gradually add this dry mix to the wet ingredients, mixing on low speed just until no dry flour remains. Overmixing = tough spiders!
- Crunch Time! Gently fold in those chopped roasted peanuts with a spatula. My Twist Shines: This is where you get that delightful surprise texture! Feel the dough – it should be soft but not sticky. If sticky, add 1-2 tbsp more flour.
- Cocoa “Dirt” Bath: Mix the 1/2 cup white sugar and 2 tbsp cocoa powder in a small bowl. Roll dough into generous 1-inch balls (a small cookie scoop is your BFF here!). Roll each ball vigorously in the cocoa sugar until fully coated. Pro Tip: The sugar coating creates that classic crinkly top as they bake!
- Shape & Bake: Place balls 2 inches apart on your parchment-lined sheets. Gently flatten each ball *slightly* with your fingers or the bottom of a glass. Don’t smash! We want a slight dome to hold the truffle. Bake for 10-12 minutes. The Sweet Spot: They’re done when the edges are lightly golden and the tops look set but still soft in the very center. They firm up as they cool!
- Truffle Time! (The Magic Moment): Pull the sheets out. WORK QUICKLY! Immediately press one COLD chocolate truffle firmly into the center of each hot cookie. Push down until the cookie cracks slightly around the edges – this anchors it. Huge Hack: The residual heat slightly melts the truffle bottom, fusing it to the cookie. Perfection!
- Cool Down (Patience, Padawan): Let the cookies cool on the baking sheets for a full 10 minutes. This sets the structure. Trying to move or decorate too soon = spider carnage!
- Pipe Those Legs: Transfer cookies to a cooling rack or counter. Spoon chocolate frosting into a piping bag or a zip-top bag with a tiny corner snipped off (think 1/8-inch hole). Pipe 4 slightly curved lines coming out from each side of the truffle body to make legs. Artistic Tip: Pipe one side of all cookies first, then rotate the sheet to do the other side – it’s easier!
- Eye Spy: Use a tiny dab of frosting on the back of each candy eyeball. Attach two eyes to the front of each truffle “head.” Go wild – crossed eyes, wide eyes, sleepy eyes! Let the frosting set for 15 mins before stacking.
Showcasing Your Creepy Crawly Crew
Presentation is half the fun with these guys! Skip the boring plate. Grab a rustic wooden board, a vintage metal tray, or even a clean piece of slate. Arrange the spiders in a loose cluster, maybe with a few crawling “off” the edge for drama. Tuck in some faux spider webbing (found at party stores) or scatter a few autumn leaves or candy corn around them. For a party, label them playfully: “Enter at Your Own Risk!” or “Beware: Delicious Bites!” If packing for treats, place each spider in a clear cellophane bag tied with orange and black ribbon. They’re guaranteed to be the star of any Halloween spread!
Spin Your Own Web: Fun Recipe Twists
Got an idea buzzing? Try these spins!
- White Chocolate Ghosts: Swap chocolate truffles for white chocolate ones. Pipe simple dot eyes with black frosting. Spooky and chic!
- Nut-Free Nest: Omit chopped peanuts. Use sunflower seed butter instead of peanut butter. Roll in plain sugar or colored sprinkles. Decorate with seed butter legs.
- Pumpkin Patch Spiders: Add 1 tsp pumpkin pie spice to the dry ingredients. Roll balls in cinnamon sugar instead of cocoa sugar. Festive fall flavor!
- Mint Monster Mash: Use chocolate-mint truffles. Pipe legs with green frosting. Cool, refreshing, and creepy!
- Gluten-Free Ghouls: Use a 1:1 gluten-free all-purpose flour blend (like Bob’s Red Mill). Ensure oats/other ingredients are GF certified if needed.
From Wonky Pretzels to Truffle Elegance: My Spider Journey
Oh, how these little critters have evolved in my kitchen! As I mentioned, the original version with my grandma involved pretzel legs that snapped if you looked at them wrong and chocolate kisses that often slid off like they were escaping. Years of culinary school and countless Halloween parties taught me the power of the COLD truffle (game-changer!) and the elegance of piped frosting legs. The cocoa sugar roll? That was a happy accident when I ran out of plain sugar one frantic Halloween Eve! The chopped peanuts? Added after my nephew declared, “Aunt Em, they need CRUNCH!” The best part? This recipe is still evolving. Last year, I drizzled some with white chocolate “webs.” This year? Maybe edible glitter for “sparkly spider silk”? The point is, make them YOURS. Embrace the imperfections – a slightly crooked leg or a googly eye popping off just adds character (and a tasty snack for the decorator!). These cookies are about joy, creativity, and sharing the spooky fun. Now go make some deliciously creepy memories!
Spider Cookie SOS: Your Questions, Answered!
Let’s tackle those baking hiccups before they strike!
- Q: My truffles melted into a puddle! Help! A: Ah, the #1 issue! This means either your truffles weren’t cold enough, or the cookies sat too long before adding them. *Crucial Steps:* Keep truffles refrigerated until the *exact moment* you pull the cookies from the oven. Work quickly to press them in. If your kitchen is very warm, chill the truffles in the freezer for 10 minutes first.
- Q: The cookies spread too much and my spiders are flat! Why? A: Likely culprits: Butter instead of shortening (butter spreads more), dough was too warm before baking (chill dough 15 mins if your kitchen is hot), or over-measuring flour. Remember: Fluff, spoon, level! Also, ensure your baking soda is fresh.
- Q: Can I make the dough ahead? A: Absolutely! You can make the dough (without rolling in sugar) up to 2 days ahead. Cover tightly and refrigerate. Let it sit at room temp for 15-20 minutes before rolling in the cocoa sugar and baking. Chilled dough spreads less!
- Q: My frosting legs are too thick/too thin! A: Frosting consistency is key! If it’s too thick to pipe easily, microwave the sealed piping bag for 3-5 seconds OR add a tiny bit of milk/corn syrup and mix well. If it’s too runny, add a little powdered sugar or pop the bag in the fridge for 5 minutes to firm up. Test a leg on parchment first!
Peanut Butter Spider Cookies: Your New Halloween Baking Obsession!
- Total Time: 45 minutes
- Yield: 48 Cookies 1x
Description
Creepy meets crave-worthy in these classic peanut butter cookies, turned spooky with silky chocolate truffle “bodies” and googly candy eyes. Soft, rich, and full of Halloween flair—this double batch twist adds a surprise crunch from chopped roasted peanuts and a dusting of cocoa sugar. Perfect for trick-or-treat trays or party platters!
Ingredients
1 cup shortening
1 cup creamy peanut butter
1 cup packed brown sugar
1 cup white sugar
2 large eggs, beaten
¼ cup milk
2 tsp vanilla extract
3 ½ cups all-purpose flour
2 tsp baking soda
1 tsp salt
½ cup white sugar (for rolling)
2 tbsp cocoa powder (my twist – mix with sugar for rolling)
½ cup chopped roasted peanuts (my twist – added to dough for crunch)
48 chocolate candy truffles (e.g. Lindt Lindor), kept cold
96 candy eyeballs
1 cup chocolate frosting (for spider legs and eyes)
Instructions
Preheat oven to 350°F (175°C). Line baking sheets with parchment.
In a large bowl, beat shortening, peanut butter, brown sugar, and white sugar until fluffy.
Add eggs, milk, and vanilla. Mix well.
In another bowl, whisk flour, baking soda, and salt. Add gradually to wet ingredients.
Fold in chopped peanuts for extra texture.
In a small bowl, mix white sugar and cocoa powder.
Roll dough into 1-inch balls and coat in cocoa sugar.
Place on baking sheets and flatten slightly.
Bake 10–12 minutes until edges are golden.
Remove from oven and immediately press a cold chocolate truffle into the center of each cookie.
Let cool for 10 mins. Then, using a piping bag or zip bag with a small tip, pipe 4 legs on each side of the truffle using chocolate frosting.
Attach 2 candy eyes on each “spider” with a dab of frosting.
- Prep Time: 30 minutes
- Cook Time: 15 minutes
Nutrition
- Calories: 200/ Cookie
- Sugar: 14g / Cookie
- Fat: 10g / Cookie
- Carbohydrates: 24g / Cookie
- Protein: 3g / Cookie
Nutritional Info (Per Cookie – Approximate)
Calories: 200 | Fat: 10g | Carbohydrates: 24g | Protein: 3g | Sugar: 14g
Note: This is an estimate based on the specific ingredients used. Values can vary depending on brands and exact measurements.
🕷️ Final Thoughts: Creepy, Cute & Completely Crave-Worthy
These Peanut Butter Spider Cookies are proof that Halloween baking is all about joy, not perfection. With their melt-in-your-mouth peanut butter base, crunchy cocoa-sugar “dirt” coating, and that irresistible truffle body staring back with googly eyes, they’re equal parts playful and delicious.
Whether your spider legs wiggle a little too far or an eyeball pops off mid-party, that’s the magic—it’s homemade, it’s messy, and it’s memorable. Perfect for Halloween parties, trick-or-treat trays, bake sales, or just a cozy October afternoon in the kitchen, these cookies bring out smiles (and giggles!) every single time.
So grab your piping bag, laugh through the chaos, and embrace the spooky fun. After all, Halloween isn’t about polished perfection—it’s about deliciously silly memories baked right into every bite.
Happy haunting & happy baking! 🎃👩🍳
– Emily