Your New Favorite Halloween Treat: Candy Corn Fudge That’s Almost Too Cute to Eat!
Hey there, my fellow food adventurer! Chef Emily here, waving from my kitchen, which currently smells like sweet vanilla and happiness. Is there anything more fun than whipping up a treat that’s equal parts delicious and dazzling? I think not! And with Halloween just around the corner, my brain is buzzing with all things spooky, sweet, and spectacular.
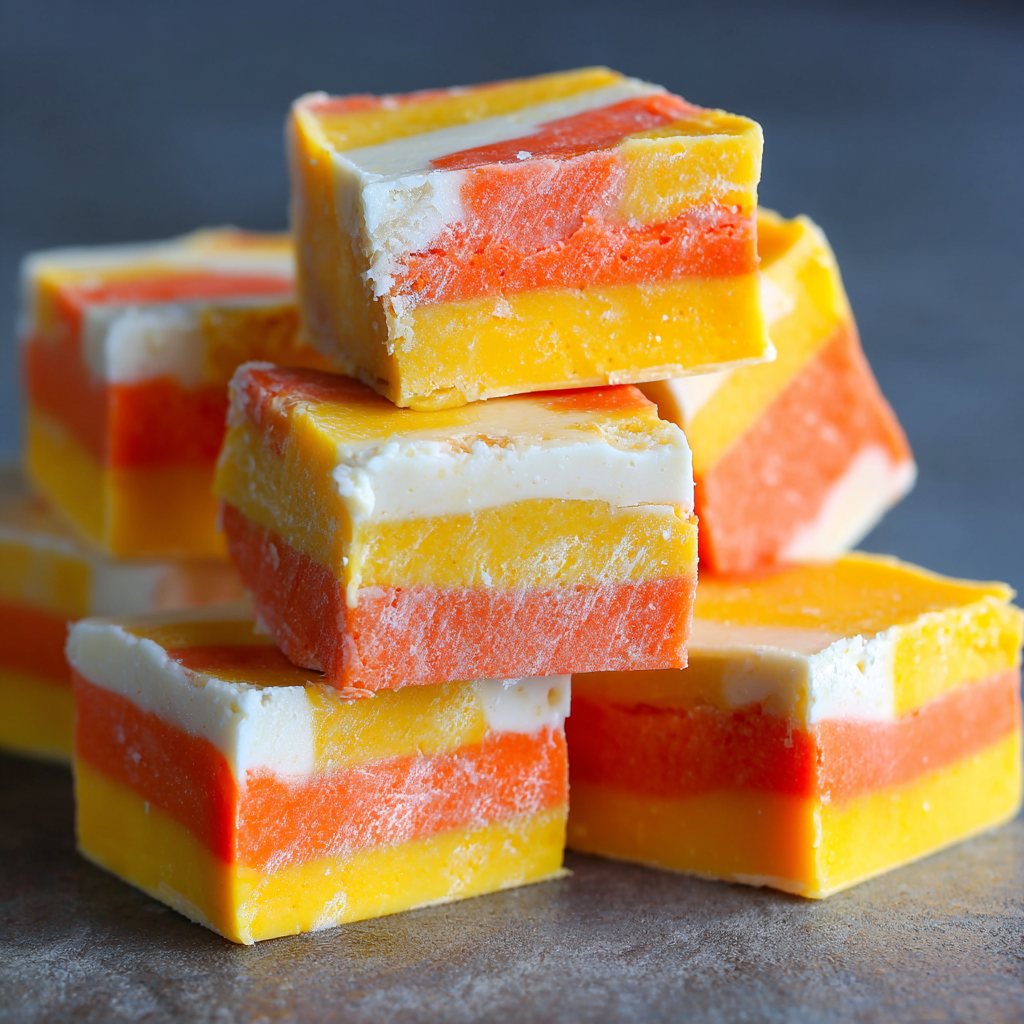
Today, we’re ditching the complicated baking projects and embracing the glorious simplicity of no-bake desserts. We’re making the most festive, conversation-starting, “how-did-you-make-that?!” treat for your Halloween spread: Candy Corn Fudge! Now, I know candy corn itself can be a… divisive little candy. You either love it or you side-eye it from across the party table. But hear me out: this fudge takes the iconic tri-color vibe of candy corn and transforms it into a smooth, creamy, melt-in-your-mouth white chocolate masterpiece that will win over everyone.
It’s shockingly easy to make, requires zero oven time, and is the perfect activity to do with your kids, your best friend, or just by yourself with a fun podcast playing in the background. So, tie on your favorite apron (the one with the stains that tell a thousand stories), and let’s create some magic together. This Candy Corn Fudge is about to become your new Halloween tradition!
A Sweet Slice of Nostalgia
This recipe always takes me right back to my grandma’s kitchen on a crisp October afternoon. The smell of burning leaves would drift through the screen door, and she’d be bustling around, preparing for the onslaught of neighborhood ghosts and goblins. She wasn’t a fancy cook, but she was a joyful one. Her signature move was a massive bowl of popcorn balls, but one year, she decided to get fancy.
She attempted a layered fudge, inspired by the candy corn she kept in a little glass dish by the door. I remember watching, utterly mesmerized, as she carefully divided this creamy white mixture into bowls and stirred in drops of food coloring from these little glass bottles with stubborn eyedroppers. Her layers were a bit wobbly and the colors bled a little, but when she cut it into triangles, my little kid mind was blown. It was magic. It wasn’t just food; it was a project, a story, and a gift, all in one. This recipe is my tribute to her—a little more refined with my chef tricks, but with the same heart and sense of wonder. Every time I make it, I feel that same spark of Halloween excitement.

Gathering Your Fudge-Making Magic
The beauty of this fudge lies in its short and sweet ingredient list. Quality matters here, friends, because each component really shines through!
- 3 cups white chocolate chips: This is the star of the show! I highly recommend using a high-quality brand like Ghirardelli or Guittard for the smoothest melt and richest flavor. Cheap chips can sometimes be finicky and seize up more easily. Chef’s Insight: White chocolate isn’t true chocolate—it’s made from cocoa butter, sugar, and milk solids. That’s why it melts differently and we need to treat it gently with low heat!
- 1 (14 oz) can sweetened condensed milk: This is our magic weapon for creating that unbelievably creamy, soft fudge texture without any sugar crystallization. It’s the glue and the sweetness all in one. Do not substitute with evaporated milk; they are very different!
- 1 tsp pure vanilla extract: A splash of good vanilla adds a beautiful depth of flavor that cuts the sweetness of the white chocolate. For a fun twist, you could use almond extract instead!
- Food coloring (orange & yellow): I prefer using gel food coloring because it gives you vibrant colors without adding extra liquid to your fudge. The liquid kind works too; you’ll just need a few more drops. Substitution Tip: For a natural route, you can use a tiny bit of turmeric for the yellow layer and a mix of paprika and annatto for the orange, but be aware it will very subtly alter the flavor.
Let’s Layer Up! Your Foolproof Fudge Guide
Ready to build your edible masterpiece? Follow these steps, and you’ll have perfect fudge every single time. Let’s do this!
- Line an 8×8-inch pan with parchment paper. This is your number one tip for easy fudge removal! Let the parchment paper hang over two opposite sides—this creates “handles” that let you lift the entire block of fudge out of the pan effortlessly before cutting. Give the paper a light spritz with cooking spray for absolute non-stick insurance.
- Melt your base. In a medium saucepan, combine the white chocolate chips and the entire can of sweetened condensed milk. Now, here’s the chef hack: use the lowest heat setting possible. White chocolate is delicate and burns easily. Stir constantly and patiently until the chips are completely melted and the mixture is gloriously smooth. This should take about 5-7 minutes. Remove it from the heat the second it’s smooth!
- Stir in the vanilla. Take the pan off the heat and immediately stir in that teaspoon of vanilla extract. It will smell amazing. Give it a good stir until everything is fully incorporated.
- Divide and conquer. This is the fun part! Quickly divide your warm mixture into three separate bowls. I like to use a kitchen scale to be super precise (about 7 ounces per bowl), but if you’re eyeballing it, that’s totally fine too. Work relatively quickly here as the fudge will start to set as it cools.
- Color your layers. Leave the first bowl plain—this is your white top layer. In the second bowl, add a few drops of yellow gel food coloring and stir until you get a vibrant, sunny yellow. In the third bowl, create your orange. I find it best to add a couple of drops of yellow first, mix it, then add red until you achieve that perfect candy corn orange. If you add red directly to white, you might get pink!
- Layer #1: The Yellow Base. Take your yellow mixture and spread it evenly into the bottom of your prepared pan. An offset spatula is the best tool for this, but a butter knife or the back of a spoon works too. Get it as smooth as you can. Pop the pan into the refrigerator for exactly 5 minutes. This quick chill sets the layer just enough so the next one doesn’t sink into it.
- Layer #2: The Orange Middle. Pull the pan from the fridge. Gently spread the orange layer on top of the yellow. Try to spread it evenly without pressing down too hard and disturbing the yellow layer beneath. Smooth the top and send it back to the fridge for another 5 minutes.
- Layer #3: The White Finish. Finally, retrieve your pan and spread the remaining white mixture over the orange layer. This is your canvas! Take your time to make this top layer as smooth and pretty as possible.
- The Big Chill. Now, the hardest part: patience. Cover the pan with plastic wrap and let the fudge chill in the refrigerator for at least 2 hours, or until it’s completely firm. Don’t try to cut it early, or you’ll have a gooey mess!
- Slice and shine! Use those parchment paper handles to lift the entire block of fudge out of the pan. Place it on a cutting board. Using a large, sharp knife, cut it into small squares. For the full candy corn effect, wipe your knife clean between cuts and slice the squares on a diagonal to create triangles! Magic.
How to Serve Your Masterpiece
Presentation is part of the fun! Arrange your Candy Corn Fudge triangles on a festive platter in a swirling pattern. They look stunning all on their own, but you could sprinkle a few actual candy corns around the plate for a cute thematic touch. This fudge is rich, so small pieces are perfect. Pile them high on a cake stand for your Halloween party, or package them in cute cellophane bags tied with orange and black ribbon for the most delicious party favors or teacher gifts.
Mix It Up! Creative Twists on Candy Corn Fudge
Feel like playing mad scientist? Here are some delicious ways to customize your creation:
- Peanut Butter Swirl: Add a few dollops of warmed peanut butter to the white layer and swirl it in with a knife before chilling for a peanut butter cup vibe.
- Chocolate Base: Not a white chocolate fan? Swap the white chips for semi-sweet or milk chocolate chips for the bottom layer only, keeping the orange and white on top.
- Funfetti Fun: Stir a handful of rainbow sprinkles into the white top layer for a confetti celebration feel.
- Maple Kiss: Replace the vanilla extract with ½ teaspoon of maple extract for a cozy, autumnal flavor that pairs beautifully with the colors.
- Boo-tiful Ghosts: Forgo the layers! Make the entire batch white, pour it into a pan, and once set, use a ghost-shaped cookie cutter to create spooky white chocolate ghost fudge.
Chef Emily’s Kitchen Notes
This recipe has evolved so much from my grandma’s wobbly version! My biggest breakthrough was discovering the power of gel food coloring—no more watery, pastel layers. I also learned the hard way about rushing the chilling process. One year, I was so impatient I tried to cut it after an hour. Let’s just say I ended up with “Candy Corn Fudge Dip” instead. It still tasted great, but it was not pretty! Now, I always set a timer and walk away.
The best part about this fudge? It’s a total crowd-pleaser. I’ve brought it to potlucks where self-proclaimed candy corn haters sheepishly came back for a third piece. It’s the power of homemade goodness, my friends. It just wins people over.
Your Fudge Questions, Answered!
Q: My white chocolate got chunky and grainy instead of smooth. What happened?
A: Ah, you’ve experienced “seizing!” This happens when moisture or too much heat causes the cocoa butter in the chocolate to tighten up. To fix it, try adding a teaspoon of vegetable shortening or a splash of warm cream and stirring vigorously. To prevent it, always use low heat and make sure your bowls and utensils are completely dry.
Q: Can I use homemade sweetened condensed milk?
A: Technically, yes, but I don’t recommend it for this recipe. The canned version has a specific consistency and stability that’s crucial for setting the fudge properly. Homemade versions can vary and might result in a softer, gooier final product.
Q: How far in advance can I make this?
A: This fudge is a great make-ahead treat! It keeps beautifully in an airtight container in the refrigerator for up to two weeks. The flavors actually meld and get even better after a day or two.
Q: My layers blended together a bit. How can I get cleaner lines?
A> The key is making sure each layer is chilled enough before adding the next. The 5 minutes in the fridge is a minimum—if your kitchen is warm, give it 7-10 minutes. Also, make sure each layer is spread gently and evenly without pressing down too hard on the layer below.

Candy Corn Fudge
- Total Time: 2 hours 15 minutes
- Yield: 36 Pieces 1x
Description
This fun and festive Candy Corn Fudge is a no-bake treat that brings all the sweetness of the season in three colorful layers. Smooth, creamy, and melt-in-your-mouth delicious, it’s made to look just like candy corn but tastes even better. Perfect for Halloween parties, gift boxes, or just a cozy fall night in, this fudge is as pretty as it is tasty.
Ingredients
3 cups white chocolate chips
1 (14 oz) can sweetened condensed milk
1 tsp vanilla extract
Food coloring (orange & yellow)
Instructions
Line an 8×8-inch pan with parchment paper.
In a saucepan, melt white chocolate chips with sweetened condensed milk over low heat, stirring until smooth. Remove from heat and stir in vanilla.
Divide mixture into three equal portions.
Leave one portion white (top layer).
Tint one portion orange.
Tint one portion yellow.
Spread yellow fudge evenly into the pan; refrigerate 5 minutes.
Spread orange layer on top; refrigerate 5 minutes.
Spread white layer on top and smooth surface.
Chill 2 hours or until firm.
Cut into squares or triangles to resemble candy corn pieces.
- Prep Time: 15 minutes
- Chill Time: 2 hours
Nutrition
- Calories: 110 / Piece
- Fat: 5g / Piece
- Carbohydrates: 14g / Piece
- Protein: 1g / Piece
Nutritional Information (Approximate, per piece)
Calories: 110 | Protein: 1g | Carbohydrates: 14g | Fat: 5g | Fiber: 0g
Final Thoughts
Candy Corn Fudge is proof that the best Halloween desserts don’t have to be complicated to be impressive. With just a handful of ingredients, a splash of food coloring, and a little patience, you can create a no-bake treat that looks like it belongs on the cover of a holiday magazine—but feels approachable and fun for anyone to make.
This recipe is part nostalgia, part kitchen craft project, and all delicious. It’s perfect for parties, classroom treats, or even as a sweet homemade gift. Whether you’re a lifelong candy corn fan or a skeptic, this fudge has a way of winning hearts (and sweet tooths) with every bite.
So embrace the fun, embrace the mess, and slice up a little piece of Halloween magic. Because at the end of the day, this isn’t just fudge—it’s a new fall tradition waiting to happen.