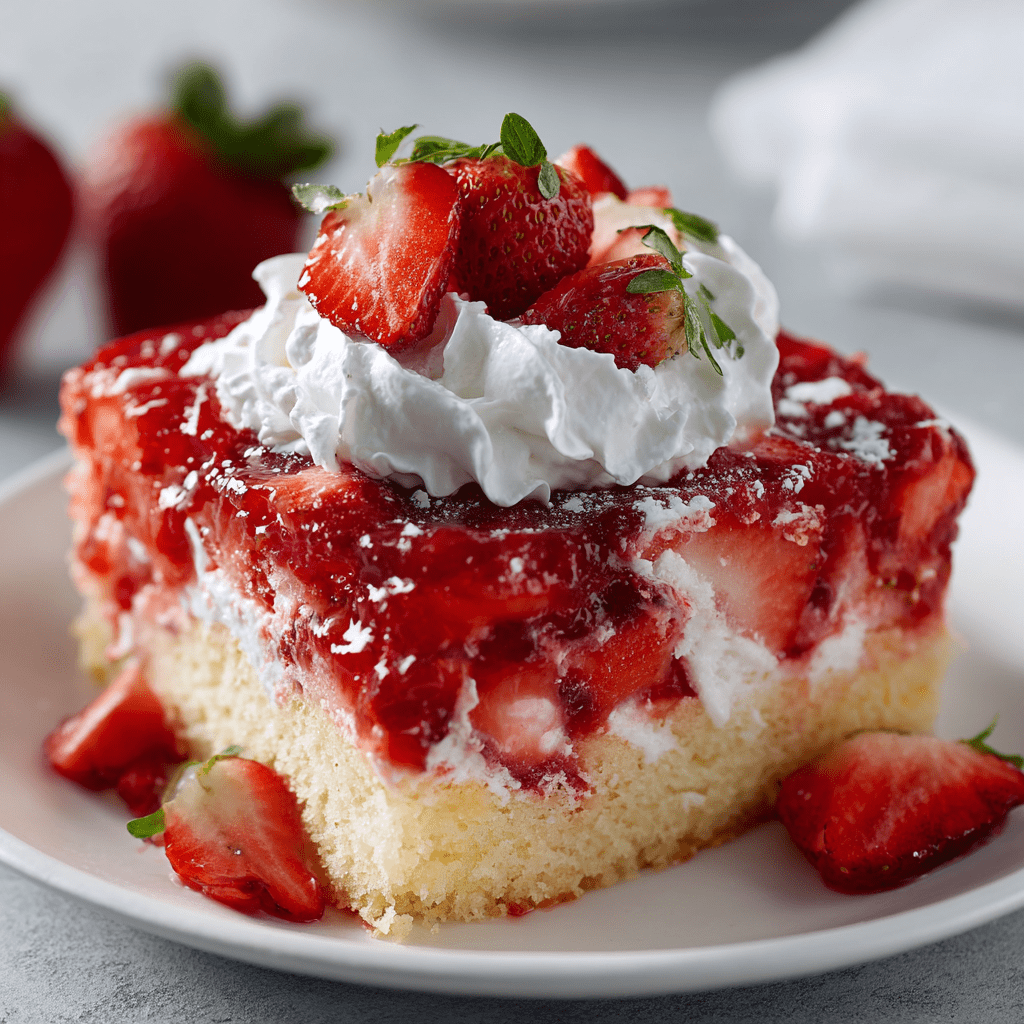
Strawberry Poke Cake: Your New Favorite Slice of Sunshine
Hey there, my fellow food lover! Chef Emily here, and I am just bursting with excitement to share this recipe with you today. If you’ve been scrolling through your feed dreaming of a dessert that’s equal parts stunning, simple, and downright delicious, you’ve hit the jackpot. We’re talking about a cake that’s so moist it practically melts in your mouth, infused with the sweet, sunny flavor of fresh strawberries, and topped with a cloud of fluffy whipped bliss. This, my friend, is the legendary Strawberry Poke Cake.
Now, I know what you might be thinking. “Emily, a cake mix? Jell-O? Is this really a *chef* recipe?” And to that, I say a resounding YES! Some of the best, most beloved recipes come from a place of fun and simplicity. This isn’t about being fussy; it’s about creating pure, unadulterated joy. This cake is the life of the party, the star of the potluck, and the secret weapon for any busy parent who needs a show-stopping dessert without spending all day in the kitchen. It’s refreshing, it’s fruity, and every single bite is a little burst of happiness. So, tie on your favorite apron (the messy one with the stains tells the best stories), and let’s make something incredibly tasty together.
A Poke Cake, a Grandma, and a Sun-Drenched Afternoon
This recipe takes me right back to my grandma’s linoleum-floored kitchen on a hazy summer afternoon. I was maybe ten years old, and the air was thick with the scent of a vanilla cake she’d just pulled from the oven. I watched, utterly fascinated, as she took the handle of a wooden spoon and started poking holes all over its golden surface. To my young eyes, it looked like she was ruining a perfectly good cake!
But then came the magic. She mixed up this vibrant, ruby-red liquid and slowly, meticulously poured it over the entire cake. We watched together as it disappeared into the holes, transforming the simple vanilla cake into something entirely new. The waiting was the hardest part. The anticipation as it chilled in the fridge felt like an eternity. But when she finally sliced into it, revealing that beautiful speckled pink interior and topped it with a dollop of real whipped cream from a neighbor’s cow, I was a believer. It wasn’t just cake; it was an experience. It was a lesson that sometimes, the most wonderful things come from a little creative “damage” and a whole lot of love. That’s the spirit I bring to this recipe every single time I make it.

Gathering Your Sunshine Squad: The Ingredients
Here’s everything you’ll need to create this masterpiece. Remember, cooking is an adventure, so don’t be afraid to make it your own!
- 1 box white or vanilla cake mix (plus the ingredients listed on the box) – This is our fantastic, timesaving base! I usually go for a classic vanilla mix. Chef’s Insight: The ingredients on the box are typically eggs, oil, and water. Using milk instead of water and melted butter instead of oil will give you a richer, more homemade flavor!
- 1 (3 oz) box strawberry Jell-O – The star of the show! This is what creates that incredible moistness and burst of fruity flavor. Substitution Tip: Any flavor of Jell-O works here. Raspberry, cherry, or even orange would be delicious twists!
- 1 cup boiling water – Crucial for dissolving the gelatin powder completely.
- 1/2 cup cold water – This cools down the liquid so it doesn’t “cook” the cake when we pour it on.
- 1 (8 oz) tub whipped topping (like Cool Whip), thawed – Our fluffy, cloud-like frosting. Substitution Tip: For a from-scratch option, whip 2 cups of heavy cream with 1/4 cup of powdered sugar and 1 tsp of vanilla extract until stiff peaks form. It’s divine!
- 1 cup fresh strawberries, sliced – The fresh, juicy finish that makes it look and taste spectacular. Chef’s Insight: Toss these in a teaspoon of sugar about 10 minutes before serving. It draws out their natural juices and creates a lovely syrup!
Let’s Build Some Magic: Step-by-Step Instructions
Don’t let the chilling time fool you—the active work for this cake is a breeze. Follow these steps, and you’ll be a poke cake pro in no time.
- Bake the Cake: First, preheat your oven according to the cake mix directions. Grease and flour a standard 9×13-inch baking pan. I’m a big believer in the parchment paper sling—just a strip under the long sides with a little overhang—to make lifting the cake out later super easy! Prepare your cake batter according to the package directions and pour it into your prepared pan. Bake it until it’s golden brown and a toothpick inserted into the center comes out clean. Chef’s Hack: For an extra-moist cake, try adding a tablespoon of vanilla extract or the zest of one lemon to the batter before baking!
- The Great Cool-Down: Take the cake out of the oven and let it cool in the pan on a wire rack for exactly 15 minutes. This is the sweet spot! It’s cool enough that the Jell-O won’t instantly evaporate, but still warm enough to readily absorb all that liquid goodness.
- Poke, Poke, Poke! Now for the fun part! Take a fork, a skewer, or even the handle of a wooden spoon (my grandma’s tool of choice), and poke holes all over the surface of the cake. Chef’s Tip: Don’t be shy! Poke right down to the bottom of the pan. And try to space the holes evenly so every single bite gets an equal share of strawberry bliss.
- Create the Strawberry Elixir: In a heat-proof bowl or measuring cup, empty the entire packet of strawberry Jell-O powder. Pour the boiling water over it and whisk for a full two minutes, until it’s completely dissolved. Then, stir in the cold water. You’ll have a beautiful, translucent red liquid.
- The Soaking Ritual: Slowly and carefully, pour the Jell-O mixture evenly over the entire surface of the warm cake. Try to pour it directly into the holes as much as you can. You’ll see it start to vanish before your eyes! It might look like a lot of liquid, but trust the process—that cake is going to drink it all up.
- The Patient Chill: This is the hardest step! Cover the pan with plastic wrap and carefully transfer it to the refrigerator. You must let it chill for at least 3-4 hours, but honestly, overnight is even better. This allows the Jell-O to fully set and the cake to become unbelievably moist and chilled throughout.
- The Grand Finale: Once the cake is completely chilled, take it out of the fridge. Give your thawed whipped topping a quick stir to fluff it up, then spread it evenly over the entire cake. Create beautiful swoops and swirls with your spatula—have fun with it! Finally, artfully arrange your sliced fresh strawberries on top.
How to Serve This Masterpiece
I love serving this cake straight from the pan—it’s casual, easy, and perfect for a crowd. Use a sharp knife to slice it into squares, wiping the blade clean between cuts for beautiful, clean edges. For an extra special touch, garnish each plate with a whole strawberry or a sprig of fresh mint. It’s fantastic on its own, but if you really want to gild the lily, a small scoop of vanilla ice cream or a drizzle of warm white chocolate sauce alongside a slice is absolutely heavenly.
Make It Your Own: Delicious Variations
The beauty of a poke cake is its versatility. Here are a few ways to switch it up:
- Tropical Paradise: Use a coconut cake mix, poke with pineapple Jell-O, and top with toasted coconut and whipped cream.
- Berry Medley: Use a white cake mix, poke with raspberry Jell-O, and top with a mix of fresh raspberries, blackberries, and blueberries.
- Chocolate Covered Strawberry: Use a chocolate cake mix, poke with the strawberry Jell-O, and top with chocolate shavings in addition to the strawberries.
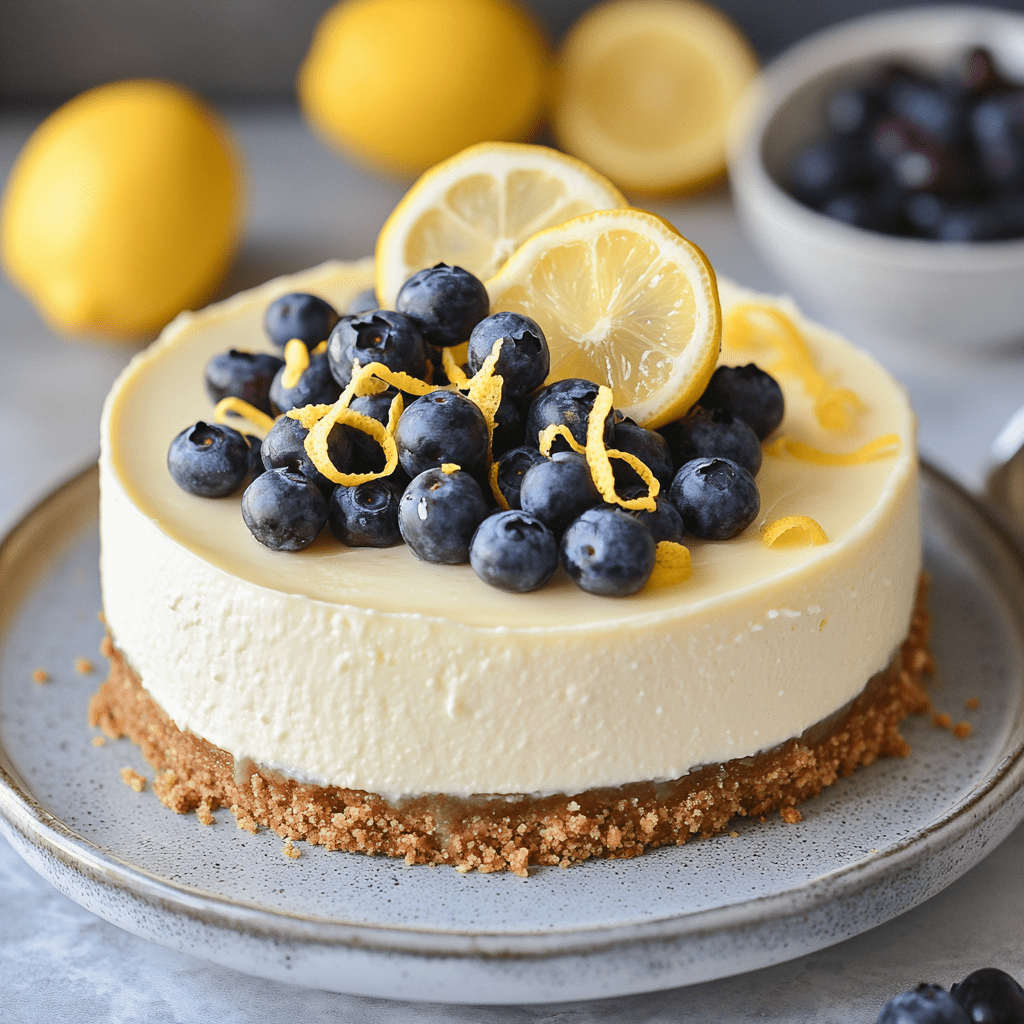
- Lemonade Stand: Use a lemon cake mix, poke with lemon Jell-O, and top with a lemon zest-infused whipped cream and fresh blueberries.
- Dairy-Free Delight: Use a vegan cake mix, ensure your sugar is vegan, and use coconut whipped topping instead of Cool Whip.
Chef Emily’s Notes from My Kitchen to Yours
This recipe has evolved with me over the years. I’ve tried it with everything from from-scratch cake (which is amazing, but let’s be real, sometimes you need a shortcut) to different types of frosting. The whipped topping is classic because it’s light and doesn’t overpower the strawberry flavor. One of my favorite kitchen fails was the time I got impatient and poured the Jell-O on while the cake was still piping hot. It created a weird, rubbery layer on top! Lesson learned: patience is a virtue, especially in baking. Now, I set a timer for that 15-minute cool down and don’t dare touch it until it goes off. This cake has been to more potlucks, birthday parties, and “just because” days than I can count. It never, ever fails to bring a smile to everyone’s face.
Your Questions, Answered: FAQs & Troubleshooting
Q: My cake seems soggy. What did I do wrong?
A: Sogginess usually happens if the cake wasn’t baked all the way through to begin with, or if you poked the holes too large/close together. Make sure your cake is fully baked and that you’re using a fork or thin skewer for poking. Also, ensure you’re using the exact amounts of water called for in the Jell-O step.
Q: Can I make this cake ahead of time?
A: Absolutely! In fact, I highly recommend it. You can make the cake (through the chilling step with the Jell-O) up to 24 hours in advance. Keep it covered in the fridge. I’d recommend adding the whipped topping and fresh berries the day you plan to serve it for the best texture and appearance.
Q: My Jell-O didn’t all soak in. What now?
A: No panic! This can happen if the holes weren’t poked deep enough or if the cake cooled too much before adding the liquid. Just do your best to spread the remaining puddle over the top—it will still set and taste delicious. It will just be a bit jellier on top!
Q: Can I use sugar-free Jell-O or a different size?
A: Yes, sugar-free Jell-O works perfectly fine in this recipe. I wouldn’t recommend using a larger box (like a 6 oz), as the ratio of liquid to cake would be off and could make it too wet.

Strawberry Poke Cake
- Total Time: 4 hrs 20 minutes
- Yield: 12 slices 1x
Description
This vibrant cake is soaked in strawberry Jell-O, layered with fluffy whipped topping, and finished with fresh berries. It’s refreshing, fun, and perfect for any celebration.
Ingredients
1 box white or vanilla cake mix (plus ingredients listed on box)
1 (3 oz) box strawberry Jell-O
1 cup boiling water
1/2 cup cold water
1 (8 oz) tub whipped topping (like Cool Whip), thawed
1 cup fresh strawberries, sliced
Instructions
Bake the cake in a 9×13″ pan according to box instructions. Let cool 15 minutes.
Use a fork or skewer to poke holes all over the top of the cake.
Dissolve Jell-O in boiling water, then stir in cold water.
Slowly pour the Jell-O over the cake, letting it soak into the holes.
Chill the cake for 3–4 hours or overnight.
Spread whipped topping evenly over the cake.
Top with sliced strawberries before serving.
- Prep Time: 20 minutes
- Chill Time: 4 hrs
Nutrition
- Calories: 270 / Slice
- Sugar: 22g / Slice
- Fat: 12g/ Slice
- Carbohydrates: 35g / Slice
- Protein: 2g / Slice
Nutritional Information
Per slice (based on 12 servings): Approximately 270 calories, 35g carbs, 12g fat, 2g protein, 22g sugar. (Please note: This is an estimate and can vary based on specific brands of ingredients used.)
Prep Time: 20 mins | Chill Time: 4 hrs | Yield: 12 slices
There you have it! The ultimate, no-fuss, always-a-hit Strawberry Poke Cake. I hope it brings as much joy to your kitchen as it has to mine. If you make it, I’d love to see your creation! Tag me @TastyChow on social media so I can share in the deliciousness.
With love and a full belly,
Chef Emily