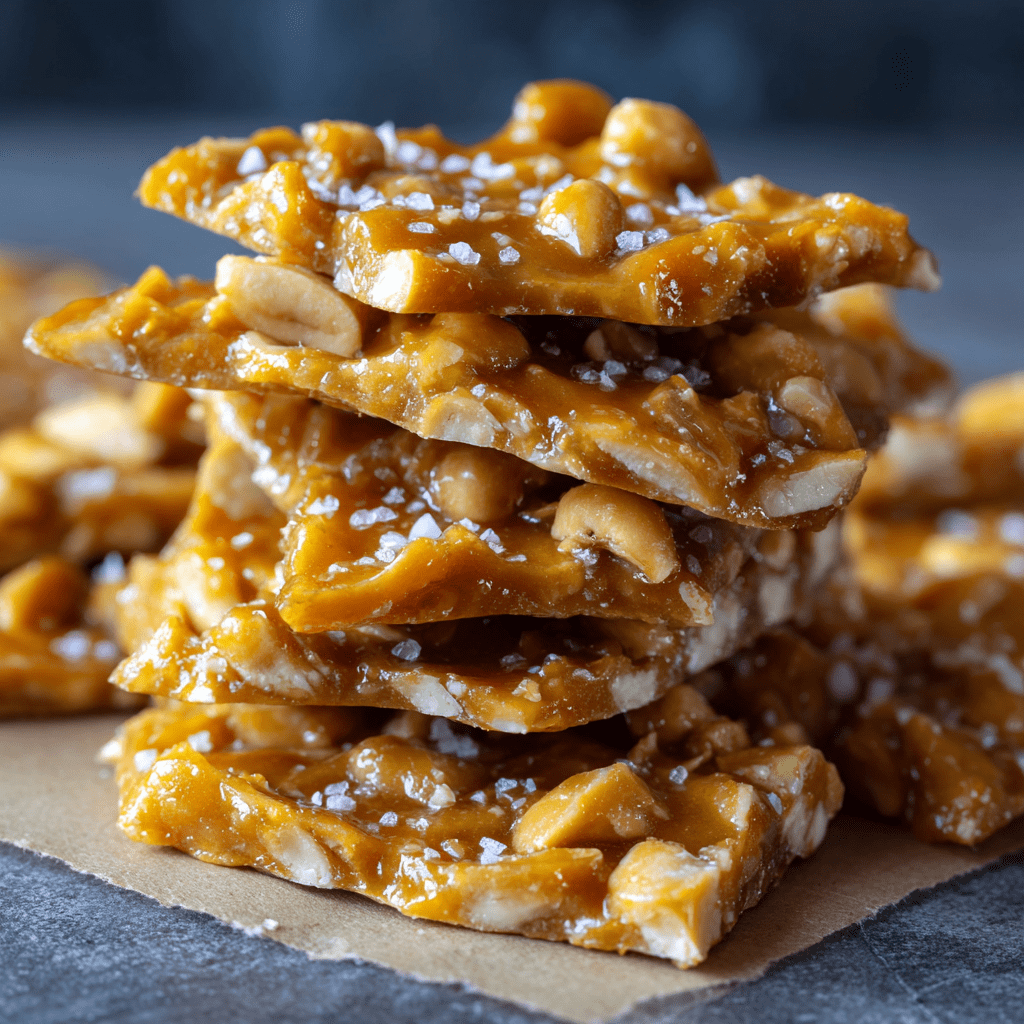
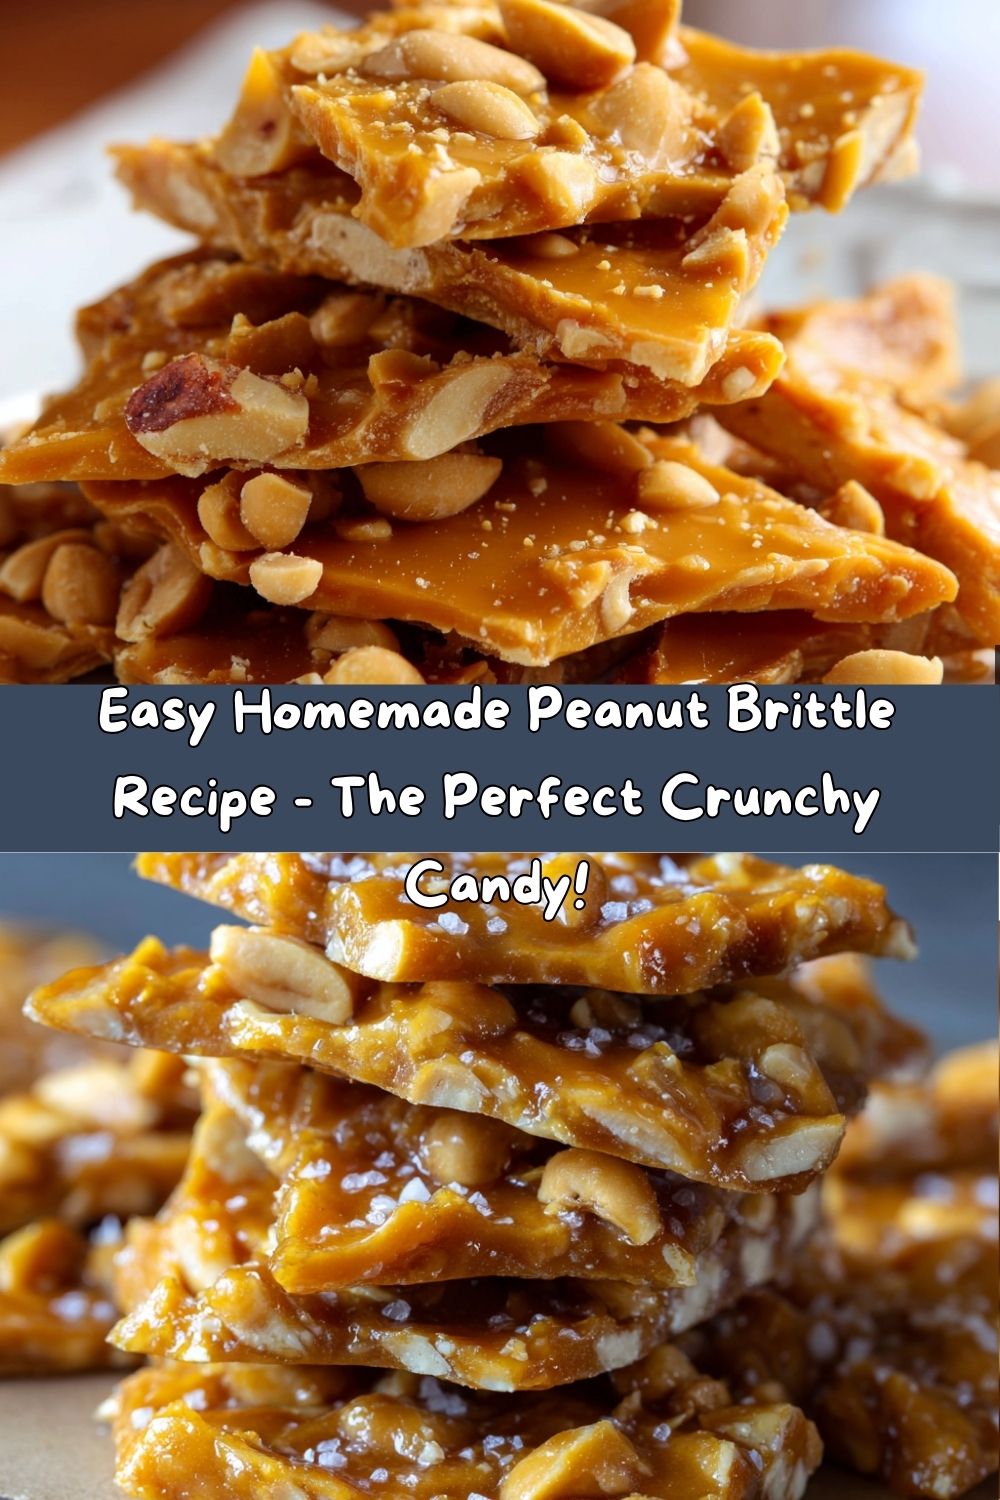
Peanut Brittle: Your New Favorite Crunchy, Golden & Totally Addictive Treat
Hey there, my fellow food lovers! Chef Emily here, coming to you from my flour-dusted kitchen with a recipe that’s pure, unadulterated magic. We’re talking about the kind of treat that sparks joy with every single crunchy, shattering bite. The kind that makes you feel like a certified kitchen wizard. That’s right, we’re making Homemade Peanut Brittle today!
I know, I know. Candy-making can sound a little intimidating. It whispers of fancy thermometers and precise temperatures. But let me let you in on a little secret: this old-fashioned peanut brittle is so much easier than you think. It’s a simple alchemy of sugar, peanuts, and a little bit of science that results in a treat that’s far superior to anything you’ll find wrapped in plastic on a store shelf. We’re creating a masterpiece of caramelized sugar, studded with perfectly roasted, salty peanuts, all with that signature brittle crack.
This isn’t just a recipe; it’s an experience. It’s the smell of toasting sugar that will fill your home with the most incredible, warm, and nutty aroma. It’s the thrilling moment when you add the baking soda and the whole mixture puffs up into a glorious, foamy cloud. And best of all, it’s the proud feeling of breaking apart a giant sheet of golden, glistening brittle into jagged, irresistible pieces.
So, tie on your favorite apron (the messy one is always the best!), grab your trusty saucepan, and let’s make some memories. This is the perfect project for a cozy weekend afternoon, a fabulous edible gift for the holidays, or just because you deserve a seriously delicious treat. Let’s get cracking!
The Christmas We Almost Burned the Kitchen (And Why It’s My Favorite Memory)
My love affair with peanut brittle started, as many of my best food memories do, in my Grandma’s kitchen. Every Christmas, she’d embark on her annual candy-making marathon. Fudge, divinity, caramels… but the crown jewel was always her peanut brittle. She’d make these enormous sheets of it, and my sole job as her eager (and tiny) sous-chef was to be the official “breaker,” tasked with whacking the cooled slab with the handle of a butter knife to create perfect, bite-sized pieces.
One particular year, I was finally deemed old enough to help with the actual cooking. Grandma was teaching me about the candy thermometer, showing me how the bubbles changed as the syrup reached the soft-ball stage. We were chatting and laughing, and I got so distracted by a story she was telling about my dad as a boy that I completely lost track of the thermometer. The syrup went from a beautiful golden amber to a dark, ominous brown in what felt like seconds. Smoke started to curl from the pot!
We lunged for the stove, shrieking with a mix of panic and laughter. We managed to save it, just in the nick of time. That batch was a shade darker than usual and had a deeper, almost burnt-sugar flavor that was… absolutely incredible. It became our “special batch,” and we joked about it for years after. It taught me that sometimes, the best recipes come from a little imperfection and a whole lot of love. That’s the spirit I bring to my kitchen every day.
Gathering Your Golden Ingredients
This recipe is beautifully simple, and each ingredient plays a crucial role in creating that perfect brittle texture and flavor. Here’s what you’ll need:
- 1 cup granulated sugar: This is the foundation of our candy. As it melts and cooks, it caramelizes, creating that deep, complex flavor and, of course, the hard, glass-like structure. Don’t be tempted to sub in brown sugar here—its moisture and molasses content will throw everything off!
- 1/2 cup light corn syrup: “But Emily, can I skip the corn syrup?” I get this question a lot! The corn syrup is our insurance policy. It’s an invert sugar that prevents the sucrose (granulated sugar) from crystallizing back into grainy, crunchy bits. It ensures our brittle is smooth and glassy, not grainy. For a substitute, you can use golden syrup or honey, but know that honey will impart its own distinct flavor.
- 1/4 cup water: This helps the sugar dissolve evenly at the beginning so it melts smoothly instead of clumping or burning.
- 1 cup roasted, salted peanuts: The star of the show! I highly recommend using salted peanuts. The hit of salt perfectly balances the intense sweetness of the caramel. Using pre-roasted means they’ll stay crunchy and won’t burn during the short cooking time. Chef’s insight: feel free to use your favorite nut here! See the variations section below for ideas.
- 2 tbsp unsalted butter: Added for richness and a more tender bite. It helps keep the brittle from being *too* hard and difficult to chew. Always use unsalted so you can control the sodium level.
- 1 tsp vanilla extract: We add this at the very end, off the heat. The high heat would cause the delicate alcohol and flavor to evaporate. This gives a wonderful, warm background note.
- 1 tsp baking soda: This is the secret weapon! When stirred in, it creates thousands of tiny air bubbles, making the brittle porous, lighter, and easier to bite into. It’s what gives it that classic, airy crunch instead of a tooth-shattering hard candy consistency. The foaming action is pure kitchen magic—be ready for it!
Let’s Make Some Magic: Step-by-Step Instructions
Okay, team! Here we go. Read through all the steps once before you begin. Candy making moves fast at the end, so it’s best to be prepared. Have all your ingredients measured and within arm’s reach. This is your mise en place—it’s a chef’s best friend, especially in candyland!
- Prep Your Pan: Line a standard-sized baking sheet with parchment paper or a silicone baking mat. You can also grease it lightly with butter, but parchment is my foolproof method for easy release. Have this ready to go before you even turn on the stove. You will not have time to search for it later!
- Dissolve the Sugar: In a medium-sized, heavy-bottomed saucepan (light-colored is best so you can see the color change!), combine the granulated sugar, light corn syrup, and water. Stir it over medium heat with a wooden spoon or heatproof spatula just until the sugar has completely dissolved and the mixture looks clear. This should only take 3-4 minutes. Chef’s Hack: Brush down the sides of the pan with a wet pastry brush to dissolve any sugar crystals clinging to the side. These stray crystals can cause the whole batch to crystallize!
- Bring to a Boil & Cook: Now, stop stirring! This is the hardest part for us stir-happy cooks. Insert your candy thermometer, making sure the bulb is submerged but not touching the bottom of the pan. Bring the mixture to a boil and let it cook, untouched, until it reaches 300°F (150°C) on the thermometer. This is the Hard Crack Stage. This process can take 10-15 minutes. You’ll see the syrup go from clear, to bubbling, to slowly turning a light golden amber color. Chef’s Tip: If you don’t have a thermometer, you can test by dropping a tiny bit of the syrup into a glass of cold water. At 300°F, it will form hard, brittle threads that break when bent.
- The Big Add-In (Work Fast!): As soon as the syrup hits 300°F, immediately remove the pan from the heat. Working quickly but carefully (it’s super hot!), stir in the butter and vanilla until the butter is fully melted and incorporated. Next, stir in the peanuts, coating them evenly. Finally, sprinkle the baking soda over the mixture and stir vigorously. It will foam up dramatically—this is exactly what you want! The mixture will become lighter in color and look opaque and foamy.
- Pour and Spread: Immediately pour the hot candy mixture onto your prepared baking sheet. Using the back of your spoon or a lightly greased offset spatula, spread and pat the mixture out as thinly and evenly as you can. Don’t press too hard, just guide it. It will be thick and foamy. Chef’s Hack: If you have them, wearing a pair of food-safe silicone gloves can help you handle the hot candy as you spread it.
- The Hardest Part: Let It Cool! Walk away. I mean it! Let the peanut brittle cool completely at room temperature. Do not try to move it or break it while it’s warm, or it will bend and be chewy instead of snappy. This will take about 30 minutes. You’ll know it’s ready when it’s firm to the touch and makes a satisfying tapping sound.
- Break It Up: Once it’s completely cool, lift the brittle slab off the parchment and place it on a cutting board. Use your hands to break it into rustic, irregular pieces. For more uniform pieces, you can place it in a zip-top bag and gently tap it with the bottom of a heavy pan or a rolling pin. Store your masterpiece in an airtight container at room temperature.
How to Serve Your Homemade Masterpiece
This brittle is a star all on its own! Pile the pieces high in a beautiful bowl or a rustic wooden tray for parties and gatherings. It’s the ultimate snack for game day, movie night, or just sitting by the fire. For gifting, divide it into clear cellophane bags, tie them with a cute ribbon, and add a handwritten tag. It’s a heartfelt, homemade gift everyone truly appreciates. It also makes an incredible topping—crush it up and sprinkle it over ice cream, yogurt, or even a frothy whipped coffee for an incredible crunch!
Get Creative! Recipe Variations
Once you’ve mastered the classic, the world of brittle is your oyster! Try these fun twists:
- Nut Swap: Use almonds, cashews, or pecans instead of peanuts. A mix of nuts is also fantastic!
- Spicy Kick: Add 1/2 teaspoon of cayenne pepper or chipotle powder with the baking soda for a sweet-and-spicy situation that is absolutely addictive.
- Chocolate Drizzle: Melt some dark or milk chocolate and drizzle it over the cooled, broken brittle. Let it set before serving. Because… chocolate.
- Sea Salt Gourmet: After pouring the brittle onto the pan, immediately sprinkle the top with a little flaky sea salt. It elevates it to gourmet status.
- Vegan Version: Use a plant-based butter substitute. Just make sure it’s a stick form, not a soft tub variety, for the right fat content.
Chef Emily’s Notes & Kitchen Confessions
This recipe has evolved in my kitchen over the years. I used to be terrified of the hard crack stage, constantly worrying I’d burn it. Now, I embrace the amber color. I’ve learned that taking it just to the edge of almost-too-dark gives it the most incredible, deep flavor—a happy accident born from that day in Grandma’s kitchen!
My biggest piece of advice? Don’t fear the foam! That baking soda reaction is the coolest part. My kids now fight over who gets to add it and watch the volcanic eruption. It never gets old. And remember, even if your brittle isn’t picture-perfect, it will almost certainly still taste amazing. I’ve had batches that were a little too thick, a little too dark, or didn’t spread perfectly, and you know what? They were all devoured with joy. Cooking is about the love you stir in, not just the ingredients.
FAQs & Troubleshooting: Your Questions, Answered!
Q: My brittle turned out chewy and sticky, not hard and crunchy. What happened?
A: This almost always means the syrup didn’t get hot enough. The most likely culprit is an inaccurate candy thermometer. Test your thermometer by placing it in a pot of boiling water; it should read 212°F (100°C). If it’s off by more than a degree or two, you’ll need to adjust your target temperature accordingly. Next time, make sure you’re cooking the syrup to a true 300°F without stirring.
Q: Why did my sugar crystallize and get grainy?
A: This happens when sugar crystals form on the side of the pan and fall back in, causing a chain reaction. To prevent this, make sure you dissolve the sugar completely at the beginning and avoid stirring after it comes to a boil. Brushing down the sides of the pan with a wet pastry brush as the sugar dissolves is a great preventative measure.
Q: Can I double this recipe?
A: I don’t recommend it for your first try. Candy making is precise, and doubling the volume can change the cooking time and how the heat is distributed, making it harder to get right. It’s best to make multiple batches if you need more.
Q: How long does homemade peanut brittle last?
A: Stored in an airtight container at room temperature in a cool, dry place, it will stay fresh and crunchy for up to 3 weeks! (Though I doubt it will last that long!)
Peanut Brittle
- Total Time: 55 minutes
- Yield: 20 Servings 1x
Description
Old-fashioned peanut brittle made at home is easier than you think—caramelized sugar, roasted peanuts, and that perfect brittle crack. A holiday classic or anytime treat!
Ingredients
1 cup granulated sugar
1/2 cup light corn syrup
1/4 cup water
1 cup roasted, salted peanuts
2 tbsp unsalted butter
1 tsp vanilla extract
1 tsp baking soda
Instructions
Line a baking sheet with parchment or grease it well.
In a saucepan, combine sugar, corn syrup, and water. Stir over medium heat until sugar dissolves.
Bring to a boil. Cook without stirring until it reaches 300°F (hard crack stage) on a candy thermometer.
Remove from heat. Quickly stir in butter, vanilla, peanuts, and then baking soda. The mixture will foam—stir fast!
Immediately pour onto prepared baking sheet and spread thin.
Let cool completely, then break into pieces.
- Prep Time: 10 minutes
- Cool Time: 30 minutes
- Cook Time: 15 minutes
Nutrition
- Calories: 130 per piece
- Sugar: 15g per piece
- Fat: 6g per piece
- Carbohydrates: 18g per piece
- Protein: 2g per piece
Nutritional Information (Approximate)
Per serving (assuming 20 servings per batch): 130 Calories | 18g Carbohydrates | 6g Fat | 2g Protein | 15g Sugar
Prep Time: 10 mins | Cook Time: 15 mins | Cool Time: 30 mins | Yield: ~1.5 lbs of brittle
Final Thoughts: Crunch, Crackle & Sweet Memories
And there you have it—homemade peanut brittle that’s golden, glossy, and absolutely addictive. It’s more than just a candy recipe; it’s a little kitchen magic you can share. Every shattering bite is a reminder that sometimes the simplest ingredients—sugar, butter, and peanuts—combine to create pure joy.
What I love most about this recipe is that it carries stories. For me, it’s Grandma’s laughter in a sugar-scented kitchen, the thrill of that foamy baking soda moment, and the pride of cracking the slab into jagged shards of sweetness. For you, maybe it will become a holiday tradition, a homemade gift, or just a crunchy treat tucked into the cookie jar “for later” (though good luck making it last!).
So don’t be afraid of the thermometer, don’t worry if it spreads a little thick, and remember—imperfections often taste the sweetest. Tie up a bag for a friend, keep a bowl for yourself, and let this peanut brittle become part of your own story.
From my candy-dusted kitchen to yours—happy cracking, happy munching, and happy memory-making.