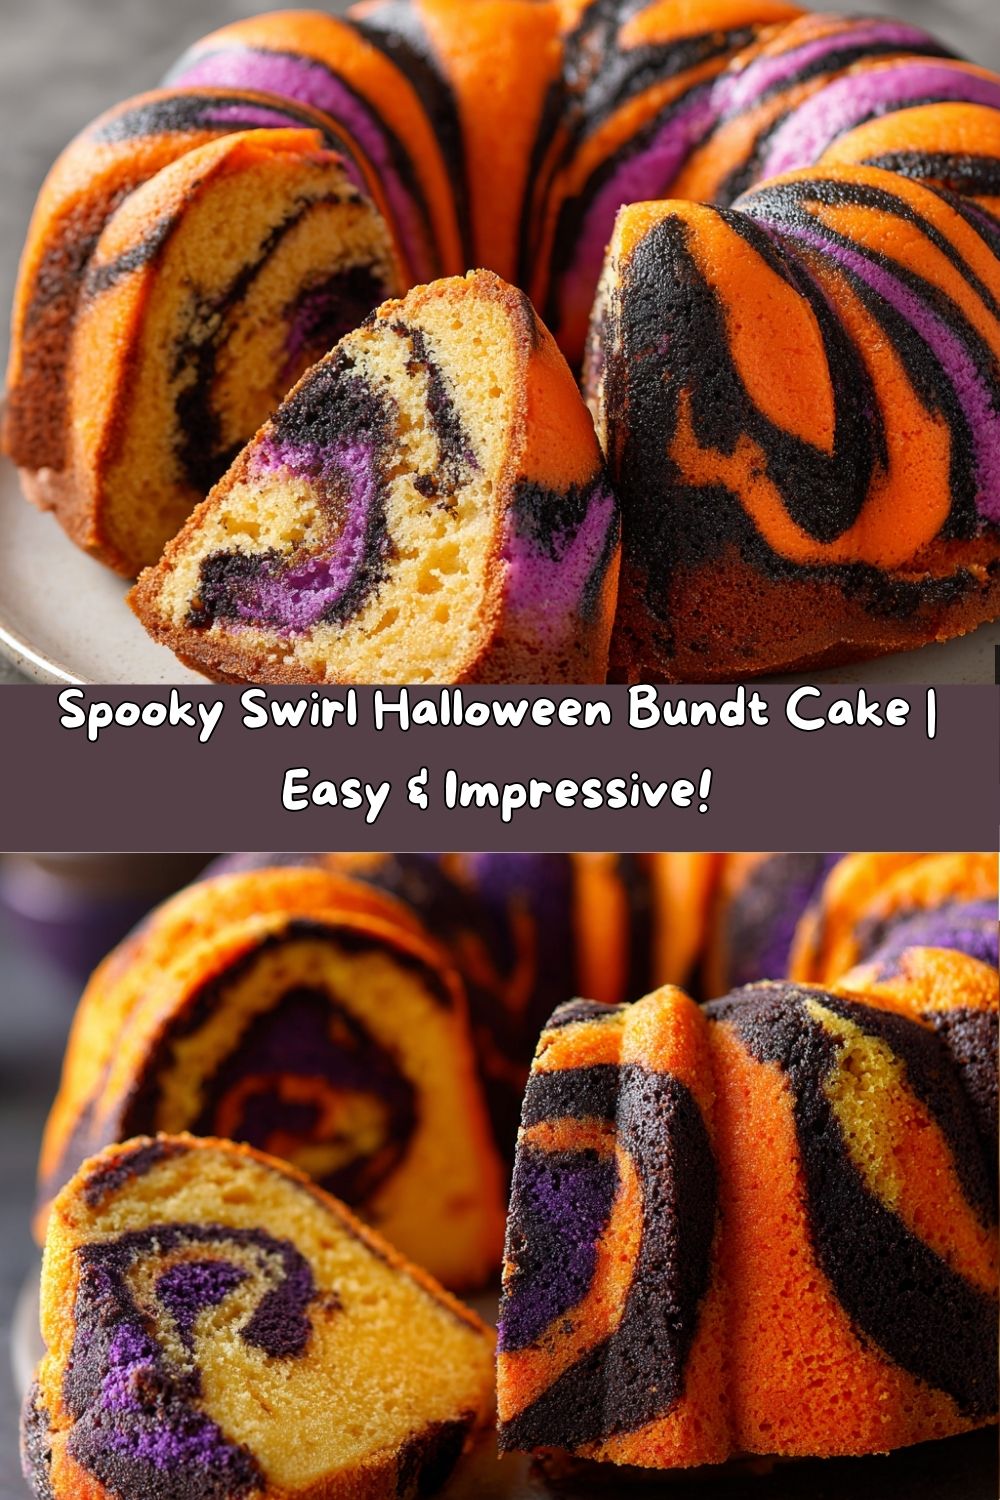
Spooky Swirl Halloween Bundt Cake: Your New Party Centerpiece!
Hey there, my fellow food adventurer! Can you smell that? It’s the crisp, slightly smoky scent of autumn in the air, mixed with the sweet promise of sugar and spice. And you know what that means—Halloween is creeping up on us, and it’s time to bring the party to the kitchen. If you’ve been scrolling through Pinterest, dreaming of a show-stopping dessert that’s equal parts spooky and spectacular, then pull up a chair, my friend. You’ve just found your baking bestie.
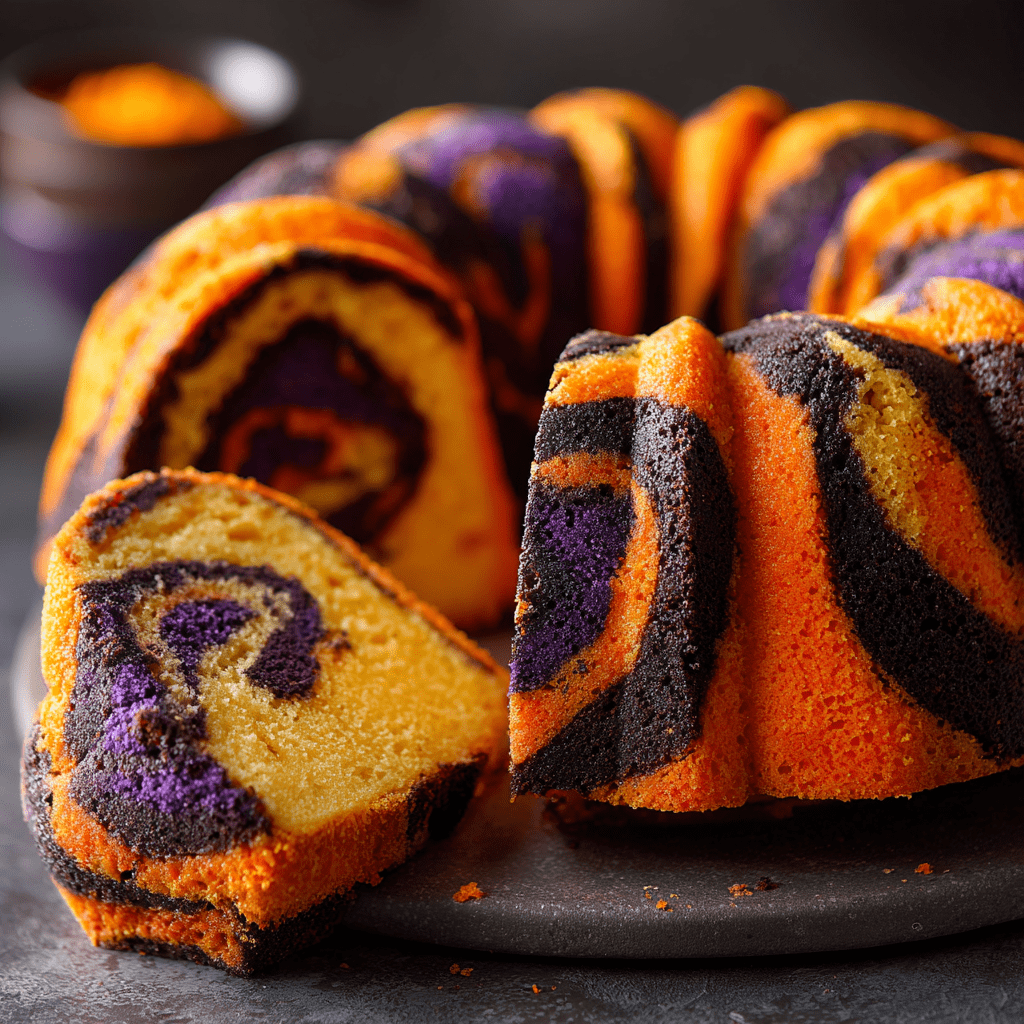
I’m not talking about a simple sheet cake here. Oh no. We’re crafting a masterpiece. A glorious, towering, neon-swirled Halloween Bundt Cake that’s going to be the absolute star of your dessert table. Imagine slicing into a moist, tender vanilla-almond cake to reveal wild, wickedly beautiful ribbons of neon orange, deep purple, and mysterious black. It’s a flavor explosion and a visual spectacle all in one. This isn’t just a cake; it’s a conversation starter, a mood-lifter, and a deliciously fun project that’s way easier than it looks. I promise. So, tie on your favorite messy apron (the one with all the character), and let’s make some magical, spooky memories together. This cake is about to become your new Halloween tradition.
The Cake That Started It All: A Spooky Kitchen Memory
This recipe takes me right back to my first Halloween in my own little apartment. The place was about the size of a postage stamp, but my dreams for a party were huge. I wanted to make something incredible, something that would make my friends’ jaws drop. But, full disclosure? I was broke. Fancy fondant skills? Zero. A pantry stocked with exotic ingredients? Not a chance.
So, I did what I always do: I got creative with the basics. I whipped up my favorite, most reliable vanilla Bundt cake batter—the one my grandma taught me, the one that never fails. Then, I raided the baking aisle for the wildest, most neon food coloring gels I could find. With a few careful swirls and a whole lot of hope, I created this marbled monster. The moment I turned that cake out onto the wire rack, revealing its psychedelic, spooky swirls, I actually did a little happy dance right there in my tiny kitchen. The cake was a massive hit. It wasn’t just about the taste (which was amazing); it was about the joy, the surprise, the sheer fun of it. That’s the spirit I’ve baked into this recipe for you.
Gathering Your Spooky Spell Ingredients
Here’s everything you’ll need to conjure up this magical cake. Remember, baking is a science, but it’s also an art—so feel free to make it your own with my chef notes and substitutions!
- 1 cup unsalted butter, room temp – This is the foundation of our rich, tender crumb. Pro Tip: “Room temp” means your finger should leave a slight indentation when you press it. If it’s melted, the cake’s texture will be off. If it’s too cold, it won’t cream properly. No time to wait? Cut it into tablespoons and microwave for 5-second bursts until perfectly soft!
- 4 egg whites + 4 whole eggs – This combo is my secret weapon! The whites give us a beautiful lift and a lighter texture, while the whole eggs provide richness and structure.
- 4 cups all-purpose flour – The workhorse of our cake. For a lighter cake, you can swap 2 cups with cake flour, but all-purpose works beautifully here.
- 2 tsp baking powder + 1 tsp salt + ½ tsp baking soda – Our leavening dream team. The baking soda specifically reacts with the buttermilk to give us an extra-soft texture. Don’t skip the salt—it makes all the flavors pop!
- 1½ cups buttermilk – The key to unbelievable moisture and a slight tang that balances the sweetness. No buttermilk? No problem! Add 1½ tbsp of lemon juice or white vinegar to a measuring cup, then fill it to the 1½ cup line with regular milk. Stir and let it sit for 5 minutes until it curdles. Boom—DIY buttermilk!
- 3 cups sugar – It seems like a lot, but trust me, it’s balanced by the other ingredients and makes a big, beautiful cake.
- 2 tsp vanilla extract + ½ tsp almond extract – Vanilla is a must. The almond extract is my “chef’s kiss.” It adds a sweet, almost marzipan-like depth that makes this cake taste gourmet.
- Zest of 1 orange – Optional, but oh-so-amazing. It adds a bright, citrusy note that cuts through the sweetness and makes the other flavors sing.
- Neon orange, neon purple, and black gel food coloring – Gel is non-negotiable! Liquid food coloring will water down your batter and give you pale, sad colors. Gel coloring gives you those vibrant, bold, spooky hues without altering the batter’s consistency.
Let’s Bake! Your Step-by-Step Guide to Spooky Swirl Success
Follow these steps, and you’ll have a perfect cake every single time. I’ve packed this section with all my favorite kitchen hacks to make you feel like a pro.
Step 1: Prep Like a Pro. Preheat your oven to 350°F (175°C). Now, here’s the most important step for a Bundt cake: GREASE AND FLOUR YOUR PAN. Do not skip this. Do not use cooking spray and think it’s enough. Take softened butter and use a pastry brush (or your fingers!) to grease every single nook and cranny of that pan. Then, add a tablespoon of flour and shake it around until the entire interior is dusted. Tap out the excess. This is your insurance policy for a perfect, un-stuck cake. Set the pan aside.
Step 2: Whisk the Dry Goods. In a medium bowl, whisk together your 4 cups of flour, 2 tsp baking powder, 1 tsp salt, and ½ tsp baking soda. Whisking does two things: it combines everything evenly, and it aerates the flour, making your cake lighter. Set this bowl aside.
Step 3: Cream the Butter & Sugar. In a large bowl, use an electric mixer to cream together the room-temperature butter and 3 cups of sugar. You’re looking for a pale, fluffy mixture. This should take a good 3-4 minutes on medium-high speed. Don’t rush this! Creaming incorporates air, which is a key part of your cake’s rise.
Step 4: Incorporate the Eggs. With the mixer on medium, add your 4 egg whites and 4 whole eggs, one at a time. Let each egg fully incorporate into the batter before adding the next. This prevents the batter from curdling and ensures a smooth, emulsified mixture. Scrape down the sides of the bowl as needed.
Step 5: Flavor Party! Mix in the 2 tsp vanilla extract, ½ tsp almond extract, and the orange zest (if using). Just until combined.
Step 6: The Alternating Game. Reduce your mixer speed to low. Add about one-third of your flour mixture and mix until just combined. Now, add half of the buttermilk. Repeat: another third of flour, the rest of the buttermilk, and finally the last third of flour. Mix until the batter is smooth and gorgeous, but don’t overmix! Overmixing develops gluten and leads to a tough cake.
Step 7: Get Your Spooky Colors On! Now for the fun part! Divide the batter evenly into three separate bowls. This is easiest with a kitchen scale, but if you don’t have one, just eyeball it. Add a generous amount of neon gel coloring to each bowl—orange in one, purple in another, and black in the last. Use a spatula to fold the color in until it’s fully and vibrantly incorporated.
Step 8: The Swirl. Using two large spoons, randomly drop spoonfuls of the different colored batters into your prepared Bundt pan. Alternate the colors as you go. Once all the batter is in the pan, take a knife or a skinny spatula and swirl it through the batter just once or twice. Do not over-swirl! You want bold ribbons of color, not a muddled brown mess.
Step 9: Bake to Perfection. Bake for 50-60 minutes. Ovens vary, so start checking at 50 minutes. The cake is done when a wooden skewer or toothpick inserted into the center comes out with just a few moist crumbs attached. The top will be a beautiful golden brown.
Step 10: The Cool Down. This is crucial! Let the cake cool in the pan on a wire rack for exactly 10 minutes. This allows the cake to set and firm up slightly. Then, place the wire rack on top of the pan and, with confidence, flip it over. The cake should release beautifully. Let it cool completely before glazing or dusting with sugar.
How to Serve Your Haunting Masterpiece
Once your cake is completely cool, it’s showtime! For a simple, elegant look, dust the top generously with powdered sugar—it looks like a light dusting of snow on a spooky landscape. For a little extra sweetness and shine, whip up a simple glaze by whisking together 1 cup of powdered sugar with 2-3 tablespoons of milk or orange juice until smooth. Drizzle it artfully over the top of the cake, letting it drip down those beautiful curves. Slice it thick, serve it on a cake stand, and watch everyone’s eyes light up when they see those incredible neon swirls inside. It’s a dessert that truly stands on its own!
Spooky Swirl Makeovers: Fun Variations to Try
Feel like mixing it up? This recipe is a fantastic canvas for creativity!
1. Chocolate Base: Replace 1 cup of the all-purpose flour with 1 cup of unsweetened cocoa powder for a decadent chocolate-vanilla swirl situation.
2. Gluten-Free Ghoul: Swap the all-purpose flour for a 1:1 gluten-free baking blend. The texture might be slightly denser but still delicious.
3. Spiced Pumpkin Twist: Add 2 tsp of pumpkin pie spice to the dry ingredients and use 1 cup of canned pumpkin puree in place of 1 cup of the buttermilk. Perfect for a Thanksgiving twist!
4. Citrus Burst: Use lemon zest and lemon extract instead of orange and almond. Color the batters yellow, green, and white for a ghostly citrus vibe.
5. Cream Cheese Swirl: Before adding the colored batter, dollop spoonfuls of sweetened cream cheese mixture (8 oz cream cheese, 1/4 cup sugar, 1 egg) into the pan, then add the colored batter and swirl. A delicious surprise inside!
Chef Emily’s Kitchen Confidential
This recipe has evolved so much since that first tiny apartment Halloween. I’ve learned a few things the hard way so you don’t have to! The biggest lesson? Gel food coloring is everything. I once used liquid and ended up with a pastel, watery-batter cake that was more “Easter pastel” than “Halloween neon.” It was a delicious tragedy.
Another fun memory: one year, I was so excited to show off the cake that I tried to flip it out of the pan after only 2 minutes. Let’s just say I spent the next hour performing “cake surgery” with toothpicks and extra glaze. Patience is not just a virtue in baking; it’s a requirement! Now, I set a timer for that 10-minute cool-down and don’t touch it. This cake is a labor of love and laughter, and I hope it brings as much joy to your kitchen as it has to mine.
FAQs & Troubleshooting: Your Questions, Answered!
Q: My cake stuck to the pan! What do I do?
A: Oh, we’ve all been there. First, don’t panic. If it’s still warm, let it cool a bit more—sometimes it will release on its own as it contracts. If pieces are stuck, gently loosen the edges with a thin, flexible spatula or a butter knife. You can then “glue” any broken pieces back on with your glaze or frosting. It will still taste incredible, I promise! For next time, be extra diligent with the butter-and-flour coating.
Q: Can I make this cake ahead of time?
A: Absolutely! This cake actually tastes better the next day as the flavors have more time to meld. Bake it, let it cool completely, and then wrap it tightly in plastic wrap. You can store it at room temperature for up to 2 days. Glaze it the day you’re serving it.
Q: My colors turned muddy instead of swirled. What happened?
A: You probably over-swirled. The key is to run your knife through the batter just once or twice in a figure-eight pattern. Less is more when it comes to marbling! We want distinct ribbons, not a homogenous mix.
Q: I can’t find black gel coloring. What’s a good substitute?
A: You can make a very deep, dark black by mixing other colors. Start with a base of chocolate batter (add 2 tbsp cocoa powder to that portion) and then add a lot of blue, green, and red gel coloring until it becomes a very dark gray/black. It works surprisingly well!
Spooky Swirl Halloween Bundt Cake
- Total Time: 1 hr 20 mins
- Yield: 16 - 18 1x
Description
Bright, bold, and hauntingly delicious—this Halloween Bundt Cake is a total centerpiece. With ribbons of neon orange, purple, and black marbled through a rich vanilla-almond batter, it’s perfect for parties, potlucks, or a spooky night in. The double batch makes it extra thick and satisfying, with a tender crumb and festive flair in every slice.
Ingredients
1 cup unsalted butter, room temp
4 egg whites
4 whole eggs
4 cups all-purpose flour
2 tsp baking powder
1 tsp salt
½ tsp baking soda
1½ cups buttermilk
3 cups sugar
2 tsp vanilla extract
½ tsp almond extract (for a sweet depth)
Zest of 1 orange (optional but amazing!)
Neon orange, neon purple, and black gel food coloring
Instructions
Preheat oven to 350°F (175°C). Grease and flour a large 12–15 cup Bundt pan thoroughly.
In a medium bowl, whisk together flour, baking powder, salt, and baking soda.
In a large bowl, cream butter and sugar until pale and fluffy (about 3–4 minutes).
Add in egg whites and whole eggs one at a time, mixing well between each.
Mix in vanilla, almond extract, and orange zest.
Alternate adding flour mixture and buttermilk, starting and ending with dry ingredients.
Divide batter evenly into three bowls. Color one neon orange, one neon purple, and one black.
Pour spoonfuls of each colored batter into the Bundt pan, layering randomly. Swirl lightly with a knife for a marbled effect.
Bake for 50–60 minutes or until a toothpick comes out clean.
Cool in pan for 10 minutes, then turn out onto a rack to cool completely. Drizzle with a simple glaze or dust with powdered sugar if desired.
- Prep Time: 25 minutes
- Cook Time: 55 minutes
Nutrition
- Calories: 340 / Serving
- Fat: 13g / Serving
- Carbohydrates: 48g / Serving
- Protein: 5g / Serving
Nutritional Information (Approximate, Per Slice)
Calories: ~340 | Fat: 13g | Carbs: 48g | Protein: 5g
Please note: This is an estimate based on the ingredients used and may vary depending on specific brands and substitutions.
Final Thoughts
The Spooky Swirl Halloween Bundt Cake is proof that you don’t need fancy fondant skills or a bakery-sized budget to create a dessert that steals the show. With just a reliable vanilla-almond cake base, a splash of neon gel colors, and a little swirl of creativity, you can turn a simple Bundt into the jaw-dropping centerpiece of your Halloween table. It’s festive, it’s fun, and it’s way easier than anyone at your party will believe.
What I love most about this cake is the moment of magic when you slice into it—those bold, electric ribbons of color practically glow against the tender crumb. It’s the kind of dessert that sparks conversation, laughter, and second helpings. And honestly? That’s what Halloween (and baking in general) is all about: joy, surprise, and a little bit of kitchen mischief.
So whether you’re hosting a haunted house bash, sending treats to school, or just looking to bring a little spooky sparkle into your week, this Bundt cake has your back. Don’t be afraid to make it your own with the variations, toppings, and flavors that call to you. And remember—patience with the pan greasing, restraint with the swirling, and confidence with the flip are your secret weapons here.