Your New Secret Weapon: Quick Pickled Onions That Transform Everything
Hey there, friend! Let me paint a picture for you. It’s Taco Tuesday. You’ve got your perfectly seasoned protein, your creamy avocado, your fresh cilantro… but you take a bite and think, “Hmm, it’s good, but it’s missing something. A little… zing. A little crunch. A little *wake-up call* for my taste buds.”
Or maybe you’re staring down a gorgeous grain bowl. It’s healthy, it’s colorful, but it’s feeling a bit… earnest. It needs a jolt of excitement to bridge the gap between “good for me” and “OH WOW, I want to eat this every single day.”
Sound familiar? I’ve been there more times than I can count. And that, my fellow flavor-chaser, is where today’s rockstar recipe comes in. We’re making Quick Pickled Onions, and I’m not exaggerating when I say this is one of the most transformative tricks in my entire kitchen playbook.
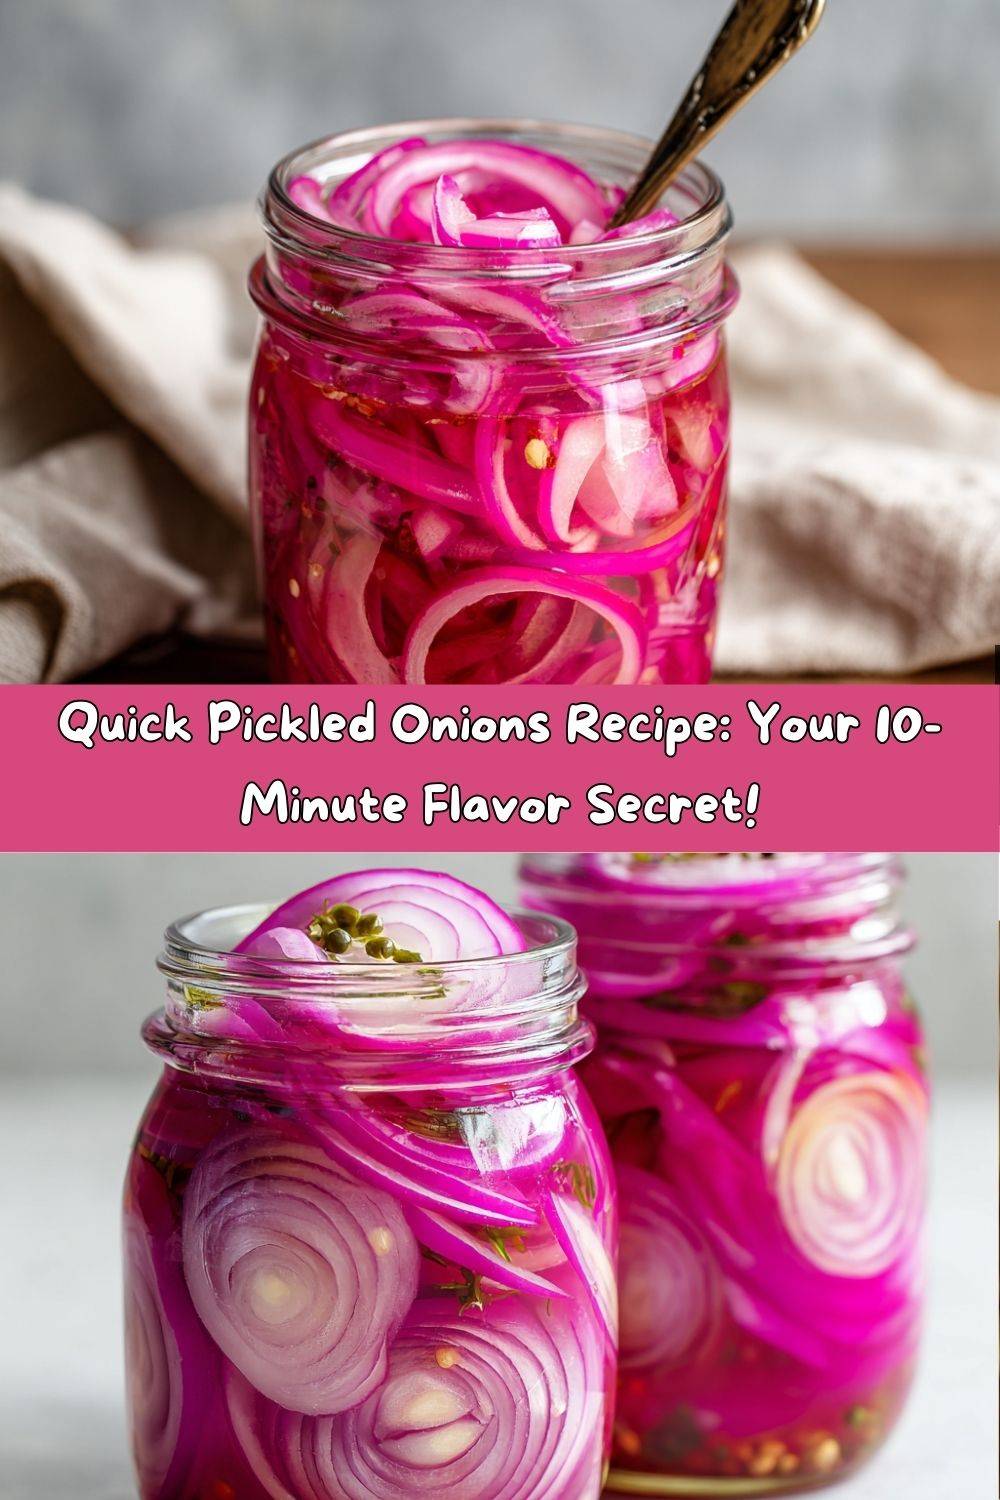
These aren’t the labored, canned-for-months pickles of your grandma’s pantry (though I love those too!). This is a speedy, no-fuss, vibrant condiment that you can whip up while the rest of your dinner is cooking. In less than 10 minutes of active time, you’ll create a jar of tangy, crisp, slightly sweet magic that elevates everything it touches. Think of them as the bright pink accessory that takes your meal from basic to brilliant. Ready to become a pickling pro? Let’s get our quick pickle on!
A Pinch of Nostalgia: My First Pickling “Aha!” Moment
My love affair with pickled onions didn’t start in a fancy culinary school kitchen. Oh no. It started with a slightly disastrous fish taco.
I was in my first apartment, feeling very much like a “real” adult, and I decided to host a taco night. I went all out—fresh tortillas, mahi-mahi with a killer spice rub, a homemade slaw. But when I took my first triumphant bite, it was… fine. It was bland. The fish was overcooked, the slaw was soggy, and my culinary ego was deflating faster than a failed soufflé.
In a moment of panic, I remembered a little deli container tucked in the back of my fridge from a sandwich shop days prior. It held the last few strands of their pickled red onions. I forked them out and scattered them over my sad tacos as a last-ditch effort.
Friends, it was a revelation. That one bite—the sharp tang cutting through the oily fish, the crisp texture against the soft tortilla, the sweet vinegar making everything else taste *more*—it completely saved the meal. It was my kitchen superhero moment. I realized that the simplest condiment could be the most powerful tool in my arsenal. I’ve always had a jar in my fridge ever since, and I promise, once you start, you will too.
Gathering Your Pickling Posse: The Ingredients
The beauty of this recipe is in its simplicity. You likely have most of this in your pantry right now! Here’s what you’ll need for one perfectly packed jar of pink perfection.
- 1 large red onion, thinly sliced – This is our star! Red onions are perfect for quick pickling because they’re naturally a bit sweeter and milder than their yellow or white cousins, and they turn that absolutely gorgeous vibrant pink hue. Chef’s Insight: The thinner you slice, the quicker they pickle and the more delicate their texture. A mandoline is your best friend here (watch those fingers!), but a sharp knife and a steady hand work perfectly.
- 3/4 cup vinegar – This is the backbone of your brine. You’ve got options! Apple cider vinegar is my go-to—it has a fruity, mild tang that’s incredibly versatile. White vinegar is sharp and clean, letting the onion flavor shine. Red wine vinegar adds a deeper, more complex fruitiness. I say, use what you love! Substitution Tip: Rice vinegar is a fantastic, milder substitute if that’s what you have.
- 1/4 cup water – This just tones down the sharpness of the vinegar a touch so it’s not overwhelming.
- 1 tbsp sugar – A little sweetness is crucial to balance the acid. Substitution Tip: You can easily swap this for honey, maple syrup, or even a pinch of your favorite sugar alternative. The goal is just a hint of sweet balance.
- 1 tsp salt – Don’t skip this! Salt is a flavor enhancer and it also helps pull moisture out of the onions, making them more receptive to absorbing the delicious brine.
- Optional add-ins: 1 garlic clove (smashed), 1/2 tsp black peppercorns, 1/4 tsp red chili flakes, a few sprigs of fresh dill or thyme – This is where you get to play! These aren’t mandatory, but they add wonderful layers of flavor. Feeling spicy? Add those chili flakes. Want an herby vibe? Throw in some dill. This is your chance to make the recipe yours.
Let’s Get Pickling! Your Foolproof Step-by-Step Guide
See? I told you it was simple. Now let’s walk through it together. You’ll be a pro by the end of this section!
- Prep Your Onion. First, peel your red onion and slice it in half from root to stem. Now, place it cut-side down on your cutting board and slice it as thinly as you can into half-moons. I like to separate the layers with my fingers as I go—it makes packing the jar easier. Chef’ Hack: If you’re super sensitive to onion fumes, pop the onion in the fridge for 30 minutes before slicing or chew a piece of gum while you do it. It really helps!
- Pack the Jar. Take a clean 16-ounce glass jar (a mason jar is perfect) and gently pack all those beautiful onion slices inside. If you’re using any of the optional add-ins like garlic, peppercorns, or herbs, toss them in with the onions now. Don’t pack it so tightly that the onions are smashed, but you want them all to fit snugly.
- Create the Magic Brine. In a small saucepan, combine your vinegar, water, sugar, and salt. Now, place it over medium heat. We’re not trying to get this to a rolling boil! We just want to warm it up enough so that the sugar and salt completely dissolve. Give it a gentle stir with a whisk or a spoon. This should only take 2-3 minutes. You’ll see little bubbles start to form around the edge—that’s your cue that it’s ready. Chef’s Tip: Do NOT boil the brine aggressively. Overheating the vinegar can make it evaporate and become too sharp. Gentle heat is the name of the game.
- The Big Pour. Carefully take your hot brine and pour it directly over the onions in the jar. You want to make sure every single onion is submerged under the liquid. This is key for even pickling! I like to use a butter knife or a chopstick to poke down any rebellious onion slices that float to the top, ensuring they get a nice brine bath.
- The Waiting Game (The Hardest Part!). Screw the lid on the jar and let it sit on your counter until it cools down to room temperature. This usually takes about 30-45 minutes. Once it’s cool, pop it right into the refrigerator. Chef’s Insight: You can technically eat them after 30 minutes of chilling—they’ll be lightly pickled and delicious. But for the full, best flavor? Let them hang out in the fridge for at least a few hours, or ideally overnight. The flavor and color just get better and better.
How to Serve Your Pickled Masterpiece
Okay, the jar is chilled, the onions are a brilliant pink, and you’re ready to eat! The real question is, what don’t you put these on? Here are a few of my absolute favorite ways to use them:
- The Taco & Burger Topper: This is their destiny. They add a crucial crunch and acid that cuts through rich, fatty meats beautifully.
- The Salad & Bowl Booster: Scatter them over greens, grain bowls, or buddha bowls. They provide a punch of flavor that makes healthy eating feel like a treat.
- The Sandwich & Wrap Star: Forget bland lettuce. Pile these high on pulled pork sandwiches, turkey clubs, or veggie wraps for a serious upgrade.
- The Sidekick for Rich Foods: Serve them alongside heavy meals like barbecue, fried chicken, or creamy casseroles. They act as a palate cleanser between bites!
- Straight from the Jar: No judgment here. Sometimes I just sneak a forkful when I open the fridge. They’re that good.
Get Creative! 5 Flavorful Twists
Once you’ve mastered the basic formula, the world of quick-pickling is your oyster! Here are a few fun variations to try:
- Spicy Mexican: Add 1 sliced jalapeño, 1/2 tsp chili flakes, and a big pinch of dried oregano to the jar.
- Herby Mediterranean: Use red wine vinegar and add a few sprigs of fresh thyme, a smashed garlic clove, and a quarter of a lemon, thinly sliced.
- Sweet & Zesty: Swap the sugar for honey and add a few strips of orange zest to the brine.
- Dilly-Delicious: Perfect for burgers! Add a generous handful of fresh dill fronds and 1/2 tsp of mustard seeds.
- Asian-Inspired: Use rice vinegar, swap the sugar for a touch of honey, and add a few thin slices of fresh ginger and a star anise pod.
From My Kitchen to Yours: Chef Emily’s Notes
This recipe has been my faithful companion for years, and it’s evolved in the most fun ways. I once, in a frantic pre-dinner party panic, tried to quadruple the recipe in a giant stockpot. Let’s just say I ended up with lukewarm vinegar and impatient guests. I learned my lesson: this recipe is meant to be small-batch and simple! Make multiple jars with different flavors instead of one gigantic one.
I also love how this recipe is a gateway drug to other quick-pickling adventures. I’ve used the exact same brine for quick-pickled cucumbers (quickles!), radishes, and even carrots. The method is foolproof.
The best part? They make you feel like a kitchen wizard with minimal effort. Nothing beats the feeling of a friend taking a bite of something you made, their eyes going wide, and asking, “WHAT is on this? It’s incredible!” And you get to casually say, “Oh, just some quick pickled onions I threw together.” Pure magic.
Quick Pickled Onions FAQs: Your Questions, Answered!
Q: Why are my pickled onions not turning pink?
A: Don’t worry! They will. The reaction between the red onion pigment and the acid in the vinegar is what creates that gorgeous color. It can sometimes take a few hours in the fridge to really develop. If you’re impatient, using a more acidic vinegar like white vinegar can speed up the process a bit.
Q: How long do they really last in the fridge?
A: If you keep them fully submerged in the brine, they will easily last for 3 to 4 weeks in the refrigerator. The vinegar is a great preservative. Always use a clean fork to take them out to prevent introducing bacteria that could spoil them.
Q: My brine became cloudy. Did I do something wrong?
A: Not at all! A cloudy brine is usually a sign of happy, natural fermentation or just minerals from your onions or garlic. It’s completely safe to eat and often means your pickles are extra flavorful.
Q: Can I use this method with other vegetables?
A: Absolutely! This brine is perfect for cucumbers (slice them thin!), radishes, carrots, or even jalapeños. Harder vegetables might take a bit longer to soften up and absorb the flavor, but the method is exactly the same.
QUICK PICKLED ONIONS
- Total Time: 35 minutes
- Yield: 1 jar 1x
Description
These Pickled Onions are the easiest way to add a punch of flavor to tacos, sandwiches, salads, or grain bowls. Bright, tangy, and slightly sweet, they come together in minutes and last in the fridge for weeks.
Ingredients
1 large red onion, thinly sliced
3/4 cup vinegar (apple cider, white, or red wine vinegar)
1/4 cup water
1 tbsp sugar (or honey)
1 tsp salt
Optional add-ins: 1 garlic clove, black peppercorns, chili flakes, or fresh herbs
Instructions
Thinly slice the onion and place in a clean glass jar.
In a small saucepan, combine vinegar, water, sugar, and salt. Heat just until sugar dissolves (do not boil).
Pour the hot mixture over the onions, making sure they’re fully submerged.
Let cool to room temperature, then cover and refrigerate.
They’re ready in about 30 minutes, but best after a few hours. Keeps for 2–3 weeks in the fridge.
- Prep Time: 5 minutes
- Cook Time: 30 minutes
Nutrition
- Calories: 10
- Carbohydrates: 2g
Quick Pickled Onions Nutrition Info (Per 2-tbsp serving)
Calories: 10 | Carbs: 2g | Fat: 0g | Protein: 0g
Note: This is an estimate and can vary based on specific ingredients used.
Final Thoughts
Quick Pickled Onions are proof that the simplest kitchen tricks can be the most transformative. In just a few minutes, you create a jar of bright, tangy crunch that can wake up tacos, burgers, grain bowls, and even your favorite comfort food casseroles. They’re not just a condiment—they’re a kitchen hack that adds instant flavor, color, and joy to your meals.
I love that this recipe is flexible enough to suit your mood. Feeling spicy? Toss in jalapeños. Want a Mediterranean vibe? Add fresh herbs and lemon. Craving something sweet? A swirl of honey and citrus zest will do the trick. Once you start experimenting, you’ll see just how endlessly versatile these onions can be.
The best part? Every time you pull out that glowing jar of pink magic from your fridge, you’ll feel like you’ve given your meal a little upgrade without breaking a sweat. It’s the kind of recipe that becomes a staple in your kitchen—a secret weapon that makes everything better.
So next time your dinner feels like it’s missing “something,” you’ll know exactly what to reach for. Bright, crunchy, and utterly irresistible, these Quick Pickled Onions are about to be the MVP of your fridge.