Air Fryer Cherry Cheesecake Biscuit Pockets: Your New 10-Minute Dessert Obsession
Hey friends! Emily here, from my flour-dusted kitchen to yours. Have you ever had one of those days where you’re hit with a sudden, undeniable craving for something sweet, warm, and straight-up comforting, but the idea of dragging out the mixer and waiting for an oven to preheat feels… impossible? Yeah, me too. Honestly, most of my best kitchen creations start with that exact feeling. That’s why I’m practically bouncing in my apron to share this recipe with you today.
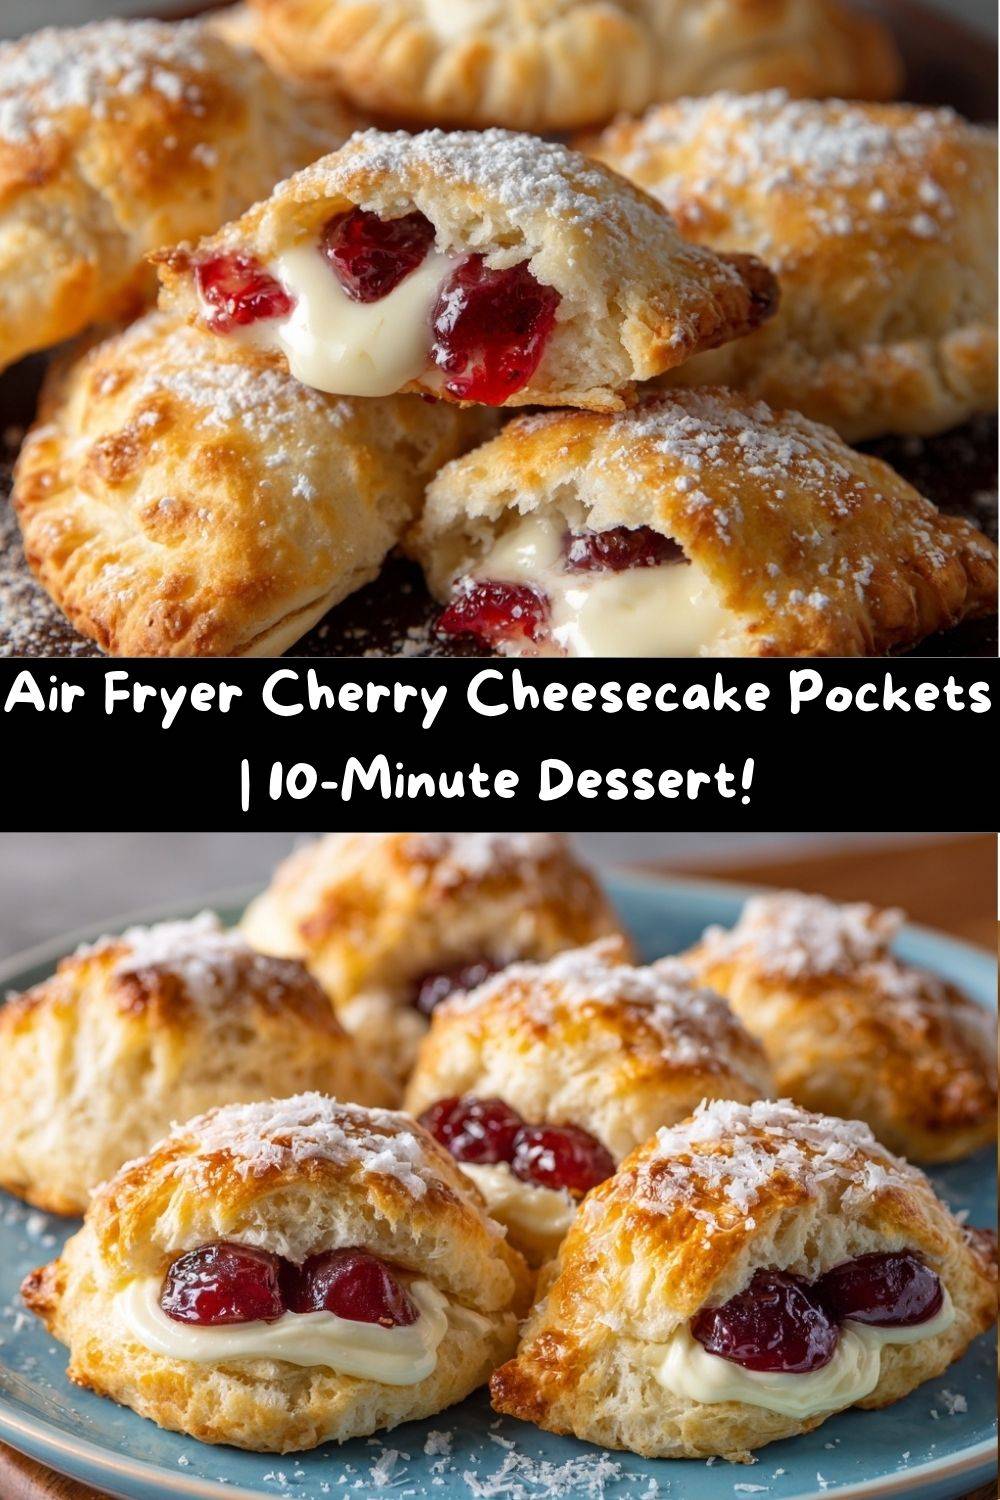
Imagine this: flaky, golden-brown pastry, warm and crisp from the air fryer, giving way to a creamy, tangy cheesecake filling and a burst of sweet-tart cherry goodness. All of that, in your hands, in about the time it takes to scroll through your social media feed. These Air Fryer Cherry Cheesecake Biscuit Pockets are nothing short of magic. They’re the glorious love child of a lazy Saturday morning and a fancy bakery dessert, and they are so doable.
We’re turning humble canned biscuits into something spectacular. No one will believe these started in a tube. They’re perfect for a quick dessert, a fun after-school snack, a last-minute potluck hero, or just because you deserve a little handheld joy. So, let’s skip the fuss and dive straight into the fun. Grab your air fryer, and let’s make something deliciously irresistible together!
The Story Behind the Pocket: Grandma’s Apron & My Messy Experiments
This recipe takes me right back to my grandma’s linoleum floor, standing on a step-stool, watching her make her famous fried pies. She’d use leftover biscuit dough and whatever jam was in the icebox, and to my five-year-old self, they were the most sophisticated dessert in the world. The kitchen would smell like butter and joy, and she’d always let me crimp the edges with a fork, my tiny hands pressing down with serious concentration.
Years later, in my first apartment with a kitchen the size of a postage stamp, I wanted to recreate that feeling. But frying felt intimidating and messy. My “experiments” were… educational. Let’s just say I created a few hockey pucks and one memorable jam volcano in my toaster oven. The dream of a quick, flaky, fruity pocket felt out of reach. Then, the air fryer entered my life. It was a game-changer! That hot, circulating air gave me the golden, flaky result I craved without the vat of oil. Swapping in a simple cheesecake filling? That was my “text-your-best-friend” moment. It’s my modern, shortcut tribute to Grandma’s wisdom—proof that the warmest food memories can be made in just minutes.
Gather Your Goodies: A Peek into My Pantry
Here’s what you’ll need to make these magical pockets. I’ve added my little chef notes next to each one—because knowing the *why* makes you a more confident cook!
- 1 can Grands Flaky Biscuits (8 count): The hero of our shortcut! The “Grands” size gives us plenty of room to fill. The flaky layers are key—they puff up and get so beautifully crisp in the air fryer.
- 4 oz (½ block) Cream Cheese, softened: Full-fat is my friend here for the creamiest texture. Let it sit on the counter for 30-60 minutes. If you’re in a rush, pop it in the microwave for 10-15 seconds, but don’t let it melt!
- 1 cup Powdered Sugar: It dissolves instantly into the cream cheese for a smooth, silky filling without any graininess. No powdered sugar? Blend regular sugar in a clean coffee grinder for a minute!
- 1 tsp Pure Vanilla Extract: The soul of the cheesecake flavor. That warm, aromatic note makes all the difference. Don’t skip it!
- 1 can (21 oz) Cherry Pie Filling: The classic, juicy star. Look for one with “more fruit.” You’ll only use about half the can, which means you get to make a second batch… or spoon the rest over ice cream!
- Cooking Spray (Avocado or Canola Oil): A quick spritz guarantees that ultimate golden, crispy exterior. It’s the air fryer’s best friend.
- 2 Tbsp Unsalted Butter, melted: For the glorious post-fry brush. This gives the tops a beautiful sheen and helps our final sprinkle of sugar stick.
- 2 Tbsp Granulated Sugar: That final sparkling, crunchy touch. It’s the bakery-style finish that makes these look and taste extra special.
Let’s Build Some Pockets: Your Foolproof Blueprint
Follow these steps, and you’ll be a pocket pro in no time. I’m sharing all my little hacks along the way!
- Prep Your Station: Lightly dust your work surface with a bit of flour. Pop open that biscuit can (the best sound in the world!) and separate the biscuits. Use a rolling pin or even just your hands to gently flatten and stretch each biscuit into a 5-6 inch round. Chef’s Tip: Thinner in the middle, slightly thicker at the edges helps prevent leaks!
- Whip the Filling: In a medium bowl, beat the softened cream cheese with a hand mixer or a strong fork until it’s smooth and creamy. Add the powdered sugar and vanilla. Mix on low at first (to avoid a sugar cloud!), then beat until completely combined and luscious. This should take about 1-2 minutes. Give it a taste—you deserve it.
- Fill & Fold: Place a heaping tablespoon of the cream cheese mixture slightly off-center on each biscuit round. Top with 4-5 cherries and a little sauce from the pie filling (about 1 tablespoon total). Do not overfill! This is the number one rule. Leave a ½-inch border. Fold the dough over to create a half-moon. Now, seal it tight! Use the tines of a fork to press down firmly all along the curved edge. Give it a good press—this is what locks in the ooey-gooey goodness.
- Air Fryer Time! Preheat your air fryer to 350°F (175°C) for 3 minutes. Lightly spray the basket with oil. Arrange 3-4 pockets in the basket, leaving space between them for air to circulate. Give the tops a light spray with oil. This promotes even browning. Air fry for 6-8 minutes, until they are puffed and a deep, golden brown. Chef’s Hack: No preheat function? Just add 1-2 minutes to the cook time and keep an eye on the color.
- The Glorious Finish: Carefully remove the hot pockets (they’re molten inside!). While they’re still piping hot, brush the tops generously with the melted butter and immediately sprinkle with granulated sugar. The butter helps the sugar adhere and creates a divine, slightly crunchy topping. Let them cool for at least 5 minutes on a wire rack. I know it’s hard, but that filling is like lava! This rest time lets the filling set just enough.
How to Serve These Sweet Handheld Treasures
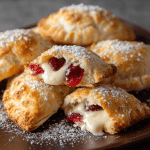
Presentation is part of the fun! I love serving these warm on a big, rustic platter with a dusting of extra powdered sugar. For a real diner-style vibe, place one on a small plate with an extra dollop of the leftover cherry pie filling and a tiny scoop of vanilla ice cream on the side. If you’re feeling fancy, a drizzle of simple vanilla glaze (just mix ½ cup powdered sugar with a tablespoon of milk) takes them over the top. They’re perfect with a cup of coffee for a decadent breakfast treat, or with a cold glass of milk for an after-dinner delight. The best part? No forks required—just happy hands and big smiles.
Mix It Up! 5 Delicious Twists on the Classic
Once you master the basic pocket, the flavor world is your oyster! Here are some of my favorite riffs:
- Blueberry Lemon Zest: Use blueberry pie filling and add 1 teaspoon of lemon zest to the cream cheese mixture. So bright and fresh!
- Apple Pie Spice: Swap in apple pie filling and mix ½ teaspoon of cinnamon into the cream cheese. A classic fall flavor in minutes.
- Chocolate Hazelnut Dream: Skip the fruit filling. Spread a tablespoon of chocolate-hazelnut spread on the dough, top with the cheesecake filling, and add a few chocolate chips. Seal and cook as directed. Pure bliss.
- Peaches & Cream: Use canned peach pie filling or finely chopped fresh peaches tossed with a teaspoon of sugar. Divine.
- Dairy-Free Swap: Use your favorite plant-based cream cheese and butter, and ensure the biscuits are dairy-free (many store brands are!). An inclusive treat for everyone.
Emily’s Kitchen Confidential Notes
This recipe has become my go-to “impress people without stress” trick. I’ve made them for book club, after soccer practice, and even as a silly midnight snack with my partner. The recipe has evolved—I used to just do jam, but adding the cheesecake layer makes it feel so special. A funny story: I once tried to seal them with a fancy pastry crimper I bought online. It was a disaster; the forks work better! Keep it simple. Also, if you have a little filling leftover, it makes an amazing fruit dip for graham crackers. Waste not, want not!
Your Questions, Answered!
Q: My pocket burst open in the air fryer! What happened?
A: Ah, the great burst! This almost always means overfilling. Remember, a heaping tablespoon of cheesecake mix + about 1 tbsp of cherries max. Also, ensure you’re crimping the edges very firmly with that fork. A good seal is non-negotiable.
Q: Can I bake these in a regular oven?
A> Absolutely! Preheat your oven to 375°F (190°C). Place the pockets on a parchment-lined baking sheet, brush/spray with oil, and bake for 12-15 minutes, until golden brown. The texture will be slightly different but still delicious.
Q: Can I make these ahead of time?
A> You can assemble the uncooked pockets, place them on a baking sheet, and freeze until solid. Then transfer to a freezer bag. Cook straight from frozen, adding 3-4 minutes to the air fry time. Perfect for having “fresh” dessert on demand!
Q: The bottom of my pocket isn’t getting brown. Help?
A> This is common in some air fryer models. Try placing a small piece of parchment paper in the bottom of the basket (trim it so air can still flow around it). It creates a barrier and promotes more even cooking on the bottom.
Air Fryer Cherry Cheesecake Biscuit Pockets : Quick, Flaky & Irresistible
- Total Time: 11 minutes
- Yield: 8 1x
Description
Turn canned biscuits into golden, handheld cherry cheesecake pastries with just a few pantry staples and an air fryer. Flaky on the outside, creamy and fruity on the inside, these sweet pockets come together in under 10 minutes and taste like bakery magic—without the fuss.
Ingredients
1 can Grands biscuits
4 oz cream cheese, softened
1 cup powdered sugar
1 tsp vanilla extract
Canned cherry pie filling
Cooking spray
Melted butter (for brushing)
Granulated sugar (for topping)
Instructions
Roll out each biscuit into a flat round.
In a bowl, mix cream cheese, powdered sugar, and vanilla until smooth.
Add a spoonful of the cream cheese mixture and a bit of cherry pie filling to the center of each biscuit.
Fold over to create a half-moon, then crimp edges with a fork to seal.
Spray tops with oil.
Preheat air fryer to 350°F. Cook for 6 minutes or until golden.
While hot, brush with melted butter and sprinkle with sugar.
- Prep Time: 5 minutes
- Cook Time: 6 minutes
Nutrition
- Calories: 260 / Serving
- Sugar: 16g / Serving
- Sodium: 380mg / Serving
- Fat: 13g / Serving
- Carbohydrates: 30g / Serving
- Protein: 3g / Serving
- Cholesterol: 20mg / Serving
Nutritional Information (For Your Info!)
Alright, my friends, let’s keep it real. This is a dessert, a treat, a moment of joy. I’m a big believer in enjoying food fully. That said, I know some of you like to plan. The following is a rough estimate per pocket, based on the ingredients listed and assuming 8 servings. Remember, using low-fat cream cheese or a sugar substitute will change these numbers.
Per Pocket (Approximate): Calories: ~260 | Total Fat: 13g | Saturated Fat: 6g | Cholesterol: 20mg | Sodium: 380mg | Total Carbohydrates: 30g | Dietary Fiber: 0g | Sugars: 16g | Protein: 3g
The main sources of sugar are the powdered sugar and the pie filling. The fat comes from the biscuit, cream cheese, and butter—AKA the deliciousness agents! Enjoy these as part of a balanced diet, savor every bite, and don’t sweat the small stuff.
Final Thoughts from My Kitchen to Yours
And there you have it! Your secret weapon for instant dessert satisfaction. These Air Fryer Cherry Cheesecake Biscuit Pockets prove that incredible flavor doesn’t have to be complicated. They’re about the joy of creating something delightful with your own two hands, in mere minutes. I hope you’ll make them, share them, and watch the happy faces around your table. Food is love, and love should be easy sometimes.
If you make them (and I really hope you do!), tag me @TastyChow or use #TastyChow so I can see your beautiful creations! Now, go forth and air fry something amazing. Until next time, keep your spatula close and your appetite closer.
With love and a buttery, flaky crunch,
Emily