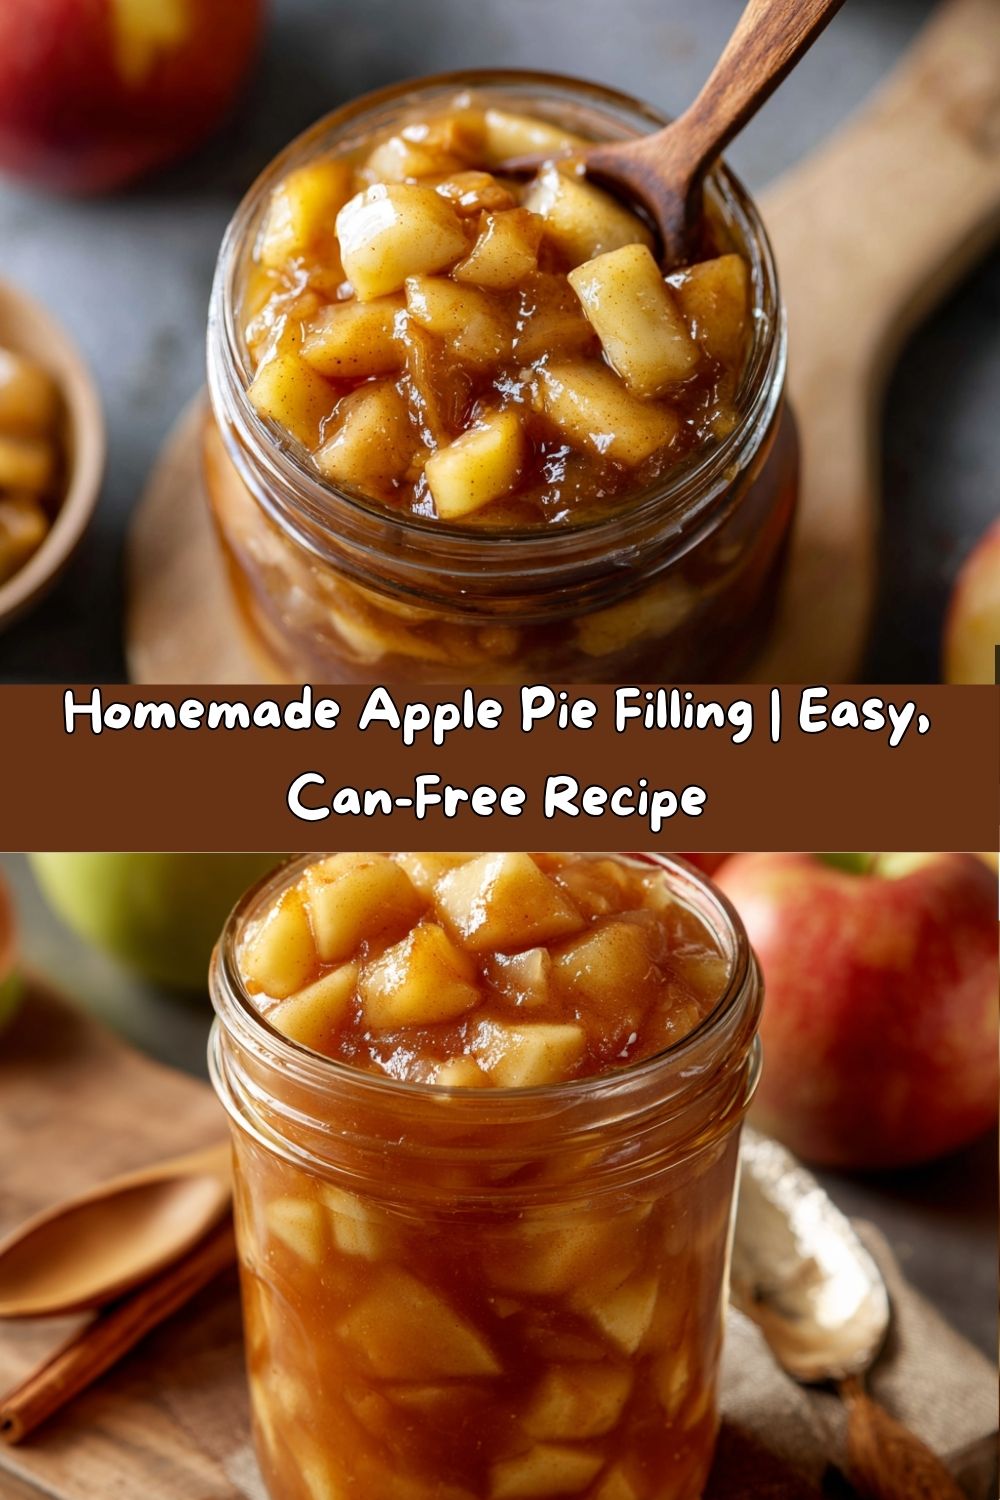
Ditch the Can! This Homemade Apple Pie Filling is Your New Secret Weapon
Hey there, my fellow food lover! 👋 Let’s talk about that little can of apple pie filling sitting in your pantry. You know the one. It’s… fine. It’ll do in a pinch. But if you’ve ever cracked one open and found yourself a little disappointed by the overly sweet, slightly mushy, and vaguely spiced apples inside, then my friend, you are in for the most delicious treat today.
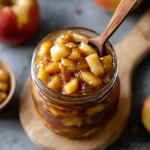
I’m about to show you how to make a homemade apple pie filling that will absolutely blow your mind. We’re talking tender, yet firm, apple slices swimming in a glossy, perfectly spiced sauce that tastes like a warm hug from your grandma. This isn’t just a recipe; it’s a game-changer. This filling is the golden ticket to not just incredible pies, but to a whole world of easy, impressive desserts and breakfasts.
Imagine waking up to this spooned over a stack of fluffy pancakes, swirling it into your morning oatmeal, or layering it into flaky pastries for a quick yet “wow-worthy” dessert. This filling is your back-pocket recipe for instant cozy vibes. So, tie on your favorite messy apron (the one with all the character!), and let’s make your kitchen smell absolutely incredible. Trust me, once you go homemade, you’ll never go back to that can again.
The Sunday Smell of Grandma Dot’s Kitchen
This recipe takes me right back to my Grandma Dot’s kitchen. It wasn’t a fancy, chef-style kitchen by any means—it had floral wallpaper, a humming refrigerator from the 70s, and a window that looked out onto her prize-winning roses. But on Sundays, that kitchen transformed into the heart of our universe.
The air would be thick with the scent of baking pastry and simmering cinnamon. My job, as her tiny, eager sous-chef, was to “test” the apple slices for sweetness. (A tough job, but someone had to do it!) She’d let me sprinkle the nutmeg and tell me stories about her mother, who would put up dozens of jars of this very filling every autumn. It wasn’t just about preserving fruit; it was about preserving a feeling. It was about having a little bit of summer sunshine and love stored away for a cold winter’s day. That’s the magic I want to share with you. This recipe is more than instructions; it’s a little jar of comfort, ready for you to create your own stories with.
Gathering Your Cozy-Making Ingredients
Here’s the beautiful part: you probably have most of this in your pantry right now! The magic is in the quality and the balance. Let’s break it down:
- 6 cups peeled, cored, and sliced apples – This is where the magic starts! I highly recommend a mix of Granny Smith (for their tartness and ability to hold their shape) and Honeycrisp (for their incredible sweetness and juicy texture). Chef’s Insight: Using a blend gives you a more complex flavor and perfect texture. No one wants a mushy pie! Other great options: Braeburn, Jazz, or Pink Lady.
- ¾ cup granulated sugar – This is our workhorse sweetener. It dissolves beautifully into the sauce, creating that classic, clear syrup.
- ¼ cup brown sugar – This is our flavor secret weapon! The molasses in the brown sugar adds a deep, caramel-like warmth that makes the filling taste incredibly rich and cozy.
- ¼ cup cornstarch – This is our thickening agent. It creates a gorgeous, glossy sauce that clings to every apple slice. Substitution Tip: You can use an equal amount of tapioca starch (which gives a brilliantly clear, glossy finish) or arrowroot powder.
- 1½ tsp ground cinnamon – The quintessential apple spice. It’s warm, sweet, and absolutely non-negotiable.
- ¼ tsp ground nutmeg – This is the supporting actor that makes the cinnamon shine even brighter. It adds a subtle, nutty depth. For the best flavor, grate it fresh if you can!
- Pinch of salt – Never, ever skip the salt! It’s not there to make things salty; it’s there to balance all the sweetness and make the other flavors pop. It’s the difference between “good” and “OMG, what is in this?!”
- 2 cups water – This forms the base of our luscious sauce.
- 1 tbsp lemon juice – A little acid is crucial! It brightens all the flavors and prevents the apples from browning. Chef’s Hack: You can also use apple cider vinegar in a pinch.
- 1 tsp vanilla extract – The grand finale! Stirring this in at the very end adds a beautiful, floral aroma that makes the whole thing smell and taste like a bakery dream.
Let’s Get Cooking: Your Foolproof Steps to Filling Bliss
Ready? This comes together so quickly. Let’s do this step-by-step, together!
- Prep Your Apples First! Before you even think about turning on the stove, peel, core, and slice your apples. I like my slices about ¼-inch thick—thick enough to have a satisfying bite, but thin enough to cook through evenly. Toss them in a large bowl with the lemon juice as you go to keep them from turning brown. Chef’s Tip: If you have one, an apple corer/slicer is a huge time-saver here! You’ll still need to peel them, but it makes the job a breeze.
- Make the Glorious Sauce Base. In a large, heavy-bottomed saucepan or Dutch oven, whisk together the granulated sugar, brown sugar, cornstarch, cinnamon, nutmeg, and that all-important pinch of salt. Whisking the dry ingredients first is a pro move—it prevents the cornstarch from clumping up when you add the liquid. Now, slowly pour in the 2 cups of water while you continue to whisk. Keep whisking until it’s completely smooth and there are no lumps. Chef’s Hack: For an ultra-smooth sauce, you can mix the cornstarch with a few tablespoons of the water first to create a “slurry,” then whisk that into the rest of the water and sugars. Foolproof!
- Thicken It Up! Place your saucepan over medium heat. Now, here’s the key: stir it constantly! I like to use a flat-bottomed wooden spatula or whisk. You’ll watch the mixture go from a cloudy liquid to a clear, thick, bubbling lava. This should take about 5-7 minutes. Once it’s thick and glossy, you’ve built the foundation of your filling!
- Welcome the Apples to the Party. Carefully add all of your prepared apple slices to the bubbling sauce. Gently stir them with a spoon until every single slice is lovingly coated in that spiced syrup. This is where it starts to smell like heaven.
- Simmer to Perfection. Reduce the heat to low-medium, pop a lid on the pot, and let it simmer for 10-15 minutes. You’ll want to give it a gentle stir every few minutes to make sure nothing is sticking to the bottom. You’re looking for the apples to be tender but still have a bit of a bite—what we call “fork-tender.” You don’t want apple mush! Chef’s Tip: The timing can depend on your apple variety. Start checking at the 8-minute mark.
- The Finishing Touches. Once the apples are perfectly tender, remove the pot from the heat. Now, stir in that tablespoon of lemon juice and the teaspoon of vanilla extract. These volatile ingredients lose their punch if you cook them, so adding them off the heat preserves their beautiful, bright flavors.
- Cool It Down. If you’re using this filling for a pie you’re baking right away, you can let it cool for just 15-20 minutes before pouring it into your crust. If you’re storing it for later, you need to let it cool completely to room temperature before putting it in jars or containers. This prevents condensation from making it watery.
How to Serve Up This Slice of Heaven
The possibilities are truly endless! Of course, it’s phenomenal in a classic double-crust pie or a rustic galette. But let’s think outside the pie plate! Spoon it warm over a scoop of vanilla ice cream for the world’s easiest dessert. Layer it with yogurt and granola for a parfait, or use it as a topping for pancakes, waffles, or French toast. It’s incredible swirled into oatmeal or even as a filling for hand pies and turnovers. Get creative—your breakfast and dessert game is about to level up!
Make It Your Own: Delicious Twists & Swaps
This recipe is a perfect canvas for your creativity!
- Bourbon-Spiked: For a grown-up twist, replace ¼ cup of the water with bourbon. The flavor is incredible.
- Maple Kissed: Swap the brown sugar for pure maple syrup for a deep, autumnal flavor.
- Ginger Spark: Add ½ teaspoon of ground ginger or a tablespoon of finely minced crystallized ginger for a warm, spicy kick.
- Vegan & Gluten-Free: This recipe is naturally both! Just ensure your sugar is certified vegan if that’s a concern.
- Lower Sugar: You can reduce the total sugar to ¾ cup without a huge textural change. The flavor will be less sweet and more appley!
Chef Emily’s Notes & Kitchen Stories
This recipe has evolved so much from my Grandma Dot’s original! She used flour to thicken hers, which could sometimes get a little cloudy. I’ve found cornstarch gives that beautiful, glossy finish I just love. One of my favorite kitchen fails was the time I was filming a video for this recipe and was chatting away to the camera, completely forgetting to reduce the heat after adding the apples. Let’s just say I ended up with apple sauce! It was still tasty on yogurt, but it was a good reminder to always stay present with your food. The best part about this filling? It freezes like a dream. Let it cool completely, pop it in a freezer-safe bag or container, and it’ll keep for up to 3 months. Thaw it in the fridge overnight whenever a pie emergency strikes!
Your Apple Filling Questions, Answered!
Q: My filling turned out runny. What happened?
A: The most common culprit is not letting the cornstarch mixture come to a full, bubbling simmer for long enough. It needs that full heat to activate its thickening power. Also, make sure you’re using the correct amount of cornstarch and that you whisked it smoothly into the water. If your filling is runny after cooling, you can pour it back into the pot, mix another tablespoon of cornstarch with two tablespoons of cold water to make a slurry, and whisk it in. Bring it back to a simmer for a few minutes to thicken up.
Q: Can I use this filling for canning?
A: This specific recipe is not designed for safe shelf-stable canning as written. To can apple pie filling safely, you need to use a specific method that includes bottled lemon juice (for consistent acidity) and a precise processing time in a water bath canner. I recommend searching for a recipe specifically labeled “for canning” from a trusted source like the National Center for Home Food Preservation.
Q: What are the very best apples to use?
A: You want a firm apple that won’t turn to complete mush when cooked. My top picks are Granny Smith, Honeycrisp, Braeburn, Jazz, and Pink Lady. Using a mix of two kinds (one tart, one sweet) will give you the most award-winning flavor and texture!
Q: How long will this keep in the fridge?
A: Stored in an airtight container in the refrigerator, your homemade apple pie filling will stay fresh and delicious for up to 5-7 days.
Apple Pie Filling
- Total Time: 35 minutes
- Yield: 4 cups 1x
Description
Skip the can—this homemade apple pie filling is packed with tender apples, warm spices, and just the right touch of sweetness. Whether you’re baking a pie, layering it into pastries, or spooning it over pancakes, this filling brings cozy flavor to everything it touches.
Ingredients
6 cups peeled, cored, and sliced apples (Granny Smith or Honeycrisp work great)
¾ cup granulated sugar
¼ cup brown sugar
¼ cup cornstarch
1½ tsp ground cinnamon
¼ tsp ground nutmeg
Pinch of salt
2 cups water
1 tbsp lemon juice
1 tsp vanilla extract
Instructions
In a large saucepan, combine sugars, cornstarch, cinnamon, nutmeg, and salt. Whisk in water until smooth.
Bring to a simmer over medium heat, stirring constantly until thickened, about 5–7 minutes.
Add apple slices and stir to coat. Reduce heat, cover, and simmer for 10–15 minutes, until apples are tender.
Remove from heat and stir in lemon juice and vanilla extract.
Let cool completely if storing or using later.
- Prep Time: 15 minutes
- Cook Time: 20 minutes
Nutrition
- Calories: 130 Per ½ cup
- Carbohydrates: 34g Per ½ cup
- Fiber: 1g Per ½ cup
Nutritional Information*
Prep Time: 15 minutes | Cook Time: 20 minutes | Total Time: 35 minutes | Makes: Approx. 4 cups
*This is an estimate provided for informational purposes only. I am not a nutritionist.
Per ½ cup serving: ~130 calories | 0g fat | 34g carbs | 1g fiber | 0g protein
Final Thoughts: A Jar of Comfort, Anytime You Need It
And there you have it, my friend—homemade apple pie filling that tastes like a warm hug and turns even the simplest dish into something extraordinary. Whether you tuck it into a flaky pie crust, spoon it over pancakes on a lazy Sunday morning, or swirl it into yogurt for a quick weekday breakfast, this recipe is proof that the best flavors don’t come from a can.
What I love most about this filling is its versatility—it’s not just for pies, it’s a little jar of comfort you can keep in your fridge or freezer, ready to make everyday moments feel like a celebration. It carries the soul of Grandma Dot’s kitchen, those stories and aromas woven into every spoonful.
So, go ahead and make a batch (or two). Share it with family, gift it to friends, or keep it stashed away for your own cozy cravings. However you enjoy it, I hope it brings a little extra warmth and joy to your kitchen.
From my apron-covered, cinnamon-dusted kitchen to yours—happy cooking, and happy memories ahead.