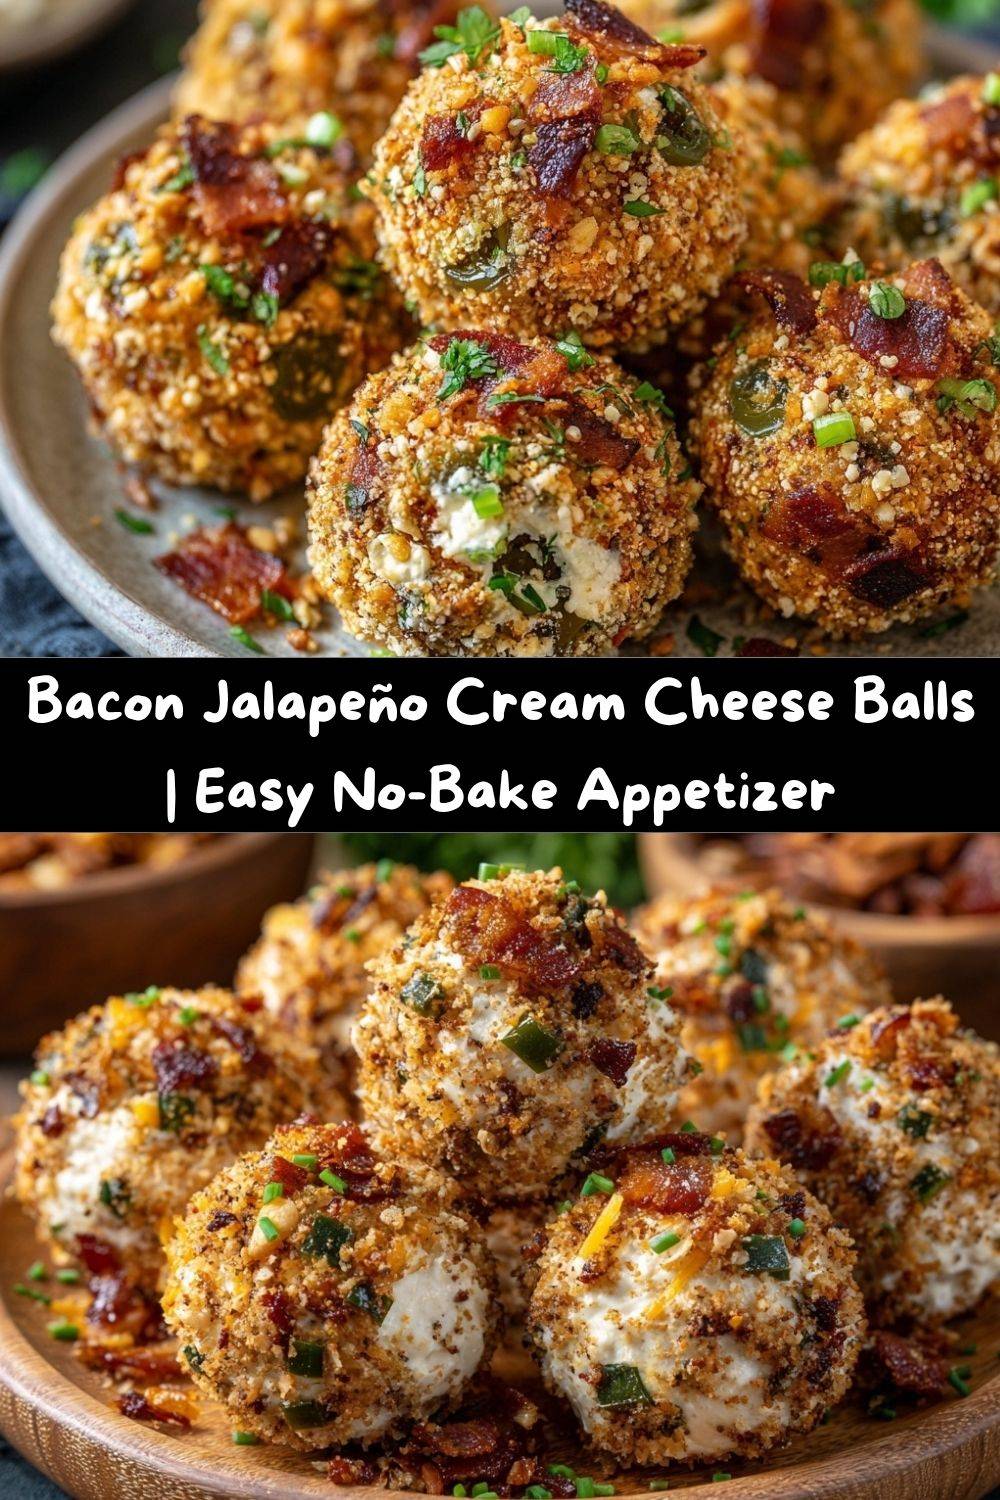
Bacon Jalapeño Cream Cheese Balls – Your New Go-To Party Hero!
Hey there, friend! Let’s talk about party food. We’ve all been there: scrolling through endless appetizer ideas, trying to find that one recipe that’s guaranteed to disappear from the platter faster than you can say, “Did you try the cheeseball?” You want something impressive but not fussy, flavorful but not complicated, and absolutely, 100% crowd-pleasing.
Well, pull up a chair and get ready to meet your new culinary best friend: Bacon Jalapeño Cream Cheese Balls. These are not your grandma’s cheese ball (though I love a good retro cheeseball!). These are sleek, modern, bite-sized flavor bombs that deliver a one-two punch of smoky, creamy, and spicy in every single pop-able bite.
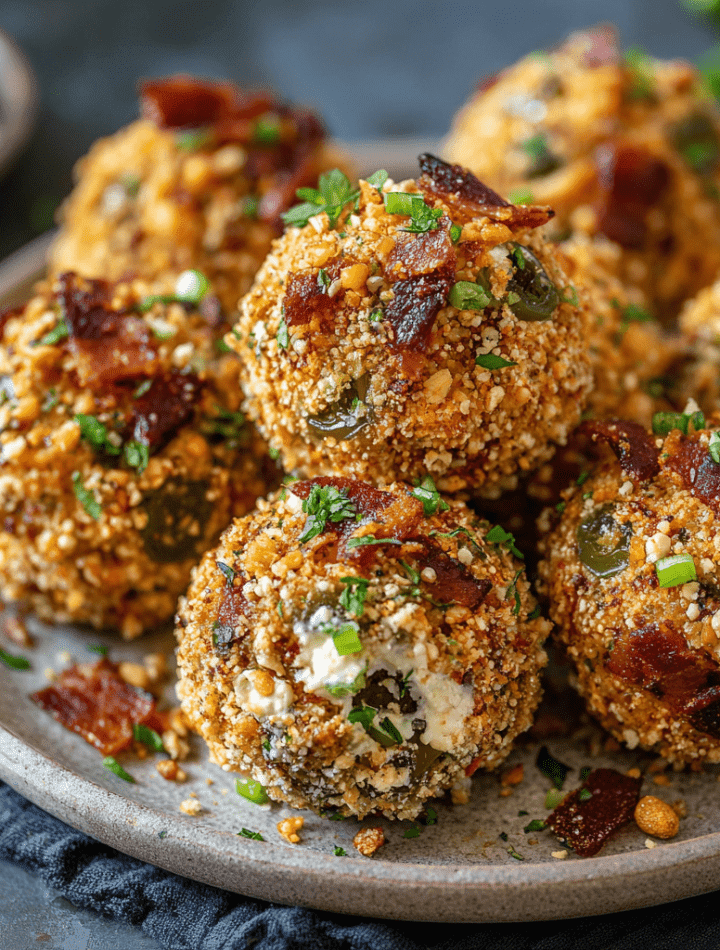
Imagine this: a creamy, tangy center packed with crispy bacon and the gentle kick of fresh jalapeño, all rolled in a crunchy, flavorful coating. They’re no-bake, they come together in about 30 minutes, and they are the ultimate conversation starter. Whether it’s game day, a potluck, a fancy soiree, or just a Tuesday night that needs a little jazzing up, these little guys are here to save the day. So, tie on your favorite apron—the one with the stains that tell a story—and let’s make something deliciously unforgettable together.

The Happy Accident That Started It All
I have to confess, the genesis of this recipe was a classic case of “fridge forage.” It was the night before a big friendsgiving potluck a few years back, and my fridge was a landscape of near-empty containers. I had a block of cream cheese that needed a purpose, a few lonely strips of bacon from breakfast, and a jar of pickled jalapeños staring me down.
In a moment of what I can only describe as hungry inspiration, I threw it all in a bowl. I remember thinking, “Well, it can’t be bad with these ingredients, right?” I rolled the mixture into little balls, and in a last-minute panic because they looked a little plain, I rolled them in some crushed pretzels I found in the pantry. I brought them to the party the next day, slightly apprehensive, and placed them quietly on the table. Friends, they were gone in six minutes flat. I’m not exaggerating! My friend Mark literally stood by the platter, guarding the last one. That’s when I knew this happy kitchen accident was destined for greatness. It’s a reminder that some of the best recipes aren’t meticulously planned—they’re born from a little creativity and whatever you have on hand.
Gathering Your Flavor All-Stars
Here’s everything you’ll need to create these irresistible bites. The beauty of this recipe is its flexibility, so I’ve included my favorite chef insights and swaps right alongside the ingredients.
- 16 oz Cream Cheese, softened: This is the creamy, tangy base of our operation. Pro-Tip: Let it sit on the counter for a good 30-45 minutes before you start. A room-temperature cream cheese blends smoothly and prevents a lumpy mixture. If you’re in a pinch, you can microwave it for 15-20 seconds, but be careful not to melt it!
- 2 cups Shredded Cheddar Cheese (optional, but highly recommended): This adds a sharp, rich depth and a bit of structure. I love using a sharp white cheddar for its flavor, but any good melting cheddar will work. For a fun twist, try Pepper Jack cheese here for an extra kick!
- 8 Strips Bacon, cooked and crumbled: The king of smoky, salty flavor. I bake my bacon on a sheet pan at 400°F for about 15-20 minutes for perfectly even crispiness. For a shortcut, high-quality pre-cooked bacon works in a pinch, but freshly cooked really does make a difference.
- 4 Jalapeños, finely diced (seeds removed for less heat): This is where we get our spark! Removing the seeds and white membranes tames the heat significantly, leaving you with that wonderful jalapeño flavor without the fire. Love heat? Keep those seeds in! And always, always wash your hands thoroughly after handling jalapeños.
- 1 tsp Garlic Powder & 1 tsp Onion Powder: These pantry heroes provide a savory, aromatic foundation that fresh garlic and onion can’t achieve in a no-bake recipe (they’d be too pungent).
- ½ tsp Smoked Paprika: Don’t skip this! It adds a subtle, smoky sweetness that complements the bacon beautifully. It’s the secret ingredient that makes people say, “Wow, what is that flavor?”
- Salt and Black Pepper, to taste: Go easy on the salt at first, as the bacon and cheddar are already quite salty. I usually start with ¼ tsp of black pepper and a small pinch of salt, then taste and adjust.
- 1 cup Assorted Coatings: This is where you get to play! I use a mix of:
- Crushed Pretzels: For salty crunch.
- Toasted & Chopped Pecans or Walnuts: For a buttery, elegant finish.
- Toasted Panko Breadcrumbs: For a light, crispy shell.
- Finely Minced Fresh Herbs like parsley or chives: For a fresh, colorful pop.
Let’s Get Rolling: Your Foolproof Guide
Ready to make some magic? Follow these steps for perfect cream cheese balls every single time. I’ve sprinkled in all my favorite chef hacks to make the process a breeze.
- The Great Mix-Down: In a large mixing bowl, combine the softened cream cheese, shredded cheddar, crumbled bacon, diced jalapeños, garlic powder, onion powder, smoked paprika, salt, and pepper. Now, here’s my favorite tip: use your hands! Seriously, ditch the spoon. Clean hands are the best tool for this job. You can gently knead and mix everything until it’s perfectly and evenly combined. You’ll feel when it’s right—no streaks of plain cream cheese left.
- The Chill Factor: If your mixture feels too soft or sticky to handle (this can happen if your kitchen is warm), cover the bowl and pop it into the fridge for 10-15 minutes. Don’t skip this if you need it! A slightly firmer mixture is infinitely easier to roll and will hold its shape beautifully.
- Ball Time! Using a small cookie scoop (about 1 tablespoon in size) or a tablespoon, portion out the mixture. Roll each portion between your palms into a smooth, round ball, about 1 to 1.5 inches in diameter. A cookie scoop is a game-changer here for getting them all the same size, which makes for a gorgeous, professional-looking platter.
- Get Coated: Spread your chosen coatings into shallow bowls or plates. Now, gently roll each cream cheese ball in the coating until it’s fully covered. Press lightly to make sure the coating adheres. I like to use a few different coatings in separate bowls to create a visually stunning and texturally exciting platter.
- The Final Set: Arrange your beautifully coated balls on a plate or baking sheet lined with parchment paper. Give them one last quick chill in the fridge for about 10 minutes before serving. This final rest helps them firm up completely, making them easy to pick up and ensuring they hold their perfect round shape on the platter.
Plating Up for Maximum “Oohs” and “Ahhs”
Presentation is part of the fun! You’ve put in the work, now let’s make these babies shine. For a simple, elegant look, arrange them on a beautiful wooden board or a pristine white platter. If you used multiple coatings, group them together—a little cluster of pretzel-coated balls here, a section of herby ones there. It creates a gorgeous, textured effect.
Don’t be afraid to add some greenery! A few sprigs of fresh parsley, cilantro, or even some baby arugula scattered around the platter makes the colors pop. For an extra touch, you can add a small bowl of dipping sauce in the center—a spicy ranch, a sweet chili sauce, or even a extra spoonful of the jalapeño jelly we talked about in the variations. Provide a stack of small cocktail napkins and some festive toothpicks, and watch your masterpiece disappear.
Make It Your Own: Endless Flavor Twists
One of the best things about this recipe is its versatility. Once you’ve mastered the base, the flavor world is your oyster! Here are a few of my favorite riffs:
- The Everything Bagel: Swap the cheddar for everything bagel seasoning mixed right into the cream cheese, and roll the finished balls in more everything bagel seasoning. Instant brunch superstar!
- Jalapeño Popper 2.0: Add a surprise in the middle! Take a small block of mozzarella cheese (the kind that comes in water, often called “ciliegine”), pat it dry, and encase it inside each cream cheese ball before rolling in the coating. When you bite in, you get a glorious, melty center.
- Ranch Lover’s Dream: Omit the garlic and onion powder and stir in 1 tablespoon of dry ranch seasoning mix. Roll the balls in finely chopped chives and a little extra crumbled bacon.
- Sweet & Spicy Twist: For a truly show-stopping appetizer, roll the finished balls in a fine layer of jalapeño pepper jelly. The sweet, sticky jelly against the spicy, creamy center is a combination that will haunt your dreams (in the best way possible).
- Lighter Option: You can use Neufchâtel cheese (the 1/3 less fat cream cheese) and reduced-fat cheddar. The texture will be slightly softer, so a longer chilling time is key.
From My Kitchen to Yours: A Few Parting Thoughts
This recipe has evolved so much since that first fridge-forage night. I’ve learned that toasting the nuts for the coating (just a quick 5 minutes in a 350°F oven) brings out their oils and makes them infinitely more flavorful. I’ve also found that letting my cream cheese mixture chill for the full 15 minutes on a hot summer day is non-negotiable. It’s these little lessons, learned through slightly messy hands and lots of tasting, that make a recipe truly yours.
The best part? These balls are fantastic for making ahead. You can assemble them completely, keep them in an airtight container in the fridge for up to two days, and then just pull them out 15 minutes before your guests arrive. They are the low-stress, high-reward party food we all need in our lives.
Your Questions, Answered!
Over the years, I’ve gotten a few repeat questions about this recipe. Here are the answers to help you troubleshoot like a pro!
Q: My mixture is too sticky to roll! What did I do wrong?
A: Don’t worry, this is the most common issue! It usually means your cream cheese was a bit too warm, or your kitchen is just on the toastier side. The fix is simple: just chill the mixture for another 10-15 minutes. You can also lightly dampen your hands with cold water before rolling to prevent sticking.
Q: Can I make these ahead of time?
A: Absolutely! They are the perfect make-ahead appetizer. Prepare them completely, store them in a single layer in an airtight container in the fridge for up to 2 days. The flavors actually meld and get even better!
Q: How spicy are these really?
A: With the seeds removed from the jalapeños, they have a very mild, manageable warmth that most people enjoy. The cream cheese and bacon really balance it out. If you’re serving a crowd that is very sensitive to spice, you can even use just 2 jalapeños. For the heat-seekers, leave the seeds in or add a splash of your favorite hot sauce to the mix.
Q: My coating isn’t sticking well. Any tips?
A> For coatings like nuts or panko, sometimes they need a little help. After you roll the ball, gently press the coating onto the surface with your fingers. If you’re using a dry herb like parsley, it might just need a light press. For a more secure hold, you can even roll the uncoated ball in a very light dusting of the cream cheese mixture itself—it acts like a glue for the outer coating.
Nutritional Information (For Your Info!)
Okay, let’s be real—these are an indulgent, celebratory treat! But I believe in knowing what you’re eating. Here’s a general breakdown per ball (assuming the recipe makes about 24 balls and using the full-fat ingredients). Remember, this is an estimate and can vary based on your specific ingredients and coatings.
- Calories: ~120
- Protein: 5g
- Carbohydrates: 2g
- Fat: 10g
- Fiber: <1g
The majority of the calories come from the fats in the cream cheese, cheddar, and bacon, which is what makes them so rich and satisfying. To lighten them up, see the variation above using lower-fat dairy options. But for a party? I say enjoy every single delicious, creamy bite!
You’ve Got This!
And there you have it! Your complete guide to creating the most talked-about appetizer at your next gathering. These Bacon Jalapeño Cream Cheese Balls are more than just a recipe; they’re a little bite of confidence, a testament to the fact that the best food is often the simplest, made with love and a sense of fun.
I hope you have as much fun making these as I do. I can just picture you in your kitchen, rolling these little spheres of happiness, maybe with some great music playing in the background. When you serve them, and you see that first person’s eyes light up after they take a bite, you’ll know you’ve created something special.
So go on, be the hero of the party. Make these, share them, and soak up all the compliments. And when someone asks for the recipe, you can tell them Chef Emily sent you. Happy cooking!
— Emily 🧀


