Balsamic Chicken with Blistered Tomatoes: Your New Weeknight Hero
Hey friends, Emily here! Raise your hand if you’ve ever stared into the fridge at 5:30 PM, willing dinner to magically appear. 🙋♀️ Me too. That’s exactly why I’m obsessed with recipes that look and taste like a fancy restaurant meal but come together in one pan with less fuss than ordering takeout. This Balsamic Chicken with Blistered Tomatoes is that recipe. It’s my ultimate weeknight warrior, my secret weapon for easy entertaining, and a dish that never, ever fails to get those “wow, you made this?” compliments.
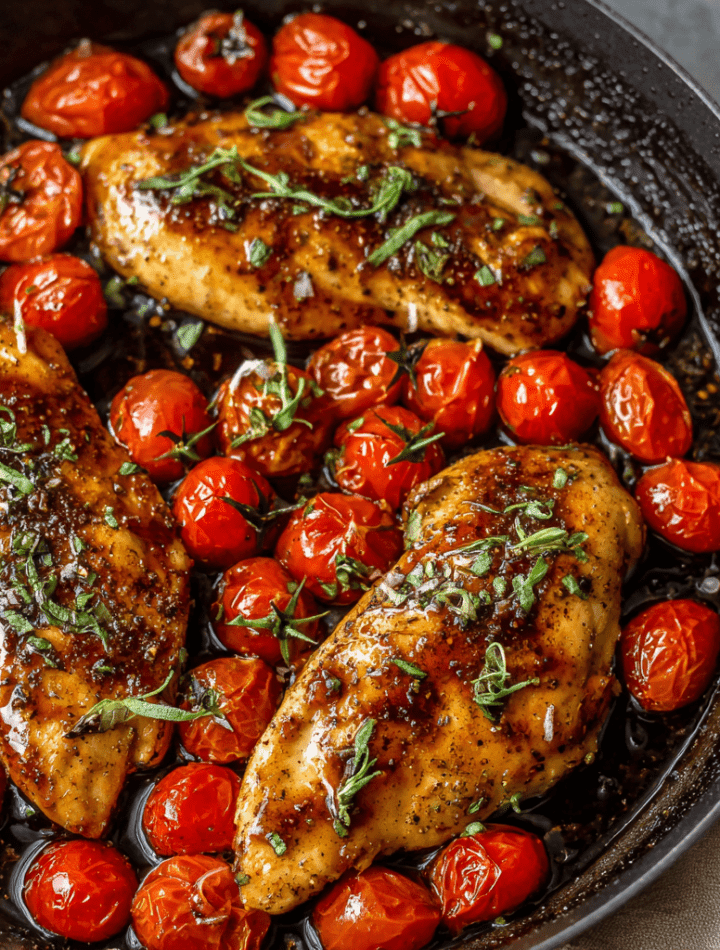
Imagine this: juicy, pan-seared chicken breasts, glistening with a sticky, sweet-tangy balsamic glaze. Then, imagine plump cherry tomatoes, blistered until their skins pop and their sweetness concentrates, all swimming in a garlicky pan sauce that you’ll want to eat with a spoon. It’s vibrant, it’s bursting with flavor, and the whole beautiful mess comes together in about 30 minutes. This isn’t just dinner; it’s a mood-lifter, a belly-filler, and proof that the most delicious things are often the simplest. So grab your favorite skillet, and let’s make some one-pan magic together.

The Night This Dish Saved the Day (And My Reputation)
This recipe has a special place in my heart because it literally saved a date night early in my relationship. Picture this: I wanted to impress, so I decided on an elaborate, four-course menu. Of course, I lost track of time, the soup was too salty, and I was one minor disaster away from just calling for pizza. With 45 minutes until my now-husband arrived, I panicked. I saw chicken breasts, a pint of cherry tomatoes about to turn, and a bottle of good balsamic vinegar my grandma gave me.
I threw it all in a pan, crossed my fingers, and hoped for the best. The smell alone was a triumph—that rich, caramelizing balsamic scent filled the apartment. When he took the first bite, his eyes lit up. “This is incredible,” he said. “You have to make this again.” The fancy menu was forgotten. We ate straight from the skillet, soaking up every last drop of that glossy glaze with crusty bread. It was messy, real, and absolutely perfect. It taught me that the best meals aren’t about complexity; they’re about good ingredients, a little bit of love, and the confidence to trust a simple, flavorful process.
Gathering Your Flavor Arsenal
Here’s everything you’ll need to create this masterpiece. Don’t stress about exact brands—this is about building layers of flavor with what you have!
- 4 boneless, skinless chicken breasts: The star of our show! For the juiciest result, I try to pick breasts that are roughly the same size so they cook evenly. Chef’s Tip: If yours are very thick, place them between parchment paper and gently pound them to an even ½-inch thickness. This ensures quick, uniform cooking.
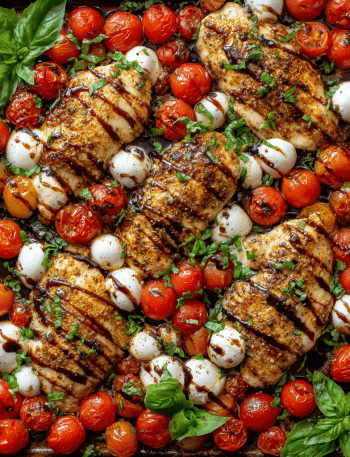
- 2 cups cherry or grape tomatoes: Little bursts of sunshine! I love the multi-colored ones for a pop of color, but any variety works. Their natural sweetness intensifies beautifully when blistered. Substitution: In a pinch, you can use diced regular tomatoes, but you’ll miss those fun “pops.”
- 3 tbsp good balsamic vinegar: This is your flavor powerhouse. A moderately priced, aged balsamic makes a world of difference—it’s thicker and sweeter. Avoid the super cheap, watery kind. Chef’s Insight: The vinegar reduces to create the glaze, so its quality directly impacts your sauce.
- 1 tbsp honey (or pure maple syrup): A touch of sweetness to balance the vinegar’s tang and help the glaze get beautifully sticky. Substitution: Maple syrup is a perfect vegan swap and adds a lovely depth.
- 2 garlic cloves, minced: A non-negotiable for that aromatic base. Please, use fresh garlic! The jarred stuff just won’t give you the same punch.
- 2 tbsp olive oil: We’ll use this in two stages—one for searing the chicken, one for blistering the tomatoes. A good extra-virgin olive oil adds fruity notes.
- Kosher salt & freshly ground black pepper, to taste: Your fundamental flavor-builders. Season confidently!
- Optional garnish: fresh basil or parsley, shaved parmesan: The finishing touches! Fresh herbs add a bright, final note, and a little parmesan adds a salty, umami kick.
Let’s Get Cooking: Your Step-by-Step Guide
Follow these steps, and you’ll have a restaurant-worthy dish with minimal cleanup. I’ve packed each step with my favorite kitchen hacks to guarantee success.
- Prep & Season the Chicken: Pat your chicken breasts completely dry with paper towels. This is the #1 secret to a perfect, golden sear—wet chicken steams instead of browns. Season both sides generously with salt and pepper. Let them sit for 5 minutes while your pan heats up; this helps the seasoning penetrate.
- Sear to Perfection: Heat a large skillet (stainless steel or cast iron works great) over medium-high heat. Add 1 tablespoon of olive oil. Once the oil is shimmering, carefully add the chicken. Listen for that satisfying sizzle! Don’t touch it for 4-5 minutes. We’re building a gorgeous, golden-brown crust. Peek underneath; when it releases easily and is beautifully browned, flip. Cook for another 4-5 minutes on the other side, or until cooked through (internal temp of 165°F). Remove the chicken to a plate and tent loosely with foil. It will continue to cook a tad and stay juicy.
- Blister Those Tomatoes: In the same, now-flavor-packed pan, add the remaining 1 tablespoon of olive oil. Toss in all the cherry tomatoes. Let them cook, shaking the pan occasionally, for 4-5 minutes. You’ll hear them start to sizzle and pop, and their skins will wrinkle and char in spots. That’s the blistered magic! In the last 30 seconds, add the minced garlic and stir constantly—just until fragrant. We don’t want burnt garlic!
- Create the Glaze: Here’s where the magic happens. Reduce the heat to medium-low. Pour in the balsamic vinegar and honey. It will bubble and sizzle furiously—that’s good! Use your spatula to scrape up all those delicious browned bits (the “fond”) from the bottom of the pan. This is pure flavor gold. Let the mixture simmer for 1-2 minutes. It will reduce slightly and become syrupy. You’ll know it’s ready when you drag your spatula through it and it leaves a clean path for a second before filling in.
- Bring It All Together: Return the chicken breasts and any accumulated juices on the plate back to the skillet, nestling them into the tomatoes and sauce. Spoon that glorious glaze and tomatoes over the top of each piece. Let everything simmer together for just 1 more minute so the chicken can soak up all the tangy-sweet flavors. This is the harmony step!
How to Serve It Up in Style
This dish is a canvas for your favorite sides! Presentation is easy because the food does all the talking. I like to place a chicken breast slightly off-center on a warm plate, then generously spoon the blistered tomatoes and all that glossy sauce over and around it. The vibrant red tomatoes against the golden chicken is just gorgeous. Now, for the supporting cast:
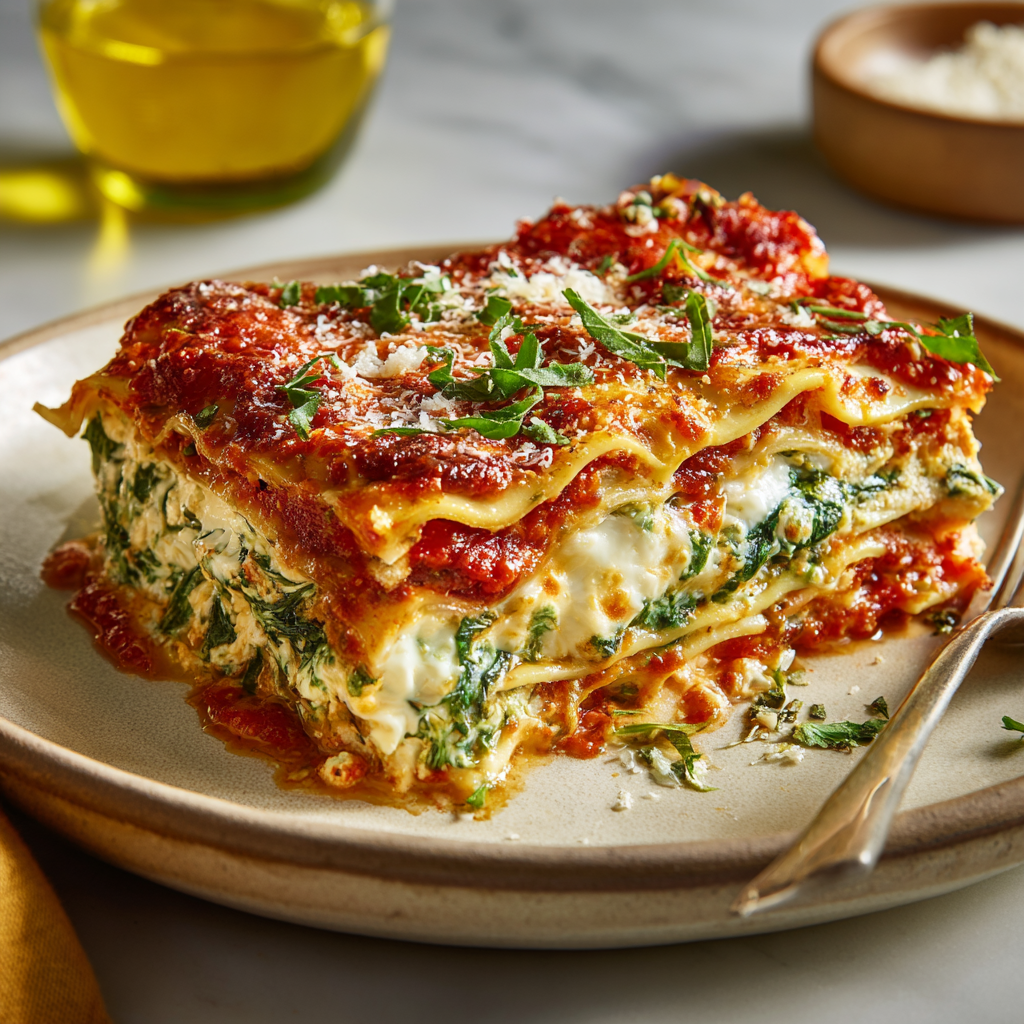
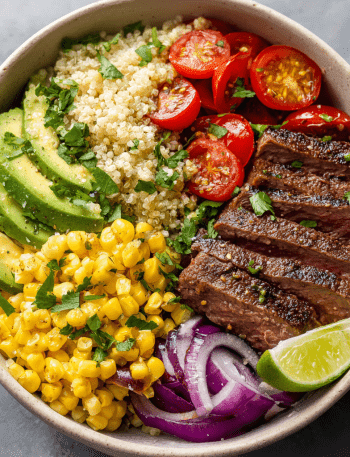
My Top Pairings: For a cozy meal, serve it over a bed of creamy mashed potatoes, polenta, or fluffy couscous—they’re dreamy for soaking up the sauce. For something lighter, try quinoa or a simple arugula salad. And never, ever underestimate the power of a thick slice of crusty, warm bread to do “sauce duty.” A final flourish of chopped fresh basil or parsley and a few curls of shaved parmesan makes it look like it came from a professional kitchen. Dinner is served!
Make It Your Own: 5 Delicious Twists
Love the base recipe? Here are some fun ways to switch it up based on what’s in your fridge or your dietary needs!
- Caprese Style: After plating, add fresh mozzarella pearls (bocconcini) and extra basil. The residual heat will gently melt the cheese.
- With a Creamy Twist: Stir 2-3 tablespoons of heavy cream or crème fraîche into the glaze at the very end for a luxurious, pink, creamy sauce.
- Go Thighs for More Flavor: Swap chicken breasts for boneless, skinless thighs. They’re more forgiving and stay incredibly juicy. Just increase the initial sear time by a minute or two per side.
- Vegan/Vegetarian Power Bowl: Replace the chicken with thick slices of pan-seared halloumi or extra-firm tofu (pressed and cubed). The salty halloumi with the sweet balsamic is a revelation!
- Herb & Olive Medley: Add 1 teaspoon of fresh rosemary or thyme to the pan with the garlic. Finish by stirring in a handful of pitted Kalamata olives for a briny, Mediterranean kick.
Chef Emily’s Kitchen Notes
This recipe has evolved so much from that frantic date-night version. I used to be afraid of reducing the balsamic too much, but now I let it go until it truly coats the back of a spoon—that’s when you get that professional, glossy finish. I’ve also learned that sometimes, the tomatoes don’t all blister at the same time, and that’s okay! A few charred, a few just split open—it adds great texture. My one non-negotiable? Letting the chicken rest after searing. It seems like a small step, but it’s the difference between juicy and dry. This dish has become a requested staple for my friend group’s potlucks, and I always smile remembering its humble, “kitchen-sink” beginnings.
Your Questions, Answered!
Q: My balsamic glaze isn’t thickening. What did I do wrong?
A: No worries! This usually means the heat was too low or you didn’t let it simmer long enough. Simply increase the heat to medium and let it bubble for another 1-2 minutes, stirring constantly. Remember, it will continue to thicken slightly once off the heat.
Q: Can I make this ahead of time?
A> You can prep components! Season the chicken and store it covered in the fridge. Wash and dry the tomatoes. Whisk the balsamic and honey together. Then, when ready to cook, you’re 80% done! I don’t recommend fully cooking and reheating, as the chicken can overcook.
Q: Is my sauce supposed to be so dark?
A> Yes! A good, reduced balsamic glaze is deep, dark brown and very sticky—almost like a syrup. That’s where the intense flavor and beautiful sheen come from. If it tastes too sharp, a tiny pinch more honey can balance it.
Q: Help! My garlic burned when I added it to the hot pan.
A> Been there! The key is to add the garlic after the tomatoes have blistered and released some of their juices, which cools the pan slightly. Always add it in the last 30-60 seconds and keep it moving.
Nutritional Information (Approximate)
While I’m all about indulgence, I know many of us like to have a general idea of what’s in our food. Here’s a breakdown per serving (1 chicken breast with sauce and tomatoes), calculated without optional garnishes or sides. Remember, this is an estimate from a nutrition calculator, and your specific ingredients may cause slight variations.
- Calories: ~320
- Protein: 30g (Excellent for keeping you full!)
- Total Fat: 14g
- Saturated Fat: 2.5g
- Carbohydrates: 15g
- Dietary Fiber: 2g
- Sugars: 10g (Mostly natural from the honey and tomatoes)
- Sodium: ~240mg (Will vary based on how generously you salt)
This dish is a great source of lean protein and contains vitamins from the tomatoes and garlic. To make it lower in sugar, you can reduce the honey by half. For a lower-sodium version, be mindful of your salt seasoning and skip the parmesan garnish.
Final Thoughts from My Kitchen to Yours
And there you have it, my food-loving friend—my absolute go-to for a stunning, simple, and soul-satisfying meal. This Balsamic Chicken with Blistered Tomatoes is more than just a recipe; it’s a reminder that incredible food doesn’t require a dozen ingredients or hours of work. It requires a little technique, a few quality components, and the joy of the process. I hope this dish finds a regular spot in your dinner rotation and creates its own delicious memories around your table.
Did you make it? Did you add your own twist with olives or cream? I’d love to hear about it! Tag me on social or leave a comment on the blog—seeing your creations is my favorite part of this job. Now, go forth, conquer that skillet, and enjoy every last bite. Until next time, happy cooking! — Emily 🧡