Banana Bread Granola Bars: Your New Favorite On-the-Go Hug
Hey there, friend! Let’s be real for a second. How many times have you stood in your kitchen, one hand on your hip, staring down a trio of bananas that have officially given up on life? They’ve gone from bright yellow and hopeful to speckled, soft, and… let’s just say, *fragrant*. For the longest time, my only answer was to preheat the oven for a loaf of classic banana bread. And don’t get me wrong, I love a good loaf! But sometimes, you need that same cozy, cinnamon-spiced comfort in a form you can grab with one hand while you’re juggling car keys, a coffee mug, and your dignity.
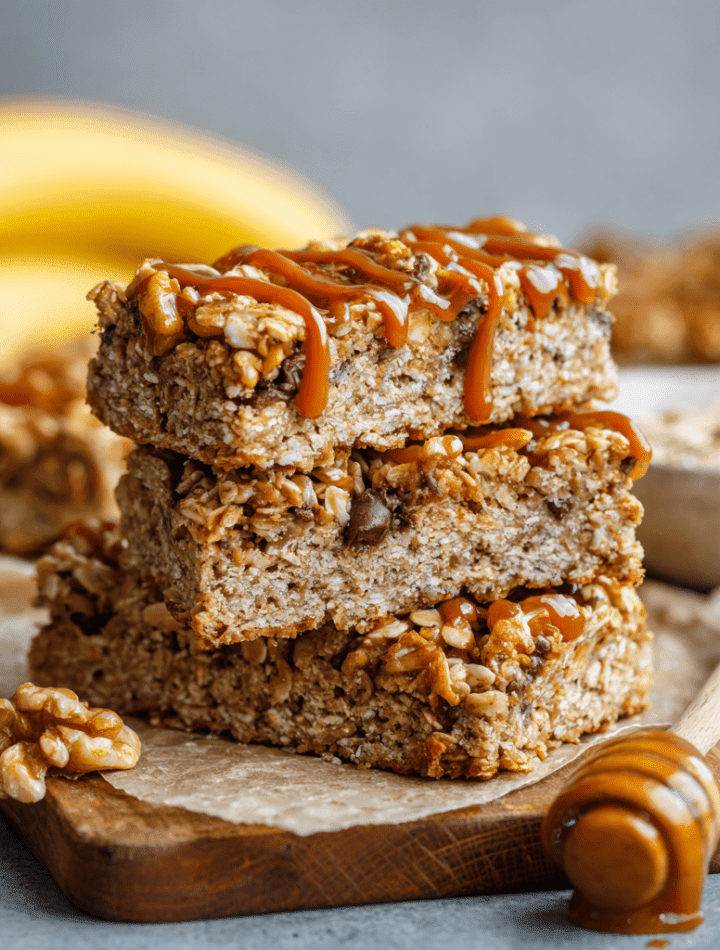
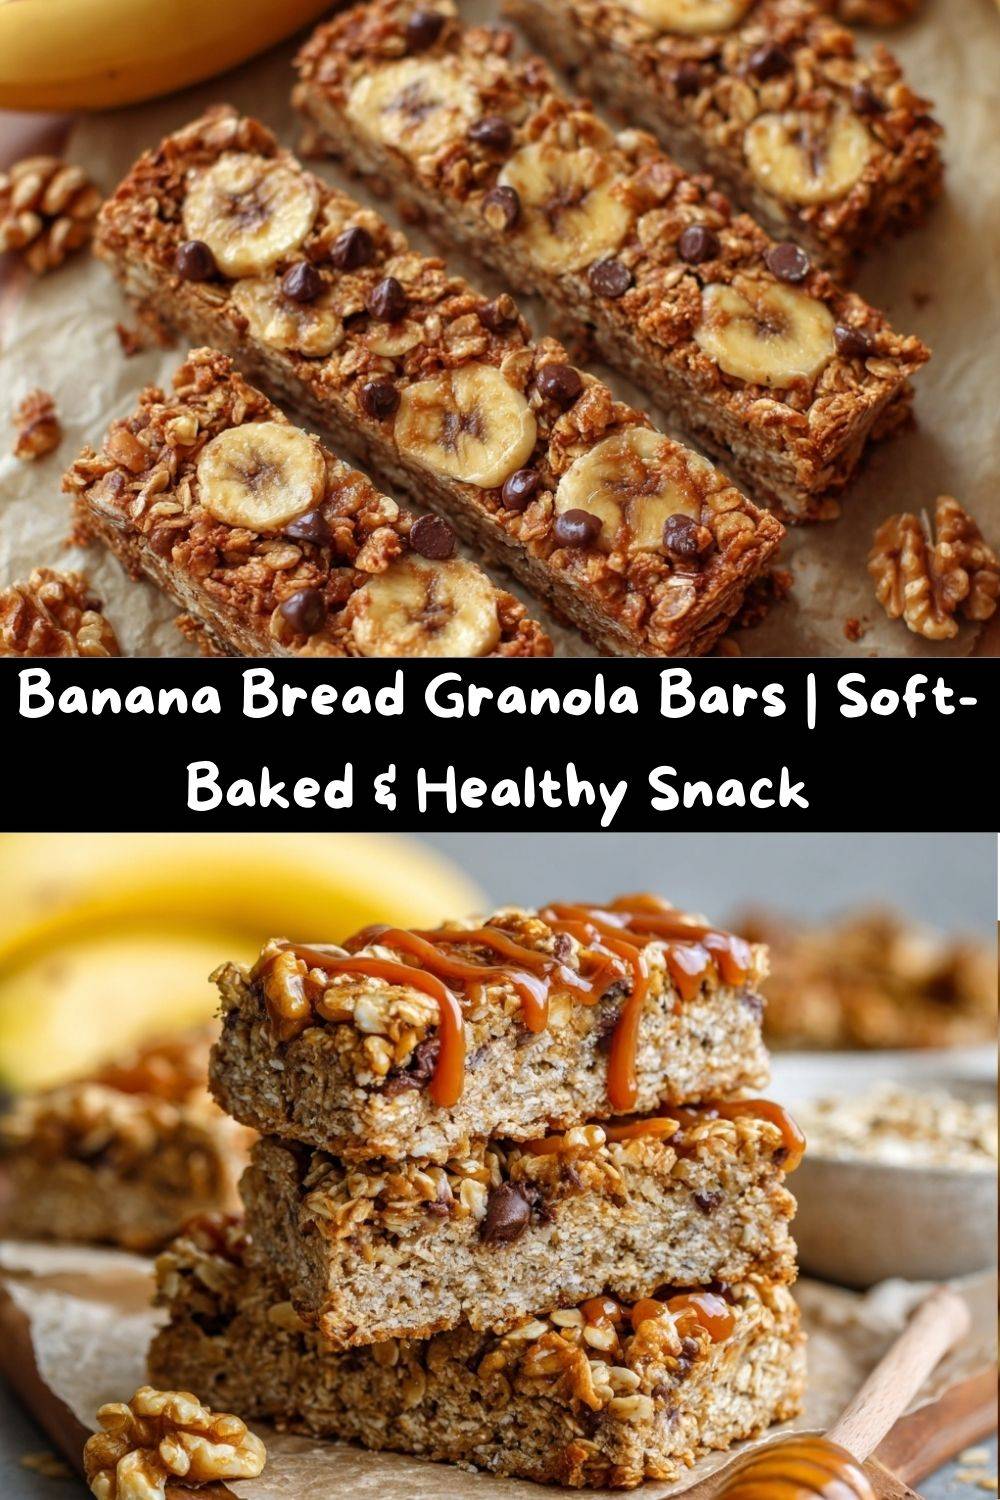
That’s where the magic of these Banana Bread Granola Bars comes in. Imagine all the soul-warming flavor of your grandma’s best banana bread—the moist crumb, the toasty walnuts, the hint of spice—but transformed into a soft-baked, chewy, totally packable bar. These little guys are the ultimate kitchen multitaskers. They’re a breakfast for busy mornings, a lunchbox superstar, and that 3 PM snack that actually feels like a treat, not a cheat.
Best of all, they’re unbelievably simple. We’re talking one bowl, ten minutes of prep, and ingredients you probably already have in your pantry. They’re naturally sweetened with ripe bananas and a kiss of honey, making them a healthier-ish option you can feel genuinely good about. So, let’s rescue those overripe bananas from the compost bin and make something deliciously snackable together. Your future self, rushing out the door but still eating like a champ, will thank you.
The Smell of Sundays: Where This Recipe Really Started
This recipe always takes me right back to my grandma’s kitchen on a sleepy Sunday morning. The air would be thick with the scent of brewing coffee and something sweet baking in the oven. Without fail, it was her famous banana bread. She never used a recipe card; it was all in her head, measured in pinches and handfuls. I’d sit at the worn wooden table, kicking my feet, watching her mash the bananas with a fierce, joyful energy.
The best part was the “bowl tax.” You know, the unspoken rule that the person who cleans the mixing bowl gets to lick it. That batter, with its little flecks of banana and earthy walnut bits, was my childhood treasure. I wanted to capture that exact feeling—that pure, uncomplicated joy—in a form I could take with me. These granola bars are my tribute to those slow Sundays. They’re that same warm hug from Grandma, just in a shape that fits perfectly in your hand and your on-the-go life.
Gather Your A-Team: The Ingredients
This is where the fun begins! Let’s break down our cast of characters. This is a simple list, but every ingredient plays a starring role.
- 2 Ripe Bananas, Mashed: The undisputed star! The riper they are (read: brown and spotty), the sweeter and more banana-forward your bars will be. They provide natural sweetness and that signature moist, soft texture. No ripe bananas? You can quick-ripen them by baking whole, unpeeled bananas at 300°F for 15-20 minutes until the skins are black.
- 2 ½ Cups Old-Fashioned Oats: The hearty, chewy backbone of our bar. I love old-fashioned oats because they hold their texture beautifully. Chef’s Insight: Don’t use quick oats if you can help it—they can make the bars a bit gummy.
- ½ Cup Chopped Walnuts: For that essential crunch and toasty, earthy flavor that makes banana bread, well, banana bread! Feel free to toast them in a dry skillet for a few minutes first to really unlock their nutty potential.
- ⅓ Cup Honey or Maple Syrup: This is our liquid sweetener that helps bind everything and adds a beautiful golden color. Honey gives a floral depth, while maple syrup offers a lovely, robust sweetness. For a vegan option, maple syrup is your best friend.
- 1 Teaspoon Cinnamon: The warm, cozy spice that makes your kitchen smell like a bakery. It’s the soulmate to banana. Don’t be shy with it!
- 1 Teaspoon Vanilla Extract: The flavor enhancer! It rounds out all the other flavors and adds a layer of warm, aromatic sweetness. A little splash makes a world of difference.
- ¼ Teaspoon Salt: This is my secret weapon. Salt makes the sweet flavors pop and balances the entire bar. Trust me, you don’t want to skip it.
- Optional: ½ Cup Mini Chocolate Chips or Caramel Chips: Because sometimes, you just need a little extra joy. Mini chips distribute better than regular-sized ones. This is your chance to get creative!
Let’s Get Baking: Your Step-by-Step Roadmap
Ready? Apron on, let’s do this! It’s a simple process, but I’ve packed in all my favorite chef hacks to ensure your bars are absolutely perfect.
- Preheat & Prep: First things first, get that oven going to 350°F (175°C). This is key for even baking from the second the pan goes in. Now, line an 8×8-inch baking pan with parchment paper, leaving a little overhang on two opposite sides. Chef’s Hack: This little “sling” will be your best friend later, making it a breeze to lift the entire slab of bars out for clean, easy cutting. A quick spritz of cooking spray on the paper helps it stick down.
- The Wet Team Mix-Up: In a large bowl, grab those ripe bananas and mash them well with a fork until they’re mostly smooth with a few little lumps for character. Add in the honey (or maple syrup), vanilla extract, cinnamon, and salt. Give this a really good stir until it’s one beautifully fragrant, unified liquid. Pro Tip: If your honey is super thick, warm it for 10 seconds in the microwave to make it easier to mix.
- Bring in the Dry Crew: Now, dump in the old-fashioned oats and the chopped walnuts. Use a sturdy spatula to fold everything together. You want every single oat and walnut piece to be coated in that glorious banana-honey mixture. This is where the magic happens! If you’re using chocolate or caramel chips, now’s the time to fold them in gently.
- The Press & Set: Transfer your mixture into your prepared pan. Now, here is the most important step for bars that hold together: PRESS, PRESS, PRESS! Use the back of a spoon, a flat-bottomed measuring cup, or even your clean hands to press the mixture down firmly and evenly into every corner of the pan. The more compact it is now, the less likely it will be to crumble later.
- Bake to Golden Perfection: Slide the pan into your preheated oven and bake for 25-30 minutes. You’re looking for the edges to be lightly golden brown and the top to feel firm to the touch. Don’t overbake! We want these soft-baked and chewy, not hard and crunchy.
- The Patience Game (The Hardest Part!): This is the ultimate test of willpower. You must let the granola slab cool completely in the pan on a wire rack. I know it’s tempting, but if you cut into them while they’re warm, they’ll fall apart. I usually let mine cool for at least an hour, sometimes two. For the cleanest cuts, I even pop the entire pan into the fridge for 30 minutes after it’s cooled to room temperature.
- Slice & Savor: Once it’s completely cool, use the parchment paper sling to lift the entire block out of the pan. Place it on a cutting board and use a sharp knife to slice it into bars or squares. Store them in an airtight container in the fridge to maintain that perfect chewy texture!
How to Serve & Savor Your Masterpiece
Okay, you’ve made these gorgeous bars. Now what? The beauty is in their versatility!
For the ultimate breakfast-on-the-run, just grab one and go. It’s a complete meal in your hand. For a more decadent weekend treat, I love warming a bar for 15 seconds in the microwave and serving it with a dollop of Greek yogurt and a drizzle of extra honey. It tastes like dessert but is totally acceptable to eat at 8 AM!
They are also the undisputed champions of the lunchbox. Pair one with an apple, some cheese sticks, and a veggie pouch for a lunch your kids (or you!) will actually get excited about. And for my fellow coffee addicts, trust me when I say there are few things in life better than the combination of a soft, nutty Banana Bread Granola Bar and a hot, freshly brewed cup of coffee. It’s a match made in heaven.
Get Creative! Fun Flavor Twists & Swaps
Once you’ve mastered the classic, the kitchen playground opens up! Here are a few of my favorite ways to mix things up:
- Chocolate Lover’s Dream: Swap the walnuts for ½ cup of mini chocolate chips AND a tablespoon of unsweetened cocoa powder mixed in with the dry ingredients. Double the chocolate, double the fun.
- Tropical Vacation: Feeling beachy? Use chopped macadamia nuts instead of walnuts and add ¼ cup of shredded coconut and ¼ cup of chopped dried pineapple. Aloha, flavor!
- Peanut Butter Bliss: Because banana and peanut butter are a legendary duo. Add ¼ cup of creamy peanut butter to the wet ingredients. You can use peanuts instead of walnuts for the full effect.
- Nut-Free & Seed-Crunchy: For school-safe or allergy-friendly bars, simply replace the walnuts with an equal amount of sunflower seeds or pumpkin seeds. The crunch and nutrition are fantastic!
- Blueberry Banana: A match made in muffin heaven! Fold in ½ cup of dried blueberries instead of chocolate chips for a burst of fruity sweetness.
From My Kitchen to Yours: A Few Chef’s Notes
This recipe has been a living, evolving thing in my kitchen. The first time I made them, I was so impatient that I cut into them warm and ended up with a pan of delicious, but very crumbly, “banana bread granola *clumps*.” We still ate it over yogurt, but it was a valuable lesson in patience!
Over time, I’ve learned that the type of banana really matters. The bigger and spottier, the better. I’ve also found that a firm, confident press into the pan is non-negotiable. And while I love them plain, my husband is firmly on Team Extra Chocolate Chips, so our version usually has a heavy hand with the minis. Make the recipe yours—that’s the whole point of cooking with love!
Your Questions, Answered!
I’ve gotten so many wonderful questions about these bars over the years. Here are the most common ones to help you out.
Q: My bars are too crumbly! What did I do wrong?
A: This is the #1 question! Usually, it’s one of two things: 1) Not enough pressing when you put the mix in the pan. Really compact it! Or 2) You didn’t let them cool completely. The bars need time to set up and bind together as they cool. The fridge is your secret weapon here.
Q: Can I make these gluten-free or vegan?
A> Absolutely! For gluten-free, just ensure you’re using certified gluten-free oats. For vegan, use maple syrup instead of honey and check that your chocolate chips are vegan-friendly. Easy peasy.
Q: How long do they last, and how should I store them?
A: They keep beautifully! Store them in an airtight container in the refrigerator for up to a week. They also freeze like a dream for up to 3 months. Just layer them between parchment paper in a freezer bag and thaw at room temperature or in the microwave.
Q: Can I add a protein boost?
A> You sure can! Stirring 2-3 tablespoons of your favorite vanilla or unflavored protein powder into the wet ingredients is a great way to make them even more filling. You may need to add a teaspoon of milk or water if the mixture seems too dry.
A Quick Peek at the Nutrition
I’m all about balance, and I love knowing what’s going into my body! Here’s a general breakdown of what you’re getting in one of these wholesome bars (this is an estimate, especially if you customize with different add-ins).
Per Bar (Approximate, with chocolate chips):
Calories: 210 | Protein: 4g | Fat: 9g | Carbohydrates: 29g | Sugar: 13g | Fiber: 3g
The beauty of these bars is that the sugar is primarily natural, coming from the bananas and honey/maple syrup. The oats and walnuts provide a great source of fiber and healthy fats, which help keep you full and satisfied. They’re a much better option than most store-bought granola bars, which are often loaded with refined sugars and preservatives. It’s a snack you can feel genuinely good about!
Final Thoughts & A Big Virtual Hug
Well, my friend, we’ve done it! We’ve taken those sad, forgotten bananas and turned them into a portable, packable, downright delightful treat. I hope this recipe finds its way into your regular rotation and becomes a little beacon of comfort in your busy week.
Remember, baking is supposed to be fun. It’s okay if your bars aren’t perfectly square. It’s okay if you eat the crumbly bits straight from the pan with a spoon (I certainly do). The goal is to fill your kitchen with love and your belly with something made with your own two hands.
I’d love to hear how your Banana Bread Granola Bars turn out! Did you add chocolate chips? Go tropical? Tag me on social @TastyChow or leave a comment below. Happy baking, and as always, chow down!
— Emily
