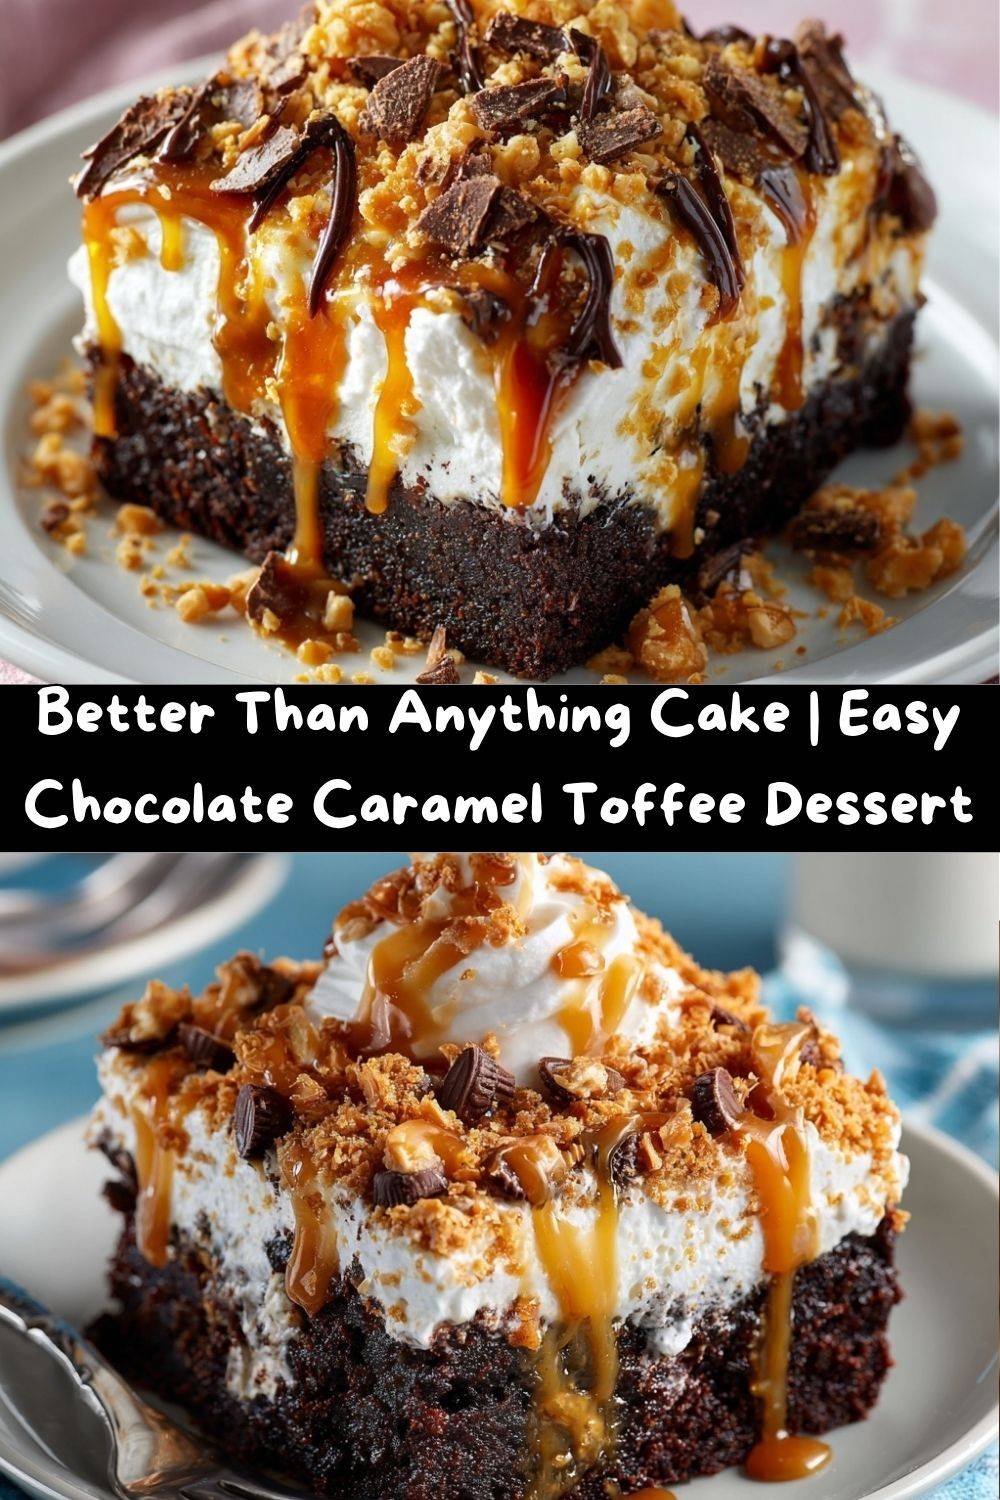
Better Than Anything Cake: Your New Go-To Dessert Obsession
Hey there, my fellow food lover! Let’s have a little heart-to-heart. You know those days when only a truly epic, no-holds-barred, soul-soothing dessert will do? Maybe it’s a birthday, a potluck where you want to be the undisputed dessert champion, or just a Tuesday that decided to be extra. I’m talking about a dessert that doesn’t just whisper “yum” but proudly shouts “HOLY MOLY, THAT’S GOOD” from the rooftops.
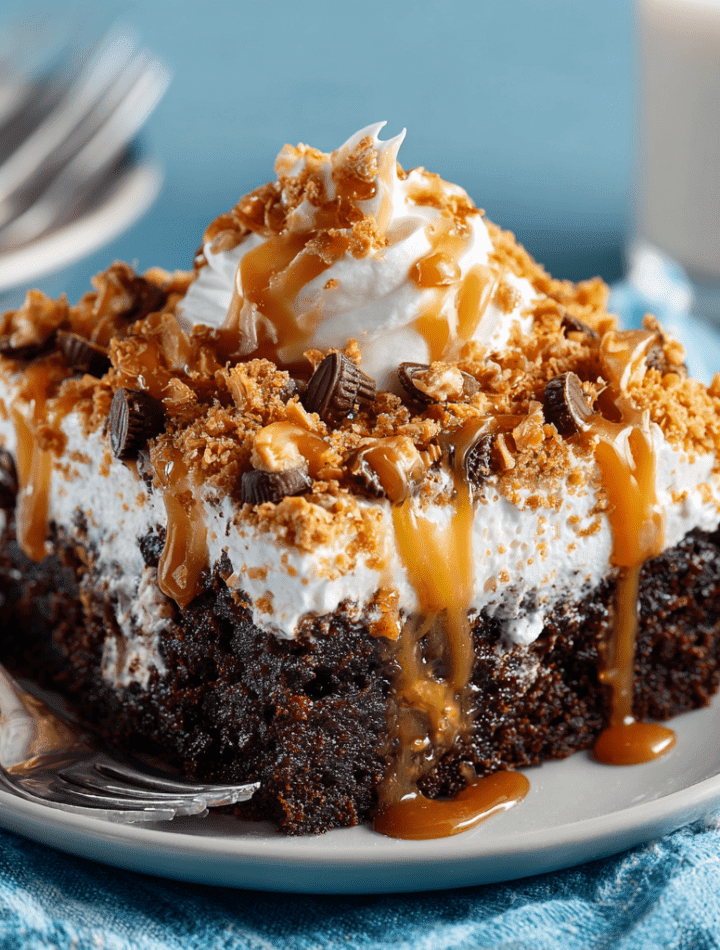
Well, my friend, you’ve just found it. Welcome to the glorious universe of Better Than Anything Cake. Now, I know that’s a bold claim. But one bite of this chocolate-caramel-toffee paradise, and you’ll be nodding along, fork in hand, completely understanding how it earned its confident name. This isn’t just a cake; it’s an experience. A moist, incredibly rich devil’s food cake base gets transformed by a magical soak of sweetened condensed milk and caramel, then it’s all topped with a cloud of whipped topping and a crunchy, salty-sweet toffee blanket.
It’s the kind of dessert that creates a hush around the dinner table, followed by a chorus of “Wow.” The best part? It’s unbelievably easy to make. We’re starting with a box mix (no shame in our game!), and the rest is just assembly and a little bit of patience while it chills. So, tie on your favorite apron—the one with the stains that tell stories of past kitchen victories—and let’s make something downright legendary together.
A Slice of Memory: Why This Cake Feels Like Home
This cake takes me right back to my first “real” potluck as a newly minted culinary school graduate. I was so nervous, surrounded by seasoned home cooks and my new chef colleagues. I wanted to bring something that would prove I belonged, but I was also exhausted from weeks of non-stop, fancy techniques. In a moment of panic the night before, I remembered this humble, glorious poke cake my Aunt Susan used to make for every family reunion.
It was never fancy. It lived in a well-loved 9×13 pan, its surface a beautiful, chaotic mess of whipped cream and toffee bits. But it was always, without fail, the first dessert to disappear. So I threw one together, whispering a little hope into the poked holes as I poured the caramel. The next day, amidst the intricate tarts and delicate pastries, my simple, messy cake was the one that had everyone asking for the recipe. My boss, a formidable pastry chef, took a bite, closed her eyes, and said, “Emily, this is pure joy. Never underestimate the power of a dessert that feels like a hug.” It was a powerful lesson that the best recipes aren’t always the most complicated—they’re the ones made with love and a understanding of what truly makes people happy.
Gathering Your Treasure: The Ingredients & Why They Work
Here’s the dream team of ingredients that come together to create pure magic. I’ve included some of my favorite chef insights and swaps so you can make this cake your own!
- 1 box Devil’s Food Chocolate Cake Mix (plus the ingredients listed on the box, typically oil, eggs, and water) – This is our fantastic foundation. The deep, dark chocolate flavor stands up beautifully to the sweet soak. Chef’s Tip: For an even richer cake, substitute the water with strong brewed coffee! You won’t taste the coffee, but it will amplify the chocolate flavor like a dream.
- 1 can (14 oz) Sweetened Condensed Milk – This is the first layer of our soak and the secret to the cake’s unbelievable moisture. It’s thick, creamy, and sweet, and it seeps into every nook and cranny, making the cake almost pudding-like. Substitution Tip: In a pinch, you can make a homemade version with milk and sugar, but the canned stuff provides the perfect texture.
- 1 jar (12 oz) Caramel Sauce or Topping – This is the second part of our dynamic soaking duo, adding that classic buttery, salty-sweet flavor. Chef’s Insight: For a deeper flavor, look for a “salted caramel” sauce. The hint of salt cuts through the sweetness perfectly. You can also warm the caramel slightly before pouring to make it easier to drizzle.
- 1 tub (8 oz) Whipped Topping (like Cool Whip), thawed – This gives us a light, fluffy, and stable topping that doesn’t overwhelm the cake. Substitution Tip: Feel free to use an equal amount of freshly whipped heavy cream sweetened with a tablespoon of powdered sugar! It will be a bit less stable but equally delicious.
- ½ cup Crushed Toffee Bits (e.g., Heath) – The crunch! This is the textural hero of the dish, providing a buttery, crunchy contrast to the soft, soaked cake and creamy topping. Chef’s Hack: If you can’t find pre-crushed bits, just buy Heath or Skor bars and give them a few good whacks inside a sealed plastic bag with a rolling pin.
- Optional: Extra Caramel Drizzle and Chocolate Shavings – This is for the grand finale! A little extra drizzle and some dark chocolate shavings make it look bakery-level gorgeous.
Let’s Build the Magic: Step-by-Step Instructions
Ready to see the transformation happen? Follow these steps, and you’ll be a poke-cake pro in no time. I’ve sprinkled in my favorite kitchen hacks to ensure your success!
- Bake the Cake: First, preheat your oven and prepare the devil’s food cake mix according to the package directions. Grease your trusty 9×13-inch pan well—I like to use a little baking spray with flour in it for foolproof release. Pour in the batter and bake until a toothpick inserted in the center comes out clean. Chef’s Tip: Don’t overbake! A slightly under-done (but not raw) cake will be even more tender and absorb the sauces better. Start checking a few minutes before the box suggests.
- The “Poke” Heard ‘Round the World: As soon as the cake comes out of the oven, and while it’s still blazing hot, it’s time to poke! Grab the handle of a wooden spoon—it creates the perfect-sized hole. Poke holes all over the cake, going all the way down to the bottom. Be generous! You want lots of channels for that goodness to flow into. Little Chef Hack: Don’t use anything too small (like a skewer) or the holes will seal up. And don’t use anything too big, or you’ll have craters! The wooden spoon handle is the Goldilocks of poke-cake tools.
- The First Soak: Sweetened Condensed Milk: Slowly and evenly pour the entire can of sweetened condensed milk over the warm cake. Take your time here, letting it seep down into all those beautiful holes you created. Watch as the cake greedily drinks it up—this is the moment the magic truly begins.
- The Second Soak: Caramel Bliss: Now, immediately follow up with the jar of caramel sauce, doing the same slow pour. The warmth of the cake will help it become wonderfully fluid. You’ll see the cake start to glisten and become even more saturated. It’s a beautiful sight! Chef’s Tip: If your caramel is too thick, pop the open jar in the microwave for 15-20 seconds to thin it out for easier pouring.
- The Patience Game: Cool It Down: This is the hardest step! You absolutely must let the cake cool completely to room temperature. If you try to add the whipped topping to a warm cake, it will melt into a sad, soupy puddle. I sometimes let mine cool on a wire rack for a good hour or two. Use this time to clean up and dream about the deliciousness to come.
- Top It Off with Fluffy Clouds: Once the cake is completely cool, take your thawed whipped topping and spread it in an even, swoopy layer over the entire surface. Be gentle so you don’t pull up too many crumbs.
- The Grand Finale: Crunch & Drizzle: Now for the fun part! Sprinkle the crushed toffee bits evenly over the whipped topping. If you’re feeling fancy (and you should!), take that extra caramel and drizzle it artfully over the top. A few chocolate shavings never hurt anybody, either.
- The Final Countdown: Chill Out: Cover the cake and refrigerate it for at least one hour before serving. I’m serious about this! This chilling time allows all the flavors to marry and the cake to set up, making it easier to slice. Little Chef Secret: Honestly, this cake is even better the next day. Overnight in the fridge turns it into a sublime, can’t-stop-thinking-about-it dessert.
Sharing the Love: How to Serve This Masterpiece
Presentation is part of the fun! While this cake is perfectly happy living in its 9×13 pan, you can make it feel extra special with a few simple tricks. For clean, beautiful slices, dip your knife in hot water and wipe it dry before each cut. The heat will glide right through the layers. I love serving this on a simple white plate to let all those gorgeous layers of chocolate, caramel, and cream really pop.
This is a rich dessert, so a standard-sized square is perfect. A little goes a long way in the best way possible! It pairs wonderfully with a hot cup of black coffee to balance the sweetness or a tall glass of cold milk for the ultimate nostalgic treat. It’s the star of the show, so it doesn’t need any accompaniment, but a few fresh berries on the side never hurt for a touch of brightness.
Make It Your Own: Delicious Recipe Variations
Once you’ve mastered the classic, the playground of possibilities opens up! Here are a few of my favorite twists on this iconic dessert:
- Tropical Escape: Use a vanilla or coconut cake mix. Poke and soak with a can of coconut cream (the drinking kind, not the canned milk) mixed with a little sweetened condensed milk. Top with whipped cream, toasted coconut flakes, and a drizzle of mango or passionfruit puree.
- Cookies & Cream Delight: Use a chocolate cake mix. For the soak, use the sweetened condensed milk but replace the caramel with a simple chocolate sauce. Top with whipped topping and a generous crushing of Oreo cookies.
- Salted Caramel Pretzel Crunch: Add a salty-sweet element! After adding the whipped topping, sprinkle on a layer of crushed salted pretzels along with the toffee bits. The combination of crunchy, salty, sweet, and creamy is mind-blowing.
- Peanut Butter Cup Heaven: Are you a PB & chocolate fanatic? Replace the caramel sauce with a jar of hot fudge sauce for the soak. Swirl some peanut butter into the whipped topping before spreading, and then garnish with chopped peanut butter cups.
- Lighter(ish) Version: Use a sugar-free chocolate cake mix and sugar-free caramel topping. Substitute the whipped topping with light Cool Whip or freshly whipped low-fat cream. It’s still an indulgence, but with a few tweaks for everyday cravings.
From My Kitchen to Yours: Chef Emily’s Notes
This recipe has been a part of my life for so long, and it’s evolved in little ways. I used to be so precise with my poking, making perfect little rows. Now? I embrace the beautiful chaos! I poke with joyful abandon, because every hole is a pocket of potential deliciousness. I also used to be impatient and would skimp on the chilling time, but I’ve learned that the wait is a crucial ingredient itself.
The funniest thing that ever happened was when I was making this for my nephew’s birthday. I turned my back for two seconds, and my dog, Biscuit, managed to drag the entire pan off the counter! The cake landed upside down on the floor. We salvaged what we could, scooped it into trifle glasses, and called it “Deconstructed Better Than Anything Trifle.” The kids thought it was the coolest dessert ever. So remember, even kitchen disasters can be delicious!
Your Questions, Answered: FAQs & Troubleshooting
Over the years, I’ve gotten a lot of questions about this cake. Here are the answers to the most common ones!
- Q: My cake is soggy! What did I do wrong?
A: There’s a fine line between luxuriously moist and unpleasantly soggy. This usually happens if the cake was slightly underbaked to begin with, or if you used a tool that created holes that were too large. Stick to the wooden spoon handle and ensure your cake is fully baked before poking. - Q: Can I make this cake ahead of time?
A: Absolutely! In fact, I highly recommend it. You can make this cake up to 24 hours in advance. Just keep it covered in the refrigerator. The flavors have more time to meld, making it even more incredible. Add the final toffee sprinkle right before serving to keep it crunchy. - Q: What can I use instead of a tub of whipped topping?
A: You can absolutely use homemade whipped cream! Just whip 1.5 to 2 cups of heavy whipping cream with 2 tablespoons of powdered sugar and 1 teaspoon of vanilla extract until you get stiff peaks. It will be lighter and less sweet, which is a fantastic alternative. - Q: The sauces all pooled at the bottom of the pan. Help!
A: This can happen if the holes aren’t deep enough or if the cake cooled too much before you added the sauces. The key is to pour the condensed milk and caramel onto the cake *the second* it comes out of the oven. The heat is what helps the cake absorb the liquids downward.
Just the Facts: Nutritional Information*
Let’s be real—this is a celebration dessert, and it’s all about indulgence! But I believe in transparency, so here’s a general breakdown per serving (assuming 12 generous slices). Remember, these are estimates and can vary based on the specific brands you use.
- Calories: ~420
- Protein: ~4g
- Carbohydrates: ~50g
- Fat: ~22g
*This nutritional information is provided as a courtesy and is an estimate only. We recommend using a dedicated nutritional calculator with the exact brands and quantities you use for the most accurate data.
Prep Time: 10 mins | Bake Time: 30 mins | Chill Time: 1 hour+ | Total Time: ~1 hr 45 mins
One Last Bite of Wisdom
And there you have it, my friend — the story, the secrets, and the soul of the legendary Better Than Anything Cake. This isn’t just another dessert recipe; it’s a celebration of everything that makes baking joyful. It’s proof that you don’t need to be a pastry chef or spend hours in the kitchen to create something people will remember, crave, and talk about for days.
This cake is pure comfort, wrapped in chocolate, caramel, and a little nostalgia. It’s the one you make when you want to remind yourself (and everyone else) that food is meant to be fun, not fussy. That sweetness can heal a rough day. That joy often lives in the simplest recipes — the ones that make us close our eyes after the first bite and smile.
So whether you serve it at a party, share it with your neighbors, or sneak a forkful straight from the fridge at midnight (we’ve all been there), know this: you’ve just baked something extraordinary. Something that brings people together, sparks laughter, and makes life just a little more delicious.
Here’s to the messy, beautiful, perfectly imperfect desserts that feed both the heart and the soul. And here’s to you — for keeping the love of homemade magic alive, one decadent slice at a time.
— With caramel-drizzled gratitude,
Chef Emily 💛