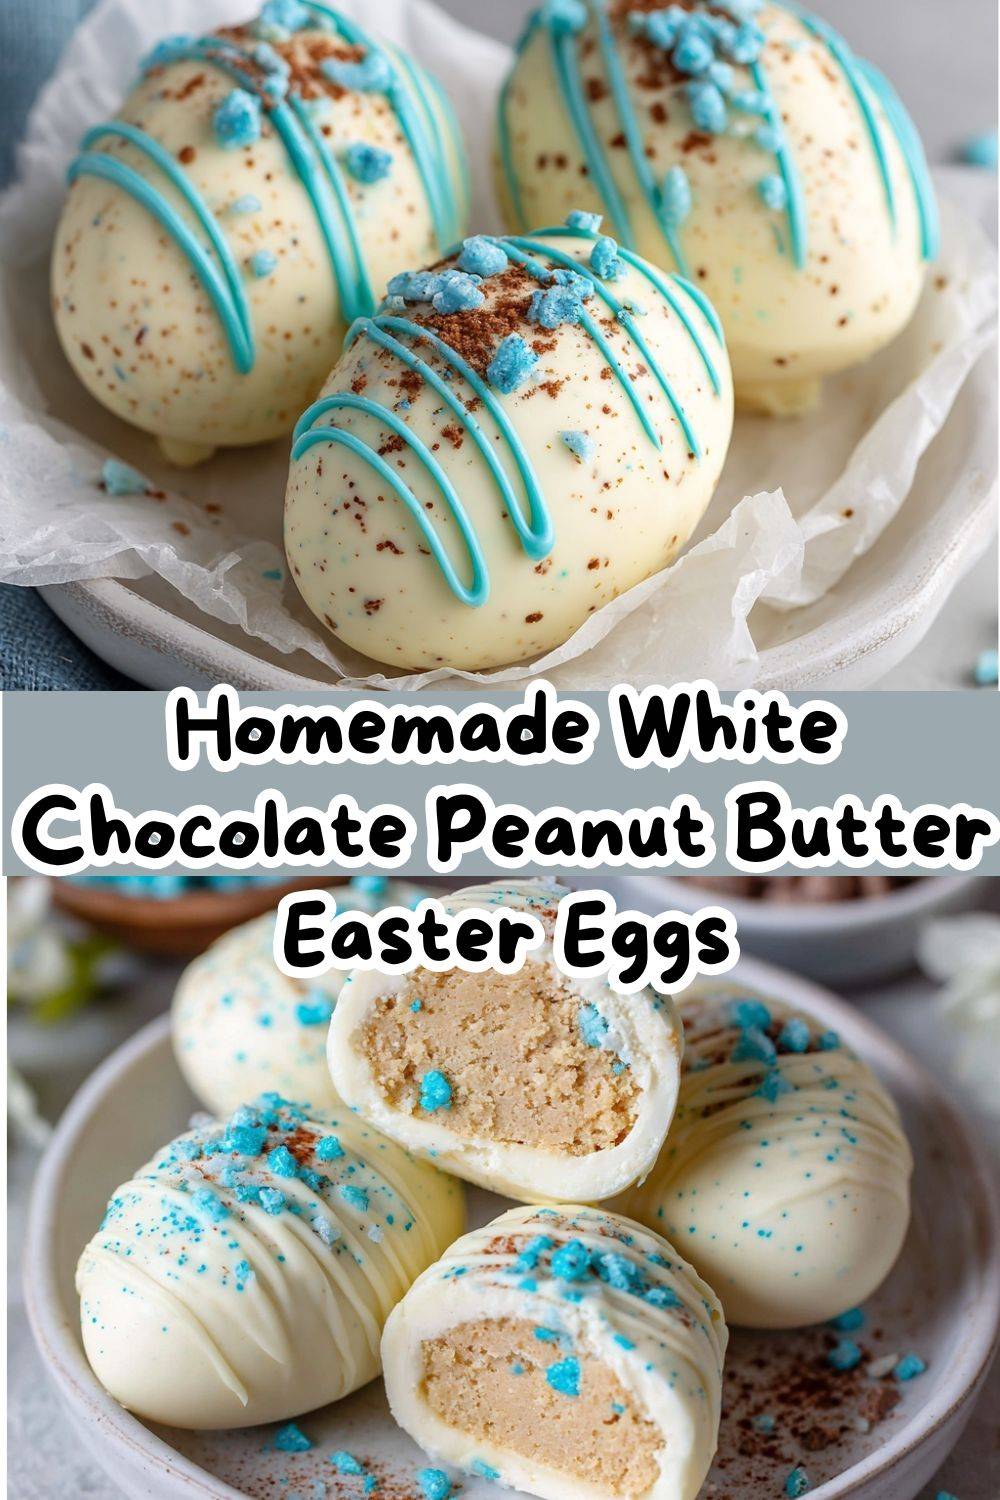
Better Than Store-Bought? You Bet! Our Homemade White Chocolate Peanut Butter Easter Eggs Are Here
Hey friends, Emily here! Can we talk about that moment of pure joy when you bite into a perfectly crafted peanut butter egg? That sweet, salty, creamy center wrapped in a smooth, rich chocolate shell… it’s a little bite of springtime happiness. But here’s my kitchen-confession: I’ve always found the store-bought versions a tad too sweet, a little waxy, and honestly, never quite enough. Sound familiar?
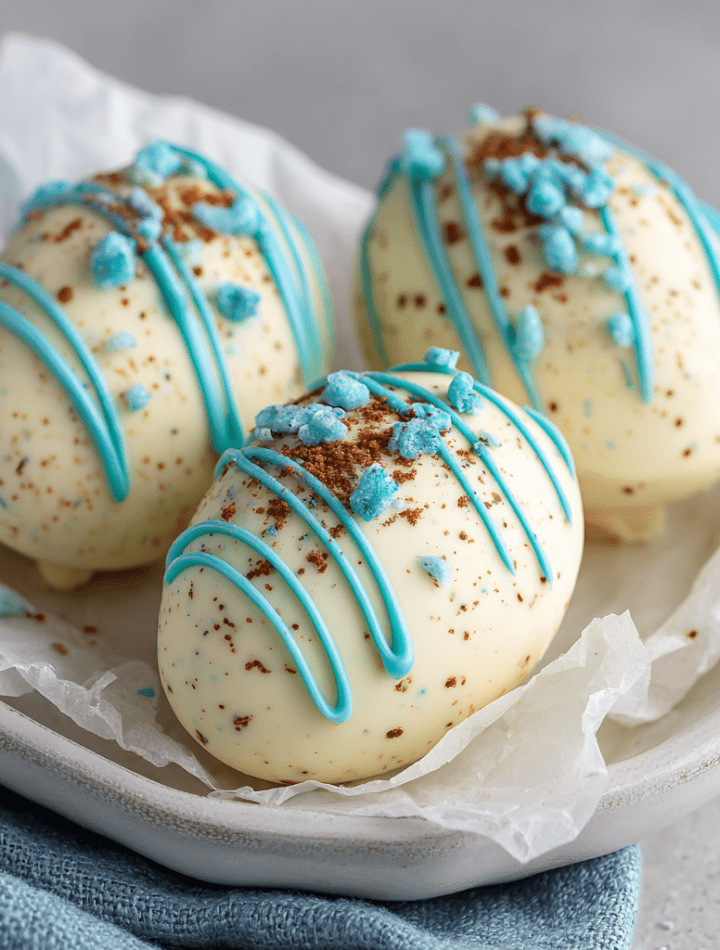
That’s exactly why I rolled up my sleeves (and probably got peanut butter everywhere) to create a homemade version that’s not just a copycat, but a full-blown upgrade. We’re talking a luxuriously soft, just-sweet-enough peanut butter filling that melts on your tongue, hugged by a layer of dreamy white chocolate. And the best part? We’re giving them the most adorable, delicate “robin’s egg” speckles that will make you the absolute hero of your Easter basket, dessert table, or… you know, your Tuesday afternoon snack.
The magic here is in the simplicity. No baking, no fancy equipment—just a bowl, a spoon, and a whole lot of love. This is the kind of fun, foolproof kitchen project that creates as many memories as it does delicious treats. So, grab your favorite apron (the messy one is encouraged), and let’s make something wonderfully, whimsically delicious together. Trust me, once you try these, you’ll never look at a foil-wrapped egg the same way again.
The Sweet Spot: A Memory That Inspired These Eggs
This recipe takes me straight back to my grandma’s linoleum-tiled kitchen, the weekend before Easter. The big meal was her domain, but she always cleared a corner of the counter for my “crafts,” which usually involved more mess than mastery. One year, we decided to try making candy eggs. I remember the hilarious, lopsided shapes we created, our hands coated in sticky peanut butter and smudges of chocolate. They were far from perfect, but to my 8-year-old self, they were absolute treasures—and they tasted infinitely better because we made them.
That’s the spirit I wanted to bottle with this recipe. It’s not about achieving factory-line perfection. It’s about the fun of shaping the dough with your hands, the gentle *tap-tap-tap* of letting the excess chocolate drip off, and the artistic flick of the wrist to create those final speckles. It’s about creating that same feeling of proud, delicious accomplishment. Every time I make these now, I get a little wave of that childhood excitement. My hope is that they bring a bit of that simple, sweet joy into your kitchen, too.
Gathering Your Happy Ingredients
Here’s the beautiful line-up for our edible spring project! I love using simple, whole ingredients where we can—it lets the pure, fantastic flavors of peanut butter and chocolate really sing.
For the Peanut Butter Filling:
- 1 ¼ cups natural, runny peanut butter – The kind where the oil separates is perfect here! It gives us that creamy, dreamy texture without being dry. Chef’s Insight: Avoid the super-stiff, shelf-stable kind; it can make the filling too thick and hard to work with.
- ¼ cup pure maple syrup – Our natural sweetener that adds a hint of warm, cozy depth. Honey works great too if that’s what you have!
- ¼ cup powdered sugar – This isn’t just for sweetness; it’s our texture magician. It helps bind the filling and gives it that iconic, melt-in-your-mouth quality.
- ⅓ cup almond flour – The secret weapon! It absorbs just enough oil to make the mixture pliable without adding a nutty flavor that competes with the peanut butter. Sub Tip: If you need a nut-free version, oat flour or even more powdered sugar can work in a pinch.
- ½ tsp pure vanilla extract – The flavor booster. It rounds out all the other notes beautifully.
- A generous pinch of salt – Crucial! It balances the sweetness and makes the peanut butter flavor pop. Don’t you dare skip it.
For the Coating & Speckles:
- 8 oz high-quality white chocolate melting wafers – I’m a melting wafer evangelist for projects like this. They’re formulated to set smoothly and don’t require tempering. Chef’s Hack: If you only have chocolate bars, chop them finely and add an extra ½ tsp of coconut oil when melting.
- 2 tsp coconut oil – This little bit of fat is our insurance policy for a thin, smooth, crackly coating that’s easy to dip into.
- Blue spirulina + matcha powder (or a drop of blue/green food coloring) – For that beautiful pastel robin’s egg blue! The natural combo gives a gorgeous, subtle hue. Food coloring gets you there fast and vibrant—your choice!
- 1 tsp cocoa powder + 1 tbsp water – Our all-natural “speckle” paint! Mixed together, it creates the perfect watery mixture to flick on for those authentic little dots.
Let’s Make Some Magic: Step-by-Step
Ready? Let’s do this! Clear some counter space, put on a fun playlist, and let’s transform these simple ingredients into edible art.
- Create the Peanut Butter Heart. In a medium bowl, combine the peanut butter, maple syrup, powdered sugar, almond flour, vanilla, and salt. Stir, stir, stir until it’s completely smooth and comes together into a soft, slightly sticky dough. Chef’s Chatter: You can use a hand mixer, but I often just go for it with a sturdy spatula and a little arm power—it’s surprisingly therapeutic! The dough should hold its shape when you pinch it.
- Shape Your Eggs. Line a baking sheet with parchment paper. Scoop the dough into about 2-tablespoon-sized portions. I use a cookie scoop for consistency, but two spoons work just fine. Roll each portion into a ball between your palms, then gently shape it into an oval egg shape. Place them on the prepared tray. Pro Tip: If the dough is too sticky, pop it in the fridge for 15 minutes or dust your hands lightly with powdered sugar.
- The Big Chill. Slide the tray of shaped eggs into the freezer for at least 20-30 minutes. This is non-negotiable! A firm, cold center is what makes the dipping process possible and mess-free.
- Prep Your “Paint.” While the eggs chill, make your speckle mixture. In a small bowl, whisk the cocoa powder and water together until completely smooth. Set aside. Also, get your colored chocolate ready: Melt the white chocolate wafers and coconut oil together in a heatproof bowl in 20-second bursts in the microwave, stirring vigorously between each burst, until perfectly smooth. Stir in your chosen colorant until you get a lovely, even pastel blue.
- The Dip of Dreams. Here’s the fun part! Remove a few eggs from the freezer at a time. Spear one gently with a toothpick. Dip it fully into the melted chocolate, swirling to coat. Lift it out, let the excess chocolate drip off for a few seconds, then carefully place it back on the parchment paper. Gently twist and remove the toothpick. Chef’s Hack: Use a second toothpick or a small spoon to help smooth over the tiny hole. Repeat with all eggs, working quickly.
- Speckle Time! Let the chocolate set for just a minute or two (it should be wet but not runny). Dip a small pastry brush or even a clean toothbrush into your cocoa “paint.” Hold it over an egg and run your finger along the bristles to flick tiny, perfect speckles all over the surface. Channel your inner Jackson Pollock!
- The Final Set. Let the eggs set completely at room temperature, or for a faster finish, pop them back in the fridge for about 10 minutes. You’ll know they’re ready when the chocolate is firm to the touch.
How to Serve These Little Masterpieces
Presentation is half the fun! These eggs are gorgeous just piled high in a rustic ceramic bowl or a pretty pastel colander for a casual spring gathering. For a truly stunning Easter table centerpiece, nestle them in a bed of shredded green paper “grass” or real wheatgrass in a shallow basket. Tuck in a few faux robin’s eggs or fresh flowers for extra whimsy.
They’re the ultimate homemade addition to an Easter basket—wrap a couple in a clear cellophane bag tied with a ribbon for a gift that will genuinely delight. And let’s be real: they also taste phenomenal with a hot cup of coffee for your own personal afternoon pick-me-up. No judgment here!
Make It Your Own: Delicious Twists & Swaps
Once you’ve mastered the classic, the playground is open! Here are a few of my favorite ways to mix it up:
- Milk or Dark Chocolate Dream: Swap the white chocolate for milk or dark chocolate coating. It’s a more classic Reese’s vibe and utterly delicious.
- Crunchy Time: Add ¼ cup of finely chopped roasted peanuts or even crushed pretzel bits to the peanut butter filling for a fantastic salty crunch.
- “Peanut Butter Cup” Style: Skip the egg shape! Press the filling into mini muffin liners, let them set, then spoon melted chocolate over the top for perfect, portion-controlled cups.
- Nut-Free Friendly: Use sunflower seed butter (note: it may turn the filling slightly green over time, but it still tastes great!) and swap the almond flour for oat flour or more powdered sugar.
- Cookie Dunker: Roll the shaped eggs in crushed graham cracker crumbs or biscoff cookie crumbs before dipping in chocolate for an extra layer of flavor and texture.
From My Kitchen to Yours: A Few Parting Thoughts
This recipe has seen a few iterations over the years. My first batch was, let’s say, “abstract” in shape and the chocolate was way too thick. The beauty of homemade is in that learning curve! The almond flour was my “aha!” moment—it solved the texture issue perfectly. And the speckles? That came from a happy accident when I was decorating cookies nearby and splashed some cocoa mixture. The best recipes often come from a little mess and a lot of laughter.
Remember, these are meant to be fun. If your eggs aren’t perfectly symmetrical or your speckles are more like polka dots, it just adds to the charm. You made them! And that makes them infinitely more special.
Your Questions, Answered!
Q: My filling is too soft/sticky to shape. Help!
A: No worries! This usually means your peanut butter was very runny or it’s a warm day. Pop the mixture in the fridge for 20-30 minutes to firm up. You can also add a touch more almond flour or powdered sugar, a tablespoon at a time, until it’s workable.
Q: Why use melting wafers instead of regular white chocolate chips?
A> Great question! Melting wafers contain stabilizers that help them melt smoothly, set firmly, and retain a nice snap at room temperature. Regular chips can be trickier to melt without seizing and often stay a bit soft. If chips are all you have, add that extra coconut oil and melt very slowly!
Q: Can I make these ahead of time?
A> Absolutely! They are perfect for making ahead. Store them in a single layer in an airtight container in the fridge for up to 2 weeks, or freeze for up to 2 months. Let them come to room temperature for about 10 minutes before serving for the best texture.
Q: My chocolate coating cracked after setting. What happened?
A> This typically means the peanut butter centers were too cold (a huge temperature difference shocks the chocolate) or the chocolate layer was dipped too thick. Next time, let the centers sit out of the freezer for 2-3 minutes before dipping, and aim for a thinner coating.
A Note on Nutrition & Details
While these are definitely a celebratory treat, I love knowing what’s in my food. Using natural peanut butter and maple syrup means we’re avoiding highly processed oils and corn syrups. Each egg is rich, satisfying, and packs a good amount of protein and healthy fats from the peanut butter and almond flour, which means one is often enough to curb that sweet craving. Remember, this is homemade joy in a bite—meant to be savored and shared!
- Prep Time: 30 minutes (plus chilling)
- Chill Time: 30 minutes (freezing) + 10 minutes (setting)
- Total Time: ~1 hour 10 minutes
- Yield: About 14 beautiful eggs
Final Thoughts from My Kitchen
And there you have it, my friend—your guide to creating Easter treats that are bursting with love and flavor. More than just a recipe, I hope this gives you a reason to gather, create, and share something wonderfully homemade this season. Food connects us, and these little eggs are a sweet reminder of that.
I’d love to see your creations! If you make them, tag me on social @TastyChow so I can cheer you on. Now, go forth, get a little messy, and make something delicious. Happy Easter and happy cooking!
With love and a full heart,
Emily