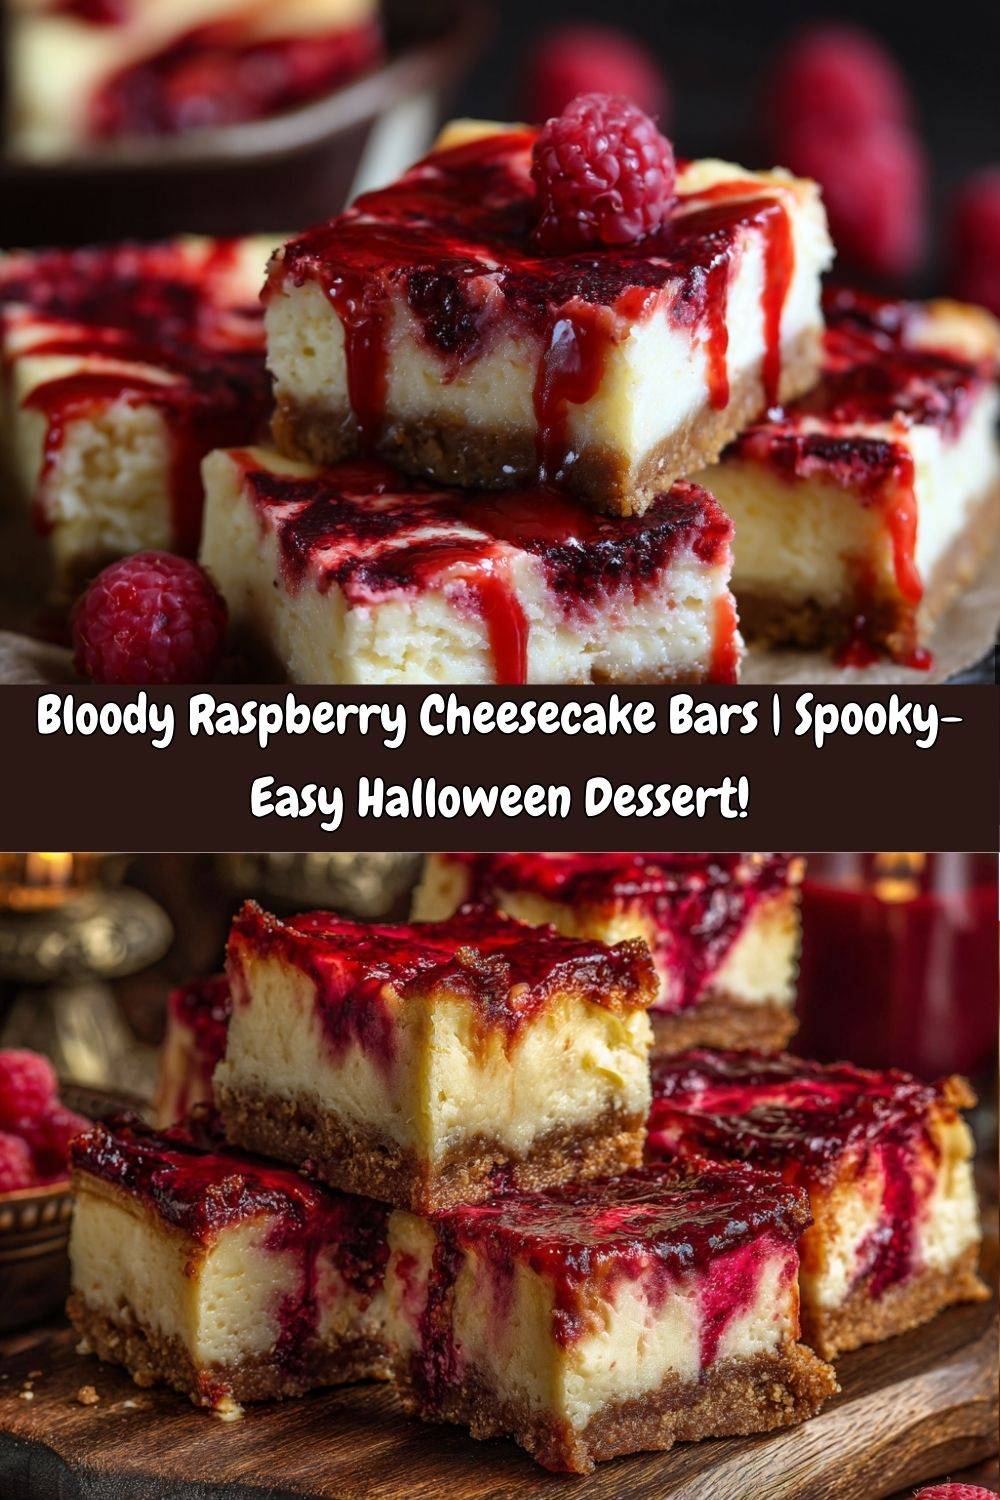
Bloody Raspberry Cheesecake Bars: Spooky Sweet Magic!
Hey, my fellow flavor adventurers! 👋 Picture this: It’s twilight on Halloween night. Cobwebs drape the porch, jack-o’-lanterns wink mischievously, and inside… your kitchen smells like creamy vanilla and tart raspberries. That’s the spell these Bloody Raspberry Cheesecake Bars cast! I’m not gonna lie—I live for desserts that marry drama with deliciousness, and these bars? They’re the ultimate showstoppers. Imagine velvety cheesecake cradled by a buttery graham crust, swirled with a raspberry “blood” sauce so vivid, it’d make Dracula swoon. Whether you’re hosting a monster mash, craving a midweek treat with personality, or just love turning heads (and taste buds), these bars deliver. They’re surprisingly simple—no fancy skills needed—but oh, do they pack a visual punch. So tie on your favorite apron (the one with questionable stains, we’ve all got one), and let’s make dessert magic that’s equal parts eerie and irresistible!
Why cheesecake bars, you ask? Friend, they’re the unsung heroes of the dessert world! No water baths, no stress cracks, just portable, sliceable joy. And that raspberry swirl? It’s not just “blood”—it’s a burst of tangy brightness cutting through the rich creaminess. Perfect for Halloween? Absolutely! But here’s a secret: I make these year-round when I need a little edible excitement. Ready to bake something unforgettable? Let’s dive in!
Ghosts, Giggles & Grandma’s Apron
This recipe? It’s got roots in my very first “grown-up” Halloween bash. Picture baby chef Emily, fresh out of culinary school, determined to impress her friends with something spooktacular. I attempted a full-sized raspberry-swirl cheesecake… and let’s just say it looked less “elegantly haunted,” more “cheesecake crime scene.” The swirls bled together, the crust crumbled like gravestones, and my vampire fangs (yes, I wore them) kept getting stuck in it! But you know what? My friends DEVOURED it. Between giggles and fake blood smudges (courtesy of extra sauce), we created a memory as sweet as the dessert itself. That night taught me: Imperfect food? Often the most joyful. These bars are my redemption arc—same spooky spirit, way less drama. Every time I swirl that ruby-red sauce, I hear my grandma’s voice: “Sweetheart, if it tastes good and makes people smile, you’ve nailed it.” Amen, Grandma.
Gathering Your Delicious Arsenal
Here’s your grocery spellbook! Don’t stress—these are pantry staples with wiggle room. Pro tip: Pull cream cheese & eggs out 1-2 hours before baking. Room temp = silky-smooth filling!
- Graham Cracker Crumbs (1 ½ cups): The cozy campfire hug for our cheesecake! Chef’s Insight: Smash ’em fine so your base holds tight. Substitute: Digestive biscuits, vanilla wafers, or gluten-free crumbs work great!
- Granulated Sugar (¼ cup + ½ cup, divided): Sweetness balancer! The crust gets ¼ cup; the filling gets ½ cup. Substitute: Coconut sugar works, but expect a darker hue.
- Unsalted Butter (½ cup, melted): Liquid gold binder! Chef’s Tip: Unsalted lets you control the salt. Melt it gently—no browning!
- Cream Cheese (16 oz, softened): The STAR! Use full-fat brick-style (not tubs). Non-Dairy Swap: Equal amount of high-quality vegan cream cheese.
- Eggs (2 large): Structure & silkiness! Pro Tip: Crack into a small bowl first—no shell surprises!
- Vanilla Extract (1 tsp): Warmth & depth! Pure extract > imitation. Feeling fancy? Scrape a vanilla bean instead!
- Sour Cream (¼ cup): Secret tang & creaminess! Substitute: Plain Greek yogurt (full-fat) in a pinch.
- Raspberries (1 cup, fresh or frozen): Our “blood”! Frozen berries are budget-friendly & work perfectly. Flavor Twist: Swap in blackberries or pitted cherries!
- Lemon Juice (1 tsp): Brightens the berry flavor! Freshly squeezed is best.
- Cornstarch + Water (1 tsp each, mixed): Our thickening “slurry”! Substitute: Arrowroot powder works too.
Let’s Brew Some Delicious Magic!
Follow these steps, and you’re golden (or should I say, blood-red?). Remember: Don’t overmix the filling—gentle is key!
- Preheat & Prep (325°F / 165°C): Line your 8×8 inch pan with parchment paper, letting it hang over two sides (this is your “cheesecake lifter” later!). Lightly grease exposed pan sides. Chef Hack: Use binder clips to hold parchment in place while you pour!
- Crust Time! In a bowl, mix graham crumbs, ¼ cup sugar, and melted butter until it resembles wet sand. Dump into your pan. Press firmly and evenly using a flat cup or measuring cup. Bake for 10 mins. Let it cool slightly while you make the sauce. Tip: Pressing hard prevents a crumbly crust disaster!
- Make the “Blood” Sauce: In a small saucepan, combine raspberries, 2 tbsp sugar, and lemon juice. Simmer over medium heat for 5 mins, mashing berries gently. Stir cornstarch slurry into the bubbling mix. Cook 1-2 mins more until thick & glossy like jam. Strain through a fine sieve into a bowl (this catches seeds for that smooth “blood” effect!). Let cool slightly. Chef Insight: Taste it! Add a pinch more sugar if too tart.
- Cheesecake Bliss: Beat softened cream cheese and ½ cup sugar in a large bowl with a mixer (or serious elbow grease!) until completely smooth—no lumps! Scrape bowl sides. Add eggs one at a time, beating just until blended after each. Overbeating = cracks! Mix in vanilla and sour cream until just combined.
- Swirl Like a Boss: Pour filling over your slightly cooled crust. Drop small spoonfuls of raspberry sauce randomly on top. Grab a toothpick or knife. Swirl gently through the sauce and filling—don’t overdo it! We want veins of “blood,” not a pink mess. Pro Tip: Wipe your toothpick between swirls for cleaner lines!
- Bake & Chill: Bake 35-40 mins. It’s done when edges are set but the center still has a slight, gentle jiggle (like Jell-O, not liquid). Turn off oven, crack door open, and let it chill inside for 1 hour (prevents shocking cracks!). Remove, cool completely on a rack, then refrigerate at least 4 hours (overnight is IDEAL for perfect slicing). Patience, grasshopper!
Drama on a Plate!
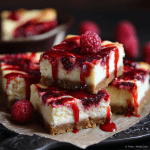
Presentation is half the fun! Use the parchment overhangs to lift the whole slab onto a cutting board. Wipe a sharp knife under hot water, dry it, and slice into 9 bars (or 12 for smaller servings). For maximum gore-factor, drizzle extra room-temp raspberry “blood” sauce over each bar right before serving. Plop on a dollop of whipped cream “ghost” or garnish with fresh raspberries. Serve chilled—that creamy, tangy contrast is everything! These bars scream, “Eat me!” (in the best possible way).
Switch Up the Spook!
This recipe loves a costume change! Try these tasty twists:
- Berry Macabre: Swap raspberries for blackberries (deep purple “blood”) or strawberries (bright red).
- Chocolate Graveyard: Add ¼ cup cocoa powder to the crust mix + swirl melted dark chocolate into the filling with the sauce.
- Boo-zy Bars: Stir 1 tbsp Chambord (raspberry liqueur) into the cooled sauce for grown-up gore.
- Dairy-Free Darkness: Use vegan cream cheese, plant-based butter, coconut yogurt, and a flax egg (1 tbsp ground flax + 2.5 tbsp water per egg).
- Nutty Necropolis: Replace half the graham crumbs with finely ground toasted pecans or almonds.
Emily’s Extra Sprinkle of Thoughts
Oh, the evolution of this recipe! It started as that wobbly full cheesecake I mentioned, then became mini tartlets (cute but fussy!), before landing happily as these bars—the perfect combo of easy + epic. One hilarious fail involved using beets for “blood” (DO NOT RECOMMEND, tasted like earthy regret). My biggest lesson? Chill time is non-negotiable. Trying to cut warm cheesecake is like performing surgery with a spoon. Trust me, set that timer! And about the “blood” swirl: Don’t aim for perfection! Random, jagged swirls look more authentically spooky. These bars have become my signature Halloween gift for neighbors—wrapped in parchment with a red ribbon, they look like little edible coffins. The gasps when they open them? Priceless.
Your Cheesecake Conundrums, Solved!
Let’s tackle those kitchen gremlins before they strike!
Q: Can I use frozen raspberries? Will it mess up the sauce?
A: Frozen berries are TOTAL MVPs here! They’re affordable, available year-round, and often break down even better than fresh for sauce. No need to thaw—just toss ’em in the pot straight from the freezer. Simmer a minute or two longer if needed.
Q: Help! My cheesecake cracked! Did I ruin it?
A: First, deep breath! Cracks happen (usually from overmixing, overbaking, or temperature shock). But guess what? We’re drizzling extra “blood” sauce on top—it’s the ultimate crack concealer! Taste is unaffected. Next time: Avoid overbeating after adding eggs, don’t overbake (center should jiggle slightly), and cool gradually in the turned-off oven.
Q: Can I make these ahead of time? How long do they keep?
A: Absolutely! These bars are better made ahead. The flavor deepens, and they slice cleaner after a full overnight chill. Store covered in the fridge for up to 5 days. You can also freeze the un-sliced slab (wrap tightly in plastic + foil) for up to 2 months. Thaw overnight in the fridge before slicing and saucing.
Q: My sauce is too thin/too thick! How do I fix it?
A: Too thin? Mix another ½ tsp cornstarch with ½ tsp cold water, whisk into the simmering sauce, cook 1 min more. Too thick? Stir in warm water, 1 teaspoon at a time, until desired consistency. It thickens slightly as it cools!
Bloody Raspberry Cheesecake Bars
- Total Time: 5 Hours
- Yield: 9 bars 1x
Description
Turn dessert into a deliciously eerie delight with these Bloody Raspberry Cheesecake Bars. Creamy, tangy cheesecake meets a swirl of rich raspberry “blood” sauce for a treat that’s as hauntingly beautiful as it is addictive. Perfect for Halloween or whenever you’re craving drama on a dessert plate!
Ingredients
For the crust:
1 ½ cups graham cracker crumbs
¼ cup granulated sugar
½ cup unsalted butter, melted
For the cheesecake:
16 oz cream cheese, softened
½ cup granulated sugar
2 large eggs
1 tsp vanilla extract
¼ cup sour cream
For the “blood” raspberry sauce:
1 cup raspberries (fresh or frozen)
2 tbsp sugar
1 tsp lemon juice
1 tsp cornstarch + 1 tsp water (for slurry)
Instructions
Preheat oven to 325°F (165°C). Line an 8×8 inch pan with parchment paper.
Mix crust ingredients, press firmly into the pan. Bake for 10 minutes, then cool slightly.
Make raspberry “blood”: Simmer raspberries, sugar, and lemon juice for 5 minutes. Stir in slurry and cook until thick. Strain for smoothness.
Prepare cheesecake: Beat cream cheese and sugar until creamy. Add eggs one at a time, then vanilla and sour cream.
Assemble: Pour cheesecake over crust. Drop spoonfuls of raspberry sauce on top and swirl with a toothpick for a bloody effect.
Bake for 35–40 minutes or until center is just set. Cool completely, then chill for 4 hours or overnight.
Slice & serve — dramatic flair optional, but encouraged!
- Prep Time: 25 minutes
- Chill Time: 4 hrs
- Cook Time: 40 min
Nutrition
- Calories: 280 / Bar
- Sugar: 19g / Bar
- Sodium: 180mg / Bar
- Fat: 18g / Bar
- Saturated Fat: 10g / Bar
- Carbohydrates: 26g/ Bar
- Fiber: 4g / Bar
- Cholesterol: 85mg/ Bar
Nutritional Info (Approximate per Bar)
Calories: ~280 | Fat: 18g | Saturated Fat: 10g | Cholesterol: 85mg | Sodium: 180mg | Carbohydrates: 26g | Fiber: 1g | Sugar: 19g | Protein: 4g
Remember: This is an indulgent treat! Savor every spooky bite.
Final Thoughts
If Halloween had a signature dessert, these Bloody Raspberry Cheesecake Bars would be it—rich, creamy, and just a little wicked. They strike that perfect balance between spooky presentation and crave-worthy flavor, making them a hit long after the cobwebs come down. And because they’re sliceable, portable, and completely make-ahead friendly, they’re just as practical as they are dramatic.
So whether you’re hosting a full-blown monster bash or simply want to surprise your friends with something delightfully gory, these bars deliver the magic. They’re proof that dessert can be playful, beautiful, and absolutely unforgettable—all without a single water bath or pastry chef’s degree. Wrap them up for gifts, plate them with extra “blood” for flair, or enjoy one in your kitchen while the trick-or-treaters ring the doorbell. No matter how you serve them, you’ll be sinking your teeth into a little piece of spooky-sweet heaven.