Your New Favorite Snack is Hiding in Your Sourdough Jar
Hey there, friend! Let’s have a little heart-to-heart about that jar of sourdough discard sitting in your fridge. You know the one. It’s the culinary equivalent of a guilt trip, quietly bubbling away and making you feel just a *little* bit bad every time you open the fridge door. “Are you going to use me?” it seems to whisper. “Or am I destined for the compost bin… again?”
Well, I’m here to banish that guilt forever and turn it into pure, unadulterated joy. What if I told you that the secret to the most incredibly crispy, cheesy, and downright addictive homemade crackers is already in your possession? That’s right—we’re taking that tangy, unfed starter and transforming it into a snack so good, it’ll give store-bought cheese crackers a serious identity crisis.
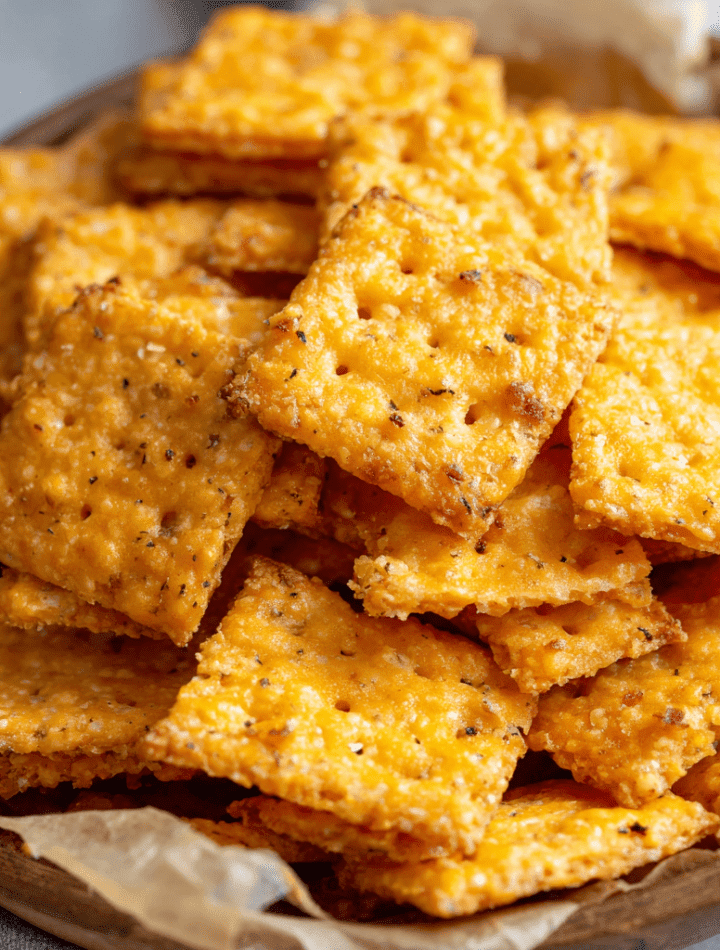
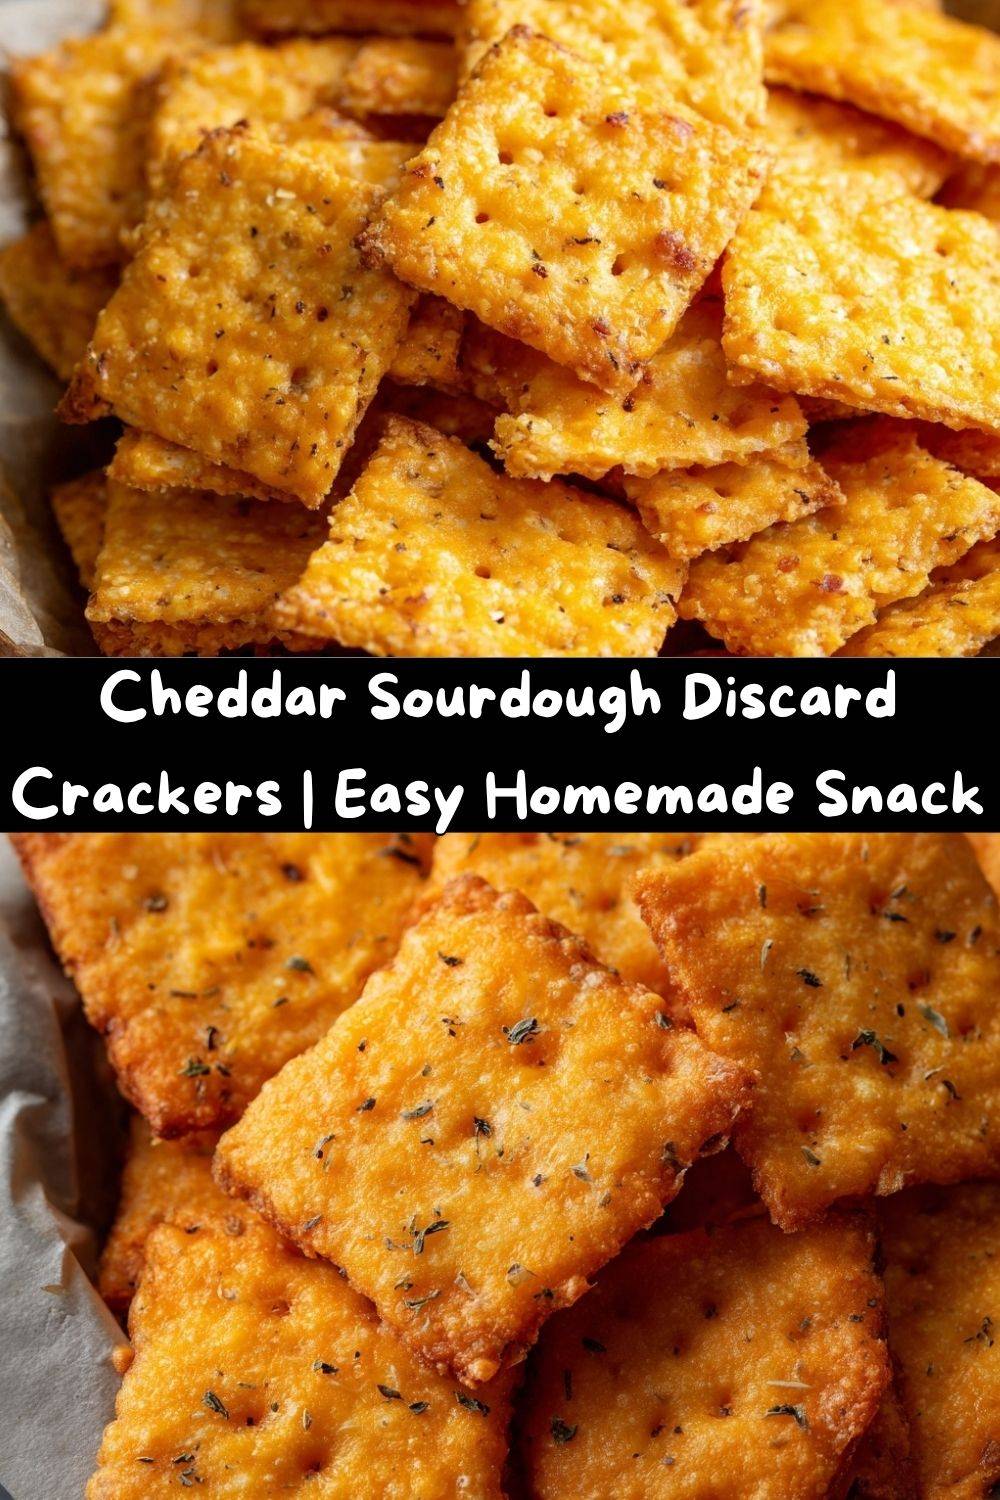
Imagine a cracker with the satisfying snap of a premium water cracker, the deep, savory punch of sharp cheddar, and a subtle, tangy backbone that only sourdough can provide. These Cheddar Sourdough Discard Crackers are my absolute go-to for using up starter, and they’ve become a non-negotiable staple in my kitchen. They’re perfect for lunchboxes, unbeatable on a party platter, and dangerously good for late-night munching. So, let’s roll up our sleeves, preheat that oven, and make something deliciously rewarding out of what you might have once thrown away!
The Happy Accident That Started It All
This recipe was born, like so many of my favorites, from a happy little kitchen accident. It was a rainy Sunday, and my sourdough starter, Felix, was looking particularly peckish. I’d already fed him for a loaf of bread, but I couldn’t bring myself to discard the remains of his last meal. At the same time, my goddaughter, Lily, was rummaging through my pantry, dramatically bemoaning the lack of “good snacks.”
In a moment of “what if?” inspiration, I remembered my grandma’s cheese straws. She never used a recipe, just a feel for the dough. I thought, what if I swapped out some of the liquid for my tangy discard? I threw some shredded cheddar, a pat of butter, and that lonely cup of discard into a bowl. The dough came together in a shaggy, orange-hued ball. I rolled it out, sliced it into rustic squares, and crossed my fingers.
The smell that wafted from the oven was pure magic—buttery, cheesy, with that unmistakable warm, toasty note. The second they were cool enough to handle, Lily and I taste-tested one. Her eyes went wide. “Auntie Em,” she declared, her mouth full, “these taste like a fancy Cheez-It that went to college!” It was the highest compliment I could have received. We’d not only avoided waste but created a new family favorite in the process.
Gathering Your Cheesy, Tangy Toolkit
One of the best things about this recipe is its simplicity. You likely have most of these ingredients in your kitchen right now! Here’s what you’ll need, with a few of my chef-y insights to guide you.
- 1 cup sourdough discard (unfed): This is your star player! The beauty is that it doesn’t matter if your discard is fresh from the fridge or has been sitting out for a day. Its tanginess is the secret flavor weapon here. Chef’s Insight: The hydration of starters can vary. If yours is very thick, your dough might need less flour; if it’s very runny, it might need a touch more. We’ll adjust as we go!
- 1 cup sharp cheddar cheese, finely shredded: Please, I’m begging you, shred your own cheese! Pre-shredded cheese is coated in anti-caking agents like potato starch or cellulose, which can prevent it from melting smoothly into your dough. The fine shred helps it distribute evenly. Substitution Tip: Feel free to experiment! Gruyère, Pepper Jack, or even a mix of Parmesan and cheddar would be fantastic.
- 3 tablespoons unsalted butter, softened: Butter adds richness and helps create that melt-in-your-mouth, flaky texture. Using unsalted lets you control the salt level perfectly. Chef’s Insight: “Softened” means it should give easily when you press it, but it shouldn’t be greasy or melted.
- ½ cup all-purpose flour: This is the structural backbone that brings our dough together. We’re starting with a half-cup, but you may need a dusting more when rolling if the dough is sticky.
- ¼ teaspoon garlic powder: This is our flavor enhancer. It gives a subtle, savory depth without the sharpness of fresh garlic. Substitution Tip: Onion powder would also be lovely here.
- ¼ teaspoon smoked paprika: Don’t skip this! It doesn’t make the crackers spicy; instead, it adds a beautiful color and a whisper of smoky complexity that pairs wonderfully with the cheddar. Chef’s Insight: For a little kick, use a pinch of cayenne pepper instead.
- ¼ teaspoon salt (plus more for sprinkling): Salt is crucial for balancing the flavors. We’ll add a little inside and then have the option to sprinkle a flaky salt on top for that professional, bakery-style finish.
- 1–2 tablespoons cold water, if needed: This is our “save the dough” ingredient. If your mixture seems too dry and isn’t coming together, a tablespoon of cold water will help it form a cohesive ball.
Let’s Make Some Magic: The Step-by-Step
Ready to see that discard become a snack superstar? Follow these steps, and you’ll be a cracker-making pro in no time. I’ve sprinkled in all my best tips to ensure your success!
- Combine and Conquer: In a medium-sized mixing bowl, combine the sourdough discard, finely shredded cheddar, softened butter, all-purpose flour, garlic powder, smoked paprika, and salt. I like to get in there with my hands (the best tools in the kitchen!) and squish everything together until it forms a shaggy dough. Chef’s Hack: If you’re not a fan of messy hands, a sturdy spatula or even a stand mixer with a paddle attachment works great. Mix until the dough is uniform and no dry streaks of flour remain.
- The Water Test: This is where you use your baker’s intuition. Squeeze a bit of the dough in your palm. Does it hold together? Perfect! If it’s crumbly and won’t form a ball, add one tablespoon of cold water and mix again. Repeat only if necessary. You want a pliable but not sticky dough.
- Roll It Out: Divide your dough in half. This makes it much easier to handle. Place one portion between two sheets of parchment paper. Now, roll it out until it’s about ⅛ of an inch thick—that’s the sweet spot for maximum crispiness! Chef’s Hack: Using parchment paper means no added flour is needed (which can toughen the crackers) and makes cleanup a breeze. Try to roll it into a rough rectangle for easy, uniform cutting later.
- The Chill Factor: Slide the parchment paper with your rolled-out dough onto a baking sheet and pop it into the refrigerator. Let it chill for at least 20 minutes. Don’t skip this step! This firms up the butter, which results in a flakier texture and prevents the crackers from spreading too much. It also makes the dough much easier to cut cleanly.
- Preheat and Prep: While the dough chills, preheat your oven to 350°F (175°C). This ensures a hot, ready-to-go environment for your crackers, helping them bake evenly and get perfectly crisp.
- Cut and Poke: Take your chilled dough out of the fridge. Using a pizza cutter or a sharp knife, slice the dough into 1-inch squares. They don’t have to be perfect—rustic is charming! Now, take a fork, a toothpick, or a skewer and poke a hole in the center of each square. Chef’s Insight: This isn’t just for decoration! It allows steam to escape during baking, preventing the crackers from puffing up like little pillows and ensuring they stay flat and crispy.
- Bake to Perfection: You can bake the crackers right on the parchment paper. Sprinkle them with a tiny bit of extra salt if you like. Bake for 20-25 minutes. Chef’s Hack: Rotate your baking sheet halfway through the baking time to ensure even browning. You’re looking for golden brown edges and a firm, crisp feel. The ones around the edges will always color first, so don’t worry if they’re not all uniform!
- The Patience Payoff: This is the hardest part, I promise! Let the crackers cool completely on the baking sheet. They will continue to crisp up as they cool. Resist the urge to eat them warm! The full, satisfying crunch only develops once they are at room temperature.
How to Serve These Cheesy Wonders
Okay, you’ve waited patiently, and now you have a mountain of gorgeous, homemade crackers. What next? The possibilities are endless!
For the ultimate solo snacking experience, just pour them into a bowl and watch them disappear. They are utterly perfect on their own.
To create a show-stopping party platter, arrange these crackers around a wheel of baked Brie, a bowl of creamy spinach and artichoke dip, or a simple but elegant charcuterie board. Their tangy, cheesy flavor pairs beautifully with cured meats, sharp olives, and sweet elements like fig jam or grapes.
For soup season, forget boring crackers! These are the ultimate companion to a steamy bowl of tomato soup, a hearty chili, or a creamy broccoli cheddar. They’re sturdy enough to hold up to a good dunk without disintegrating.
And let’s not forget the lunchbox! Toss a handful into a container alongside some cheese cubes, apple slices, and some salami for a lunch that both kids and adults will get genuinely excited about.
Get Creative! Flavor Twists & Dietary Swaps
Once you’ve mastered the basic recipe, the kitchen playground awaits! Here are a few of my favorite ways to mix things up.
- “Everything Bagel” Crackers: Before baking, brush the rolled-out dough very lightly with an egg wash (a beaten egg with a teaspoon of water) and sprinkle generously with everything bagel seasoning. It adds onion, garlic, sesame, and poppy seed goodness in every bite.
- Spicy Sriracha Kick: Add one tablespoon of Sriracha (or your favorite hot sauce) to the dough along with the discard. You’ll get a beautiful red hue and a lovely, slow-building heat that pairs amazingly with the cheese.
- Herb Garden Delight: Stir in two tablespoons of finely chopped fresh herbs. Rosemary and thyme are a classic combination, or try chives and dill for a brighter flavor profile.
- Gluten-Free Adaptation: You can easily make these gluten-free! Simply swap the all-purpose flour for a 1:1 gluten-free baking blend. The texture might be slightly more delicate, but they will be just as delicious.
- Vegan-Friendly Version: Use your favorite plant-based cheddar shreds and replace the butter with a solid, high-quality vegan butter. The flavor will be different but still wonderfully savory and crisp.
From My Kitchen to Yours: A Few Parting Thoughts
This recipe has evolved so much since that first rainy Sunday. I’ve learned that a slightly thicker cracker (closer to ¼ inch) is a bit sturdier for dipping, while a paper-thin one is ethereally crisp. I’ve also learned that my dog, Biscuit, will materialize in the kitchen the second these come out of the oven, hoping for a cheesy crumb to come his way (he usually gets one).
The biggest lesson, though, is that the best recipes aren’t about perfection. They’re about the joy of creating, the satisfaction of using what you have, and the simple pleasure of sharing something truly delicious with the people you love. So, if your crackers aren’t all perfectly square, or if some are a little more “well-done” than others, I promise you, no one will care. They’ll just be asking for the recipe.
Your Cracker Questions, Answered!
Let’s tackle a few common questions to make sure your cracker-making journey is smooth sailing.
Q: My crackers came out soft, not crispy. What happened?
A: The most common culprit is under-baking. Ovens can vary, so if yours runs cool, they might need a few extra minutes. Make sure they are a deep golden brown at the edges. The second reason is not letting them cool completely on the baking sheet. They crisp up as they cool!
Q: Can I freeze the dough for later?
A: Absolutely! This is a fantastic make-ahead tip. After you roll the dough into a log or a disc (instead of rolling it flat), wrap it tightly in plastic wrap. It will keep in the freezer for up to 3 months. When you’re ready, let it thaw just enough to slice, then bake as directed. You can even slice it frozen and just add a few minutes to the baking time.
Q: My dough was really sticky and hard to handle. Help!
A: No worries! This usually means your sourdough discard was very hydrated. Just add a little more all-purpose flour, one tablespoon at a time, until the dough is manageable. Also, remember that chilling the dough is non-negotiable—it makes a sticky dough much easier to work with.
Q: Why did my crackers puff up so much?
A: They needed a better steam vent! Make sure you’re poking that hole all the way through the dough with a fork or skewer. This simple step is the key to flat, crisp crackers.
A Quick Bite on Nutrition
While we’re not claiming these are a health food, it’s always good to know what you’re enjoying! Homemade crackers like these have a few inherent benefits over their store-bought cousins. You control the quality of ingredients—real cheese, real butter, and no artificial preservatives or flavors.
The sourdough discard, while not active, still contains some of the beneficial acids and enzymes developed during fermentation. And because they are so packed with flavor, a small handful is often more satisfying than a giant bowl of a blander snack, which can help with portion control (though good luck with that—they’re seriously addictive!).
Approximate Nutritional Info (per 10 crackers):
Calories: 160 | Carbohydrates: 12g | Fat: 10g | Protein: 5g | Sodium: 210mg
Please note: These values are estimates and can vary based on specific ingredients and portion sizes.
The Final, Delicious Crumb
Well, my friend, we’ve done it. We’ve taken that jar of sourdough discard—a symbol of kitchen guilt—and transformed it into a triumph of flavor, texture, and pure homemade joy. These Cheddar Sourdough Discard Crackers aren’t just a snack; they’re a tiny celebration of resourcefulness, creativity, and the kind of kitchen magic that happens when you give humble ingredients a chance to shine.
Whether you’re nibbling on them warm from the baking sheet, packing them into school lunches, pairing them with a gorgeous charcuterie board, or sneaking a few during a midnight fridge raid (I won’t tell!), these crackers are guaranteed to bring a smile to your face. They’re crispy, cheesy, tangy, utterly addictive, and—maybe best of all—a delicious reminder that your sourdough discard has so much potential beyond the compost bin.
So the next time you open your fridge and see that jar staring back at you, don’t sigh—smile. Because now you know exactly what to do: make something wonderful, sharable, and snackable. Something that tastes like a little victory.
And when you do, I’d love to see it! Tag me @TastyChowEmily on Instagram so I can cheer on your beautiful, cheesy creations. Until then, keep treating your kitchen like the playground it is, keep feeding your starter (and your soul), and as always…
Chow down and enjoy every crumb!
With love, warmth, and a tray full of crackers,
Emily 🧡