Let’s Bake Some Magic: Cheesecake Stuffed Baked Apples
Hey there, my fellow food lover! Pull up a chair, grab a cup of coffee (or let’s be real, a glass of wine—I won’t tell!), and let’s have a little kitchen chat. Ever find yourself craving something decadently sweet, wonderfully warm, and just a little bit fancy, but the thought of making an entire cheesecake feels… overwhelming? I’ve been there more times than I can count. That’s exactly why I’m so utterly obsessed with these Cheesecake Stuffed Baked Apples.
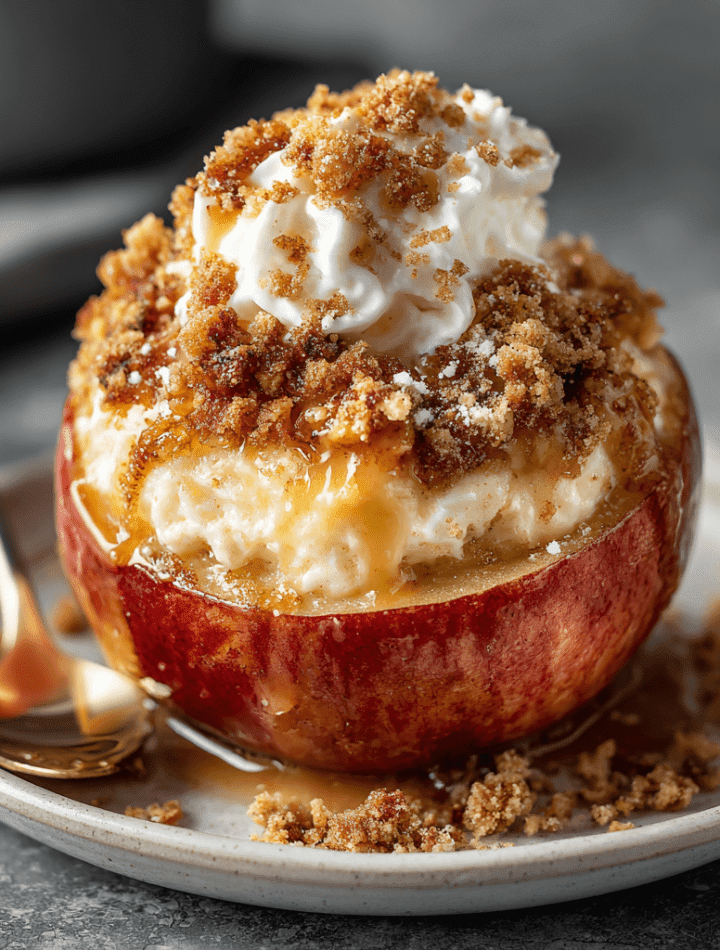
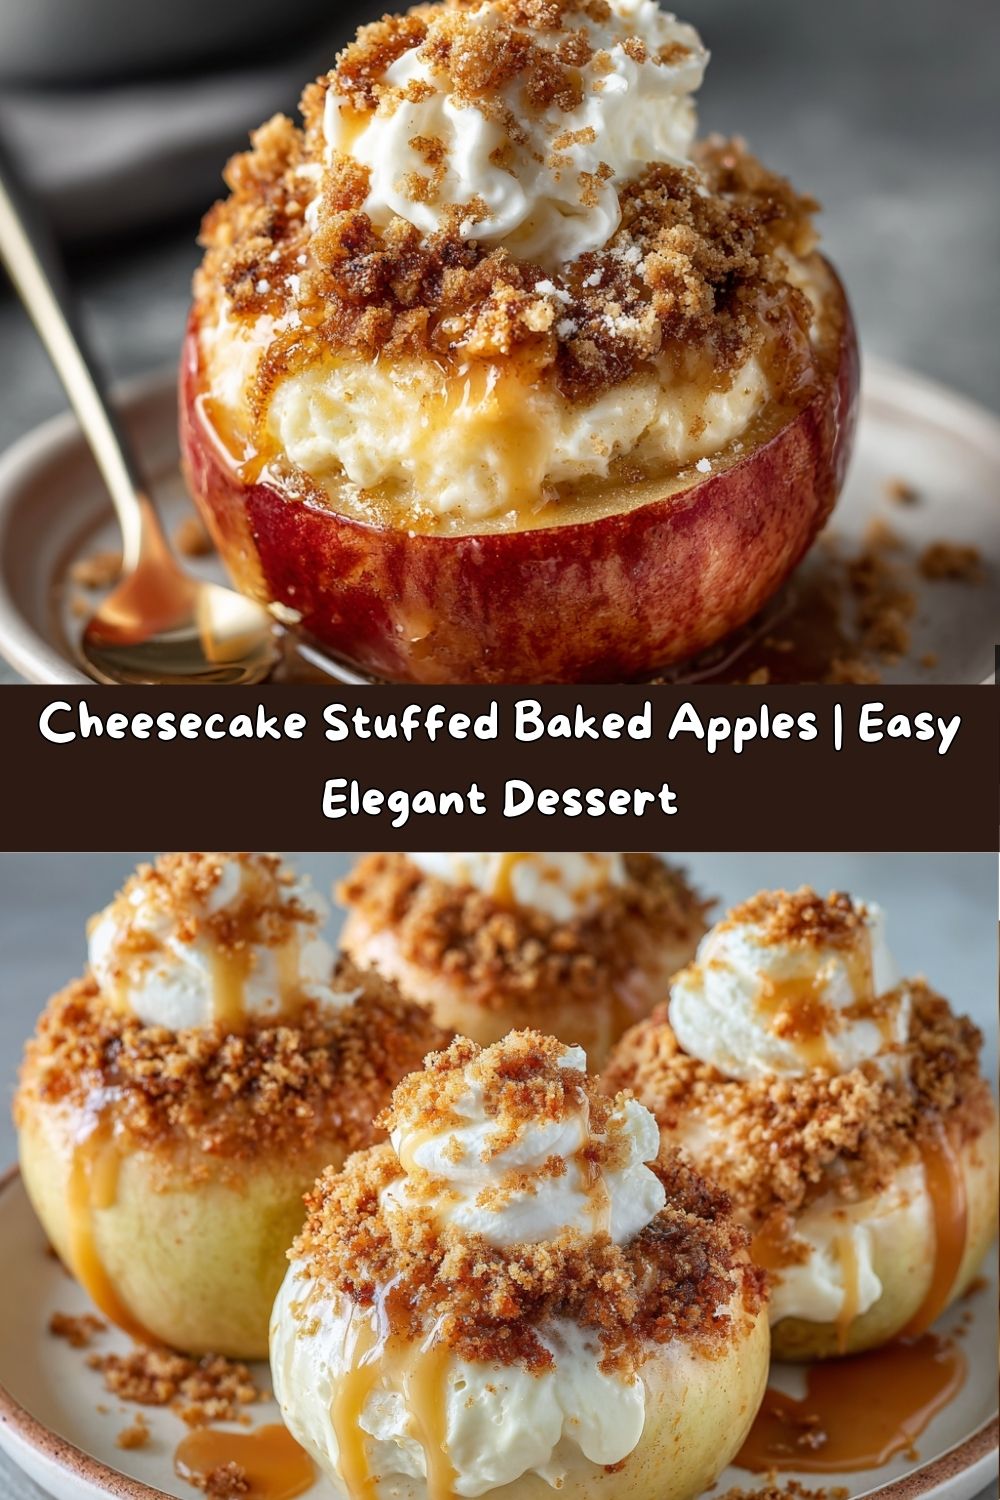
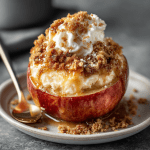
Imagine this: A crisp, juicy apple, softened and warmed in the oven, acting as the most natural, edible bowl you’ve ever seen. Now, fill that bowl with a luxuriously smooth, creamy, and tangy cheesecake filling. Top it all off with a buttery, cinnamon-kissed graham cracker crunch that bakes into a golden crown. The final result is a dessert that is cozy enough for a Tuesday night but elegant enough to serve at your holiday dinner party. It’s the best of both worlds, and I’m so excited to guide you through every single step. This isn’t just a recipe; it’s a little adventure in a baking dish, and I promise, you’re going to absolutely love it. So, preheat that oven, and let’s make something incredibly delicious together!
A Spoonful of Nostalgia: My Grandma’s Kitchen
This recipe, like so many of my favorites, starts with a memory. It takes me right back to my grandma’s kitchen, a place that always smelled like a beautiful collision of cinnamon, baking apples, and something buttery. She was the queen of simple, heartfelt desserts. She’d make baked apples that would puff up and practically melt in your mouth, filling the entire house with the most incredible aroma. It was pure comfort in a dish.
Years later, while I was deep in the throes of culinary school, I found myself desperately missing that simple comfort. But my brain was constantly in “chef mode,” thinking about deconstruction and flavor profiles. One rainy afternoon, homesick and surrounded by textbooks, I had a lightbulb moment. What if I took the soul-warming comfort of Grandma’s baked apples and stuffed them with the rich, indulgent cheesecake I was learning to perfect? The first test run was… messy. Let’s just say I learned a lot about the structural integrity of apple skins! But the taste? Oh, the taste was pure magic. It was the perfect hug of nostalgia and innovation. Every time I make these now, I think of her, and I know she’d get a kick out of her classic recipe getting a deliciously creamy upgrade.
Gathering Your Culinary Crew: The Ingredients
Here’s the beautiful part: this fancy-looking dessert requires incredibly simple, humble ingredients. Let’s break them down, because knowing your ingredients is the first step to cooking with confidence!
- 4 large, firm apples (Honeycrisp or Granny Smith work well): Think of these as your edible baking cups! You need a firm apple that can hold its shape. Honeycrisp are my go-to for a perfect sweet-tart balance, while Granny Smiths offer a fantastic tangy contrast to the sweet filling.
- 8 oz cream cheese, softened: This is the heart of our cheesecake filling. Pro Chef Tip: Let it sit on the counter for a good 30-60 minutes before you start. A soft cream cheese blends into a silky-smooth filling without any lumps. In a pinch, you could use mascarpone for an even richer, creamier texture!
- ¼ cup granulated sugar: This sweetens the deal. It’s the perfect amount to complement the tangy cream cheese without making it overly sweet.
- 1 tsp vanilla extract: The flavor MVP! Always use pure vanilla extract if you have it—it makes a world of difference, adding a warm, complex depth to the filling.
- 1 egg yolk: This is our binding agent, giving the cheesecake filling that classic structure and rich, velvety texture. Save the white for a healthy omelet tomorrow!
- ½ tsp cinnamon: The warm, cozy spice that ties the apple and cheesecake flavors together in a delicious hug.
- ¼ cup crushed graham crackers or granola: This is our crunchy, buttery topping. Graham crackers give you that classic cheesecake crust vibe. Granola is a fantastic swap for a heartier, oaty crunch!
- 1 tbsp butter, melted: We’ll toss this with our crunchy topping to help it get golden brown and delicious in the oven.
- Optional: caramel drizzle or whipped cream for topping: This is the equivalent of putting on your favorite sparkly earrings—it’s the finishing touch that takes things from great to absolutely glorious.
Let’s Get Baking: Your Step-by-Step Guide
Okay, team! Aprons on? Let’s do this. I’ll walk you through each step with all my best tips and tricks to ensure your cheesecake apples are absolutely perfect.
- Prep Your Apples: First, preheat your oven to 350°F (175°C). Grab your apples. Using a sharp paring knife or a sturdy melon baller, carefully cut out the core, creating a nice, wide cavity for all that filling. Chef’s Hack: Don’t cut all the way through the bottom! Leave about a ½-inch base at the bottom so the filling doesn’t leak out. It’s like creating a little edible cup. Place your cored apples upright in a small baking dish—something just big enough to hold them snugly.
- Make the Cheesecake Filling: In a medium bowl, add your beautifully softened cream cheese, sugar, vanilla, egg yolk, and cinnamon. Now, using a hand mixer (or a whisk and some serious arm power!), beat everything together until it is completely smooth and dreamy. Pro Tip: Scrape down the sides of the bowl a few times to make sure there are no hidden lumps of cream cheese trying to sabotage your smooth filling. You’re looking for a pale, creamy, and luscious mixture.
- Fill ‘Em Up! Grab a spoon and generously fill each apple cavity with the cheesecake mixture. Don’t be shy! Fill it right up to the top. A little spillover is totally okay—it just adds to the rustic, homemade charm.
- Create the Crunchy Topping: In a small bowl, mix your crushed graham crackers (or granola) with the melted butter. Stir it until all the crumbs are nicely moistened. Then, sprinkle this buttery goodness evenly over the top of each filled apple. This topping is going to bake into the most delicious, crispy crown.
- Bake to Perfection: Slide your beautiful creations into the preheated oven and bake for 25-30 minutes. You’ll know they’re done when the apples are tender (you can easily poke them with a knife) and the cheesecake filling is set. It might still have a very slight jiggle, but it shouldn’t be liquid. Your kitchen will smell absolutely heavenly at this point.
- The Hardest Part: Let Them Rest! Carefully remove the baking dish from the oven. I know, I know, you want to dig in immediately! But trust me on this: let them cool for at least 10-15 minutes. This allows the filling to set a bit more and, more importantly, prevents you from burning the roof of your mouth on molten-hot cheesecake. It’s worth the wait, I promise!
Plating with Pizzazz: How to Serve
Presentation is part of the fun! While these apples are stunning all on their own, a little flair goes a long way. I love to serve each warm apple in a shallow bowl. Then, it’s time for the accessories! A generous drizzle of warm caramel sauce is non-negotiable in my book—it creates rivers of gooey goodness that run down the sides. A dollop of freshly whipped cream or even a scoop of vanilla bean ice cream is the ultimate finishing touch. The contrast of the warm apple and cool, melting ice cream is a textural dream come true. For a final bit of chef’s flair, I’ll grate a little nutmeg over the top or add a tiny sprinkle of flaky sea salt to the caramel to really make the flavors pop. Light a candle, call your people to the table, and get ready for the “oohs” and “aahs.”
Mix It Up! Delicious Variations
One of the best things about this recipe is how adaptable it is! Feel free to get creative and make it your own. Here are a few of my favorite twists:
- Snickerdoodle Twist: Replace the graham cracker topping with a mixture of crushed cinnamon sugar cookies (like Biscoff or speculoos) and butter. It’s like a snickerdoodle and cheesecake had a baby inside an apple!
- Peanut Butter Cup: Swirl 2 tablespoons of creamy peanut butter into the cheesecake filling before stuffing the apples. Top with chopped peanuts and a dark chocolate drizzle after baking. You’re welcome.
- Lighter Option: Use Neufchâtel cheese (it’s lower in fat than cream cheese) and a natural sugar substitute like monk fruit or erythritol that measures 1:1 like sugar. The result is still incredibly creamy and satisfying.
- Apple Pie Vibes: Add a quarter teaspoon of nutmeg and a pinch of allspice to the cheesecake filling. For the topping, use crushed ginger snaps instead of graham crackers for a warm, spicy kick.
- Chocolate Hazelnut Dream: Swirl 2 tablespoons of Nutella into the filling and top with chopped, toasted hazelnuts for a truly decadent, European-inspired treat.
From My Kitchen to Yours: Chef’s Notes
This recipe has evolved so much since that first messy attempt in my tiny apartment kitchen! I’ve learned that a wider, shallower apple corer is your best friend for this job. I’ve also found that a mini ice cream scoop is the perfect tool for neatly distributing the filling. One of my favorite kitchen fails was the time I got overzealous and overfilled the apples so much that the cheesecake erupted like a delicious volcano in my oven. It was a mess to clean, but even that was delicious! The moral of the story? Don’t stress about perfection. Even if they’re a little messy, they will taste incredible. Cooking is about joy, not perfection. These apples are now a staple in my home, especially during fall, and I love hearing how you all make them your own!
Your Questions, Answered: FAQs & Troubleshooting
Q: Can I make these ahead of time?
A: You can absolutely prep them ahead! Assemble the apples up to the point of baking—core them, fill them, and add the topping. Cover the dish tightly with plastic wrap and refrigerate for up to 8 hours. When you’re ready, just pop them in the oven. You might need to add 3-5 extra minutes to the baking time since they’ll be going in cold.
Q: My filling leaked out everywhere! What happened?
A> Don’t worry, this is a common hiccup! It usually means the core was cut a little too deep, puncturing the bottom of the apple. Next time, just be sure to leave that solid ½-inch base at the bottom. Even if it leaks, it’s still going to taste amazing—it just becomes a baked apple cheesecake cobbler situation!
Q: Can I use a different type of apple?
A: You can, but stick with firm, baking apples. Fuji, Pink Lady, or Braeburn apples would also work well. I’d avoid softer apples like Red Delicious, as they tend to turn to mush in the oven.
Q: Is there a way to make this without an egg?
A: The egg yolk is key for setting the cheesecake filling properly. Omitting it will result in a much softer, almost sauce-like center. If you need an egg-free version, you could try using a cornstarch slurry (1 tsp cornstarch mixed with 1 tbsp of milk or water) whisked into the filling, though the texture will be slightly different.
Cheesecake Stuffed Baked Apples
- Total Time: 45 minutes
- Yield: 4 1x
Description
This dessert is cozy and elegant all at once—crisp baked apples filled with a creamy cheesecake center, topped with a sprinkle of cinnamon-sugar crunch. Warm, comforting, and just sweet enough, it’s a show-stopping treat that feels fancy without the fuss.
Ingredients
4 large firm apples (Honeycrisp or Granny Smith work well)
8 oz cream cheese, softened
¼ cup granulated sugar
1 tsp vanilla extract
1 egg yolk
½ tsp cinnamon
¼ cup crushed graham crackers or granola
1 tbsp butter, melted
Optional: caramel drizzle or whipped cream for topping
Instructions
Prep apples: Core apples, scooping out centers to make a cavity for filling. Place in a baking dish.
Make cheesecake filling: Beat cream cheese, sugar, vanilla, egg yolk, and cinnamon until smooth.
Fill apples: Spoon cheesecake mixture into each apple cavity.
Top: Mix crushed graham crackers with melted butter. Sprinkle over the filled apples.
Bake: Bake at 350°F (175°C) for 25–30 minutes until apples are tender and filling is set.
Serve: Enjoy warm, topped with caramel or whipped cream if desired.
- Prep Time: 15 minutes
- Cook Time: 30 minutes
Nutrition
- Calories: 320 / Serving
- Sugar: 28g / Serving
- Fat: 18g / Serving
- Carbohydrates: 35g / Serving
- Fiber: 4g / Serving
- Protein: 4g / Serving
Nutritional Information (Approximate, Per Serving)
While this is definitely a treat, it’s fun to know what’s in it! Here’s a rough breakdown for one cheesecake-stuffed apple (without optional caramel or whipped cream toppings). Remember, these values can vary based on the specific brands and sizes of ingredients you use.
Calories: ~320 | Protein: 4g | Fat: 18g | Carbohydrates: 35g | Fiber: 4g | Sugar: 28g
This dessert provides a source of energy and a small amount of fiber from the apple. The fat comes primarily from the cream cheese, which gives it that rich, satisfying quality that helps you feel content after just one. It’s a perfectly portioned indulgence!
Final Thoughts
Well, my friend, we’ve reached the end of our baking journey together. I hope you feel inspired, empowered, and maybe a little bit hungry! These Cheesecake Stuffed Baked Apples are more than just a recipe; they’re a reminder that the most joyful desserts often come from simple ingredients and a little bit of love. They’re a testament to the fact that you don’t need fancy equipment or complicated techniques to create something truly special and memorable in the kitchen.
So, whether you’re baking these for a quiet night in, impressing your dinner guests, or simply treating yourself after a long day, I hope they bring you as much happiness as they’ve brought me and my family. Thank you for letting me share my kitchen stories with you. Now, go forth and bake! And don’t forget to tag me on social @TastyChow if you make them—I love seeing your creations!
With a full heart and a happy belly,
Emily