Cheesy Garlic Chicken Wraps: Your New Go-To for Melty, Savory Bliss
Hey there, fellow food lover! 👋 Let me paint you a picture: it’s one of those nights. You’re tired, you’re hungry, and the takeout menus are starting to look like a boring stack of recycled ideas. Your stomach is growling for something supremely comforting, something that feels like a treat, but your brain is pleading for something you can throw together without a fuss. Sound familiar? Friend, you are officially in the right place. Welcome to the solution to your weeknight woes and your lunchbox dreams: my unbelievably delicious, totally crave-worthy Cheesy Garlic Chicken Wraps.
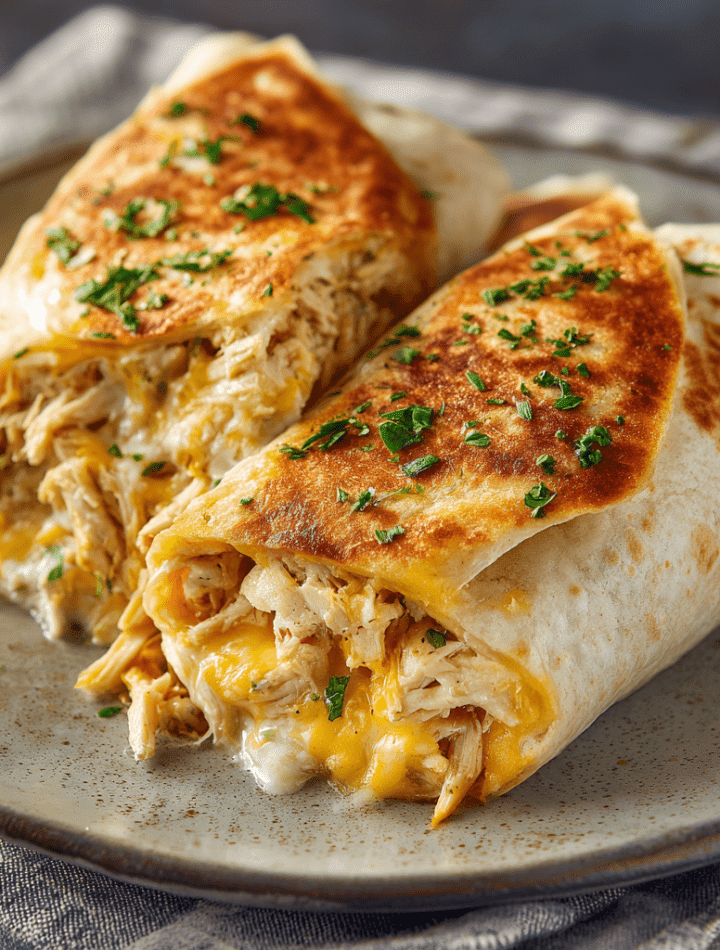
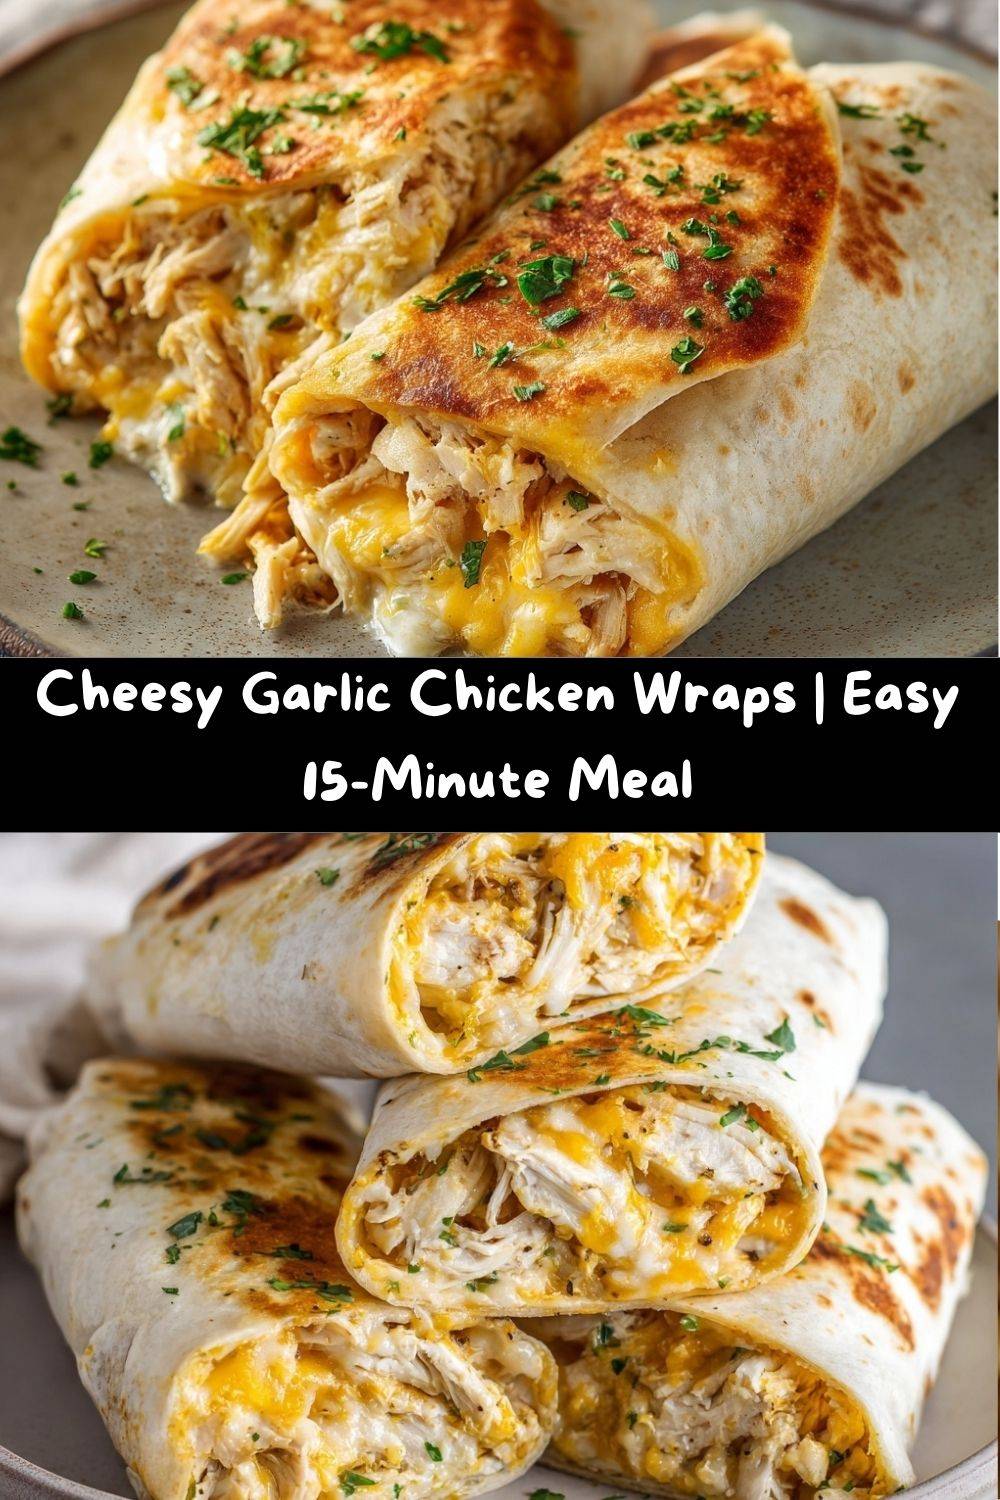
Imagine this: tender, juicy shredded chicken hugged by a lusciously creamy, garlicky cheese mixture, all bundled up in a warm, toasty tortilla that gets gloriously golden and crisp in a hot skillet. With every bite, you get that irresistible pull of melted mozzarella, the savory punch of garlic, and the satisfaction of a meal that feels far fancier than the 15 minutes it took to make. This isn’t just a recipe; it’s a kitchen hack for instant happiness. It’s the kind of food that makes everyone at the table (or on the couch, no judgment here!) go quiet for a second, then immediately ask, “Can you make this again tomorrow?” So, tie on that apron, grab your favorite skillet, and let’s turn a few simple ingredients into your new favorite food obsession. Trust me, your future self, scrambling for a quick and amazing meal, will thank you.
The Story Behind the Wrap: A Happy Accident
This recipe was born from a beautiful, chaotic kitchen “oops” that turned into a “wow.” Picture my culinary school days, living in a tiny apartment with an even tinier kitchen. My roommate and I were notorious for our “Fridge Cleanout Fridays,” where we’d throw whatever leftovers we had into a tortilla and hope for the best. One Friday, we had some rotisserie chicken, a sad-looking nub of cream cheese, and a bag of shredded mozzarella that was begging to be used. I was also roasting garlic for another project, and the smell was intoxicating. On a whim, I mashed a clove into the cream cheese, mixed it all together, and created a filling so good we both stopped mid-bite to stare at each other.
It was a messy, cheesy, glorious revelation. That humble “cleanout wrap” evolved over years—through family picnics, last-minute dinner parties, and my own busy weeknights—into this perfected, foolproof recipe. It reminds me that the best dishes often come from playing with what you have and listening to that little voice that says, “Hey, what if we added some garlic?” It’s a tribute to improvisation, comfort, and the pure joy of melted cheese.
Gathering Your Flavor Team: The Ingredients
Here’s your shopping list for deliciousness! I’ve added my little chef insights and swap-outs so you can make this your own.
- 2 cups cooked, shredded chicken: The star of the show! I love using the meat from a store-bought rotisserie chicken for maximum flavor and ease (a true busy-night savior). Leftover grilled or baked chicken works perfectly, or you can quickly poach two chicken breasts. Chef’s Insight: For extra juicy chicken, shred it while it’s still warm and let it soak up all the cheesy goodness.
- 2 tbsp cream cheese, softened: This is our secret weapon for a luxuriously creamy, cohesive filling that doesn’t dry out. It adds a subtle tang and richness that binds everything together beautifully. Substitution Tip: For a lighter version, you can use an equal amount of plain Greek yogurt. The tang will still be there, just with a bit more protein!
- 1 cup shredded mozzarella or cheddar cheese: Melty, gooey, cheesy perfection. I prefer mozzarella for its epic stretch factor, but sharp cheddar brings a bolder flavor. Why not use a blend? Chef’s Insight: Always shred your own cheese if you have an extra minute! Pre-shredded cheese is coated to prevent clumping, which can make it less melty.
- 1–2 cloves garlic, minced: Optional? Ha! I say highly recommended. This is what gives the wrap its addictive, savory soul. Fresh is best here. Substitution Tip: In a real pinch, ¼ teaspoon of garlic powder will work, but the flavor pop from fresh minced garlic is unbeatable.
- Salt & black pepper to taste: The essential flavor enhancers. Don’t be shy! Taste your filling before you wrap it up.
- 2–3 large flour tortillas: The cozy blanket for our filling. Burrito-sized tortillas are ideal for easy rolling. Chef’s Insight: Look for tortillas without too many gums or preservatives; they toast up nicer and have a better texture.
- Butter or oil for toasting: A light brush is all you need to achieve that gorgeous, crispy, golden-brown exterior. I’m team butter for flavor, but avocado or olive oil works great too.
Let’s Get Wrapping: Your Step-by-Step Guide
Ready to build some magic? Follow these simple steps, and I’ll walk you through every tip and trick I’ve learned along the way.
- Mix the Filling: In a medium bowl, combine the shredded chicken, softened cream cheese, shredded cheese, minced garlic, salt, and pepper. Get in there with a fork or your hands (the best tools!) and mix until every bit of chicken is coated in that creamy, cheesy, garlicky mixture. Chef’s Hack: If your cream cheese is still cold, zap it in the microwave for 10-15 seconds to make mixing a breeze.
- Warm the Tortillas: This is a CRUCIAL step for crack-free wrapping! Lay your tortillas on a plate and microwave them for 15-20 seconds, just until they are warm and pliable. You can also warm them one by one in a dry skillet for about 10 seconds per side. A warm tortilla is a flexible, forgiving tortilla.
- Fill & Roll: Spoon a generous amount of the chicken mixture onto the lower third of a warmed tortilla. Shape it into a rough log, leaving about an inch border on the sides. Now, let’s roll: fold the bottom edge up and over the filling, tucking it in snugly. Then, fold in the left and right sides. Continue rolling tightly away from you until you have a neat, sealed package. Repeat with remaining tortillas and filling. Chef’s Tip: Don’t overstuff! It’s tempting, but a slightly less-full wrap is much easier to seal and won’t burst in the pan.
- Toast to Perfection: Heat a non-stick or cast-iron skillet over medium heat. Lightly brush the surface with butter or oil. Carefully place your wraps in the skillet, seam-side down first. This helps seal them shut. Toast for 2-3 minutes per side, or until each side is beautifully golden brown and you can hear the cheese sizzling inside. Chef’s Hack: Press down gently with your spatula while toasting. This creates more surface contact for an even, crispy crust.
- Slice & Serve: Transfer your gorgeous, golden wraps to a cutting board. Let them rest for just a minute (this helps the filling set slightly), then use a sharp serrated knife to slice them in half on a diagonal—it just looks prettier! Serve immediately while the cheese is at its peak meltiness.
How to Serve These Melty Masterpieces
These wraps are fantastic all on their own, standing proudly as a one-handed meal. But if you want to turn them into a full feast, here are some of my favorite ways to plate them up:
For a casual dinner, I love serving them with a big, crisp side salad tossed in a light vinaigrette to cut through the richness. The cool crunch is the perfect contrast to the warm, melty wrap. If you’re feeding a crowd (or just feeling extra hungry), a side of crispy oven fries, sweet potato wedges, or a simple cup of tomato soup for dipping creates the ultimate comfort food plate. For lunch, pack a whole wrap (unsliced travels better) with some carrot sticks, grapes, and a little container of ranch or chipotle mayo for dipping. No matter how you serve them, the goal is a happy belly and a smile!
Mix It Up! Delicious Recipe Twists
Once you’ve mastered the classic, the fun really begins! Here are a few of my favorite ways to remix this versatile recipe:
- Buffalo Blue Cheese: Swap the mozzarella for crumbled blue cheese and add 2-3 tablespoons of buffalo sauce to the chicken mixture. Serve with extra buffalo sauce and celery sticks on the side. Game day perfection!
- Pesto & Sun-Dried Tomato: Omit the garlic and mix in 2 tablespoons of basil pesto and ¼ cup of chopped sun-dried tomatoes (oil-packed, drained) into the filling. The flavors are incredibly vibrant and fresh.
- BBQ Ranch: Use shredded cheddar. Add 2 tablespoons of your favorite BBQ sauce and 1 tablespoon of dry ranch seasoning mix to the filling. Top with extra BBQ sauce after toasting.
- Spinach & Artichoke (Vegetarian Option): Replace the chicken with one (14 oz) can of artichoke hearts (drained and chopped) and a large handful of fresh spinach, finely chopped. You’ve just made a warm spinach-artichoke dip wrap!
- “Everything Bagel” Style: Add 1 tablespoon of everything bagel seasoning to the filling. After toasting, brush the wraps with a little more cream cheese and sprinkle with extra seasoning before slicing.
Chef Emily’s Notes From My Kitchen to Yours
This recipe has been my trusty friend for years, and it’s evolved with me. I’ve made it for my niece’s sleepovers (a total hit), packed it for road trips, and even served a fancy sliced version as an appetizer at a casual get-together. The biggest lesson? Don’t stress about the roll! If your first one is a little loose or funky-looking, I promise it will still taste incredible. The skillet toast covers a multitude of sins. I also love making a double batch of the filling and storing it in the fridge for up to 3 days. That way, when hunger strikes, I’m literally 5 minutes away from a fresh, hot wrap. It’s my favorite kind of kitchen magic—simple, reliable, and always delicious.
FAQs & Troubleshooting: Your Questions, Answered
Q: My wrap keeps bursting open in the pan! What am I doing wrong?
A: This usually means one of two things: you’re overstuffing, or your tortilla wasn’t warm enough. Use a little less filling and make sure to warm those tortillas until they are very flexible. Also, always start toasting with the seam-side down to seal it first.
Q: Can I make these ahead of time?
A> You can absolutely prepare the filling 2-3 days ahead and store it in an airtight container in the fridge. I don’t recommend assembling and refrigerating the raw wraps, as the tortillas can get soggy. For best results, assemble and cook them fresh when you’re ready to eat.
Q: How do I reheat leftovers?
A> To maintain the crispy exterior, reheat in an air fryer or toaster oven at 375°F for 5-7 minutes. The microwave will work in a pinch but will make the tortilla soft.
Q: Can I use corn tortillas?
A> Corn tortillas are smaller and less pliable. If you want a gluten-free option, I’d recommend using larger, specific “wrap-style” gluten-free tortillas designed for rolling.
Cheesy Garlic Chicken Wraps : Melty, Savory, and Totally Crave-Worthy
- Total Time: 15 minutes
- Yield: 2–3 wraps 1x
Description
These Cheesy Garlic Chicken Wraps are the perfect solution for quick lunches or comforting weeknight dinners. Loaded with tender shredded chicken, creamy garlic-infused cheese, and wrapped in a toasty tortilla, they’re melty, flavorful, and ready in minutes.
Ingredients
2 cups cooked, shredded chicken
2 tbsp cream cheese
1 cup shredded mozzarella or cheddar cheese
1–2 cloves garlic, minced (optional but recommended)
Salt & black pepper to taste
2–3 large flour tortillas
Butter or oil for toasting
Instructions
In a bowl, mix shredded chicken, cream cheese, shredded cheese, garlic, salt, and pepper until combined.
Warm tortillas slightly to make them flexible.
Spoon the filling into the center of each tortilla and roll tightly into a wrap.
Heat a skillet over medium heat and brush lightly with butter or oil.
Toast wraps for 2–3 minutes per side until golden and cheese is melted.
- Prep Time: 10 minutes
- Cook Time: 6 minutes
Nutrition
- Calories: 380 / Wrap
- Fat: 22g / Wrap
- Carbohydrates: 18g / Wrap
- Fiber: 1g / Wrap
- Protein: 28g / Wrap
Nutritional Information*
Here’s a general breakdown per serving (based on one wrap using the ingredients listed). Remember, this is an estimate and can vary based on specific brands and any modifications you make!
- Calories: ~380
- Protein: 28g
- Carbohydrates: 18g
- Fat: 22g
- Fiber: 1g
*This information is provided as a courtesy and is an estimate based on online nutrition calculators. For precise dietary needs, please calculate using your specific ingredients.
Final Thoughts: Go Forth and Wrap!
And there you have it, my foodie friend! Everything you need to conquer those hunger pangs with something truly special. These Cheesy Garlic Chicken Wraps are more than just a quick meal; they’re a reminder that cooking doesn’t have to be complicated to be soul-satisfyingly good. They’re about embracing simplicity, playing with flavors, and creating a little moment of joy in your day. I hope this recipe finds its way into your regular rotation and becomes a trusted friend in your kitchen, just like it is in mine. Now, I’d love to hear from you! Did you try the classic version or one of the fun twists? Snap a pic and tag me @TastyChow so I can see your delicious creation. Until next time, keep your spatula handy and your heart hungry for more flavor!
With love and a fully stocked cheese drawer,
Emily