Cherry Vanilla Butter Buttons – Soft Butter Cookies with Maraschino Cherries
Hey there, friend! Pull up a stool and grab a mixing bowl. Today, we’re making one of my all-time favorite, soul-warming cookies: Cherry Vanilla Butter Buttons. If you’ve ever wondered what a cloud might taste like if it were buttery, vanilla-scented, and topped with a jewel-like cherry, you’re about to find your new baking obsession.
These aren’t just any cookies; they’re little bites of pure, unadulterated joy. They’re the stars of every holiday cookie tray I’ve ever made, but honestly, their cheery (pun totally intended) disposition is welcome any day of the year. With a melt-in-your-mouth texture and that sweet, festive pop of maraschino cherry, they’re the cookie that makes people’s eyes light up. The best part? They’re deceptively simple. You don’t need any fancy equipment or hard-to-find ingredients. This recipe is all about celebrating the classics and creating something beautiful and delicious with your own two hands. So, tie on that apron—the messy one is always the best—and let’s fill your kitchen with the incredible aroma of butter and vanilla. Get ready to fall in love with baking all over again.
My Grandma’s Cookie Jar Magic
Every time I bake these Cherry Vanilla Butter Buttons, I’m instantly transported back to my grandma’s linoleum-floored kitchen. Her cookie jar wasn’t a fancy ceramic pig or a sleek modern thing; it was a simple, slightly chipped Tupperware container that lived on the counter. But to me, it was a treasure chest. I’d sneak in, lift the lid, and my heart would do a little happy dance if I saw those familiar, pale golden cookies with their bright red cherry centers winking up at me.
She called them her “Button Cookies,” and she’d always pretend she didn’t see me taking two (or three). She taught me that the secret wasn’t just in the recipe, but in the gentle press of your thumb to make the perfect little nest for the cherry. It was my first real “baking lesson”—that food is love, made tangible. It’s that feeling of warmth, nostalgia, and simple, homemade goodness that I’ve tried to bottle up in this very recipe. Baking them now, I can still hear her saying, “Don’t overwork the dough, Emily-girl,” and I smile. Some recipes are just heirlooms for the heart.
Gathering Your Cookie Crew: The Ingredients
This is a simple, straightforward list, but each ingredient plays a starring role. Let’s break it down so you understand the “why” behind the “what.”
- 2 cups (4 sticks) unsalted butter, softened: This is the soul of our Butter Button! Using unsalted butter lets you control the salt level. “Softened” is key here—it should be pliable but not melted. A quick test? You should be able to press your thumb into it easily and leave an indent. Pro tip: If you forget to take it out of the fridge, cut it into tablespoons and let it sit for 15-20 minutes.
- 1 cup granulated sugar: We’re keeping the sweetness level classic and not overpowering. The sugar doesn’t just sweeten; it helps create a tender crumb by creaming beautifully with the butter.
- 2 large eggs: Our binding agents! They bring the dough together and add richness and structure. Make sure they’re at room temperature to blend seamlessly into the creamed butter and sugar.
- 1 tablespoon vanilla extract: Don’t be shy! This generous tablespoon gives that warm, aromatic vanilla flavor that pairs so magically with the cherry. For a next-level twist, you could use vanilla bean paste to get those lovely little specks.
- 4 ½ cups all-purpose flour: The backbone of our cookie. I always fluff my flour with a spoon before measuring it, then level it off with a knife. This prevents you from accidentally packing in too much flour and ending up with dry cookies.
- ½ teaspoon salt: The flavor enhancer! Salt is the secret weapon that makes the sweet, buttery flavors pop. It balances everything out perfectly.
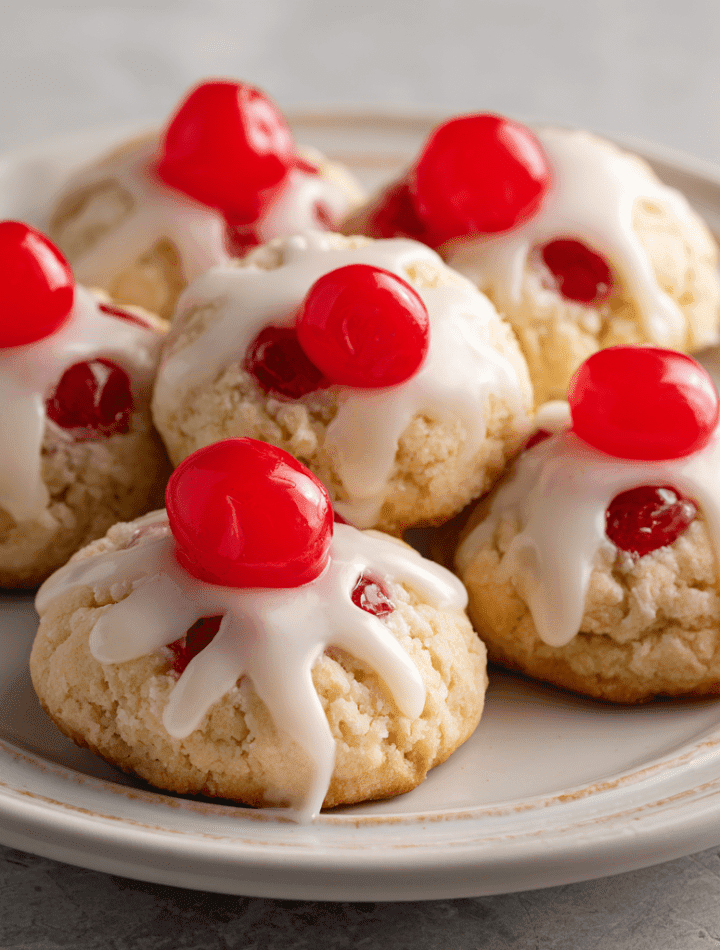
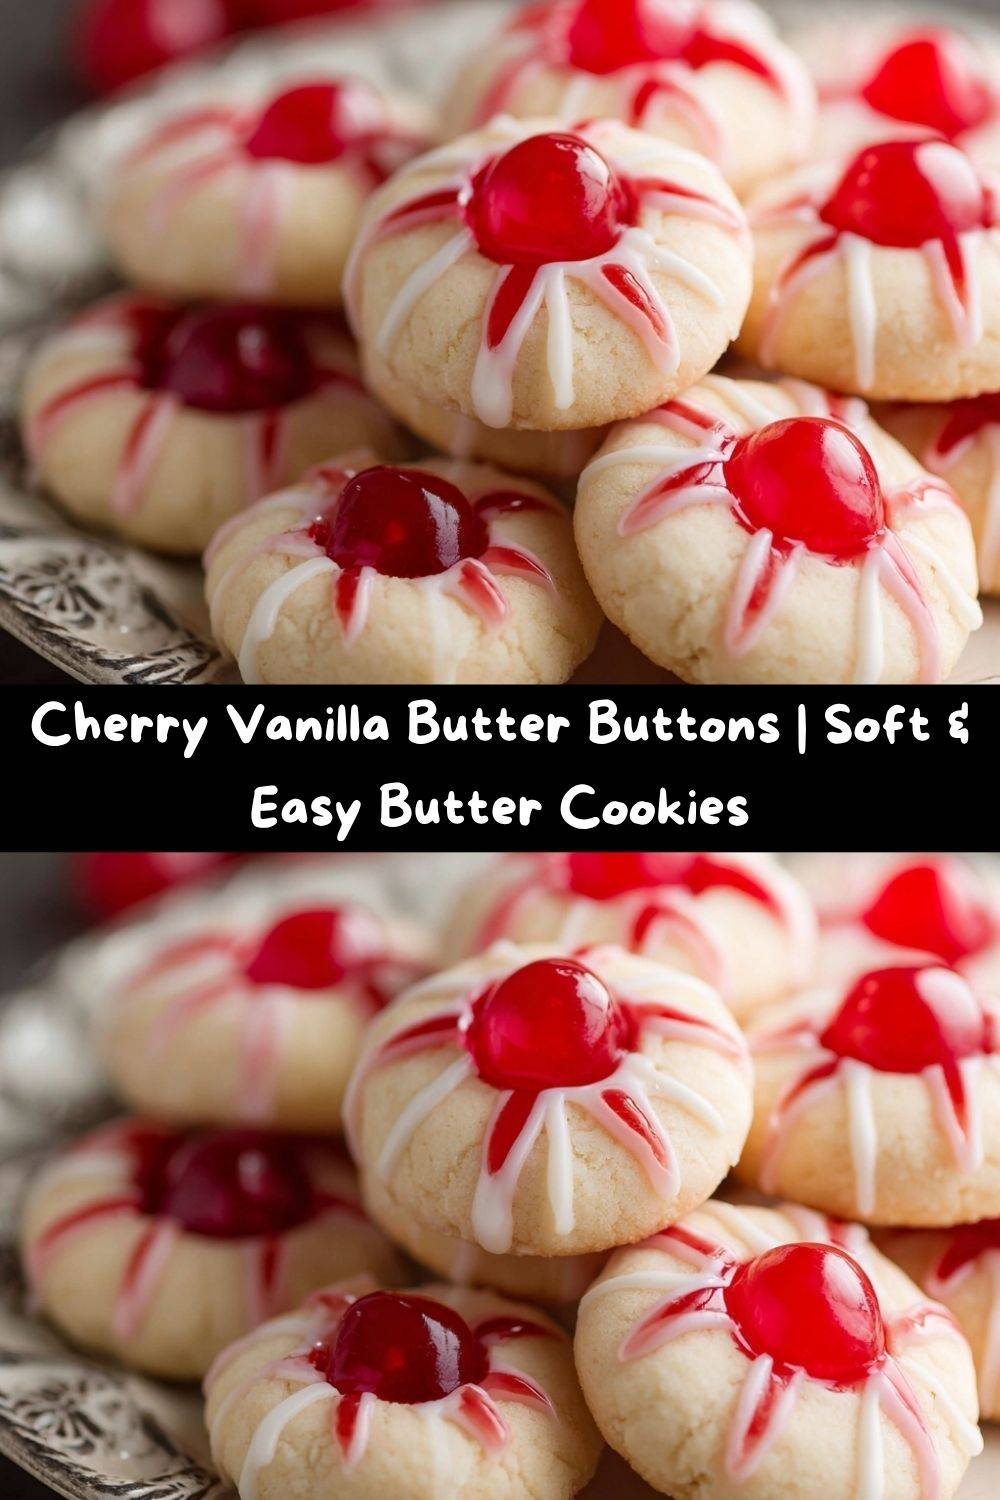
- 2 small jars (10 oz each) maraschino cherries, halved and WELL drained: The showstoppers! I’m shouting “WELL DRAINED” because any extra liquid can seep into your cookies and make them soggy. After draining, I like to pat them dry gently with a paper towel. This little step makes a world of difference.
Let’s Make Some Magic: Step-by-Step Instructions
Ready? Let’s turn these simple ingredients into cookie perfection. Follow these steps, and you’ll be a Butter Button pro in no time.
- Preheat and Prep: First things first, get that oven preheating to a cozy 350°F (175°C). You don’t need to grease your baking sheets—the generous amount of butter in the dough takes care of that for us! This helps the cookies keep their perfect round shape.
- The Creaming Dream: In a large mixing bowl, beat the softened butter and sugar together. Now, don’t rush this! We’re looking for a light, pale, and fluffy mixture. This usually takes a good 2-3 minutes with a stand or hand mixer. This step is crucial because it incorporates air into the dough, giving our cookies that lovely, tender texture.
- Incorporate the Wet Team: Beat in that glorious tablespoon of vanilla extract. Then, add the eggs one at a time, mixing well after each addition until each egg is fully embraced by the butter-sugar mixture. Scrape down the sides of the bowl to make sure everything is homogenous.
- Bring in the Dry Crew: Whisk your flour and salt together in a separate bowl. This ensures the salt is evenly distributed. Now, with your mixer on low speed, gradually add the flour mixture about one cup at a time. Mix just until the flour disappears and a soft dough forms. Chef’s Hack: The second you can’t see any more dry flour, STOP MIXING. Overmixing at this stage can lead to tough cookies, and we want melt-in-your-mouth tender.
- Scoop and Roll: This dough is a dream to work with. Scoop up about a tablespoon of dough and roll it into a smooth, neat ball between your palms. Place them about 1-2 inches apart on your ungreased baking sheets. They don’t spread a huge amount, but they do need a little room to breathe.
- The Signature “Button” Press: Here’s the fun part! Take your finger (I like to use my pinky for a smaller, more “button-like” indentation) and gently press straight down into the center of each dough ball. You’re creating a little well for our cherry to sit in. Don’t press all the way to the baking sheet—just a nice, deep dimple.
- Top with a Cherry: Take your beautifully drained and patted-dry cherry halves and nestle one, cut-side up, into each dimple. Gently press it in just so it feels secure. They look so cheerful already, don’t they?
- Bake to Perfection: Slide those trays into your preheated oven and bake for about 10 minutes. We’re looking for them to be “set” but not browned. The edges might just barely be turning a faint golden color, but the tops should still be pale. This is the secret to their soft texture.
- The All-Important Cool Down: When they come out of the oven, let the cookies rest on the hot baking sheet for 5 minutes. This allows them to set up properly so they don’t fall apart when you move them. Then, carefully transfer them to a wire rack to cool completely.
- The Icing Drizzle (Optional, but oh-so-pretty!): Once the cookies are completely cool, you can whisk together 1 cup of powdered sugar with about 1-2 tablespoons of milk or cherry juice and ½ teaspoon of vanilla or almond extract. Drizzle this simple icing over the cookies with a spoon or piping bag for an extra festive, professional touch.
Sharing the Joy: How to Serve Your Butter Buttons
Now for the best part: serving them up! These cookies are incredibly versatile. For a classic holiday cookie tray, pile them high on a beautiful vintage platter alongside other favorites like shortbread and gingerbread men. The red and white color scheme is just so festive. For a simple afternoon pick-me-up with coffee or tea, stack them on a cute cake stand right in the middle of your kitchen island—they’ll disappear faster than you can say “seconds, please!” I love gifting these, too. Tuck a dozen into a cellophane bag tied with a pretty ribbon, or layer them in a gift tin with parchment paper between the layers. They’re a homemade gift straight from the heart that says, “I think you’re wonderful.”
Get Creative! Fun Recipe Variations
Once you’ve mastered the classic, feel free to play with the formula! Here are a few of my favorite twists:
- Almond Joy: Swap the vanilla extract for almond extract (start with 1-2 teaspoons, as it’s more potent). The almond-cherry combo is a match made in heaven.
- Chocolate Drizzle Delight: Skip the vanilla icing and instead, melt some semi-sweet or white chocolate chips. Drizzle it artfully over the cooled cookies for a rich, decadent finish.
- Thumbprint Style: Before baking, make a deeper well and fill it with a small spoonful of your favorite jam—raspberry or apricot are fantastic—instead of a cherry.
- Lemon Zest Lift: Add the zest of one lemon to the dough along with the vanilla. The bright, citrusy note cuts through the richness beautifully and pairs wonderfully with the cherry.
- Gluten-Free Friendly: You can easily make these with a 1:1 gluten-free all-purpose flour blend. I’ve had great success with this swap, and the texture remains wonderfully soft.
From My Kitchen to Yours: Chef’s Notes
Over the years, this recipe has become a true workhorse in my kitchen. I’ve learned a few things through trial and error (and a few batches that spread a little too much!). The biggest lesson? Patience with the butter. If the dough ever feels too soft or sticky when you’re rolling, just pop the whole bowl into the fridge for 20-30 minutes. Chilled dough is much easier to handle. I also used to be impatient and drizzle the icing on warm cookies, creating a melty, sticky mess. Learn from my mistake—let them cool completely! This recipe makes a big batch, and that’s on purpose. They freeze like a dream, so you can have a little taste of holiday magic anytime you want.
Your Questions, Answered: FAQs & Troubleshooting
Q: My cookies spread too much and lost their shape. What happened?
A: This is almost always a butter issue! Either your butter was too soft/melted, or your oven wasn’t fully preheated. Make sure your butter is just softened, and always give your oven plenty of time to come to the right temperature.
Q: Can I make the dough ahead of time?
A: Absolutely! You can wrap the dough tightly in plastic wrap and refrigerate it for up to 2 days. Let it sit at room temperature for 15-20 minutes before rolling so it’s easier to handle.
Q: My cookies are a little dry. How can I prevent that?
A: The most common culprit is over-measuring the flour. Remember to fluff, spoon, and level! Also, be careful not to over-bake them. The 10-minute mark is a guide—if your oven runs hot, they might be done in 9.
Q: Can I use fresh cherries instead?
A: I don’t recommend it for this specific recipe. Maraschino cherries have a unique sweet flavor and a firm texture that holds up during baking. Fresh cherries contain too much water and will make the cookies soggy.
A Little Note on Nutrition
I’m all about balance, and that includes enjoying homemade treats without guilt! While these are certainly a dessert, it’s helpful to know what you’re enjoying. Please note, this is an estimate per cookie (without icing) based on the ingredients used. Your specific nutrition may vary depending on brands and exact measurements.
Estimated Per Cookie: 85 calories | 5g fat | 9g carbs | 1g protein
These are rich, buttery cookies, so a little goes a long way in satisfying a sweet craving. The joy and connection that comes from baking and sharing them? Well, that’s priceless and 100% good for the soul.
Your New Go-To Cookie Recipe
And there you have it! My heart-on-a-platter recipe for Cherry Vanilla Butter Buttons. This is more than just a list of ingredients and steps; it’s an invitation to create a little moment of sweetness in your day. I hope these cookies bring as much laughter and happiness to your kitchen as they have to mine and my grandma’s all those years ago. Remember, baking is an act of love, so don’t stress over perfection. Have fun with it! Now, I’d love to hear from you.