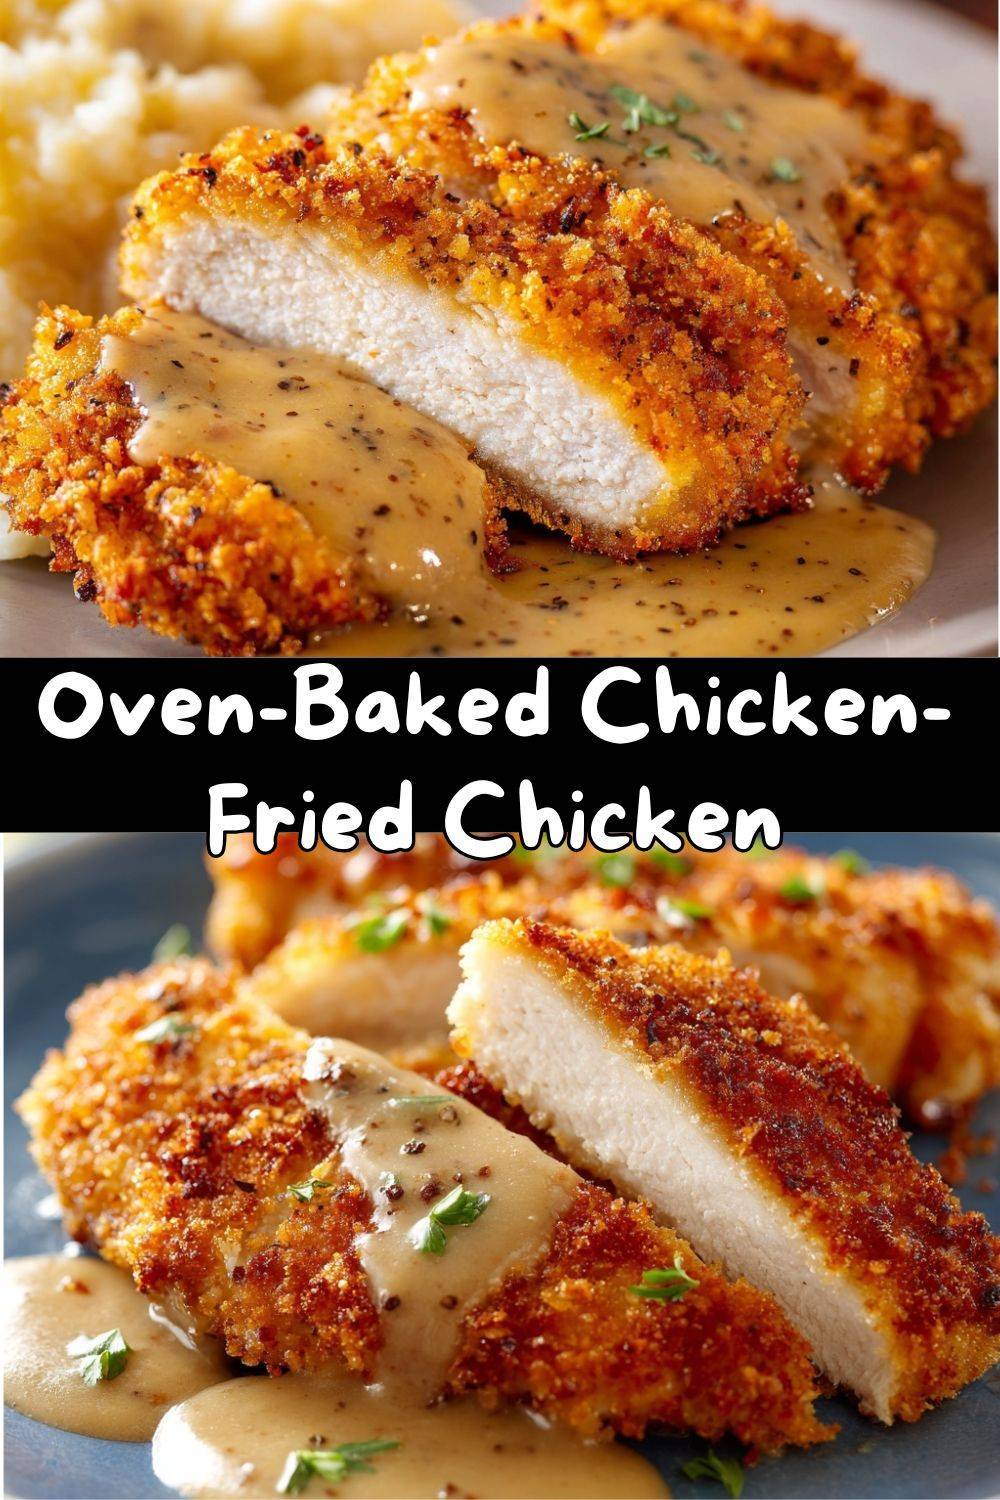
Chicken-Fried Chicken Breast (Oven Style) – A Southern Classic, Lightened Up
Hey there, friends! Emily here from Tasty Chow. Let’s talk about a beautiful, beautiful contradiction: that magical moment when something crispy and indulgent also feels a little bit… sensible. I know, I know. “Sensible” isn’t usually the first word that comes to mind when you dream of Southern comfort food. You think of bubbling cast iron skillets, golden crusts, and that rich, peppery gravy that hugs your soul. Am I right?
For years, I thought you needed a vat of oil and a prayer to achieve that perfect chicken-fried chicken crunch. But then, life happened. Weeknight dinners needed to get on the table, and my favorite jeans wanted to keep fitting. So, I got curious. Could I capture that iconic, crispy, soul-warming essence of a Southern diner classic without the deep fryer? Friends, the answer is a resounding, fist-pumping YES.
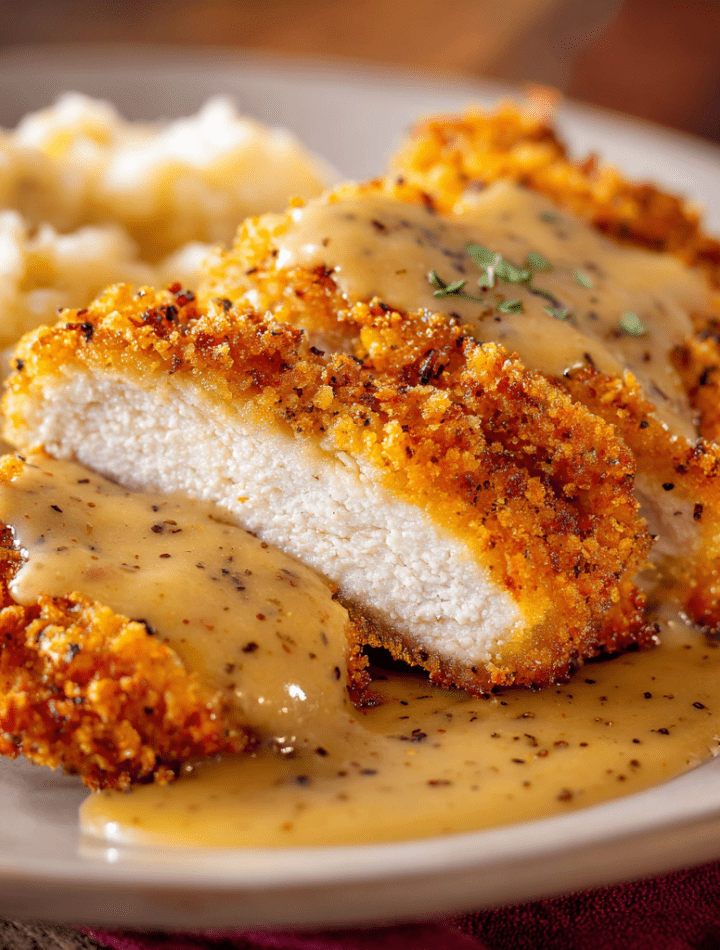
This Oven-Baked Chicken-Fried Chicken is my love letter to flavor, crunch, and smart cooking. We’re taking juicy chicken breasts, giving them a serious flavor spa treatment, coating them in a seasoned, crackly crust, and letting the oven work its magic. The result? Everything you crave—the peppery bite, the satisfying shatter of the breading, the tender meat inside—all with less fuss and fewer calories. And because we’re not barbarians, we’re absolutely whipping up a quick, creamy pepper gravy to pour over the top. It’s comfort food, reimagined for the way we cook today. Let’s make your kitchen smell incredible.
The Sunday Scramble & A Grandma’s Whisper
This recipe has its roots in my grandma’s kitchen, but it truly came to life in my first apartment, during what I fondly call “The Great Smoke Alarm Symphony of 2018.” I was determined to master her chicken-fried steak. I had the oil, the cast iron, the courage. What I didn’t have was a proper ventilation system. Let’s just say the meal was delicious, but my apartment smelled like a county fair for three days.
I called my grandma, slightly defeated, and she just laughed that warm, knowing laugh of hers. “Sugar,” she said, “the goal is the crust and the memory, not the method. Your kitchen, your rules.” That permission was everything. I started playing with oven temperatures, adding panko for extra crunch, and using a trusty wire rack to get air circulating all around the chicken. The first successful batch came out of the oven, crispy as a fall leaf, and I did a little happy dance right there on the linoleum. It wasn’t her exact recipe, but it carried the same spirit: generous seasoning, a love for texture, and the promise of a meal that makes everyone gather ’round. Now, it’s my go-to for a “wow” dinner that doesn’t create a cleanup nightmare.
Gathering Your Flavor Toolkit
Here’s what you’ll need to build layers of flavor and that perfect crunch. Don’t just dump and mix—think of each ingredient as a little building block for happiness!
For the Chicken:
- 4 boneless, skinless chicken breasts: The main event! Look for similarly sized ones so they cook evenly. Chef’s Insight: If yours are huge, consider cutting them in half horizontally (butterflying) to make thinner cutlets. It means faster cooking and even more crust-to-chicken ratio (a win!).
- 1 cup buttermilk: Our tenderizing flavor bath. The slight acidity breaks down proteins for super-juicy meat. Easy Sub: No buttermilk? Mix 1 cup milk with 1 tablespoon lemon juice or white vinegar. Let it sit for 5 minutes before using.
- 1 cup all-purpose flour: The base of our crispy coating. It creates that classic “fried” texture when baked.
- 1/2 cup panko breadcrumbs: The secret weapon for insane crunch! Panko’s flaky, airy texture gets extra crisp in the oven where traditional breadcrumbs might just brown.
- 1 teaspoon paprika: For warmth, color, and that subtle sweet-pepper vibe. Smoked paprika is a fun twist here!
- 1/2 teaspoon garlic powder & 1/2 teaspoon onion powder: The dynamic duo of dried seasonings. They distribute flavor evenly throughout the breading so every bite is packed with taste.
- Salt and black pepper, to taste: Do not be shy, especially with the pepper! This is “chicken-fried” chicken. Pepper is a co-star, not a background actor.
- Olive oil spray or melted butter, for coating: This is what makes our breading brown and crisp beautifully in the oven. Butter gives amazing flavor; oil spray is super convenient. Your choice!
For the Pepper Gravy (Do It!):
- 2 tablespoons butter: The rich foundation for our gravy.
- 2 tablespoons flour: Our thickener. Cook it with the butter to make a “roux” and get rid of that raw flour taste.
- 1 1/4 cups milk: Whole milk makes it luxuriously creamy, but 2% works just fine. Warm it up a tad before adding for a smoother gravy.
- 1/2 teaspoon (or more!) black pepper: This is PEPPER gravy. Start with 1/2 tsp and add more until it makes you smile. Freshly cracked is ideal.
- Salt, to taste: Brings all the gravy flavors together.
Let’s Build Some Crunch: Your Step-by-Step Roadmap
Follow these steps, and you’ll be a pro. I’m tossing in all my best kitchen hacks along the way!
- Prep Your Station & Chicken. Preheat your oven to a hot 425°F (220°C). This high heat is key for mimicking that fried crispness! Line a baking sheet with parchment paper (hello, easy cleanup) and set a wire rack on top. Spray the rack lightly with oil. Now, take your chicken breasts. If they’re unevenly thick, place them between two sheets of plastic wrap and gently pound them to an even 1/2-inch thickness using a rolling pin, skillet, or meat mallet. This ensures they cook quickly and evenly, without drying out.
- The Buttermilk Soak (Flavor Infusion!). Place the pounded chicken in a shallow dish and pour the buttermilk over it. Make sure each piece gets a good dunk. Let it soak for at least 15 minutes at room temp. If you have time, cover and refrigerate for up to 4 hours (or even overnight). This simple step is your #1 guarantee for succulent, flavorful chicken. Chef’s Hack: Add a dash of hot sauce or a pinch of those dry seasonings to the buttermilk for an extra layer of flavor!
- Create Your Breading Party Mix. In another shallow dish (a pie plate works perfectly), whisk together the flour, panko, paprika, garlic powder, onion powder, a good teaspoon of salt, and a hearty amount of black pepper. Give it a taste—the flour mixture should taste delicious and well-seasoned on its own. This is the flavor of your crust!
- The Dredge Dance. Take one piece of chicken from the buttermilk, letting the excess drip off. Dredge it thoroughly in the flour mixture. Here’s the trick: PRESS the mixture onto the chicken firmly. Get it in all the nooks. Then, place it back in the buttermilk for a quick second dip, let the excess drip again, and dredge it in the flour mixture one more time. This double-dredge is what gives you that craggy, extra-thick, ultra-crispy coating that defines great chicken-fried chicken. Place the breaded chicken on the prepared wire rack.
- Oil & Bake to Perfection. Once all pieces are on the rack, generously spray or brush the tops with olive oil or melted butter. This moisture turns to steam in the hot oven, helping the coating puff and crisp, while the fat encourages gorgeous browning. Bake for 15 minutes. Carefully flip each piece (a thin spatula helps), spray the other side, and bake for another 10-15 minutes, until the crust is deep golden brown and the chicken registers 165°F internally on a meat thermometer. The wire rack is crucial—it lets hot air circulate underneath so the bottom doesn’t get soggy!
- Whip Up the Pepper Gravy. While the chicken bakes, make the gravy. In a small saucepan over medium heat, melt the butter. Whisk in the flour and cook, whisking constantly, for about 1 minute until it’s bubbly and smells a bit nutty—this is your roux. Slowly pour in the milk, whisking vigorously to avoid lumps. Bring to a gentle simmer, and keep whisking until the gravy thickens beautifully, about 3-5 minutes. Remove from heat and stir in a generous amount of black pepper and salt to taste. It should be creamy, peppery, and glorious. If it gets too thick, whisk in a splash more milk.
Plating Up Your Masterpiece
This dish deserves a plate that’s as comforting as it is. Here’s how I love to serve it:
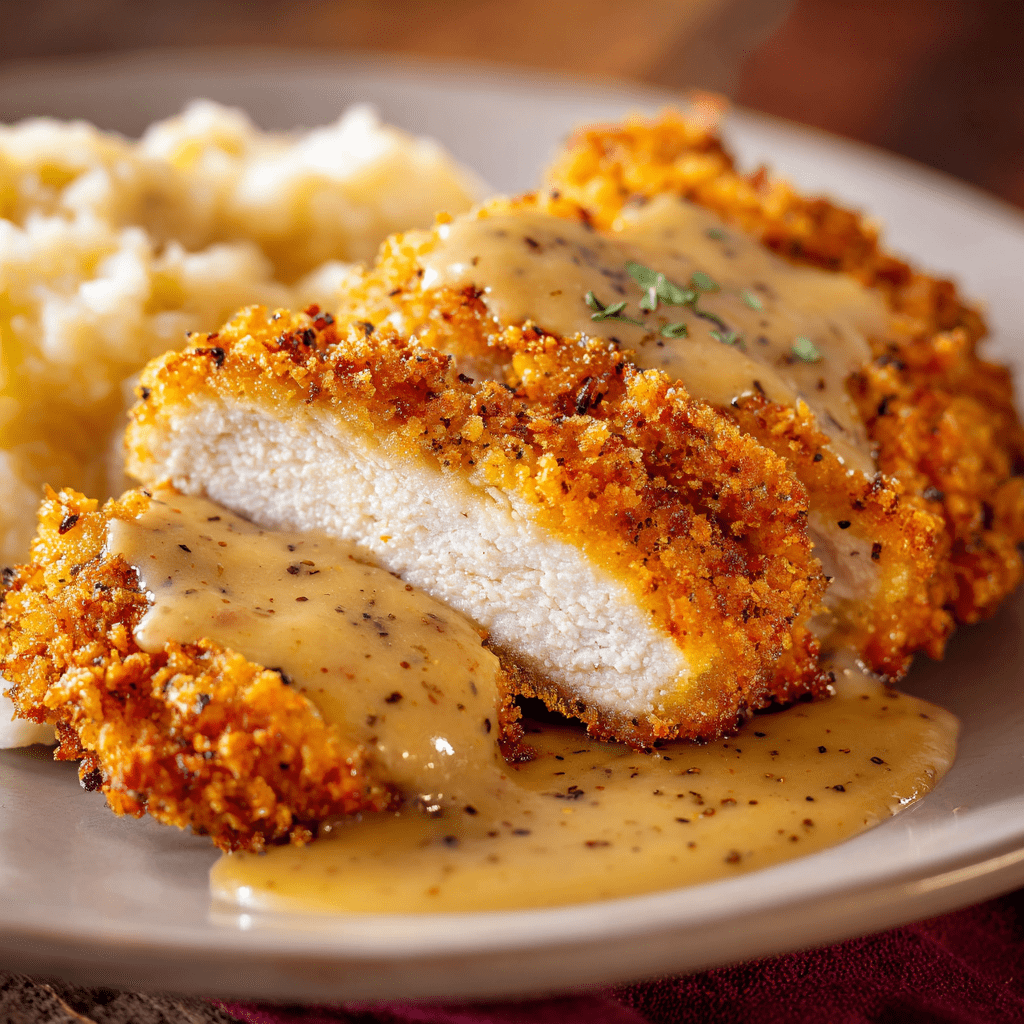
Place a crispy chicken breast right in the center of a warm plate. Ladle a generous amount of that warm pepper gravy right over the top, letting some pool around the sides. The classic pairing is with buttery mashed potatoes—the gravy has a double duty! Add a simple, bright side like steamed green beans, garlicky sautéed kale, or a crisp apple-cabbage slaw to cut through the richness. For the ultimate Southern-style plate, don’t forget a warm, flaky biscuit or a piece of cornbread on the side to sop up every last drop of gravy. It’s a plate that says “I care,” without you having to say a word.
Make It Your Own: Flavor Twists & Swaps
Love the base recipe? Let’s play! Here are some delicious ways to switch it up.
- Spicy Nashville Hot Style: After baking, brush the hot chicken with a mix of 2 tbsp melted butter, 1 tbsp hot sauce, 1 tsp cayenne pepper, and 1/2 tsp brown sugar. Serve with pickles and white bread for the full experience.
- Parmesan-Herb Crust: Add 1/4 cup grated Parmesan cheese and 1 tbsp dried Italian herbs (like oregano, basil, thyme) to the flour-panko mixture. Incredibly fragrant and cheesy!
- Gluten-Free & Crispy: Swap the all-purpose flour for your favorite 1:1 gluten-free flour blend. Use gluten-free panko breadcrumbs. The method stays exactly the same!
- “Chicken-Fried” Cauliflower Steaks (Vegetarian): Cut a large head of cauliflower into 1-inch thick “steaks.” Follow the same soaking and double-dredge process. Bake at the same temp, but you may only need 20-25 minutes total until tender and crispy. Serve with the pepper gravy—it’s mind-blowingly good.
- Air Fryer Method: For mega crunch, cook in a preheated air fryer at 400°F for 12-15 minutes, flipping halfway. You may need to work in batches. Spray well with oil for best results.
Emily’s Kitchen Notebook
This recipe has become a teaching tool in my kitchen. I use it to show new cooks the power of seasoning at every step (buttermilk, flour, gravy) and the science of the wire rack. The biggest evolution? The panko. I tried it on a whim one day when I was out of regular breadcrumbs, and the texture was so superior it never left the recipe. Also, a confession: I sometimes make a double batch of the pepper gravy. It’s fantastic over biscuits the next morning, or stirred into mashed potatoes for dinner round two. Food, like the best stories, is meant to be shared and adapted. If you find your own twist, come tell me about it in the comments!
Your Questions, Answered!
Q: My breading fell off! What happened?
A: This usually means the breading wasn’t pressed on firmly enough, or the chicken was too wet when dredged. Make sure you let the excess buttermilk drip off thoroughly between coats, and really press that flour mixture on. The double-dredge method in the recipe is designed specifically to prevent this!
Q: Can I make this ahead of time?
A: You can bread the chicken up to 4 hours ahead, place it on the rack on the sheet pan, cover loosely, and refrigerate. Bake straight from the fridge—you might need an extra minute or two. I don’t recommend baking and reheating, as the crust will lose its crispness. The gravy, however, can be made ahead and gently reheated with a splash of milk to loosen it.
Q: Why is my gravy lumpy?
A: No worries! Two fixes: 1) Prevention: Make sure your milk is warm-ish (not ice cold) when you add it, and whisk like your life depends on it. 2) Rescue: Simply pour the lumpy gravy through a fine-mesh sieve into a clean pot, pressing it through with a spatula. Good as new!
Q: Is the wire rack absolutely necessary?
A: For the crispiest bottom crust, yes. If you don’t have one, you can bake directly on the parchment-lined sheet, but flip the chicken gently halfway through. The bottom may be slightly less crispy but will still be delicious.
Nutritional Information (A Note on Nourishment)
I’m all about balance—indulging joyfully and nourishing our bodies. This “lightened up” version celebrates that balance. Here’s a general breakdown per serving (one chicken breast with gravy), but remember, your specific ingredients may cause variations:
- Calories: ~480
- Protein: 41g (Fantastic for keeping you full and satisfied!)
- Fat: 24g
- Carbohydrates: 24g
Compared to traditional deep-fried versions, you’re saving a significant amount of calories and fat by using the oven-baking method and a controlled amount of oil. The protein from the chicken is a great source of energy. To make it even lighter, you can use a light butter alternative in the gravy and serve with an extra heap of those vibrant veggies!
Final Thoughts from My Kitchen to Yours
At the end of the day, cooking is about comfort, confidence, and connection. This Oven-Baked Chicken-Fried Chicken proves that you don’t have to give up the dishes you love to cook a little smarter. You can still have that golden crunch, that peppery gravy, that deeply satisfying bite—without the stress of hot oil or a kitchen that smells like a fairground for days.
This is the kind of recipe that fits into real life. It works for weeknights, impresses on weekends, and brings people to the table with that unmistakable feeling of home. It honors Southern tradition while making room for modern kitchens and modern routines—and that balance is something I’ll always believe in.
So whether you serve it with mashed potatoes and green beans, tuck leftovers into a biscuit the next morning, or make it just because you need a little comfort on a long day, I hope this dish earns a permanent place in your recipe box. Cook it with confidence, season it boldly, and don’t forget to enjoy every crunchy, gravy-soaked bite.
From my kitchen to yours,
Emily