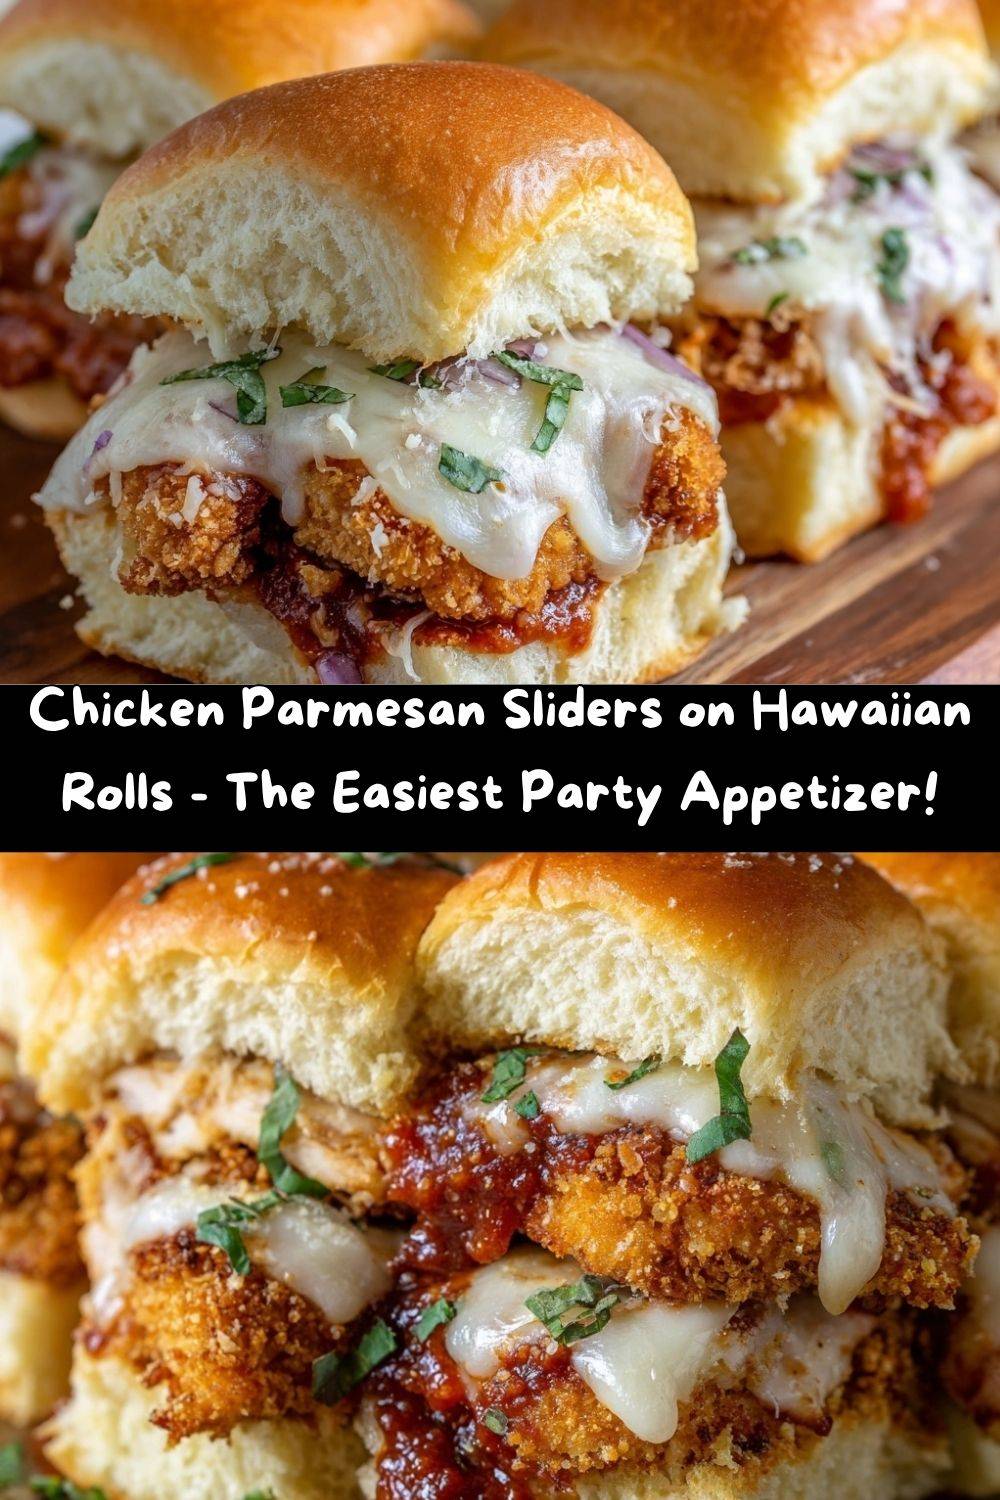
Chicken Parmesan Sliders: Your New Go-To for Fun, Feasting, and Flavor!
Hey there, friend! Let me paint you a picture. It’s game day, or maybe it’s just a gloriously lazy Sunday. Your people are gathered, laughter is filling the air, and the one question on everyone’s mind is, “What smells so incredible?” You open the oven to reveal a golden, glistening tray of pure joy: Chicken Parmesan Sliders, puffing up and bubbling away, promising cheesy, crispy, buttery perfection in every single bite.
If you’ve ever stared into your fridge, willing dinner to magically appear, or stressed about what to feed a hungry crowd without spending the whole party in the kitchen, this recipe is your new best friend. We’re taking everything we adore about classic Chicken Parm—the savory sauce, the tender chicken, the epic cheese pull—and packing it all into soft, sweet, impossibly convenient Hawaiian rolls.
This isn’t just a recipe; it’s a vibe. It’s the dish that makes you the hero of the party, the master of weeknight dinners, and the genius who figured out how to make comfort food even more comforting. They’re easy, they’re fast, and I promise you, they will vanish from the pan in minutes. So, tie on your favorite apron (the messy one with the stains of past kitchen victories is perfect), and let’s make something downright delicious together.
The Slider That Started It All: A Tale of Happy Accidents
This recipe, like so many of my favorites, was born from a happy little kitchen accident. Picture this: It was a chaotic, fun-filled football Sunday at my house a few years back. I had promised my friends a feast, but I’d also promised myself I wouldn’t miss all the fun stuck in the kitchen. My grand plan for a giant, from-scratch chicken parmesan was quickly unraveling as the kickoff clock ticked down.
I looked at the tray of Hawaiian rolls I’d bought for breakfast, the bag of golden-brown chicken nuggets in my freezer (a staple for busy nights!), and the jar of my favorite marinara. In a moment of “what if?” inspiration, I started layering. Nuggets, sauce, cheese, rolls… a quick brush of garlicky butter, and into the oven it went. Twenty minutes later, I pulled out a tray of what my friends now call “slider magic.” They were a smash hit! No plates needed, just grab and go. It was a reminder that the best food isn’t always the most complicated—it’s the food that brings people together with minimal fuss and maximum flavor. It’s a lesson from my grandma’s kitchen, just with a modern, cheesy twist.
Gather Your Ingredients: A Blueprint for Deliciousness
Here’s everything you need to create this pull-apart masterpiece. I’ve included some of my favorite chef-y insights and swaps so you can make it your own!
- 1 package (12 count) Hawaiian Rolls: Don’t you dare separate them! We’re keeping the whole sheet connected. That sweet, fluffy bread is the perfect contrast to the savory fillings and creates that iconic “pull-apart” experience. If you can’t find Hawaiian rolls, any soft, sweet dinner roll slab will work.
- 12 fully cooked Chicken Nuggets: This is our brilliant shortcut to crispy, juicy chicken without any frying! Use your favorite brand—homestyle, extra crispy, or even spicy ones if you want a kick. I always keep a bag in the freezer for moments just like this.
- 1 cup of your favorite Pasta Sauce: Marinara is classic, but a garlic and herb or a tomato basil sauce works wonderfully too. This is where you can inject a ton of personality! Use a high-quality jarred sauce for ease, or your own homemade sauce if you’re feeling fancy.
- 6 slices Mozzarella Cheese: We’re using slices because they melt beautifully and evenly, creating that dreamy, gooey cheese blanket. Provolone is a fantastic substitute if you want a slightly sharper flavor.
- ¼ cup (½ stick) Butter, melted: This is the secret to that gorgeous, golden-brown, crackly top. It adds a rich, buttery flavor that soaks into the rolls.
- 2 tablespoons Parmesan Seasoning or Grated Parmesan + Italian Herbs: I love a pre-mixed Parmesan seasoning (like the one from Trader Joe’s!), but if you don’t have it, just mix 1 ½ tablespoons of grated Parmesan cheese with ½ teaspoon of dried Italian seasoning. Easy peasy!
Let’s Get Building: Your Step-by-Step Guide to Slider Success
Ready to assemble? It’s so simple, you’ll have it memorized after one try. Follow these steps, and you’re guaranteed slider perfection.
- Preheat and Prep: First things first, get that oven nice and toasty. Preheat it to 350°F (175°C). While it’s warming up, grab a 9×13 inch baking dish. No need to grease it—the buttery topping will take care of that!Chef’s Hack: If your nuggets are frozen, now is a great time to pop them in the oven or air fryer for a few minutes to crisp them up. They don’t need to be fully cooked through, but a little head start ensures they stay crispy and don’t get soggy from the sauce.
- The Great Slice: Take your entire slab of Hawaiian rolls and, using a long, serrated bread knife, slice them in half horizontally. You want one connected top “lid” and one connected bottom “base.” This is the foundation of our slider architecture!Chef’s Hack: If the rolls are a bit sticky, pop the whole tray in the freezer for 10-15 minutes. They’ll firm up and be much easier to slice cleanly.
- Layer on the Love: Place the bottom half of the rolls snugly into your baking dish. Now, for the fun part—the layers! Start by evenly arranging the 12 chicken nuggets on top of the roll base. Next, spoon the marinara sauce over the nuggets. Don’t go overboard here, or things can get too wet. Just a good spoonful on each nugget area does the trick. Finally, lay the slices of mozzarella cheese over the saucy nuggets, covering as much surface area as you can.Chef’s Hack: Tuck a few fresh basil leaves or a handful of baby spinach under the cheese layer for a pop of color and freshness. You won’t regret it!
- Create the Buttery “Glow-Up”: In a small bowl, mix your melted butter with the Parmesan seasoning. Use a pastry brush (or the back of a spoon in a pinch) to generously brush this glorious, garlicky butter all over the top of the rolls. Get into every nook and cranny! This is what gives them that beautiful color and irresistible flavor.
- Bake to Perfection: Cover the entire baking dish tightly with aluminum foil. This is a crucial step! It traps the steam and gently heats everything through, melting the cheese and warming the rolls without burning the tops. Bake, covered, for 15 minutes. Then, remove the foil and bake for another 5-7 minutes, or until the cheese is bubbly and the roll tops are a perfect golden brown.Chef’s Hack: For an extra-crispy top, you can pop them under the broiler for the last 60-90 seconds. Watch them like a hawk, though—they can go from golden to burnt in a flash!
- Slice and Serve! Carefully remove the tray from the oven. Let it sit for just 2-3 minutes—this allows the cheese to set slightly so they’re less messy to slice. Then, use a sharp knife to slice along the roll lines, creating 12 perfect, individual sliders. Serve them warm and watch the magic happen.
How to Serve Your Slider Masterpiece
Presentation is part of the fun! You can serve these right from the baking dish for a casual, family-style vibe—just put the whole tray in the middle of the table with a stack of napkins and let everyone dig in. The pull-apart action is half the entertainment!
For a party, I love to transfer them to a large wooden board or platter. Scatter a few extra basil leaves around for a fresh, professional touch. What to serve alongside? A big, crisp green salad with a tangy vinaigrette helps cut through the richness beautifully. If you’re going full comfort food mode, a bowl of extra marinara for dipping and some crispy potato wedges or a simple pasta salad are absolutely legendary pairings.
Get Creative! 5 Fun Twists on the Classic
Once you’ve mastered the basic blueprint, the world is your slider! Here are a few of my favorite ways to mix things up:
- The Supreme Pizza Slider: Swap the marinara for pizza sauce, use pepperoni slices along with the nuggets, and try a blend of mozzarella and provolone cheese. A sprinkle of red pepper flakes after baking adds a nice heat.
- The Buffalo Chicken Slider: Toss the nuggets in ½ cup of buffalo sauce before assembling. Use a blue cheese or ranch dressing instead of marinara, and top with a Monterey Jack or pepper jack cheese for a spicy, tangy kick.
- The “Lighter” Italian Slider: For a leaner option, use grilled chicken strips or even meatballs instead of nuggets. You can also use low-fat mozzarella and brush the tops with a light olive oil spray mixed with the herbs instead of butter.
- The Philly Cheesesteak Slider: Sauté thin slices of ribeye steak with onions and bell peppers. Use this mixture instead of the chicken nuggets, and top with provolone or Cheez Whiz for an authentic feel. Skip the marinara for this one!
- The Breakfast Slider: Yes, for breakfast! Use cooked breakfast sausage patties or scrambled eggs, a slice of cheddar cheese, and a drizzle of maple syrup or a schmear of jam inside the rolls. The sweet and savory combo is out of this world.
Chef Emily’s Kitchen Notes
Over the years, this recipe has become a true workhorse in my kitchen, and it’s evolved in the best ways. I’ve learned that letting the sliders rest for a few minutes after baking is the key to a clean cut—otherwise, the cheese just runs everywhere (still delicious, but messy!). I also started adding a tiny pinch of flaky sea salt over the butter-topped rolls right before they go in the oven. It elevates the flavor so much!
One of my favorite kitchen memories is of my nephew, who is a notoriously picky eater, devouring three of these in one sitting and then asking if we could have them for every holiday from now on. That’s the power of a good, simple, cheesy recipe—it creates happy memories, one bite at a time.
FAQs & Troubleshooting: Your Questions, Answered!
Q: Can I make these ahead of time?
A: Absolutely! You can assemble the entire tray (through the butter-brushing step), cover it tightly with plastic wrap and then foil, and refrigerate it for up to 24 hours. When you’re ready, just bake it straight from the fridge, adding a few extra minutes to the covered baking time since everything will be cold.
Q: My sliders got a bit soggy. What happened?
A: The most common culprit is too much sauce. You really just need a thin layer to add flavor and moisture without drowning the rolls. Another tip is to make sure your nuggets are nice and crispy before assembling—this creates a barrier that helps prevent sogginess.
Q: Can I use shredded mozzarella instead of slices?
A: You can, but slices are my strong preference. Shredded cheese contains anti-caking agents that can sometimes prevent it from melting as smoothly and evenly as a good, old-fashioned slice. Slices give you that perfect, uninterrupted cheese pull.
Q: My rolls are browning too fast! Help!
A: Ovens can vary! If the tops are getting too dark before the cheese is melted, just put the foil back on for the remainder of the baking time. Remember, the foil is your friend for controlling browning.
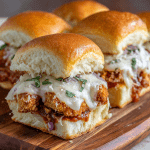
Chicken Parmesan Sliders on Hawaiian Rolls : Cheesy, Crispy, Crowd-Pleasing
- Total Time: 30 minutes
- Yield: 12 Sliders 1x
Description
These Chicken Parmesan Sliders are melty, buttery, and packed with flavor – all the best parts of chicken parm stuffed into sweet Hawaiian rolls. They’re the ultimate comfort food for parties, game day, or a fun weeknight dinner. Made with crispy nuggets, rich sauce, gooey cheese, and a garlicky butter topping – they’re guaranteed to disappear fast.
Ingredients
1 pack Hawaiian rolls (12 rolls)
12 chicken nuggets (fully cooked)
1 cup pasta sauce (marinara or garlic preferred)
6 slices mozzarella cheese
¼ cup butter, melted
2 tablespoons Parmesan seasoning or grated Parmesan + Italian herbs
Optional Twists:
Add fresh basil or spinach for a pop of green
Use spicy nuggets for a kick
Swap mozzarella for provolone or pepper jack
Brush tops with garlic butter before baking for extra flavor
Instructions
Preheat Oven: Set to 350°F (175°C).
Assemble Sliders: Slice the rolls in half horizontally (keep them connected). Place the bottom half in a baking dish. Layer with chicken nuggets, spoonfuls of pasta sauce, and mozzarella slices. Place the top half of rolls back on.
Butter Topping: Mix melted butter with Parmesan seasoning and brush over the tops of the rolls.
Bake: Cover with foil and bake for 15 minutes. Uncover and bake for 5 more minutes until tops are golden and cheese is melted.
Serve: Slice and pull apart – enjoy while warm and cheesy!
- Prep Time: 10 minutes
- Cook Time: 20 minutes
Nutrition
- Calories: 250 / Slider
- Fat: 13g / Slider
- Carbohydrates: 20g / Slider
- Protein: 12g / Slider
Nutritional Information (Approximate, Per Slider)
Let’s keep it real—this is a treat, and it’s meant to be enjoyed as such! But for those who like to know, here’s a general breakdown per slider (using standard ingredients):
- Calories: ~250
- Protein: 12g
- Carbohydrates: 20g
- Fat: 13g
Remember, these numbers can vary based on the specific brands of nuggets, cheese, and rolls you use. For lighter options, refer to the “Lighter Italian Slider” variation above!
Final Thoughts from My Kitchen to Yours
Well, my friend, there you have it—the recipe that never fails me. These Chicken Parmesan Sliders are more than just a quick meal; they’re a reminder that feeding the people you love doesn’t have to be complicated or stressful. It’s about sharing joy, one cheesy, buttery, incredibly satisfying bite at a time.
I hope this recipe finds its way into your regular rotation and creates as many happy memories for you as it has for me. Now, I’d love to hear from you! Did you add your own twist? Did your family go crazy for them? Tag me on social @TastyChow so I can see your beautiful creations!
Until next time, keep your spoons dirty and your hearts full.
— Emily 🧀✨