Chocolate Chip Cookie Granola Bars: Your New Favorite Grab-and-Go Treat!
Hey there, friend! Let’s be real for a second. Life is busy. Between work, family, and trying to remember to water your plants, finding the time to whip up a wholesome, delicious snack can feel like a monumental task. And those store-bought granola bars? Sometimes they taste more like cardboard and disappointment than the sweet, chewy treat we’re craving.
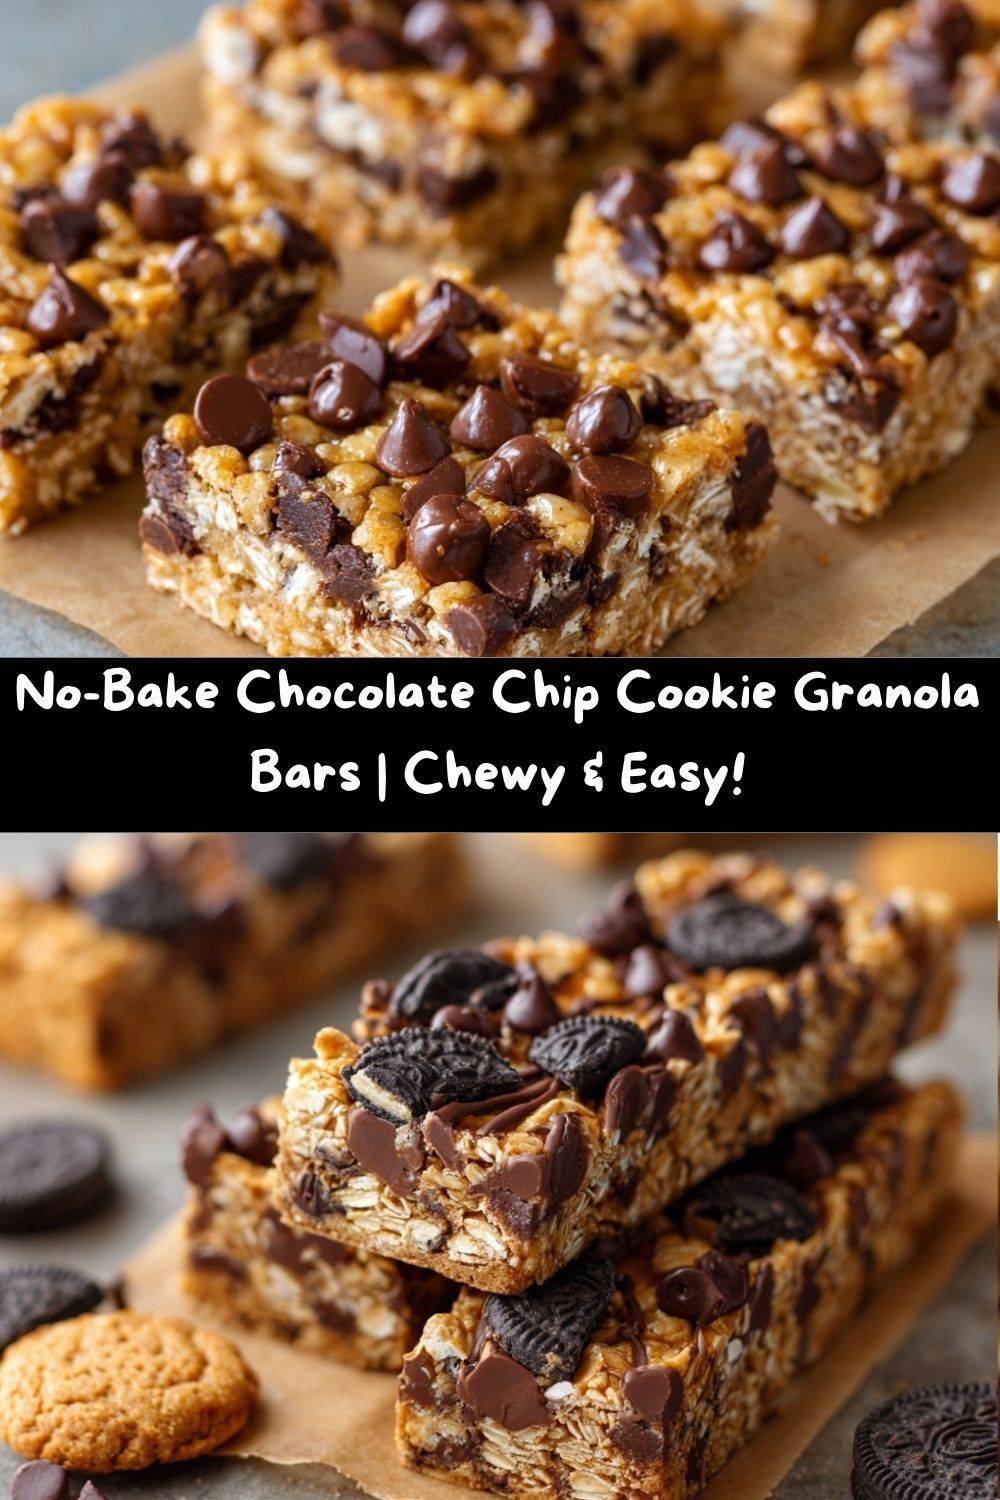
Well, I’m here to change that. Today, we’re making magic happen in a square pan. We’re talking about my No-Bake Chocolate Chip Cookie Granola Bars. Imagine the soft, chewy texture of your favorite granola bar getting a cozy hug from the nostalgic, buttery flavor of chocolate chip cookies. Now, imagine that combination is studded with melty mini chocolate chips and held together with the deep, nutty richness of brown butter. Are you swooning yet? You should be.
This is the kind of recipe that makes you feel like a kitchen superhero. It requires zero baking, comes together in about 15 minutes of active time, and uses simple ingredients you probably already have in your pantry. They’re perfect for lunchboxes, afternoon slumps, post-workout fuel, or that “I just need a little something sweet” moment at 3 p.m. So, tie on your favorite apron (the messy one is always the best), and let’s create something truly irresistible together.
The Day My Two Snack-Worlds Collided
This recipe was born out of a happy little kitchen accident, as the best ones often are. It was a typical chaotic Wednesday. I was testing a new brown butter chocolate chip cookie recipe (a noble pursuit), and let’s just say I got a little… distracted by a phone call. The cookies came out a bit flatter and crispier than I’d hoped. They were still tasty, but they weren’t the soft, puffy masterpieces I’d envisioned.
As I stared at the plate of “reject” cookies, feeling a little defeated, my eyes landed on a nearly-empty jar of homemade granola. A lightbulb went off. What if I didn’t see them as failed cookies, but as a brilliant mix-in? I crumbled them up, mixed them into my standard no-bake granola bar base, and held my breath as the mixture set in the fridge. The result? Pure, unadulterated joy. The crushed cookies added a buttery, bakery-style depth that plain oats could never achieve on their own. It was the ultimate upgrade, turning a simple snack into a dessert-worthy treat that my friends and family now request on the regular. Sometimes, the best recipes come from our “beautiful mess” moments.
Gather Your Ingredients: A Tour of Deliciousness
Here’s everything you’ll need to create these chewy, no-bake wonders. I’ve included some of my favorite chef insights and substitution tips to make this recipe your own!
- 2½ cups Old-Fashioned Oats: This is the heart and soul of our granola bar, providing that classic chewy texture and whole-grain goodness. Chef’s Tip: Do not use quick oats! They absorb moisture differently and can make the bars gummy. If you’re gluten-free, just ensure you’re using certified GF oats.
- ½ cup Mini Chocolate Chips: I prefer mini chips because they distribute themselves more evenly throughout the bars, giving you a little taste of chocolate in every single bite. Regular-sized chips will work, too!
- ¼ cup Crushed Mini Chocolate Chip Cookies: This is our secret weapon! It adds an incredible buttery, vanilla-kissed flavor that makes these bars truly special. Substitution Tip: Any simple, buttery chocolate chip cookie will work wonderfully here. For a gluten-free version, use your favorite GF chocolate chip cookies.
- 6 tbsp Unsalted Butter (browned): This is the flavor powerhouse. Browning the butter gives it a deep, nutty, almost caramel-like aroma that elevates the entire recipe from “yum” to “OH WOW.” Chef’s Insight: Using unsalted butter lets you control the salt level perfectly. If you only have salted, just reduce the added salt by a pinch.
- ⅓ cup Honey or Maple Syrup: This is our natural sweetener and binding agent. Honey gives a floral sweetness, while maple syrup offers a richer, more robust flavor. Both are fantastic!
- ¼ cup Brown Sugar: Don’t skip this! The molasses in the brown sugar works with the honey to create that perfect, chewy texture we’re after. It also complements the brown butter beautifully.
- 1 tsp Vanilla Extract: A must for enhancing all the other warm, sweet flavors in the bar. A splash of vanilla is like a warm hug for your desserts.
- ¼ tsp Salt: This is crucial for balancing the sweetness and making all the flavors pop. Trust me, it makes a world of difference.
Let’s Make ‘Em! Your Step-by-Step Guide to Granola Bar Bliss
Ready to get your hands a little sticky? This process is simple, fun, and oh-so-rewarding. Follow these steps, and you’ll be a no-bake bar pro in no time.
- Brown the Butter (The Aromatic First Step): Place your unsalted butter in a light-colored saucepan over medium heat. Let it melt, then swirl the pan occasionally. It will start to foam and make little cracking sounds—that’s the water cooking off! Keep a watchful eye. After a few minutes, you’ll see golden brown specks form at the bottom, and the butter will smell incredibly nutty and rich. Chef’s Hack: A light-colored pan makes it much easier to see the color change and avoid burning! Immediately remove it from the heat and pour it into a heat-proof bowl to stop the cooking.
- Create the Glue (Mix the Wet Ingredients): To the warm brown butter, immediately add your brown sugar, honey (or maple syrup), vanilla extract, and salt. Whisk it all together until the brown sugar has dissolved and everything is one happy, fragrant family. Little Tip: Let this mixture cool for about 5-10 minutes. If it’s too hot, it will melt your chocolate chips when you mix everything later!
- Combine the Crew (Bring It All Together): In a large mixing bowl, combine your old-fashioned oats, crushed chocolate chip cookies, and mini chocolate chips. Give it a quick stir. Now, pour that glorious brown butter mixture over the dry ingredients. Use a sturdy spatula to mix until every single oat and cookie crumb is thoroughly coated in the sweet, sticky syrup. It will look and smell amazing.
- Press It Perfectly (The Key to Chewy Bars): Line an 8×8 inch baking pan with parchment paper, leaving some overhang on two sides. This will act as a sling, making it super easy to lift the whole block of bars out later. Transfer your mixture into the pan. Now, for the most important step: PRESS, PRESS, PRESS! Use the bottom of a measuring cup or a flat spatula to press the mixture down as firmly and evenly as you can. Chef’s Secret: The harder you press, the better the bars will hold their shape. Don’t be shy! Get in there and compact it.
- Chill Out (The Patience-Testing Part): Pop the pan into the refrigerator for at least 1-2 hours, or until the bars are completely firm. This allows the fats to re-solidify and all the ingredients to bind together. Quick Tip: If you’re in a huge rush, the freezer can speed this up to about 30-45 minutes.
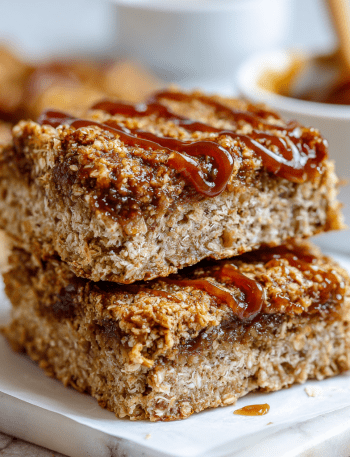
- Slice and Serve (The Grand Finale!): Once fully set, use the parchment paper sling to lift the entire granola block out of the pan. Place it on a cutting board and use a sharp knife to slice it into 10 rectangular bars (or squares—you do you!). For a fancy finish, you can drizzle them with a little melted chocolate or sprinkle on some extra cookie crumbs.
How to Serve & Savor Your Masterpiece
These bars are delicious straight from the fridge, all cool and firm. But let’s talk presentation and pairing! I love to stack them on a cute wooden board or plate for a casual gathering. They’re the ultimate grab-and-go snack, so wrapping them individually in a little parchment paper and twine makes them feel extra special for lunchboxes or picnics.
For the ultimate snack-time experience, try pairing one with a cold glass of milk, a hot cup of coffee, or your favorite creamy latte. The combination of the chewy, sweet bar and a cool, creamy drink is just *chef’s kiss*. They also make a fantastic, non-messy dessert for movie nights. Honestly, there’s no wrong way to enjoy them!
Get Creative! Fun Flavor Twists & Swaps
Once you’ve mastered the classic, have fun playing with the formula! This recipe is a fantastic canvas for your culinary creativity. Here are a few of my favorite variations:
- S’mores Sensation: Swap the crushed cookies for crushed graham crackers. Use a mix of mini chocolate chips and mini marshmallows (toss them in with the oats). You’ve just captured campfire magic in a bar!
- Peanut Butter Paradise: Replace 2 tablespoons of the butter with ¼ cup of creamy peanut butter. Add it when you’re mixing the wet ingredients. You could even use peanut butter chocolate chips for a double PB punch.
- Tropical Escape: Omit the chocolate chips and add ⅓ cup each of chopped dried mango, pineapple, and coconut flakes. It’s like a vacation in every bite!
- Double Dark Chocolate: For the chocoholics, use cacao nibs instead of half the chocolate chips and add a tablespoon of unsweetened cocoa powder to the dry ingredients. Rich, decadent, and deeply satisfying.
- Protein Power-Up: Stir in 2-3 scoops of your favorite vanilla or chocolate protein powder into the wet ingredients. You may need to add an extra tablespoon of honey or maple syrup to compensate for the dryness.
Chef Emily’s Notebook: A Few Parting Thoughts
This recipe has become a staple in my kitchen, and it’s evolved in so many fun ways. I’ve made it for preschool bake sales (a huge hit), packed it on hiking trips, and even crumbled it over vanilla ice cream for an instant, epic sundae. The first time I made it, I was so impatient that I tried to cut it after only 30 minutes of chilling. It was a delicious, crumbly mess that we ate with spoons—still 100% tasty, but not exactly bar-shaped! So, learn from my mistake and let them set fully.
The beauty of this recipe is its flexibility and the sheer joy it brings. It’s a reminder that sometimes, the simplest things, made with a little love (and brown butter), are the most memorable.
Your Questions, Answered!
I’ve gotten so many wonderful questions about these bars over time. Here are the answers to the most common ones!
Q: My bars are too crumbly and won’t hold together! What did I do wrong?
A: This usually comes down to two things: not enough binding agent or not pressing firmly enough. First, make sure you’re using the exact measurements for the honey and brown sugar—they are essential for the chewy texture. Second, really put some muscle into pressing the mixture into the pan! The more compact it is going in, the better it will hold its shape coming out.
Q: Can I make these vegan?
A: Absolutely! Use maple syrup instead of honey, and substitute the butter with vegan butter or refined coconut oil. For the cookies, just use your favorite vegan chocolate chip cookies. The results are just as delicious!
Q: How should I store these, and how long will they last?
A> I always store them in an airtight container in the refrigerator. They will stay fresh and hold their shape perfectly for up to 2 weeks. You can also freeze them for up to 3 months! Just layer them between parchment paper in a freezer-safe bag or container.
Q: My chocolate chips melted when I mixed everything. Help!
A> No worries! This happens if your brown butter mixture is still too hot. The key is to let it cool until it’s just warm to the touch, not hot, before pouring it over the oats and chips. If they do melt a little, it will still taste great—it will just have a more marbled, chocolate-swirled look!
A Quick Note on Nutrition & Dietary Info
While I’m a chef, not a nutritionist, I believe in being transparent about what we’re eating! These bars are a treat, but they’re made with wholesome ingredients like oats and honey. They provide a good source of energy from complex carbs and fats. The estimated nutritional information per bar (based on the recipe making 10 bars) is around: 210 calories, 24g carbs, 10g fat, 3g protein, and 12g sugar.
Remember, these are estimates and can vary based on the specific brands of ingredients you use. As mentioned, this recipe is easily adaptable for gluten-free and vegan diets, making it a fantastic inclusive option for almost everyone to enjoy!
Final Thoughts from My Kitchen to Yours
Well, my friend, we’ve done it. We’ve created a snack that’s both incredibly easy and unbelievably delicious. These Chocolate Chip Cookie Granola Bars are more than just a recipe; they’re a little reminder that you can create wonderful things in your kitchen, no matter how busy life gets.
I hope this recipe brings as much joy to your home as it has to mine. I’d love to hear how your batch turns out! Did you try a fun variation? Did your kids go crazy for them? Tag me on social @TastyChow or leave a comment below. Happy snacking, and remember—cook with your heart, and your stomach will always thank you.
With love and a full jar of granola bars,
Emily