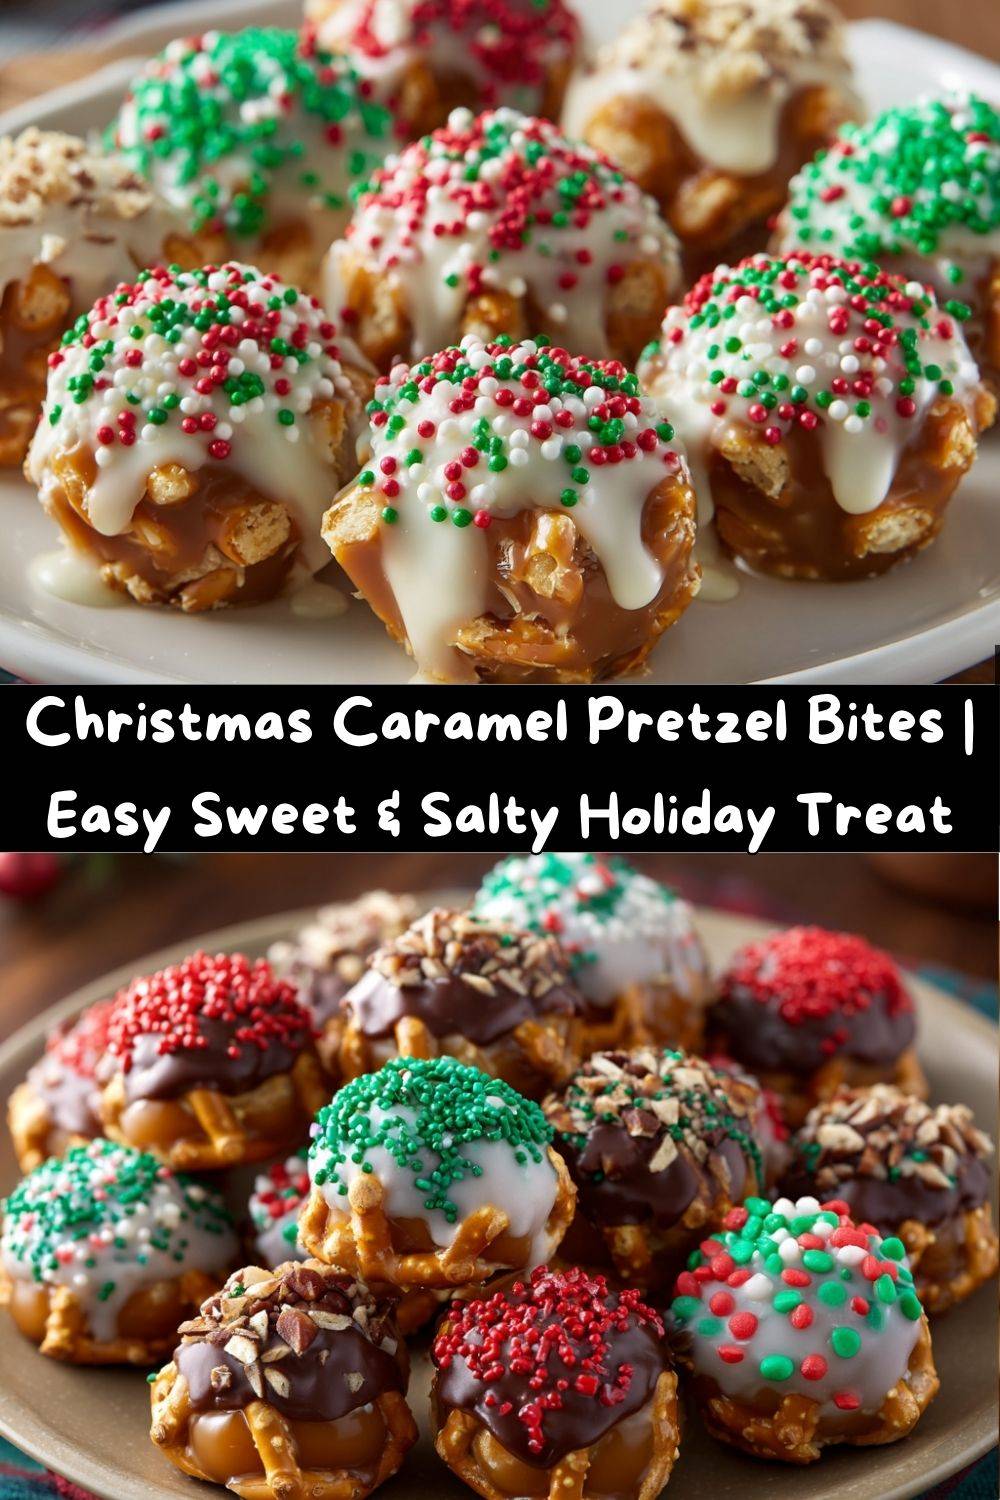
Christmas Caramel Pretzel Bites: Your New Favorite Holiday Tradition!
Hey there, my fellow food lover! Chef Emily here, coming to you from my wonderfully messy kitchen, which currently smells like sugar, nostalgia, and pure holiday joy. Is there anything better than that feeling? I’m convinced that some of the best holiday memories aren’t just made around the dinner table, but right there on the kitchen counter, surrounded by sprinkles and the happy chatter of family and friends.
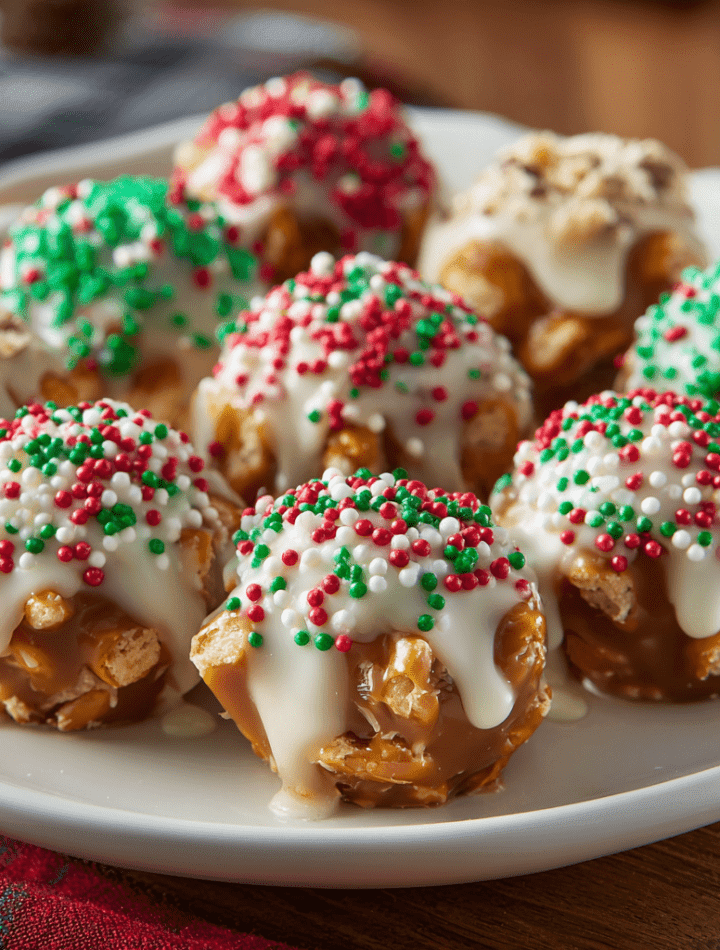
And that’s exactly where these irresistible Christmas Caramel Pretzel Bites come in. If you’ve been searching for a recipe that is guaranteed to bring a smile to everyone’s face, requires zero fancy chef skills, and delivers that epic sweet-and-salty combo we all crave, you have just hit the jackpot. These little bites are the edible equivalent of a cozy holiday sweater—comforting, cheerful, and an absolute essential for the season.
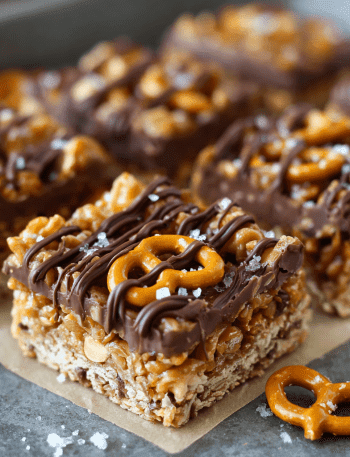
We’re taking soft, chewy caramel and sandwiching it between two crisp pretzels, then giving it a glamorous dunk in smooth candy coating and a festive shower of sprinkles. The result? A bite-sized treat that’s crunchy, creamy, sweet, salty, and ridiculously pretty. I’ve doubled our usual batch and added a few of my favorite chef-y twists to make them extra special this year. So, tie on your favorite apron (the one with the reindeer on it, obviously), and let’s make some magic together. This is one recipe your cookie trays have been dreaming of!
A Sweet and Salty Memory: The Christmas Eve Kitchen Rescue
I’ll never forget the Christmas Eve I officially declared these pretzel bites a family tradition. I was about ten years old, and my mom had tasked me with arranging the cookie platter for Santa. It was a serious job! We had sugar cookies, fudge, and peanut butter blossoms, but I felt like something was missing. The plate needed a little… sparkle. A little crunch. A little *something*.
My grandma, seeing my pondering face, whispered, “How about we whip up something new, just you and me?” She pulled out a bag of pretzels and a jar of caramel candies from the pantry. In what felt like mere minutes, we had created these magical little stacks. As we dipped them in melted chocolate (we didn’t have fancy candy melts back then!) and shook on red and green sprinkles, I felt like a culinary genius. The best part? When we placed the platter out that night, my dad “snuck” a few before bed and declared them the best thing on the tray. That spontaneous kitchen moment with my grandma taught me that the most beloved recipes are often the simplest ones, made with a big dash of love.
Gathering Your Sweet & Salty Squad: The Ingredients
Here’s everything you’ll need to create this doubled, delightfully upgraded batch of holiday happiness. Remember, baking is like a friendly conversation, not a strict lecture—so feel free to get creative with substitutions!
- 48 small pretzel twists or squares: The salty, crispy foundation of our bite. I love using square pretzels for a flat, even base, but twists work beautifully too! If you’re gluten-free, your favorite GF pretzel will work perfectly here.
- 24 soft caramels, unwrapped and halved: This is our chewy, gooey heart. Halving them ensures the perfect caramel-to-pretzel ratio. Pro tip: Use kitchen shears to snip them in half—it’s way faster than a knife! For a shortcut, you can use a teaspoon of store-bought soft caramel dip, but the candies hold their shape better during baking.
- 1 package each of red, green, and white candy melts: This is where the festive fun begins! Candy melts (or candy wafers) set firmly and come in every color imaginable. Chef’s Insight: If you’re a chocolate purist, you can absolutely use high-quality melting chocolate, but add a teaspoon of coconut oil to help it set with a smooth snap.
- 2–3 tablespoons vegetable shortening: Our secret weapon for super-smooth, dippable candy coating! Just a tiny bit thins the melts perfectly without making them greasy.
- Holiday sprinkles: The finishing touch! Use jimmies, nonpareils, or even crushed candy canes. This is your chance to let your personality shine.
- Optional Twists: Because why not?
- Flaky sea salt: A light sprinkle over the wet candy coating takes the sweet-and-salty profile to a whole new level. Trust me on this!
- Mini chocolate chips or roasted pecans: For a surprise inside, press one into the softened caramel before dipping. It’s a little gift within a gift!
Let’s Build Some Bites: Your Step-by-Step Guide
Okay, team! Let’s get our hands dirty (or at least a little sticky). This process is so fast and fun, you’ll want to put on some holiday music and make a party of it.
- Preheat and Prep: First things first, preheat your oven to a low 250°F (120°C). Then, line a large baking sheet with parchment paper. This is non-negotiable for easy cleanup! Arrange 48 pretzels in a single layer on the sheet. This is your foundation.
- The Caramel Center: Now, place half a soft caramel onto the center of each pretzel. Don’t worry if they’re not perfect—they’re going to melt into cozy little pools of deliciousness.
- The Warm Hug: Pop the baking sheet into the preheated oven for just 4-5 minutes. You’re looking for the caramels to become soft and glossy, not completely melted and runny. This is the “warm hug” that binds everything together. Chef’s Hack: Set a timer! Overbaking will make the caramel too hard when it cools.
- Create the Sandwich (or Add a Surprise!): Carefully remove the tray from the oven. If you’re adding a mini chocolate chip or a pecan half, now’s the time to gently press it into the center of each soft caramel. Then, for the classic bite, press a second pretzel on top, creating a cute little sandwich. Let them cool completely on the baking sheet. This is crucial—if they’re warm, the candy coating will slide right off!
- Melt Your Coating: While the bites cool, melt your candy melts. I like to do this in separate microwave-safe bowls. For each color, heat in 30-second bursts on medium power, stirring well between each burst. Once they start to melt, stir in about a half tablespoon of shortening per cup of melts. This gives you that perfect, fluid consistency for dipping or drizzling.
- The Dipping Dance: Now for the most fun part! You can either fully dip each pretzel bite using a fork, tapping off the excess, or simply drizzle the melted candy over the tops with a spoon for a more rustic look. There’s no wrong way! Work quickly and place each coated bite back onto the parchment paper.
- Sprinkle with Joy: Before the coating sets, shower your bites with a generous amount of holiday sprinkles. This is a fantastic job for little helpers—they love it!
- The Final Chill: Let the bites set at room temperature for about 20 minutes, or pop the whole tray in the fridge for 10-15 minutes to speed things up. You’ll know they’re ready when the candy coating is firm to the touch.
How to Serve These Festive Little Gems
Presentation is part of the fun! I love piling these bites high on a vintage cake stand for a real show-stopping effect at a holiday party. For a more personal touch, arrange them in mini cupcake liners on a platter—it makes them feel extra special and keeps them from sticking together.
These are the ultimate shareable treat. Pack them in cute cellophane bags tied with a ribbon for adorable, homemade gifts for teachers, neighbors, or coworkers. They also make a wonderful addition to any dessert charcuterie board, nestled among cheeses, fruits, and other cookies. Their sweet and salty profile is the perfect palate cleanser!
Mix It Up! Fun Flavor Variations
Once you’ve mastered the classic, the kitchen playground opens up! Here are a few of my favorite ways to twist this recipe:
- Peppermint Perfection: Use peppermint-flavored candy melts (dark chocolate or white) for a cool, festive kick. Top with crushed candy canes instead of sprinkles.
- Dark Chocolate Dream: Swap the candy melts for high-quality dark chocolate melting wafers. The slight bitterness pairs incredibly well with the sweet caramel.
- Nutty Buddy: Sandwich a whole roasted almond or pecan between the caramel and the pretzel for an added crunch and rich flavor.
- S’mores Festivus: Before baking, place a tiny piece of a Hershey’s chocolate bar and a mini marshmallow on the pretzel with the caramel. The result is a gooey, incredible surprise.
- Birthday Party Version: Use rainbow sprinkles and a variety of colorful candy melts to make these for birthdays or any celebration!
Chef Emily’s Notes from a Sprinkle-Dusted Kitchen
This recipe has evolved so much since that first Christmas Eve with my grandma. I’ve learned that the key is embracing the imperfections! Not every bite will be perfectly round or evenly coated, and that’s what makes them charming and homemade. My biggest kitchen fail with these? The year I tried to use caramel sauce instead of candies. Let’s just say it was a delicious but very, very sticky situation. Stick with the caramels—they’re foolproof!
I also love making a huge batch and freezing them. Just layer them in an airtight container between sheets of parchment paper, and they’ll keep for up to a month. It’s my secret for being holiday-party-ready at a moment’s notice!
FAQs & Troubleshooting: Your Questions, Answered!
Q: My caramel melted too much and ran off the pretzel. What happened?
A: Ah, the oven was likely too hot, or they baked a minute too long. Remember, we’re just softening them! If this happens, no worries—just use a knife to trim any excess caramel after they cool. They’ll still taste amazing.
Q: My candy coating is too thick and clumpy. How can I fix it?
A: This is common! Simply add a tiny bit more vegetable shortening (a 1/4 teaspoon at a time) and heat for another 15 seconds. Stir vigorously until it becomes smooth. The shortening is the magic ingredient for a perfect dipping consistency.
Q: Can I make these ahead of time?
A: Absolutely! They keep wonderfully in an airtight container at room temperature for up to a week, or in the fridge for two weeks. The pretzel may lose a tiny bit of its crispness over time, but they’ll still be delicious.
Q: The sprinkles won’t stick! What’s the trick?
A: You have to add the sprinkles while the candy coating is still wet. I usually decorate in batches of 4-5 bites at a time so the coating doesn’t have a chance to set. If it does start to harden, just give it a quick blast with a hairdryer on a low, warm setting to make it sticky again.
Nutritional Information (Per Bite, Approximate)
Let’s be real—these are a treat, and we’re here to enjoy every single bite! But for those who like to keep track, here’s a general idea of the nutrition per pretzel bite. Remember, these values can vary based on the specific brands of ingredients you use.
- Calories: 90
- Fat: 4g
- Carbohydrates: 12g
- Sugar: 9g
- Protein: 1g
The beauty of their small size is that they’re perfect for satisfying a sweet tooth without overdoing it. Everything in moderation, including moderation… especially during the holidays!
Final Thoughts: Share the Love!
Well, my friend, there you have it—the recipe for what might just become your most-requested holiday treat. It’s more than just a snack; it’s a activity, a gift, and a guaranteed crowd-pleaser all rolled into one sweet, salty, sprinkle-covered package.
I hope this recipe brings as much laughter and light to your kitchen as it has to mine over the years. The holidays are about connection, and what better way to connect than over a plate of something delicious made with your own two hands? If you make these (and I really hope you do!), I’d love to see your creations! Tag me on social @TastyChow with #TastyChowHoliday so I can share in the fun.
From my kitchen to yours, happy baking, and may your season be filled with love, laughter, and plenty of yummy chow.
— Emily 🎄