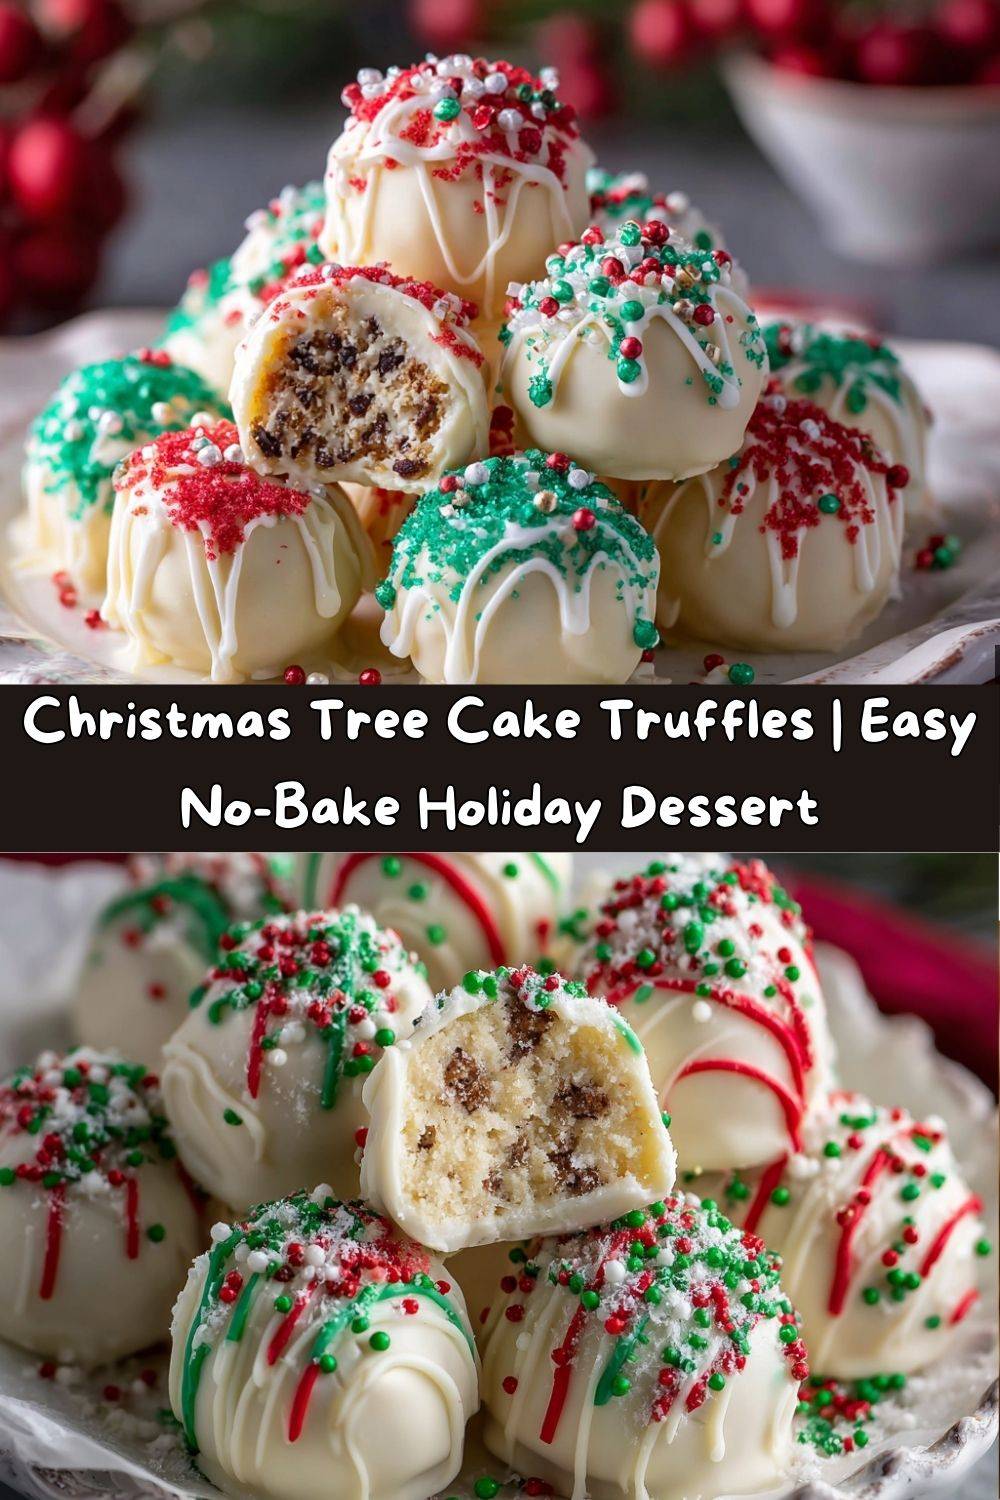
Your New Favorite Holiday Tradition: Christmas Tree Cake Truffles!
Hey there, friend! Emily here, from my flour-dusted kitchen to yours. Is there anything better than the smell of something sweet and festive wafting through the house during the holidays? I’m a firm believer that some of the best memories are made around food, especially the kind that doesn’t require turning on the oven and heating up the whole house!
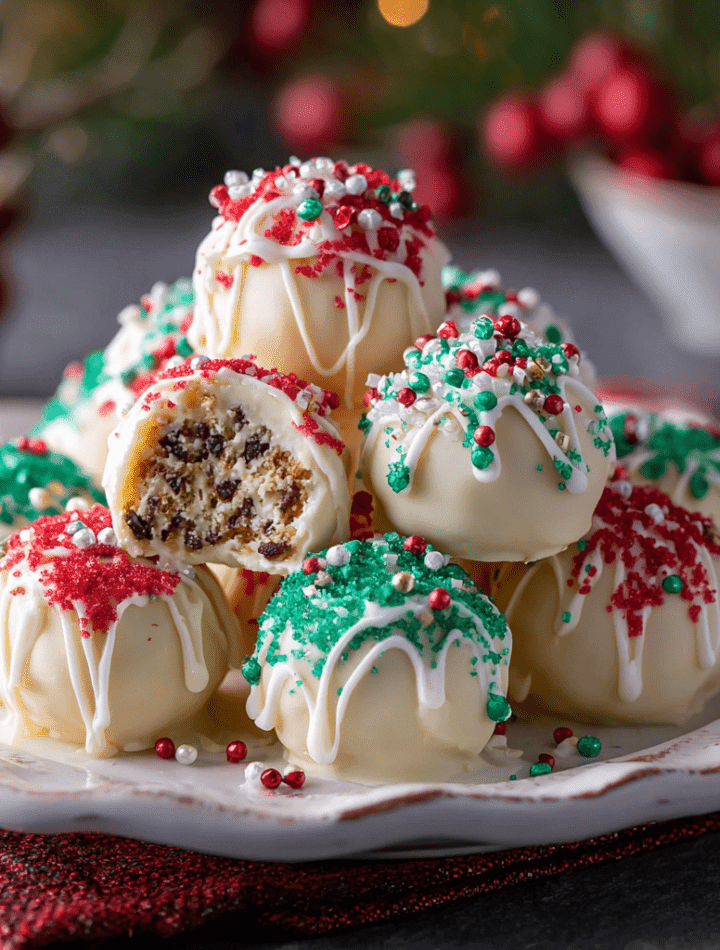
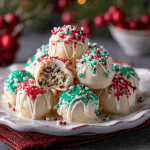
Today, we’re whipping up a batch of pure, unadulterated holiday joy: Christmas Tree Cake Truffles. If you grew up with (or have a deep, abiding love for) those iconic Little Debbie Christmas Tree Cakes with their soft cake, creamy filling, and waxy-yet-wonderful chocolate coating, then you are about to meet your new favorite treat. We’re taking that classic flavor and turning it into bite-sized, pop-able, utterly irresistible truffles that are perfect for parties, gifting, or just hiding in the fridge for a sneaky midnight snack (no judgment here!).
These truffles are the ultimate in easy, no-bake fun. They come together in less than 30 minutes, require zero fancy equipment, and are an absolute blast to decorate with kids, friends, or just by yourself with a festive holiday movie on in the background. So, tie on your favorite messy apron, and let’s make something delicious—and delightfully nostalgic—together!
A Sweet Slice of Nostalgia
This recipe takes me right back to my grandma’s kitchen table in December. The big, serious baking—the pies, the rolls, the cookies—was always done, but there was always a box of those little Christmas tree cakes tucked in the pantry. They were our secret, post-dinner treat. My grandma would pour two glasses of cold milk, and we’d sit and carefully nibble around the edges of the trees, saving the frosting-filled center for last.
She called them “our little moments of magic,” and that’s exactly what this recipe is for me. It’s a way to capture that whimsical, simple joy of the season and share it in a new form. It’s not about being gourmet; it’s about being fun, familiar, and full of heart. Every time I make these, I can almost hear her laughing in the kitchen with me, and I hope this recipe creates a little bit of that same magic for you and your loved ones.
Gathering Your Truffle Toolkit
Here’s the beautiful part: you only need a handful of simple ingredients to create these festive wonders. Let’s break them down!
- 2 boxes Little Debbie Christmas Tree Cakes (10 cakes total): The star of the show! These bring the signature flavor—the soft vanilla cake, the sweet cream filling, and that hint of festive spirit. Chef’s Insight: Don’t unwrap them until you’re ready to use them; they dry out quickly!
- 16 oz white chocolate or white candy melts: This is our luxurious coating. Substitution Tip: Candy melts are more forgiving and easier to work with for beginners as they set firmly and don’t require tempering. High-quality white chocolate will taste richer, so it’s your call!
- 6 tbsp festive sprinkles & Green sanding sugar: This is where the personality comes in! The sprinkles add crunch and color, while the green sanding sugar gives that classic “Christmas tree” effect. Raid your baking cupboard and use what you love!
- 6 tbsp red candy melts (optional, for drizzle): The optional “chef’s kiss” that makes these look professionally decorated. A simple drizzle takes them from cute to absolutely stunning.
Let’s Get Rolling: Your Foolproof Guide
Ready to make some magic? Follow these steps for perfect, gorgeous truffles every single time.
- Create the Truffle “Dough”: Unwrap all those beautiful little tree cakes and pop them into a large mixing bowl. Now, get your hands (or a fork) in there and mash them up! You’re going for a uniform, slightly sticky, dough-like consistency. Chef’s Hack: If your mixture feels a bit too dry and isn’t holding together, add a tiny spoonful of cream cheese or a dab of the frosting from a spare cake. This acts as the perfect “glue.”
- Form the Balls: Using a small cookie scoop or a tablespoon, portion out the mixture. Then, roll it between your palms to form smooth, one-inch balls. Pro Tip: A light coating of cooking spray on your hands will prevent the sticky mixture from clinging to you!
- The Chill Factor: Line a baking sheet with parchment paper and place all your truffle balls on it. Pop the entire tray into the freezer for a solid 10-15 minutes. This step is non-negotiable! A cold truffle is a firm truffle, and a firm truffle won’t fall apart when you dip it into the warm chocolate.
- Melt Your Coating: While the truffles are chilling, melt your white chocolate or candy melts. Do this in a deep, narrow bowl or a liquid measuring cup for easier dipping. Melt in 30-second bursts in the microwave, stirring vigorously between each burst, until it’s completely smooth. Chef’s Warning: Do not overheat! Scorched chocolate is a sad sight.
- The Big Dip: Remove a few truffles from the freezer at a time (keeping the rest cold). Drop one into the melted coating. Use a fork or a dipping tool to swirl it around, lift it out, and gently tap off the excess. This is the key to a thin, elegant shell.
- Decorate Immediately! Place the dipped truffle back onto the parchment paper and, before the shell sets, shower it with sprinkles and a generous pinch of green sanding sugar. The coating sets quickly, so you have to work fast! This is the perfect job for a helper.
- The Final Drizzle (Optional): If you’re using the red candy melts, melt them now. Once the first coating on your truffles is completely set, use a fork or a piping bag with a tiny tip to zig-zag red lines across the top for that classic “garland” effect.
- Set and Serve: Allow the truffles to set completely at room temperature or give them a quick 10-minute chill in the fridge to speed things up. Then, get ready to serve up some serious holiday cheer!
How to Serve These Festive Gems
Presentation is half the fun! Here’s how to make these truffles shine:
For a casual family treat, simply pile them high on a cute holiday plate or in a rustic wooden bowl. For a party or a more elegant display, place each truffle in a miniature gold or green paper liner and arrange them on a tiered dessert stand. They instantly look fancy!
These also make the most heartfelt gifts. Tuck a few into a clear cellophane bag, tie it with a gorgeous ribbon, and attach a handwritten tag. You’ve just created a delicious, homemade gift that anyone would be thrilled to receive. Pair them with a bag of gourmet coffee or a nice tea for the ultimate foodie present.
Get Creative: Fun Flavor Twists!
Once you’ve mastered the classic, why not play with the formula? Here are a few of my favorite ways to mix it up:
- Minty Magic: Add ½ teaspoon of peppermint extract to the cake mixture before rolling. It’s like a Christmas party in your mouth!
- Oreo Crunch: Mix in 4 finely crushed Oreo cookies (creme filling and all) for a fantastic chocolatey crunch and a cookies-and-cream vibe.
- Nutty Delight: Fold in ½ cup of very finely chopped toasted pecans or walnuts into the mixture. The toasty, buttery flavor is incredible with the sweet cake.
- Color Pop: Ditch the white coating! Use green or red candy melts for the full dip to make your truffles really stand out on a dessert table.
- Gingerbread Spice: Add a teaspoon of gingerbread spice blend to the cake mixture for a warm, spiced twist that feels extra cozy.
Chef Emily’s Notes from the Kitchen
This recipe has become a staple in my holiday lineup precisely because it’s so forgiving. I once had a minor kitchen disaster where I dropped an entire bag of sprinkles onto a freshly dipped tray of truffles. Instead of a delicate sprinkle, they had a crunchy blanket! My family now requests the “crunch bomb” version every year. The moral of the story? There’s no such thing as a mistake in the kitchen, just a new recipe variation!
I’ve also found that letting the kids go wild with the decorations leads to the most creative (and hilarious) truffles. Embrace the mess—it’s where the memories are made. This recipe is a living, evolving thing in our home, and I hope it becomes the same in yours.
FAQs & Troubleshooting
Q: My coating is too thick and clumpy. What did I do wrong?
A: This usually means the chocolate was overheated. Candy melts can sometimes seize if a drop of water gets in or if they get too hot. Try adding a teaspoon of coconut oil or vegetable shortening to the melted coating and stirring vigorously. This can often thin it out to a perfect dipping consistency.
Q: Can I use something other than Little Debbie cakes?
A: Absolutely! While the flavor won’t be exactly the same, you can use any similar vanilla snack cakes with cream filling. Hostess CupCakes (without the chocolate topping) or even plain vanilla cake mixed with a few tablespoons of frosting will work in a pinch!
Q: How far in advance can I make these?
A: They are best enjoyed within 3-4 days. Store them in a single layer in an airtight container in the refrigerator. Let them come to room temperature for about 10 minutes before serving for the best texture and flavor.
Q: My truffle mixture is too wet! Help!
A: If you accidentally added too much “glue” (cream cheese/frosting), you can balance it out by adding a tablespoon or two of crushed graham cracker crumbs or powdered sugar. This will help absorb the excess moisture and make the mixture rollable again.
Christmas Tree Cake Truffles
- Total Time: 25 minutes
- Yield: 24 Truffles 1x
Description
These truffles are the ultimate no-bake holiday delight, made from iconic Little Debbie Christmas Tree Cakes. They’re creamy, coated in white chocolate, and decorated with sparkle and crunch. Quick, nostalgic, and perfect for gifting or party trays – double the batch and spread more cheer!
Ingredients
2 boxes Little Debbie Christmas Tree Cakes (10 cakes total)
16 oz white chocolate or white candy melts
6 tbsp festive sprinkles
6 tbsp red candy melts (optional, for drizzle)
Green sanding sugar (for decoration)
Twists for Holiday Flair:
Minty Magic: Add ½ tsp peppermint extract to the cake mixture
Oreo Crunch: Mix in 4 crushed Oreo cookies for texture
Nutty Delight: Add ½ cup finely chopped pecans or walnuts
Color Pop: Use colored candy melts (green, red) for coating instead of white
Instructions
In a large bowl, break up the cakes and mash with a fork until a soft dough forms. If too dry, add a spoonful of frosting or cream cheese.
Roll mixture into 1-inch balls and place on a parchment-lined tray. Chill in the freezer for 10–15 minutes.
Melt white chocolate or candy melts until smooth. Dip each chilled ball into the coating, letting excess drip off.
Place truffles back on tray and decorate immediately with sprinkles and sanding sugar.
If using red candy melts, drizzle over the top after the first layer sets.
Chill until firm (about 10 minutes), then serve or package up for gifts!
- Prep Time: 15 minutes
- Cook Time: 10 minutes
Nutrition
- Calories: 160 / Truffle
- Fat: 9g / Truffle
- Carbohydrates: 19g / Truffle
- Protein: 1g / Truffle
Nutritional Information*
🕒 Prep: 15 min | Chill: 10 min | Total: ~25 min
🍬 Makes: 24 truffles
Estimated per truffle:
Calories: ~160 kcal | Fat: 9g | Carbohydrates: 19g | Protein: 1g
*Please note: Nutritional information is an estimate only and will vary based on specific ingredients and portion sizes used. The information is provided as a courtesy and should not be taken as a guarantee.
Final Thoughts
Well, my friend, there you have it! Your guide to creating the most festive, fun, and flavor-packed holiday treat that’s sure to become a new tradition. I love this recipe because it proves that you don’t need to be a pastry chef to create something special and memorable. It’s about the joy of creating, the fun of decorating, and the pure happiness of sharing something sweet with people you love.
So, from my cozy kitchen to yours, I wish you the merriest of holidays filled with laughter, love, and of course, delicious food. I’d love to see your creations! Tag me on social @TastyChow with your truffle masterpieces.
Now, go forth and spread some cheer, one truffle at a time!
With love and a sprinkle of sugar,
Emily