Let’s Make Some Magic: Christmas Tree Oreo Pops!
Hey there, my fellow holiday enthusiast! Can you smell that? It’s the scent of pine needles, cinnamon sticks, and… Oreos? You bet! If your idea of a perfect December afternoon involves Christmas music, a slightly messy kitchen, and creating something utterly delightful that will make everyone smile, then you, my friend, have come to the absolute right place. I’m Chef Emily, and today we’re ditching the complicated pastry bags and embracing our inner holiday wizard with the most adorable, whimsical, and downright fun treat: Christmas Tree Oreo Pops!
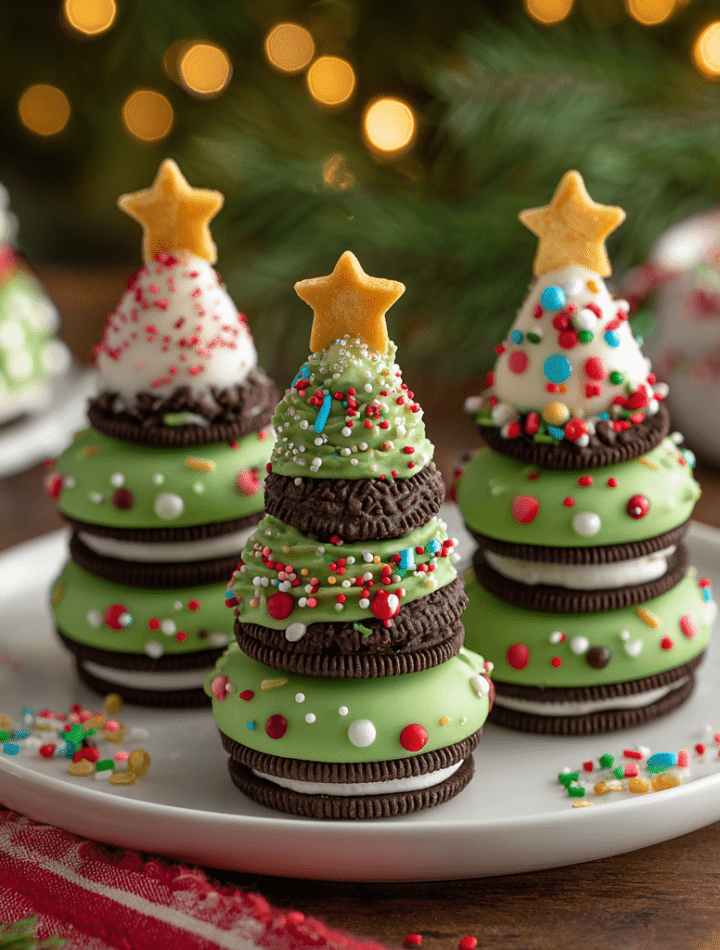
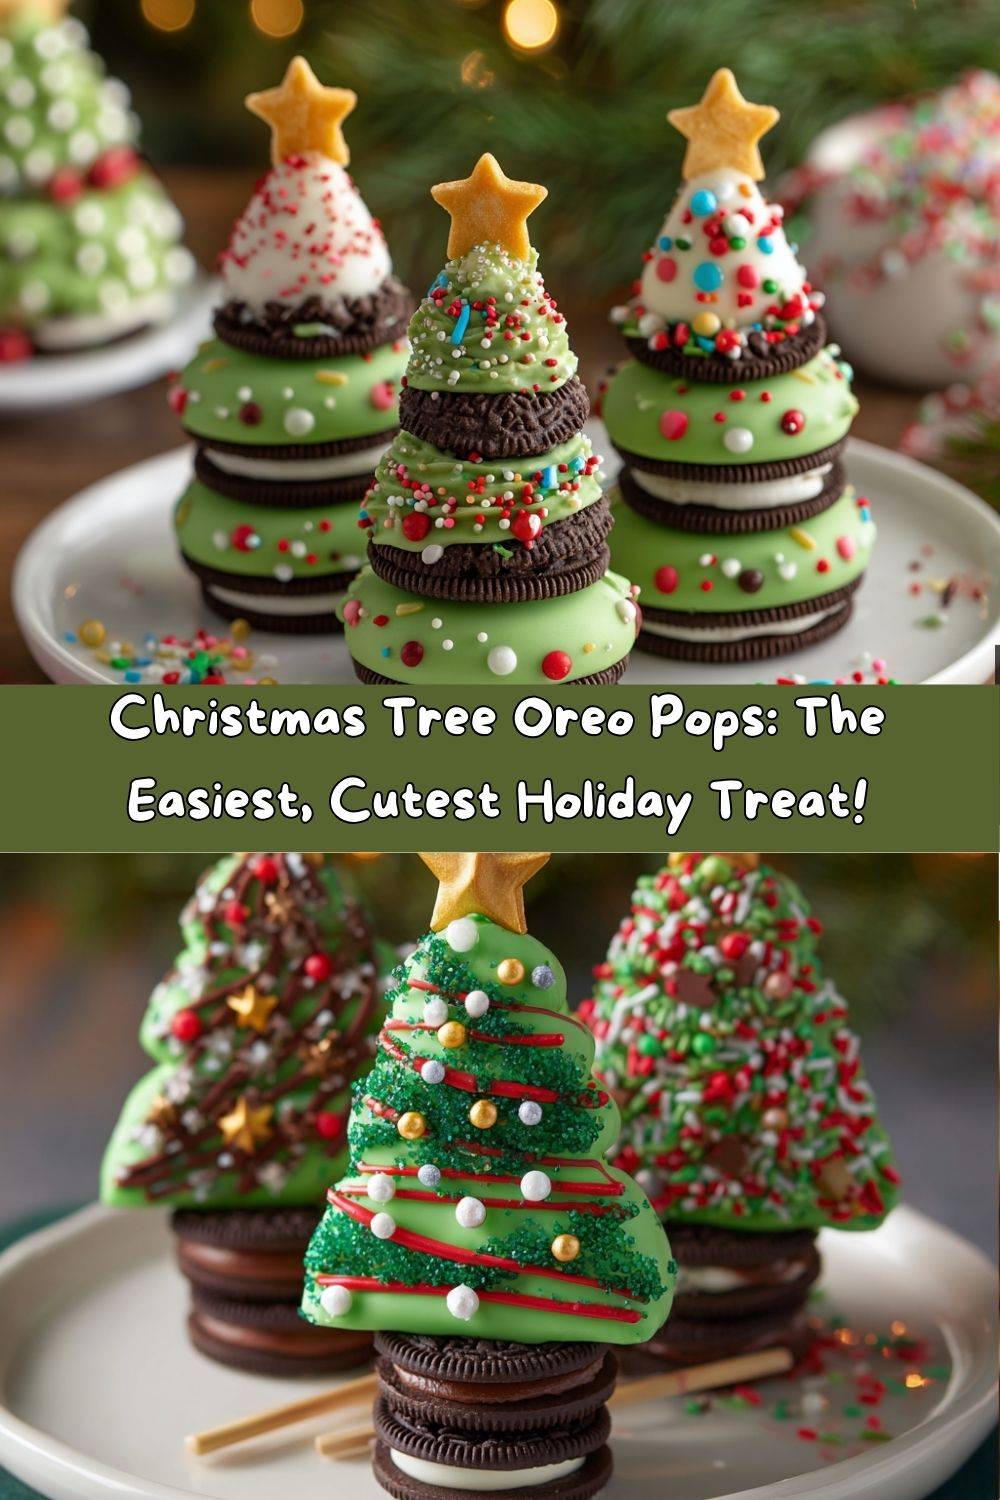
Imagine this: mini edible Christmas trees, crafted from everyone’s favorite cookie, dipped in a lush green chocolate “forest,” and decked out with the cutest sprinkle ornaments and a shining star on top. These aren’t just desserts; they’re a holiday experience. They’re the kind of project that will have kids (and let’s be honest, adults too!) gathered around the table, eager to add their own creative flair. They’re perfect for leaving out for Santa, packaging up as heartfelt homemade gifts for teachers and neighbors, or simply lining up on a platter to bring a major dose of cheer to your holiday dessert table. So, tie on your favorite festive apron—the one with the reindeer on it—and let’s turn some simple ingredients into a forest of delicious, edible magic. Trust me, your kitchen is about to become the happiest place on earth.
A Sweet, Stacked Memory
This recipe takes me right back to my first holiday season after culinary school. I was so eager to impress my family with some grand, technically perfect French pastry, but my little niece, Lily, had other ideas. She just wanted to bake with her Auntie Em. We ended up with a packet of Oreos, some melting wafers, and a whole lot of sprinkles. There was no perfection that day—just a whole lot of laughter and sticky fingers. As we stacked those cookies and watched our lopsided, brilliantly green trees take shape, I had a revelation. This, right here, was the real magic of holiday cooking. It wasn’t about the most sophisticated dish; it was about the connection, the creativity, and the pure, unadulterated joy of making something together. Every time I make these pops now, I think of Lily’s concentrated face as she carefully placed each sprinkle, and I’m reminded that the best recipes are the ones that create memories, not just meals.
Gathering Your edible Ornaments: What You’ll Need
Here’s your shopping list for fun! The beauty of this recipe is its simplicity. You probably have most of this already, and if not, it’s a quick trip to the baking aisle.
- 6–9 Oreos (double-stuffed work best): These are the sturdy trunks and branches of our trees! I highly recommend Double Stuf because the extra cream filling helps the layers stick together more securely and provides a delicious, creamy center. If you only have regular, that’s okay! You might just need to be a tad more generous with your “glue” (the melted chocolate).
- Green candy melts or green-tinted white chocolate: This is our beautiful evergreen foliage. Candy melts are my go-to because they are formulated to melt smoothly, set firmly, and hold their shape. You can find them in big craft stores or the baking aisle. If you prefer, you can use high-quality white chocolate chips or bars and tint them with a bit of oil-based green food coloring. Pro Chef Tip: If using real chocolate, add a tiny teaspoon of coconut oil to help it melt to a smoother, dip-able consistency.
- Lollipop sticks or paper straws: The trunks of our trees! Lollipop sticks are classic and sturdy. For an extra cute, festive touch, I absolutely love using red and white striped paper straws. They look adorable peeking out from the bottom!
- White chocolate or royal icing (for piping): This is for creating our snowy garlands! I prefer to melt a small amount of white chocolate and pipe with that, as I love the taste. But a simple store-bought tub of white icing will work in a pinch—just make sure it’s stiff enough to hold its shape.
- Sprinkles or nonpareils (for garlands): The ornaments! Raid your sprinkle collection. Small round sprinkles, little nonpareils, even tiny red and green sugar pearls—they all work perfectly. This is where you can really let your personality shine.
- Star-shaped sprinkles or candies (for toppers): The crowning glory! No Christmas tree is complete without a star on top. You can find tiny yellow star sprinkles, or even use a small yellow M&M or a star-shaped dragée.
- Optional: edible glitter or sanding sugar: For a little extra winter wonderland sparkle! A light dusting of edible glitter or white sparkling sugar makes these pops look like they’ve just been kissed by frost.
Building Your Edible Forest: Step-by-Step
Okay, team! Let’s get building. Don’t worry about perfection—these trees are charming because of their whimsy, not their precision. Put on some holiday tunes, and let’s do this!
- Twist and Prepare: Gently twist apart your Oreos. If you’re using Double Stuf, you can usually leave the cream filling on both sides—it acts as extra glue! If you’re using regular Oreos or find the filling is making the cookies slide, you can carefully scrape a little off one side of each cookie to create a flatter surface. This is your foundation!
- Stack and Stick: Now, let’s build our tree! Take your largest Oreo wafer and place it on your work surface. Pipe or spread a small dollop of melted chocolate (or use some of your green candy melt) onto its surface. Gently push a lollipop stick or straw into this chocolate, leaving about two-thirds of the stick sticking out the bottom. This will be your trunk. Now, take your next largest wafer and stack it on top, pressing down lightly. Repeat with a third, smaller wafer if you want a taller, more tapered tree. The melted chocolate is your construction glue, holding everything together. Chef Hack: If your stacks feel wobbly, don’t panic! Just use a little extra “glue” between the layers.
- The Big Chill: This step is non-negotiable for success! Place your assembled but naked tree pops on a parchment-lined baking sheet and pop them into the refrigerator for a solid 10-15 minutes. This allows the chocolate glue to set rock-hard, ensuring your trees won’t do a swan dive into the melting pot later. Patience, grasshopper!
- The Green Dip: Time for the magic makeover! Melt your green candy wafers according to the package directions (usually in 30-second bursts in the microwave, stirring well in between). Once smooth and fluid, take one chilled pop and dunk it right in! Use a spoon to help ladle the coating over the top and sides, ensuring every nook and cranny is covered. Gently tap the stick on the side of the bowl to shake off any excess coating—this prevents a big, messy chocolate puddle at the base of your tree (we call that the “tree skirt,” and we don’t want it too big!).
- Decorate Immediately: Work quickly here! Place the dipped pop back onto your parchment paper. Now, the fun begins! While the coating is still wet:
- Pipe on your garland using your melted white chocolate or icing in a cute zig-zag pattern.
- Immediately add your sprinkle “ornaments” onto the garland lines so they stick.
- Press your star sprinkle firmly onto the very top.
- For extra sparkle, sprinkle on a little edible glitter or sanding sugar.
- The Final Set: Once all your trees are decorated, let them set completely at room temperature. Do not refrigerate them to set if you’ve used candy melts, as this can cause condensation and make them sticky. They’ll need about 30 minutes to an hour to become firm and ready for action!
How to Show Off Your Sweet Evergreens
You’ve created a masterpiece—now let’s display it! These pops are almost too cute to eat. Almost. For a party, stick them upright in a vase filled with sugar or dried beans to create a stunning edible centerpiece. Arrange them on a festive platter surrounded by other holiday cookies for a show-stopping dessert board. For gifting, once they are completely set, you can individually wrap them in clear cellophane treat bags, tie them with a cute ribbon, and add a gift tag. They make the most heartfelt and personal gift for classmates, coworkers, or your postal carrier! However you choose to serve them, be prepared for a chorus of “Awwww!” before the “Yummm!”
Branching Out: Fun Flavor Twists
Feel like mixing it up? This recipe is a fantastic canvas for creativity! Here are a few of my favorite ways to play with the formula:
- Peppermint Forest: Use Mint Oreos for the base! Add a drop of peppermint extract to your green candy melts, and crush some candy canes to use as “ornaments” for a cool, festive flavor.
- Chocolate Lover’s Grove: Use Golden Oreos for the stack and dip them in melted milk or dark chocolate instead of green. Decorate with white chocolate garlands and gold sprinkle stars for an elegant, wintry look.
- Snowy Winter Wonderland: Skip the green and dip your assembled trees in white candy melts. Decorate with blue sprinkle garlands and silver edible glitter for a gorgeous, frosty effect.
- Gluten-Free Friendly Trees: You can absolutely make these with gluten-free sandwich cookies! Just be extra gentle during the stacking phase, as GF cookies can sometimes be more fragile.
- Nutty Trunks: Add a surprise crunch! Before stacking the Oreo wafers, spread a very thin layer of peanut butter, almond butter, or Nutella between them. It adds a delicious, grown-up flavor twist.
Chef Emily’s Kitchen Confidential
I’ll let you in on a little secret: my first batch of these was a hilarious disaster. I didn’t chill the stacks, and my trees immediately performed a synchronized slide off their sticks into the bowl of melted chocolate, creating what my nephew lovingly called “Christmas blobs.” We laughed so hard we cried. So, learn from my messy mistake: CHILL YOUR STACKS! Also, don’t stress if your trees aren’t perfectly symmetrical or your garlands are a little wobbly. That’s what gives them character and charm. The goal is fun, not flawlessness. Over the years, I’ve found that using a tall, narrow mug for dipping is easier than a wide bowl, and having all my sprinkles pre-portioned into little bowls makes the decorating frenzy much more manageable. Most importantly, just enjoy the process. The mess is part of the memory.
Your Questions, Answered!
Q: My candy coating is too thick and clumpy! What did I do wrong?
A: This usually means it got too hot. Candy melts can “seize” or become thick if overheated. The fix is simple! Add a tiny amount of solid vegetable shortening or coconut oil (start with ½ teaspoon) and stir vigorously. This should bring it back to a smooth, fluid state.
Q: My layers are sliding! How do I prevent this?
A: This is almost always a chilling issue. First, ensure you’re using enough “glue” (melted chocolate) between layers. Second, and most crucially, you must chill the assembled stacks until the chocolate is completely solid. No skipping this step! If your kitchen is very warm, even a few minutes longer in the fridge can help.
Q: Can I make these ahead of time?
A: Absolutely! Once fully set, these pops can be stored in a single layer in an airtight container at room temperature for up to 5 days. I don’t recommend refrigerating them as it can cause condensation and make them sweat and soften.
Q: My white chocolate garlands are melting into the green! Help!
A: This means your base green layer wasn’t fully set when you started piping. You need to wait until the green coating has formed a dry crust on the surface. To speed this up, you can pop the dipped trees into the fridge for just 2-3 minutes to flash-chill the outside before decorating.
A Note on Nutrition & Allergens
Let’s be real, friends: these are a festive, fun-sized treat, not a health food! Each pop is a little bundle of joy, but it’s also a bundle of sugar and carbs. The approximate calorie count is around 180-220 per pop, depending on how generous you are with the coatings and sprinkles. They contain gluten (from the Oreos), dairy (in the cream filling and chocolate), and soy (in most candy melts). For those with allergies, thankfully there are great gluten-free sandwich cookie options and dairy-free chocolate alternatives available now, so you can still join in on the fun! As always, enjoy these delightful treats in moderation as part of your holiday celebrations.
Go Forth and Create Joy!
And there you have it! Your complete guide to creating the most whimsical, delicious, and memory-making Christmas Tree Oreo Pops. This is more than just a recipe; it’s an invitation to play, to create, and to share a little bit of edible magic with the people you love. However they turn out—whether they look like they belong in a patisserie window or they’re wonderfully wonky—they will be made with love, and that’s the most important ingredient of all. So from my messy, sprinkle-covered kitchen to yours, I wish you the happiest of holidays. Now, go chow down on some holiday spirit!
— Emily