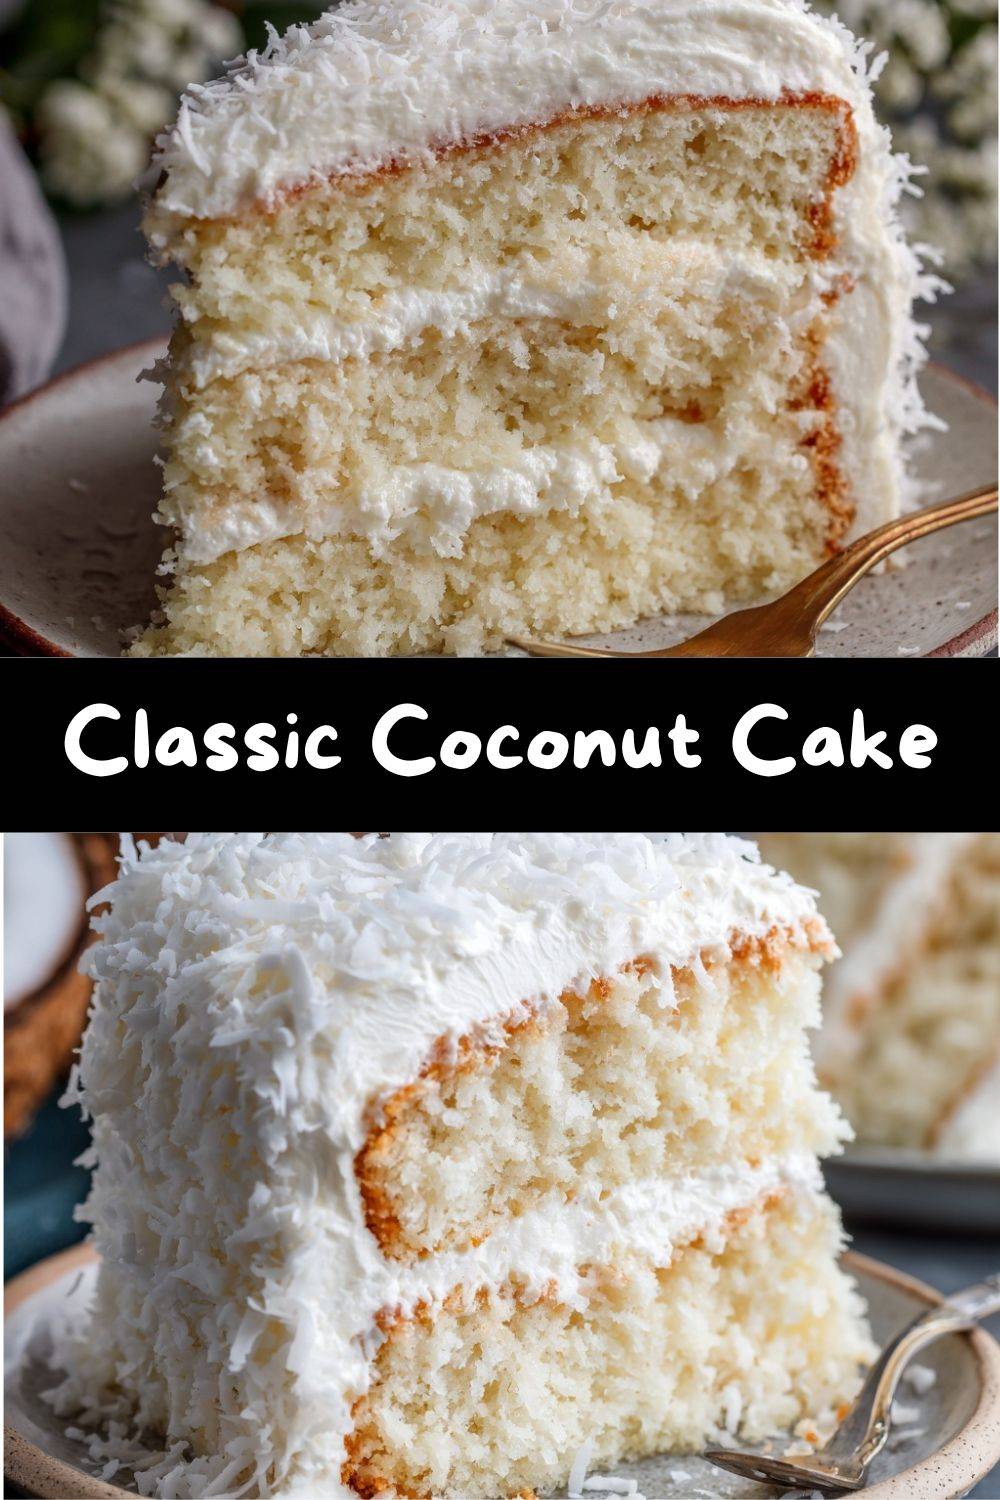
A Slice of Sunshine: The Timeless Joy of Coconut Cake
Hey there, friend! Come on in and pull up a stool. Is there anything in the world that feels quite as celebratory as a beautifully made layer cake sitting proudly on a cake stand? The promise of fluffy layers, sweet frosting, and that moment when the first slice is lifted out… it’s pure kitchen magic. And today, we’re making my absolute Classic Coconut Cake.
This isn’t just any cake. This is the cake that disappears first at potlucks. The one that earns you a chorus of “Mmm!”s and “Can I have the recipe?”s. We’re talking about layers so tender and moist they practically melt, infused with real coconut flavor from top to bottom, all wrapped up in a cloud of the creamiest coconut frosting and a snowy drift of toasted coconut. It’s elegant, comforting, and totally timeless.
Maybe you’re planning a birthday, dreaming of a show-stopping Easter dessert, or just having a Tuesday that deserves a spectacular treat. This is your recipe. I’ve poured all my love for old-fashioned, from-scratch baking into this guide, and I’ll be with you every step of the way, sharing my best chef tips and kitchen stories. So, tie on your favorite apron (the messy one is always the best), and let’s create something unforgettable together.
Grandma’s Apron & The Cake That Started It All
My love for this cake has deep, sweet roots. Picture a small, sunny kitchen in my grandma’s house. I’m about eight years old, standing on a step-stool, “helping” by licking every spoon and bowl in sight. The air was always thick with the scent of sugar and butter, but the days she made her coconut cake were special. She called it her “sunshine cake,” because no matter how gray the Michigan winter was outside, this cake brought a taste of the tropics right to her Formica table.
She didn’t use fancy extracts or tools—just simple ingredients and a whole lot of love. Her secret was toasting the coconut for the topping in her ancient cast-iron skillet until it was golden and fragrant. That nutty, warm aroma is one of my core memory scents. I’d watch, mesmerized, as she meticulously pressed handfuls of that toasted coconut onto the sides of the frosted cake, her hands steady and sure. This recipe is an homage to her—a little more refined with some professional tricks I’ve learned, but with the same soul-warming, sunny spirit. Every time I make it, I’m right back in that kitchen with her.
Gathering Your Sunshine: Ingredients & Why They Matter
Great baking starts with great ingredients. Here’s exactly what you’ll need and my little chef insights on each one. Let’s get your mise en place ready!
For the Cake:
- 2½ cups all-purpose flour: The backbone of our cake. I always fluff my flour with a spoon before gently scooping and leveling it off with a knife. This prevents a dense, dry cake. For a slightly lighter crumb, you can swap ½ cup with cake flour.
- 2½ teaspoons baking powder: Our leavening superstar! It gives the cake its beautiful rise. Make sure yours is fresh (it should fizz vigorously when added to hot water).
- ½ teaspoon salt: Never skip the salt! It balances all the sweetness and makes the coconut flavor truly pop.
- ¾ cup unsalted butter, softened: “Softened” is key here—it should give slightly when pressed but not be oily or melted. This creams into the sugar to create a light, airy base.
- 1¾ cups granulated sugar: Sweetness and tenderness. The sugar crystals help aerate the butter during creaming.
- 4 large eggs, at room temperature: Room temp eggs incorporate much more easily, creating a smoother, more emulsified batter. Place them in a bowl of warm water for 5 minutes if you forgot to take them out!
- 1 teaspoon vanilla extract + 1 teaspoon coconut extract: The dynamic flavor duo! Pure vanilla adds depth, and the coconut extract gives that unmistakable, island-vacation aroma. For a more natural flavor, you can use 2 tsp of vanilla and 1 tsp of coconut oil, but the extract packs a punch.
- 1 cup full-fat coconut milk: This is the secret to insane moisture. Shake the can well before opening. The rich fat content is what makes this cake so luscious. Don’t use the “light” version here—we’re going for glory.
- 1 cup sweetened shredded coconut: Folded right into the batter for delightful chewy, coconutty pockets in every single bite.
For the Frosting & Topping:
- 1 cup unsalted butter, softened: Just like for the cake, perfect softening is crucial for a silky, spreadable frosting.
- 4 cups powdered sugar: Sift it if it’s lumpy! This ensures your frosting is perfectly smooth.
- 3–4 tablespoons coconut milk: We’re doubling down on flavor! Start with 3 tbsp and add the 4th only if needed to reach your desired consistency.
- 1 tsp vanilla + ½ tsp coconut extract: Echoing the cake’s flavors for a harmonious bite.
- 1½ – 2 cups sweetened shredded coconut, for coating: I highly recommend toasting at least half of this. It adds a gorgeous color and a deep, nutty flavor that takes this cake to the next level.
Let’s Build This Beauty: Step-by-Step Instructions
Ready to bake? Follow these steps, and read my commentary for those “aha!” moments that make all the difference.
- Prep Like a Pro: Preheat your oven to 350°F (175°C). Now, let’s prep those pans. Take your two 9-inch round cake pans and grease them generously with butter or baking spray. Then, add a tablespoon of flour to one, tap and shake it around to coat, and dump the excess into the next pan. Do the same. This “grease and flour” method is the oldest trick in the book for guaranteeing your cakes will release cleanly. No sticking, no tears. Line the bottoms with parchment paper circles for extra insurance. Set aside.
- Whisk the Dry Team: In a medium bowl, whisk together the 2½ cups flour, 2½ tsp baking powder, and ½ tsp salt. Whisking by hand for a good 30 seconds does two things: it combines everything evenly and aerates the flour a bit. Set this bowl aside.
- Cream to Dream: In your stand mixer fitted with the paddle attachment (or a large bowl with a hand mixer), beat the ¾ cup softened butter and 1¾ cups sugar together on medium-high speed. Here’s the secret: beat it for a full 3-5 minutes, until it’s incredibly pale, fluffy, and almost white. This step incorporates air, which is essential for a light cake. Don’t rush it!
- Incorporate the Eggs: With the mixer on medium, add your 4 room-temperature eggs, one at a time. Let each egg fully incorporate into the batter before adding the next. Scrape down the bowl halfway through. Then, beat in the 1 tsp vanilla and 1 tsp coconut extract.
- The Alternate Dance: Reduce mixer speed to low. Add about one-third of your dry flour mixture and mix until just combined. Now, pour in half of the 1 cup coconut milk. Mix. Repeat: another third of flour, the rest of the milk, then the final third of flour. Mix only until the last streaks of flour disappear. Overmixing at this stage develops gluten and leads to toughness. A few small lumps are okay!
- Fold in the Coconut: Take the bowl off the mixer. Grab a rubber spatula and gently fold in the 1 cup of shredded coconut by hand. This ensures it’s evenly distributed without overworking the batter.
- Bake to Golden Perfection: Divide the batter evenly between your prepared pans. A kitchen scale is perfect for this, or you can eyeball it. Smooth the tops with your spatula. Bake for 25-30 minutes. The cakes are done when they’re golden, spring back lightly when touched, and a toothpick inserted into the center comes out clean or with a few moist crumbs (not wet batter).
- The Golden Rule: Cool Completely! Let the cakes cool in their pans on a wire rack for 15 minutes. Then, run a knife around the edges, invert them onto the rack, peel off the parchment, and let them cool completely—I mean, totally cold. Trying to frost a warm cake is a recipe for a frosting waterfall. Use this time to wash dishes and make your frosting!
- Make the Dreamy Frosting: In a clean mixer bowl, beat the 1 cup softened butter on medium until creamy and smooth. Gradually add the sifted powdered sugar, one cup at a time, on low speed (to avoid a sugar cloud!). Once incorporated, add 3 tbsp coconut milk and the extracts. Beat on medium-high for 2-3 minutes until light, fluffy, and spreadable. If it’s too thick, add the remaining 1 tbsp milk.
- Assemble & Create the Snowdrift: Place one cooled cake layer on your serving plate. Spread a generous layer of frosting on top. Place the second layer on top. Apply a thin “crumb coat” of frosting over the entire cake to seal in crumbs, then chill for 15 minutes. Finally, frost the entire cake with the remaining frosting. Now, take your toasted (or untoasted) shredded coconut and gently press handfuls onto the sides and top of the frosted cake. I like to do this over a baking sheet to catch the fallout!
Sunshine on a Plate: How to Serve This Masterpiece
Presentation is part of the joy! For a truly stunning look, place your finished cake on a simple cake stand. The height makes it feel extra special. I love garnishing the top with a few elegant twists: a ring of fresh raspberries or edible flowers around the edge, or even a sprinkle of freeze-dried raspberry powder for a pop of color and tartness against the sweet coconut.
When it’s time to slice, use a sharp, thin-bladed knife. Dip it in hot water and wipe it dry between each cut for beautifully clean slices. This cake is rich, so I find smaller slices are perfect alongside a cup of strong coffee or a glass of cold milk. For a next-level dessert experience, serve each slice with a dollop of lightly sweetened whipped cream or a scoop of mango sorbet. The tropical pairing is divine!
Make It Your Own: Delicious Twists & Swaps
Love the base recipe but want to play? Here are some of my favorite riffs:
- The Piña Colada: Add ½ cup of well-drained crushed pineapple to the batter along with the shredded coconut. For the frosting, use a tablespoon of pineapple juice in place of one tbsp of the coconut milk.
- Toasted Coconut & Chocolate Chip: Use all toasted coconut in the batter and topping. Fold in ¾ cup of mini chocolate chips for a surprise in every bite.
- Lemon-Coconut Sunshine Cake: Add the zest of one lemon to the cake batter and substitute 2 tablespoons of the coconut milk in the frosting with fresh lemon juice. It’s bright, tangy, and incredible.
- Dairy-Free Delight: Use plant-based butter sticks (like Miyoko’s or Earth Balance) and ensure your coconut milk is dairy-free. Your frosting will be slightly softer, so chill the cake well before serving.
- Mini Layer Cake: Divide the batter between three 6-inch pans for an adorable, tall mini cake. Baking time will be slightly less, so start checking at 20 minutes.
From My Kitchen to Yours: Chef’s Notes
This recipe has been my trusty companion for years, evolving from my grandma’s simpler version. My biggest “aha” moment was realizing that toasting the coconut for the topping wasn’t just for flavor—the slightly drier, toasted flakes stick to the frosting SO much better than moist, untoasted shreds! No more coconut avalanches when you slice.
A funny story: I once made this for a friend’s party and was rushing so much I forgot to add the sugar to the cake batter. I didn’t realize until we took the first (very confusing) bite. Let’s just say a “savory coconut bread” is… not what the people wanted. We all had a huge laugh, and I ordered pizza while whipping up a quick batch of coconut cupcakes. Moral of the story: read your recipe twice, measure with love, and always taste as you go!
Your Questions, Answered: FAQs & Troubleshooting
Q: My cake layers domed in the middle. What happened?
A: This usually means your oven was running a bit hot, causing the edges to set before the center finished rising. Next time, try lowering your oven temp by 25°F. You can also use cake strips—damp fabric strips wrapped around the outside of the pan—which insulate the edges for an even bake. If it happens, just level the dome with a serrated knife before frosting for a flat, stable cake.
Q: Can I make this cake ahead of time?
A: Absolutely! The unfrosted cake layers can be baked, cooled completely, wrapped tightly in plastic wrap, and frozen for up to 1 month. Thaw in the refrigerator overnight before frosting. The frosted cake keeps beautifully at room temperature (covered) for 1 day, or in the fridge for up to 3 days. Let it come to room temp for about an hour before serving for the best texture and flavor.
Q: My frosting is too runny/too thick. Help!
A: Kitchen climates vary! If it’s too runny, your butter may have been too soft or your kitchen too warm. Chill the frosting bowl for 15-20 minutes, then re-whip. If it’s too thick to spread, add more liquid—but only ½ teaspoon of coconut milk at a time until it’s perfect.
Q: I can’t find coconut extract. Can I leave it out?
A: You can, but you’ll lose a lot of that distinct coconut punch. The cake will still be deliciously moist from the coconut milk and shreds. To compensate, try using an extra ½ teaspoon of vanilla and make sure to toast your coconut topping for maximum flavor.
A Sweet Little Nutrition Snapshot
These values are estimates for 1 slice (1/12 of a two-layer 9-inch cake) and will vary based on frosting thickness and exact ingredients.
-
Calories: ~520
-
Fat: 28g
-
Saturated Fat: 18g
-
Carbohydrates: 64g
-
Sugars: 48g
-
Protein: 6g
-
Sodium: ~280mg
This is celebration cake through and through—rich, comforting, and meant to be enjoyed slowly with people you love.
One Last Slice Before You Go
There are some desserts that whisper, and others that shine. This coconut cake does the latter. It’s the kind of cake that feels like a milestone—even when the occasion is simply “we made it through the week.” It carries nostalgia, warmth, and that unmistakable sense of care that only a homemade layer cake can bring.
If you bake this cake, I hope it becomes part of your story too. Maybe it shows up at birthdays, showers, or Sunday dinners. Maybe it becomes the cake people request by name. Or maybe it’s just for you—made on a quiet afternoon when you need a reminder that sweetness still exists.