The Frosting That Feels Like a Hug: Your New Go-To Vanilla Buttercream
Hey there, friend! Come on in, pull up a stool, and let’s talk about something magical. That moment when you slide a cake out of the oven, the kitchen smelling like sweet vanilla and warm butter, is pretty special. But for me, the real magic happens next. It’s the transformative power of a perfect bowl of frosting. We’re not just spreading on sweetness; we’re adding the final, joyful, creamy layer of love that turns a simple cake into a celebration.
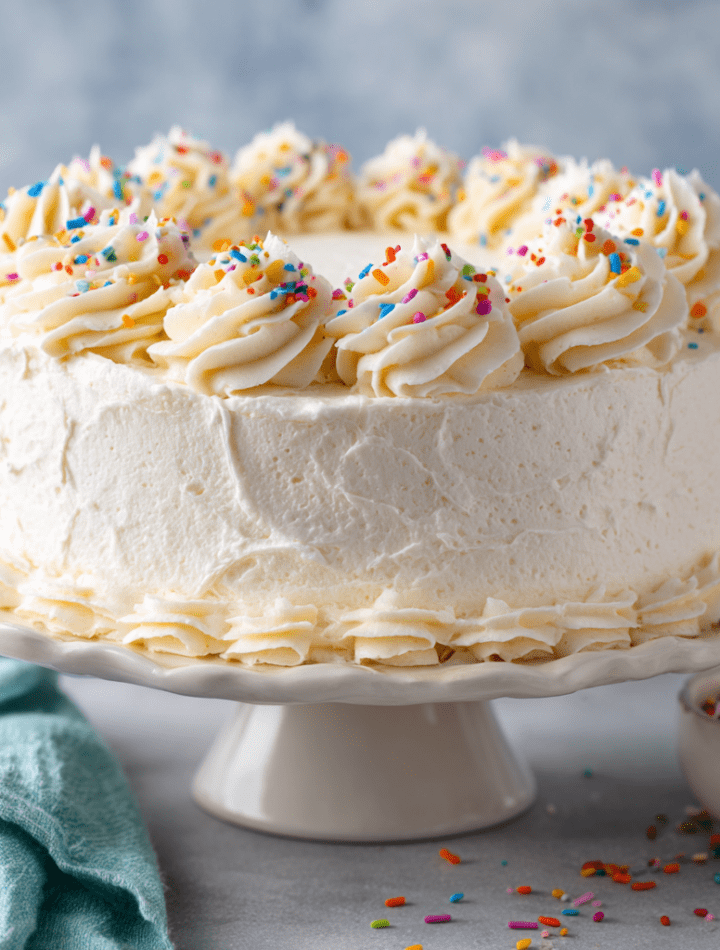
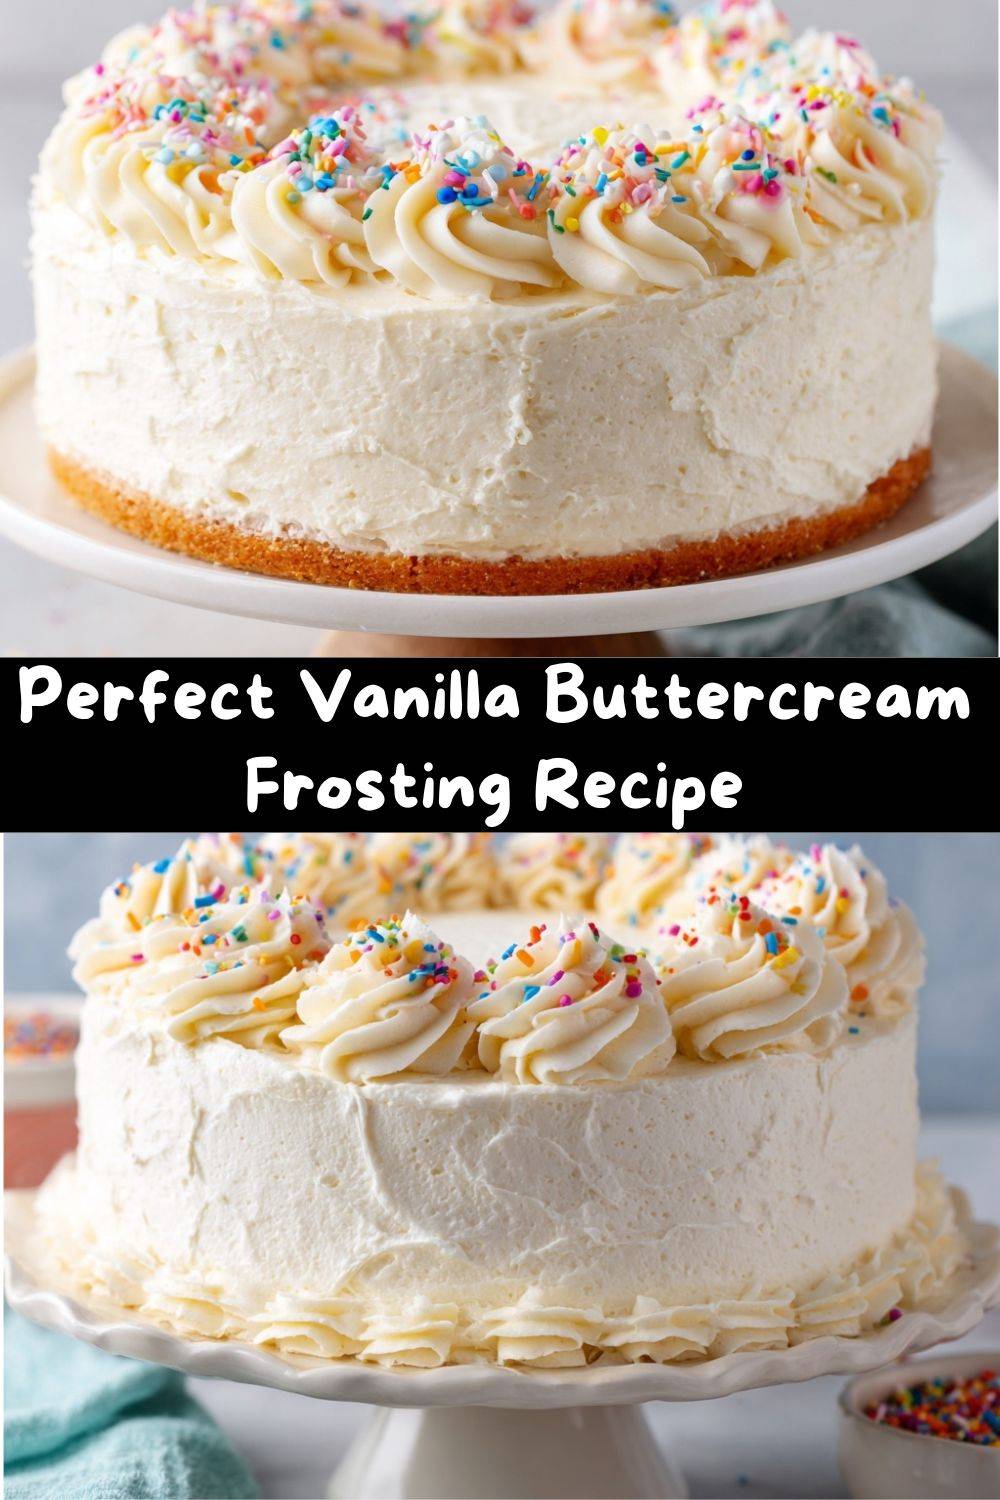
I’m talking about Classic Vanilla Buttercream. Not too sweet, not too bland, but perfectly balanced—fluffy, smooth, and begging to be licked right off the spatula (I won’t tell!). This isn’t just any frosting. This is the bakery-style superstar, the one that pipes beautiful rosettes, spreads like a dream, and holds its shape without being stiff. It’s the trusty sidekick to your favorite chocolate cake, the crowning glory on weekend cupcakes, and the secret to making any dessert feel like it came from a fancy patisserie (shh, our secret).
If you’ve ever been intimidated by frosting, worried it would split, be grainy, or just taste like a mouthful of powdered sugar, today is your day. I’m here to walk you through every single step, share all my messy-apron-wearing secrets, and show you how to create a frosting that’s so good, you might just eat it with a spoon. Ready to make something delicious? Let’s grab our mixers and get started.
A Wooden Spoon, A Sunbeam, and the Taste of Home
My love for this frosting started long before culinary school, in my grandma’s kitchen. Sunday afternoons were for baking, and her signature was a simple yellow layer cake. But to my childhood eyes, the real star was the fluffy white cloud she’d whip up in her chipped ceramic bowl. She didn’t use a stand mixer; she used a wooden spoon and sheer willpower. I’d sit on the countertop, legs swinging, watching a sunbeam cut through the flour-dusted air as she creamed the butter and sugar.
She’d let me drizzle in the vanilla—the “good stuff,” she’d whisper—and sneak me a taste on my finger. It was ethereal. It tasted like love, patience, and happy endings. That memory is baked into my soul. Now, when I make this buttercream, I still feel that sunbeam on my shoulders. I’ve swapped the wooden spoon for a mixer (my arms thank me!), but the heart of it is the same: creating a simple, perfect bit of joy to share with the people you love. This recipe is that memory, passed on to you with a whole lot of love.
Gathering Your Frosting Toolkit: It’s All About Quality & Temperature
Here’s everything you need to create frosting magic. Remember, great ingredients make a great finish!
- 1 cup (2 sticks) unsalted butter, softened – This is the foundation. Unsalted lets you control the salt level. “Softened” is KEY! It should give gently when poked but not be greasy or melted. Think cool room temperature, about 65-67°F. This makes it cream up perfectly light and airy.
- 3–4 cups powdered sugar (confectioners’ sugar), sifted – The sweet structure. I always sift it! This one step prevents lumps and ensures a silky-smooth texture. We start with 3 cups and add more as needed. Pro Tip: Use the weight on the bag to shield yourself from the inevitable sugar cloud when you turn on the mixer!
- 2–3 tablespoons heavy cream or whole milk – The moisturizer. Heavy cream gives a richer, more luxurious mouthfeel and helps with stability. Milk works perfectly in a pinch. We add this gradually to reach our perfect consistency.
- 1 teaspoon pure vanilla extract – The soul. Please use the good stuff! Pure vanilla extract, or even vanilla bean paste, makes a world of difference compared to imitation. This is where that warm, beautiful flavor comes from.
- A generous pinch of fine salt – The secret weapon. Salt isn’t here to make it taste salty; it’s here to balance the sweetness and make all the other flavors pop. Don’t skip it!
Let’s Make Some Magic: Step-by-Step to Perfect Buttercream
Follow these steps, and you’ll have frosting perfection. I’m talking right alongside you with tips and tricks!
- The Butter Prep: Place your perfectly softened butter in the bowl of a stand mixer fitted with the paddle attachment (a hand mixer works great too!). Beat on medium speed for a full 2-3 minutes. We’re not just mixing; we’re aerating. Watch it go from yellow to a very pale, almost white, creamy consistency. This step is non-negotiable for fluffiness!
- Sweetening the Deal: With the mixer on LOW speed, gradually add your 3 cups of sifted powdered sugar. I add it about ½ cup at a time, letting it incorporate fully before adding more. Why low speed? Unless you want to redecorate your kitchen in “Victorian Sugar Storm,” keep it low until the sugar is mostly mixed in!
- The Flavor Party: Stop the mixer. Add your vanilla extract, that glorious pinch of salt, and 2 tablespoons of your heavy cream or milk. Scrape down the bowl well with a flexible spatula—this ensures no pockets of un-mixed butter are hiding.
- Whip It Good: Now, turn the mixer to medium-high speed and let it beat for a full 2-3 minutes. This is where the transformation happens! The frosting will become noticeably lighter in color, incredibly smooth, and voluminous. Listen for the sound to change to a softer, fluffier whip.
- The Consistency Check: This is your moment of power. Is it too thin for piping? Beat in a little more sifted powdered sugar, ¼ cup at a time. Is it too thick or dry? Add more cream or milk, 1 teaspoon at a time, until it’s just right. For spreading, you want it like soft-serve ice cream. For piping intricate shapes, a slightly firmer hold is best.
- Ready for Action: Your frosting is ready to use immediately! If you need to store it, press plastic wrap directly onto the surface to prevent a crust from forming and keep it at room temperature if using within a few hours, or refrigerate.
Dressing Up Your Masterpiece: How to Serve & Plate
You’ve made this gorgeous, fluffy frosting—now let’s make it shine! For a classic two-layer 8-inch cake, I like to do a “crumb coat”: a super thin layer of frosting all over to trap any loose crumbs. Pop it in the fridge for 15 minutes to set, then pile on the rest of your frosting for a perfectly clean, smooth finish. Use an offset spatula dipped in hot water for super smooth sides.
For cupcakes, go wild! A simple swoop with a spoon is charming. For a bakery-style swirl, fit a piping bag with a large open star tip (like a 1M), fill it up, and pipe a tall, beautiful swirl starting from the outside edge and working in. Top with sprinkles, a berry, or even a tiny drizzle of caramel. Remember, the way you present your food is the first bite your eyes take—make it fun and full of love!
Make It Your Own: 5 Fun Flavor Twists
Classic vanilla is forever my first love, but playing with flavors is where the kitchen party starts! Here are my favorite easy twists:
- Chocolate Dream: After creaming the butter, sift in ¾ cup of unsweetened cocoa powder with the first addition of powdered sugar. You may need an extra splash of cream. For ultra-rich flavor, use 4 oz of cooled, melted semi-sweet chocolate.
- Zesty Lemon or Orange: Replace the vanilla with 1 tsp of pure lemon or orange extract. Add 1 tablespoon of finely grated citrus zest for a beautiful, bright flavor and specks of color.
- Cream Cheese Swirl: For a tangy twist, replace ½ cup (1 stick) of the butter with 4 oz of full-fat, softened cream cheese. Follow the same method. The flavor is incredible on carrot cake or red velvet!
- Almond or Mint Delight: Simply swap the vanilla for 1 ½ teaspoons of pure almond extract or ½ teaspoon of pure peppermint extract. Add a drop of gel food coloring for minty green fun.
- Berry Bliss: Reduce the cream to 1 tbsp. After whipping, gently fold in ¼ cup of seedless raspberry or strawberry jam (cooled) for a pretty pink hue and fruity flavor.
From My Kitchen to Yours: A Few Parting Tips
This recipe has been my ride-or-die for years, but it’s evolved with every batch. I once tried to shortcut the butter-softening by microwaving it… let’s just say I ended up with a soupy, separated mess and had to start over. Patience is a virtue here! I’ve also learned that on a really hot day, my frosting might get soft. No panic—just pop the bowl in the fridge for 10 minutes and re-whip. And always, always taste as you go! Adjust the vanilla or salt until it sings to you. The best recipes are guides, not dictators. Make it yours.
Your Frosting Questions, Answered!
Q: My frosting is grainy! What happened?
A: This is almost always due to undissolved powdered sugar. The fix? Keep beating! The friction from the mixer paddle will help dissolve the sugar. Ensuring your butter is properly softened and your sugar is sifted prevents this from the start.
Q: My frosting looks curdled or separated after I added all the ingredients.
A> Don’t worry, we can save it! This usually means the butter was a bit too cold or the ingredients weren’t fully incorporated. Simply place the bowl over a pot of simmering water (double-boiler style) for 5-10 seconds, just to slightly melt the outer edge of the butter. Immediately put it back on the mixer and beat on high for a minute. It should come back together beautifully.
Q: Can I make this ahead of time?
A> Absolutely! Store it in an airtight container in the fridge for up to one week, or freeze for up to 3 months. When ready to use, let it come to room temperature completely, then re-whip it in the mixer for a minute or two to restore the fluffy texture.
Q: Why do you insist on unsalted butter?
A> Different butter brands have different salt levels. Using unsalted butter gives you complete control over the seasoning of your frosting, so you can add the exact “pinch” that makes the vanilla flavor pop without risking an accidentally salty finish.
A Note on Nutrition & Portion
Let’s be real, friends—this is a celebratory frosting, a treat meant to be enjoyed in the context of a wonderful homemade dessert. This recipe yields enough to generously frost a two-layer cake or about 24 cupcakes. A standard serving (about 2 tablespoons) provides roughly 140 calories, primarily from the butter and sugar. It’s rich and satisfying, so a little goes a long way in adding that perfect sweet, creamy finish to your baking projects. As with all good things, the joy is in savoring it!
The Final Dollop: You’ve Got This!
And there you have it—everything my kitchen-loving heart knows about making the perfect, fluffy, classic vanilla buttercream. This isn’t just a recipe; it’s a tool for creating joy. It’s for birthday smiles, “just because” cupcakes, and the simple act of making something beautiful with your own two hands.
So the next time a cake comes out of your oven, don’t be afraid to slather it with love. Whip up this frosting, tell your own stories over the mixer’s hum, and share the delicious results. I’m so proud of you for giving it a go. Now, go forth and frost something amazing! And be sure to tag me @TastyChow if you share it—I love seeing your creations.
With a full heart and a sweet tooth,
Emily 🧁