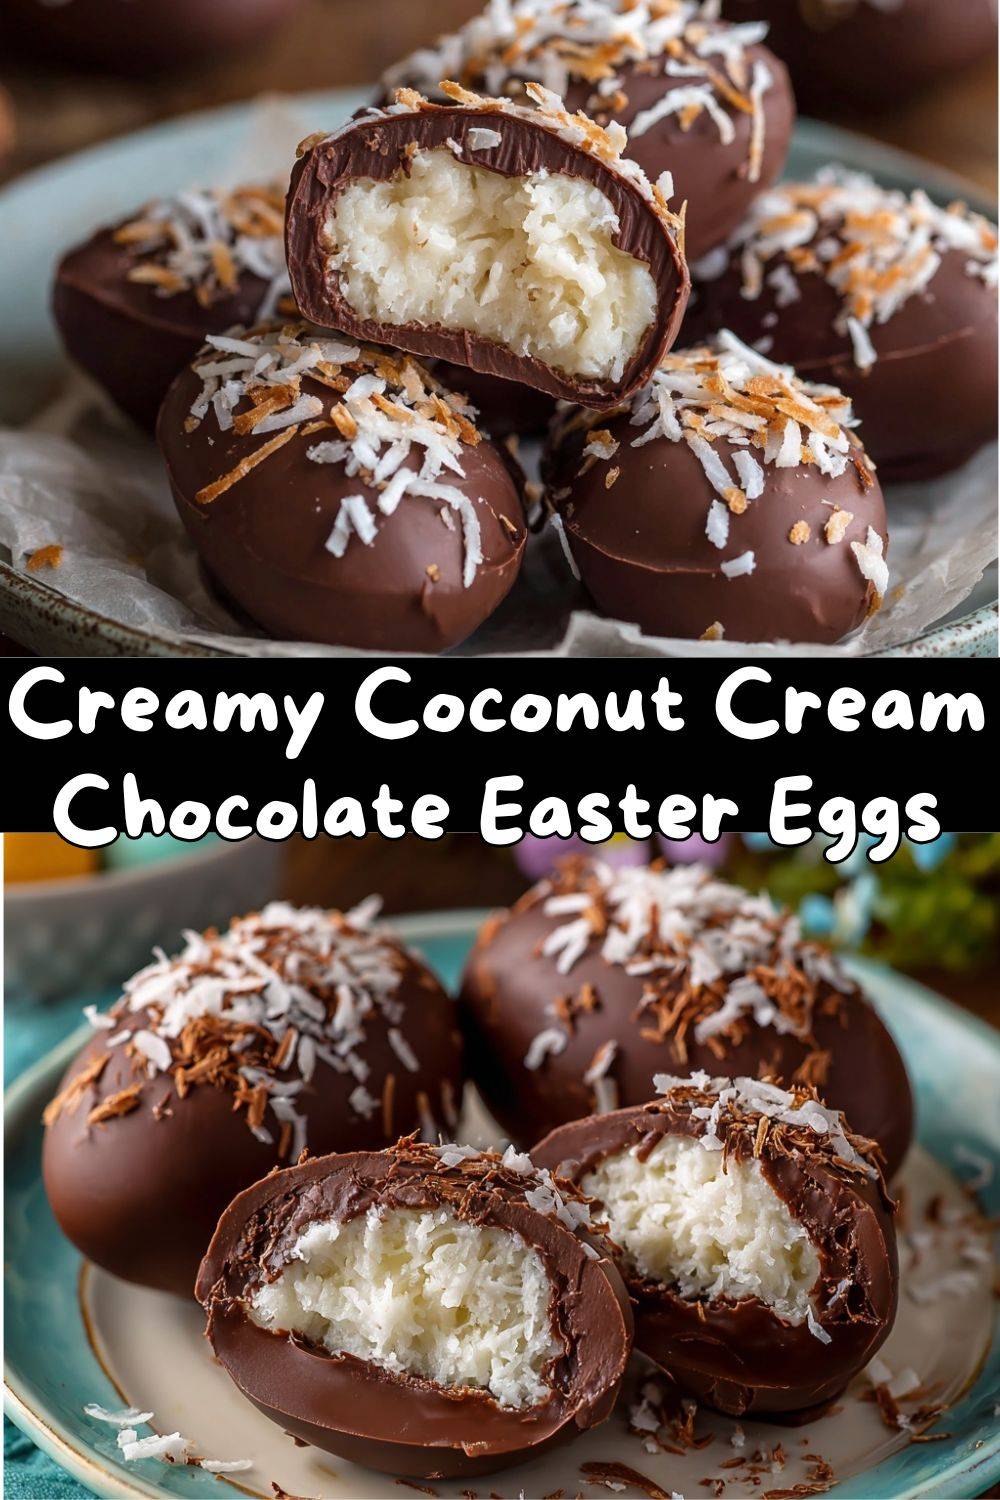
The Secret to the Creamiest, Dreamiest Coconut Cream Chocolate Easter Eggs (No Baking Required!)
Hey there, friend! Can you smell that? It’s the unmistakable, magical scent of chocolate slowly melting, mixed with the sweet, tropical whisper of coconut. That, my fellow foodie, is the smell of a homemade Easter tradition in the making. If you’ve ever stood in the candy aisle, picked up a shiny, foil-wrapped coconut cream egg, and wondered, “Could I make something even *better* at home?”—I’m here to tell you, with a big, enthusiastic chef’s kiss, YES, you absolutely can.
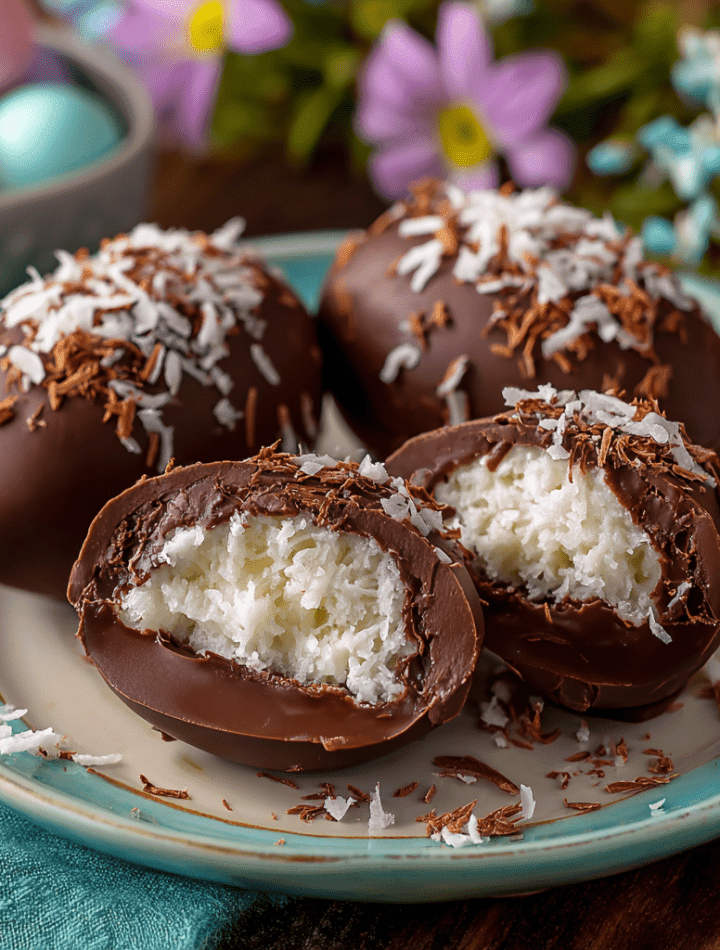
These Coconut Cream Chocolate Easter Eggs are my springtime obsession. We’re talking about a melt-in-your-mouth, irresistibly creamy coconut filling that’s not too sweet, not too heavy, but just *perfect*, all hugged by a crisp shell of luxurious chocolate. The best part? This is a no-bake wonder. Zero oven required. Just a bowl, a spoon, a little chilling time, and the immense satisfaction of creating something gorgeous and delicious with your own two hands.
This recipe is for anyone who believes holiday magic happens in the kitchen. It’s for the busy parent who wants to make a special treat without a huge production, for the dessert lover looking for a project that’s fun but foolproof, and for anyone who’s ever wanted to give a gift that genuinely says, “I made this just for you.” So, tie on your favorite apron (the one with the stains that tell stories), and let’s make some memories—and some seriously delicious candy.
A Messy Apron and a Grandma’s Secret: Where My Love for These Eggs Began
My love affair with these eggs didn’t start in culinary school. Nope. It started on a wobbly wooden step-stool in my Grandma Ruth’s kitchen, my chin barely clearing the Formica countertop. Every spring, she’d transform her tiny kitchen into a candy workshop. The air would grow thick with the scent of melting paraffin wax (her old-school trick for shiny chocolate!) and toasted coconut.
I was her official “egg shaper,” a job I took with the utmost solemnity. My little hands would roll and pat the sticky coconut mixture into lopsided ovals, which she would then, with infinite patience, dip into a deep pool of chocolate. She’d let me decorate them with the tiniest sprinkle dots. They were never perfectly symmetrical, and they often had a rogue thumbprint, but to me, they were masterpieces. Those afternoons taught me that the best recipes aren’t just about flavor—they’re about the flour-dusted stories, the shared laughter, and the proud moment of presenting something you made with love. This recipe is my homage to her, minus the paraffin, but with all the heart.
Gathering Your Candy-Making Crew: The Ingredients
Here’s the beautiful part: the ingredient list is short, sweet, and probably already in your pantry. Using quality stuff here makes all the difference, so let’s break it down.
- 1/2 cup unsalted butter, softened: This is the rich, creamy base of our filling. Chef’s Tip: *Really* let it soften at room temp for an hour. If it’s too cold, your filling will be lumpy; if it’s melted, it’ll be greasy. You want it perfectly spreadable.
- 1/2 cup sweetened condensed milk: The magical glue! It adds sweetness, creaminess, and helps bind everything into that iconic, smooth texture. Don’t substitute evaporated milk—it’s not the same!
- 1 tsp pure vanilla extract: A flavor booster that rounds out the sweetness. For a next-level twist, try coconut extract instead!
- 2 1/2 cups powdered sugar: This gives the filling structure and that classic, meltaway feel. Sift it if you have time to avoid any tiny lumps.
- 1 1/2 cups shredded sweetened coconut: The star of the show! I use finely shredded for a smoother bite, but medium works too for more texture. Substitution Tip: For a deeper flavor, toast half of it on a baking sheet at 350°F for 5-7 minutes until golden before adding. Let it cool completely first!
- 12 oz chocolate chips (dark, milk, or semi-sweet): Your coating, your choice! I adore dark chocolate for a sophisticated contrast, but milk chocolate is the classic, nostalgic route. Use a brand you love to eat on its own.
- 1 tbsp coconut oil or shortening: This little secret weapon makes the melted chocolate fluid, glossy, and easy to dip with. It helps it set with a beautiful snap.
- Optional Decorations: Pastel sprinkles, toasted coconut flakes, a drizzle of white chocolate, or a pinch of flaky sea salt. This is where your personality shines!
Let’s Make Some Magic: Step-by-Step Instructions
Ready? Let’s get our hands deliciously dirty. I’ll walk you through every step with my favorite kitchen hacks.
- Make the Filling: In a large bowl, beat the softened butter with a hand mixer or a sturdy spatula until it’s smooth and creamy. This takes about a minute. Pour in the sweetened condensed milk and vanilla, and beat again until it’s completely combined and looks like a luscious, pale sauce. Chef’s Hack: Scrape down the sides of the bowl often! This ensures no stubborn butter pockets are hiding.
- Incorporate the Dry Goods: With your mixer on low, gradually add the powdered sugar. I do it in three additions to avoid a powdered sugar snowstorm in my kitchen! Once it’s mostly incorporated, fold in the shredded coconut with a spatula. The mixture will be thick, slightly sticky, and hold together when pinched. If it feels too soft to shape, add another tablespoon or two of powdered sugar. If it’s too dry, add a *teaspoon* of extra condensed milk.
- Shape Your Eggs: Line a baking sheet with parchment paper. Scoop out heaping tablespoon-sized portions of the mixture. Roll them briefly between your palms to smooth them, then gently shape them into oval “eggs.” Don’t stress about perfection—rustic is charming! Place them on the tray. Pro Tip: If your hands get too sticky, lightly dampen them with water or dust them with powdered sugar.
- The Big Chill: Pop the tray into the freezer for 30-40 minutes. This is non-negotiable! A firm, cold center is the key to a smooth, successful chocolate dip. It prevents the egg from melting into the chocolate pool.
- Melt the Chocolate: While the eggs chill, melt your chocolate. You can use a double boiler (a heatproof bowl set over a pot of simmering water, ensuring the bowl doesn’t touch the water) or the microwave. For the microwave, heat in 30-second bursts at 50% power, stirring vigorously between each burst. When it’s almost melted, add the coconut oil and stir until the last lumps disappear and the chocolate is glossy and fluid.
- The Dip of Destiny: Take a few eggs out of the freezer at a time. Spear one with a fork, dunk it completely into the chocolate, lift it out, and gently tap the fork on the side of the bowl to let the excess drip off. Carefully slide it off the fork and back onto the parchment paper. Repeat! Chef’s Confidence Booster: If the first one is messy, that’s okay! You’ll find your rhythm. The parchment paper forgives all.
- Decorate & Set: Immediately after dipping, add your sprinkles or decorations before the chocolate sets. Once all are dipped, let them set at room temperature until the chocolate is firm, or speed things up by chilling in the fridge for 15 minutes.
How to Serve Your Homemade Masterpieces
Presentation is half the fun! For a simple, elegant look, place each set egg in a pastel-colored mini paper cupcake liner. Stack them on a beautiful cake stand or a rustic wooden board for your Easter table. If you’re gifting them, clear cellophane bags tied with a ribbon make them look incredibly professional (your secret is safe with me!). These eggs are rich, so I love serving them alongside a pot of strong coffee or a glass of cold milk. They’re the perfect finale to a spring brunch or a sweet treasure hidden in an Easter basket.
Get Creative! 5 Fun Variations to Try
Once you’ve mastered the classic, the playground is open! Here are some of my favorite twists:
- The Almond Joy: Add 1/2 cup of chopped almonds to the filling and use milk chocolate for the dip. Place a whole almond on top after dipping for a signature look.
- Pina Colada Paradise: Substitute 1/2 tsp of coconut extract for the vanilla, and add 1/4 cup of finely chopped dried pineapple to the filling. Dip in white chocolate!
- Dark Chocolate Sea Salt: Use dark chocolate for dipping and immediately after setting each egg, sprinkle with a tiny flake of flaky sea salt. The sweet-salty combo is incredible.
- Cookie Dunch: For a kid-friendly crowd, fold in 1/4 cup of mini chocolate chips into the coconut filling before shaping.
- Vegan-Friendly Swap: Use vegan butter, a vegan sweetened condensed coconut milk alternative, and dairy-free chocolate chips. The method remains exactly the same!
Chef Emily’s Notes & Kitchen Confessions
This recipe has evolved so much from my grandma’s paraffin days! I’ve learned that the type of chocolate truly matters—a higher cocoa butter content gives a better snap. I also went through a phase of adding a splash of rum to the filling (delicious for adults-only batches, I must say!). My funniest kitchen fail? The year I tried to “save time” by not chilling the eggs long enough. Let’s just say I ended up with chocolate-covered coconut *puddles* that were delicious but decidedly un-egg-like. The lesson? Patience is a ingredient, too. Now, I put the tray in the freezer and walk away to clean up—it’s my mandatory candy-making meditation.
Your Questions, Answered: FAQs & Troubleshooting
Q: My filling is too soft/sticky to shape. Help!
A: No panic! Just add more powdered sugar, a few tablespoons at a time, until it’s moldable. The humidity in your kitchen or the brand of condensed milk can affect this. Conversely, if it’s too dry and crumbly, add a teaspoon of extra condensed milk.
Q: Why did my chocolate get thick or clumpy when I melted it?
A: This is called “seizing,” and it usually happens if a tiny drop of water or steam gets into the chocolate. Always ensure your bowls and tools are completely dry. If it happens, you can sometimes save it by stirring in a teaspoon of extra coconut oil or shortening until smooth again.
Q: Can I make these ahead of time?
A: Absolutely! They are perfect for making ahead. Store finished eggs in an airtight container in the fridge for up to 2 weeks, or freeze for up to 2 months. Let them come to room temp for about 10 minutes before serving for the best texture.
Q: Is there a trick to getting a smooth, even chocolate coating?
A> Yes! Ensure your chocolate is smoothly melted and fluid (the coconut oil helps!). Tap the fork firmly against the bowl to shake off excess. If you get a “foot” or pool of chocolate at the base, you can use a second fork to gently lift it off the parchment and smooth the edge before it sets.
Nutritional Information (Because We’re All About Balance!)
Okay, let’s be real: this is a celebratory treat, meant to be enjoyed mindfully and joyfully! Here’s a general breakdown per egg (assuming the recipe makes about 20). Remember, these are estimates, and exact numbers will vary based on your specific ingredients and size of eggs. Per Egg (Approximate): 160 Calories | 1g Protein | 9g Fat (6g Saturated) | 18g Carbohydrates (16g Sugars) | 1g Fiber. These are naturally gluten-free. For a lower-sugar option, you can experiment with a sugar-free sweetened condensed milk alternative and a sugar-free chocolate coating, though the texture may vary slightly.
Final Thoughts from My Kitchen to Yours
And there you have it! Your very own batch of homemade Coconut Cream Chocolate Easter Eggs. I hope you feel that incredible pride that comes from creating something wonderful from simple ingredients. More than that, I hope you share them. Share them with your family, your neighbors, your coworkers. Wrap a few up for a friend who needs a sweet pick-me-up. Food is love made edible, and these little eggs are packed with it.
Thank you for spending this time in my kitchen corner. Making these with you has been an absolute delight. However you celebrate this season, may it be filled with joy, warmth, and of course, seriously tasty chow. Now, go grab the first egg—you’ve earned it!
With love and a chocolate-smeared apron,
Emily