Cool Whip Candy: Your New Secret Weapon for Effortless Indulgence
Hey there, friend! Emily here, waving at you from my flour-dusted kitchen. Is your sweet tooth calling? Mine does, pretty much every afternoon around 3 PM. It’s that time of day when you need a little something—a bite of chocolate, a taste of sweetness—to power you through until dinner.
But let’s be real: sometimes, turning on the oven feels like a monumental task. And complicated recipes with a sink full of dishes? No, thank you. That’s exactly why I’m so head-over-apron in love with this recipe for Cool Whip Candy.
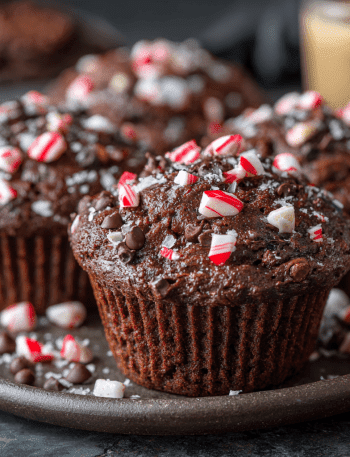
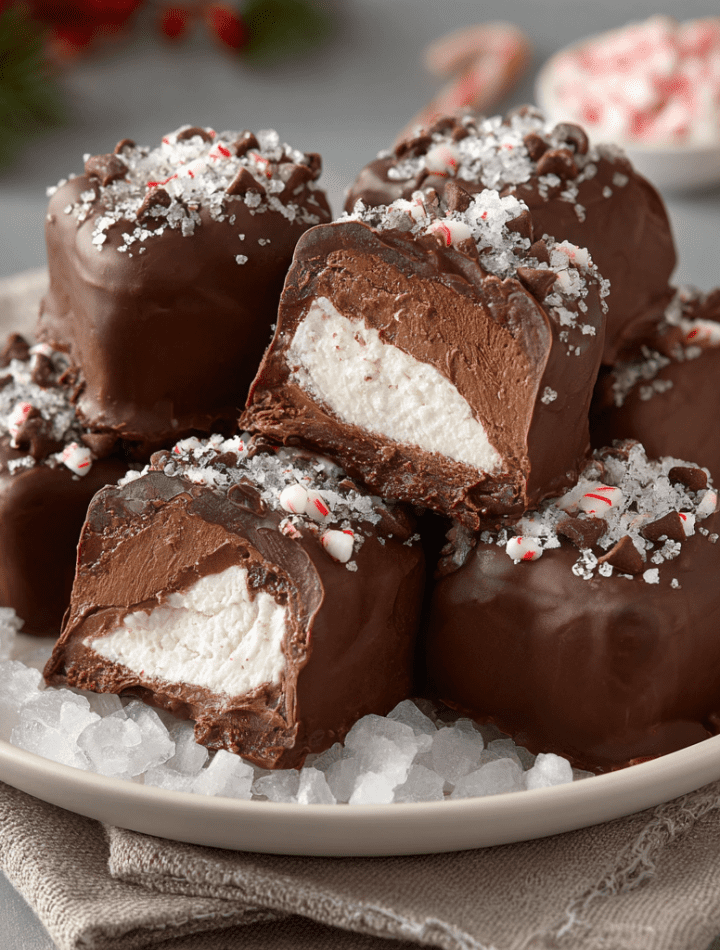
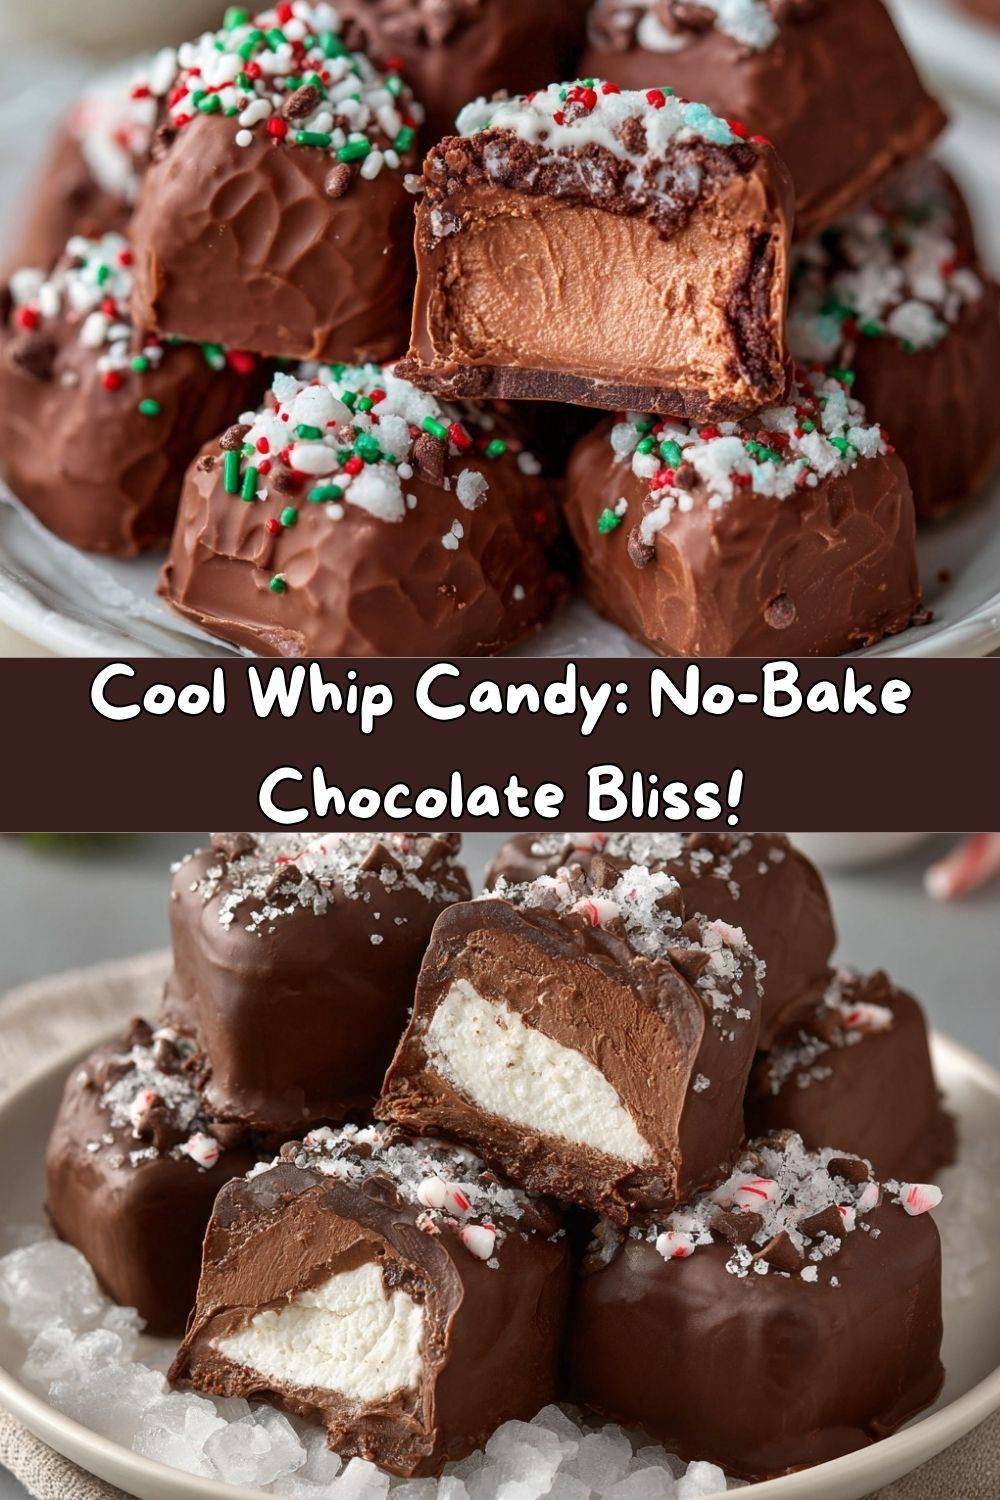
Imagine this: a cloud-like, mousse-y center that’s impossibly light, hugged by a firm, snappy shell of rich chocolate. It’s a textural dream come true. It’s cold, sweet, and melts in your mouth in the most satisfying way. The best part? This is a no-bake, four-ingredient wonder that comes together in minutes. Seriously. You probably have most of this stuff in your pantry right now.
Whether you’re prepping for the holiday cookie swap, need a last-minute hostess gift, or just want a secret stash of something sweet in your freezer for those 3 PM emergencies, this Cool Whip Candy is your answer. So, grab your favorite mixing bowl and let’s make some magic happen. No oven required!
The Happy Accident That Started It All
This recipe takes me right back to my first apartment after culinary school. My kitchen was tiny, and my budget was even tinier. A friend was coming over, and I wanted to impress her with a fancy dessert, but all I had was a bag of chocolate chips and a tub of Cool Whip leftover from a failed Jell-O salad attempt.
In a moment of “what’s the worst that could happen?” inspiration, I melted the chocolate, folded in the Cool Whip, and stuck the whole mess in the freezer. An hour later, we were scooping this fluffy, frozen chocolate mousse out of the bowl with spoons, laughing at how something so simple could taste so decadent. Over the years, that happy accident evolved. I started slicing it into squares and dipping it in more chocolate, turning my messy experiment into these elegant, bite-sized candies. It just goes to show that some of the best recipes aren’t planned—they’re discovered with a little courage and a willingness to play with your food.
Gathering Your Happy Ingredients
Here’s the beautiful shortlist of what you’ll need. I’ve added a few chef-y insights and substitution ideas to make this recipe truly yours.
- 2 cups Milk Chocolate Chips: This forms the base of our fluffy center. I love the creamy, sweet flavor of milk chocolate here—it creates a fantastic contrast with the dark coating. Chef’s Insight: Using a good quality chocolate chip (like Ghirardelli or Guittard) really makes a difference in flavor!
- 1 tub (8 oz) Cool Whip, Thawed: This is the magic ingredient that gives the candy its signature airy, mousse-like texture. Make sure it’s fully thawed in the fridge for easy mixing. Substitution Tip: For a from-scratch vibe, you can use an equal amount of freshly whipped heavy cream sweetened with a tablespoon of powdered sugar.
- 3 cups Dark Chocolate Melting Wafers or Chocolate Chips: This is for the signature snappy shell. Chef’s Insight: I highly recommend using melting wafers (like Ghirardelli or Candiquik) if you can find them. They are specifically formulated for dipping and coating, so they set beautifully and don’t require tempering.
- Optional Toppings: This is where you get to shine! Raid your pantry. Fun Ideas: Flaky sea salt, colorful sprinkles, crushed peppermint (so festive!), chopped nuts, or even a drizzle of white chocolate.
Let’s Make Some Magic: Step-by-Step Instructions
Ready? This is so much fun. Let’s create our no-bake bliss, one simple step at a time.
- Melt the Milk Chocolate: Pour your 2 cups of milk chocolate chips into a microwave-safe bowl. Heat them in the microwave in 30-second bursts, stirring vigorously with a spatula after each burst. Stop when there are just a few small lumps left—the residual heat will melt them as you stir. This prevents the chocolate from scorching! Chef’s Hack: Let the melted chocolate cool for about 5 minutes. If it’s too hot, it will deflate the Cool Whip when we mix them.
- The Big Fold: Now, take your tub of thawed Cool Whip and plop it right on top of the slightly cooled chocolate. Using that same spatula, gently fold the two together. “Folding” means you’re cutting down through the middle, scraping along the bottom of the bowl, and turning the mixture over itself. Be gentle! We want to keep as much of that airy volume as possible. You’ll know it’s done when you have a uniform, light brown, fluffy mixture with no white streaks.
- First Freeze: Line an 8×8 inch square baking pan with parchment paper, leaving some overhang on two sides. This is your “sling” that will make it super easy to lift the whole block out later. Scrape every last bit of the chocolate-Cool Whip mixture into the pan and smooth the top with your spatula. Pop it into the freezer, uncovered, for 30-40 minutes. You want it firm enough to slice cleanly.
- Slice & Second Freeze: Once firm, use the parchment paper to lift the entire block onto a cutting board. Using a sharp knife, slice it into bite-sized squares—I usually go for a 6×6 grid to get 36 perfect little candies. Pro Tip: Wiping your knife with a hot, damp cloth between cuts gives you super clean edges. Place the squares back on the parchment-lined tray and return them to the freezer for another 30 minutes. This second freeze is crucial for a mess-free dipping experience!
- Melt the Coating Chocolate: While the squares are getting nice and firm, melt your dark chocolate wafers or chips. You can use the microwave (same 30-second burst method) or a double boiler. If you’re feeling fancy, add a teaspoon of coconut oil to the chocolate as it melts—this can make it even smoother and help it set with a beautiful snap.
- The Dip! This is the most satisfying part. Remove a few squares from the freezer at a time (keep the rest cold!). Using a fork or a dipping tool, lower a square into the melted chocolate. Swirl it around to coat completely, then gently tap the fork on the edge of the bowl to shake off the excess chocolate. Chef’s Hack: This tapping motion is the secret to a thin, professional-looking shell instead of a thick, clumpy bottom.
- Top & Set: Carefully slide the coated candy onto a fresh piece of parchment paper. Immediately, while the chocolate is still wet, sprinkle on your chosen toppings. Repeat with the remaining squares. Let them set completely. You can speed this up by popping the tray in the fridge for 15 minutes, or just let them sit at room temperature if you’re not in a rush.
How to Serve Your Masterpiece
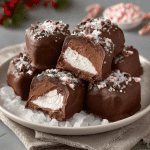
Presentation is part of the fun! These candies look gorgeous arranged on a simple white platter. For a party, I love piling them high in a rustic wooden bowl or arranging them in little mini-cupcake liners for a personalized touch.
They are best served straight from the fridge or freezer—that cool, mousse-like center is what makes them so special. Pair them with a hot cup of coffee to cut the sweetness, or a glass of cold milk for the ultimate nostalgic treat. They also make the most wonderful homemade gifts. Tuck a few into a cute cellophane bag, tie it with a ribbon, and you’ve got a present that’s guaranteed to make someone’s day.
Get Creative! Fun Recipe Variations
Once you’ve mastered the basic recipe, the flavor world is your oyster! Here are a few of my favorite twists:
- Peppermint Patty: Add ½ teaspoon of peppermint extract to the milk chocolate and Cool Whip mixture. Coat in dark chocolate and top with crushed candy canes.
- Rocky Road: Gently fold ¼ cup of mini marshmallows and 2 tablespoons of chopped almonds into the mixture before freezing.
- Cookies & Cream: Fold in ½ cup of crushed Oreo pieces (filling and all!) for a cookies-and-cream dream.
- Peanut Butter Swirl: Before freezing, dollop ¼ cup of warmed peanut butter over the mixture and use a knife to gently swirl it in.
- White Chocolate Raspberry: Use white chocolate chips for the base, and after dipping in white chocolate, top with a freeze-dried raspberry piece.
Chef Emily’s Notebook Scribbles
Over the years, this recipe has become a beloved staple in my kitchen, especially during the hectic holiday season. I once made a quadruple batch for a cookie exchange and was dubbed the “Candy Queen” for the rest of the year—a title I wear with pride!
One thing I’ve learned: don’t skip the second freeze. I learned that the hard way when I was impatient and tried to dip a slightly soft square. Let’s just say I ended up with more chocolate on my fingers than on the candy! The frozen center is the key to that perfect, clean bite. This recipe is wonderfully forgiving and a joy to make with kids, too. Just assign them sprinkle duty and watch their faces light up.
Your Questions, Answered!
Q: My chocolate mixture seemed runny and didn’t firm up well. What happened?
A: This usually means the melted chocolate was still too hot when you folded in the Cool Whip, causing it to deflate and melt. Next time, make sure your melted chocolate has cooled to just slightly warm to the touch. Also, double-check that your Cool Whip is fully thawed but still cold from the fridge.
Q: Can I make this dairy-free or vegan?
A> Absolutely! This is a super adaptable recipe. Use dairy-free chocolate chips and a vegan whipped topping (like So Delicious CocoWhip). Just check your labels to make sure everything fits your dietary needs.
Q: My chocolate coating is too thick and clumpy. Help!
A: This is often a temperature issue. If your coating chocolate is too cool, it will thicken up. You can gently re-warm it. Also, remember that vigorous tapping to shake off the excess is your best friend! Adding a tiny bit of coconut oil to the melting chocolate can also improve its viscosity.
Q: How long will these keep, and how should I store them?
A> These are freezer candies! Store them in a single layer in an airtight container in the freezer for up to 1 month. They are meant to be eaten cold and will become too soft if left at room temperature for long.
Cool Whip Candy : No-Bake, Chocolate-Coated Bliss
- Total Time: 1 hour 20 minutes
- Yield: 36 candies 1x
Description
This Cool Whip Candy is your secret weapon for effortless indulgence. With a mousse-like center wrapped in a smooth chocolate shell, it’s a freezer-friendly treat that’s equal parts fluffy, rich, and nostalgic. Perfect for the holidays, gifting, or a sweet bite anytime—no oven required.
Ingredients
2 cups milk chocolate chips
1 tub (8 oz) Cool Whip, thawed
3 cups dark chocolate melting wafers or chocolate chips (for coating)
Optional: sprinkles, crushed peppermint, sea salt, or chopped nuts for topping
Instructions
Melt the milk chocolate chips in a microwave-safe bowl in 30-second bursts, stirring in between until smooth. Let cool slightly.
Gently fold the melted chocolate into the Cool Whip using a spatula. Mix until combined into a light, fluffy mixture.
Spread the mixture evenly into a parchment-lined square pan and freeze for 30–40 minutes until firm.
Remove from the freezer and slice into bite-sized squares. Return the pieces to the freezer for another 30 minutes to set completely.
While the pieces chill, melt the dark chocolate coating until smooth.
Dip each frozen candy square into the melted chocolate, shaking off excess. Place on a lined tray and, if desired, top with sprinkles or other toppings before the chocolate hardens.
Let them set fully in the fridge or freezer before serving.
- Prep Time: 20 minutes
- Chill Time: 1 hour
Nutrition
- Calories: 115 / Candy
- Fat: 7g / Candy
- Carbohydrates: 12g / Candy
- Protein: 1g / Candy
Quick Nutritional Breakdown
Now, I’m all about balance—enjoying your treats without the stress! Here’s a general nutritional estimate per candy (based on a yield of 36, without toppings). Remember, this is just an estimate, and your exact numbers will depend on the specific brands you use.
- Calories: ~115
- Carbohydrates: 12g
- Fat: 7g
- Protein: 1g
This is a rich, indulgent treat, and a little goes a long way! The small size is perfect for satisfying a craving without overdoing it. For a slightly lighter version, you could use a sugar-free chocolate alternative, but the classic version is pure, simple joy in my book.
Final Sweet Thoughts
And there you have it! Your very own batch of homemade, no-fuss, incredibly delicious Cool Whip Candy. I hope this recipe brings as much joy to your kitchen as it has to mine. It’s proof that you don’t need fancy equipment or complicated techniques to create something truly special and shareable.
With a full heart and a happy belly,
— Emily