Introduction: The No-Bake Dream That’s Like a Hug in a Dish
Ever had one of those days where you need something sweet, something spectacular, but the very thought of turning on your oven makes you want to lie down on the cool kitchen floor? Me too, friend. That’s exactly why my Creamy Pistachio Pudding Dessert is my forever go-to. It’s a no-bake, layered masterpiece that’s light as a cloud, delightfully creamy, and packed with that nostalgic, nutty-sweet pistachio flavor we all secretly (or not-so-secretly) adore.
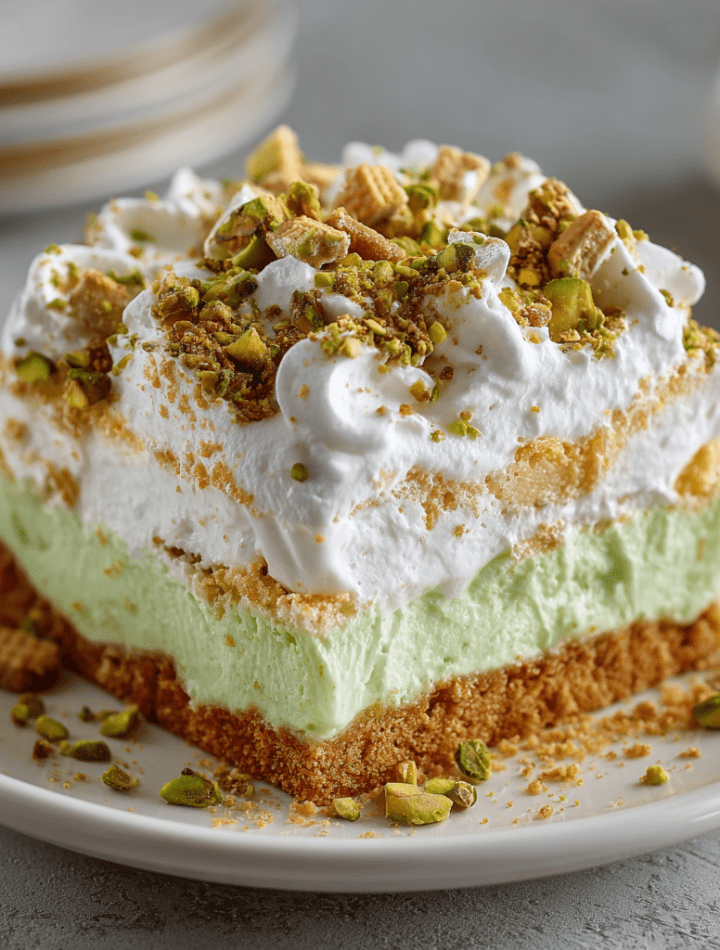
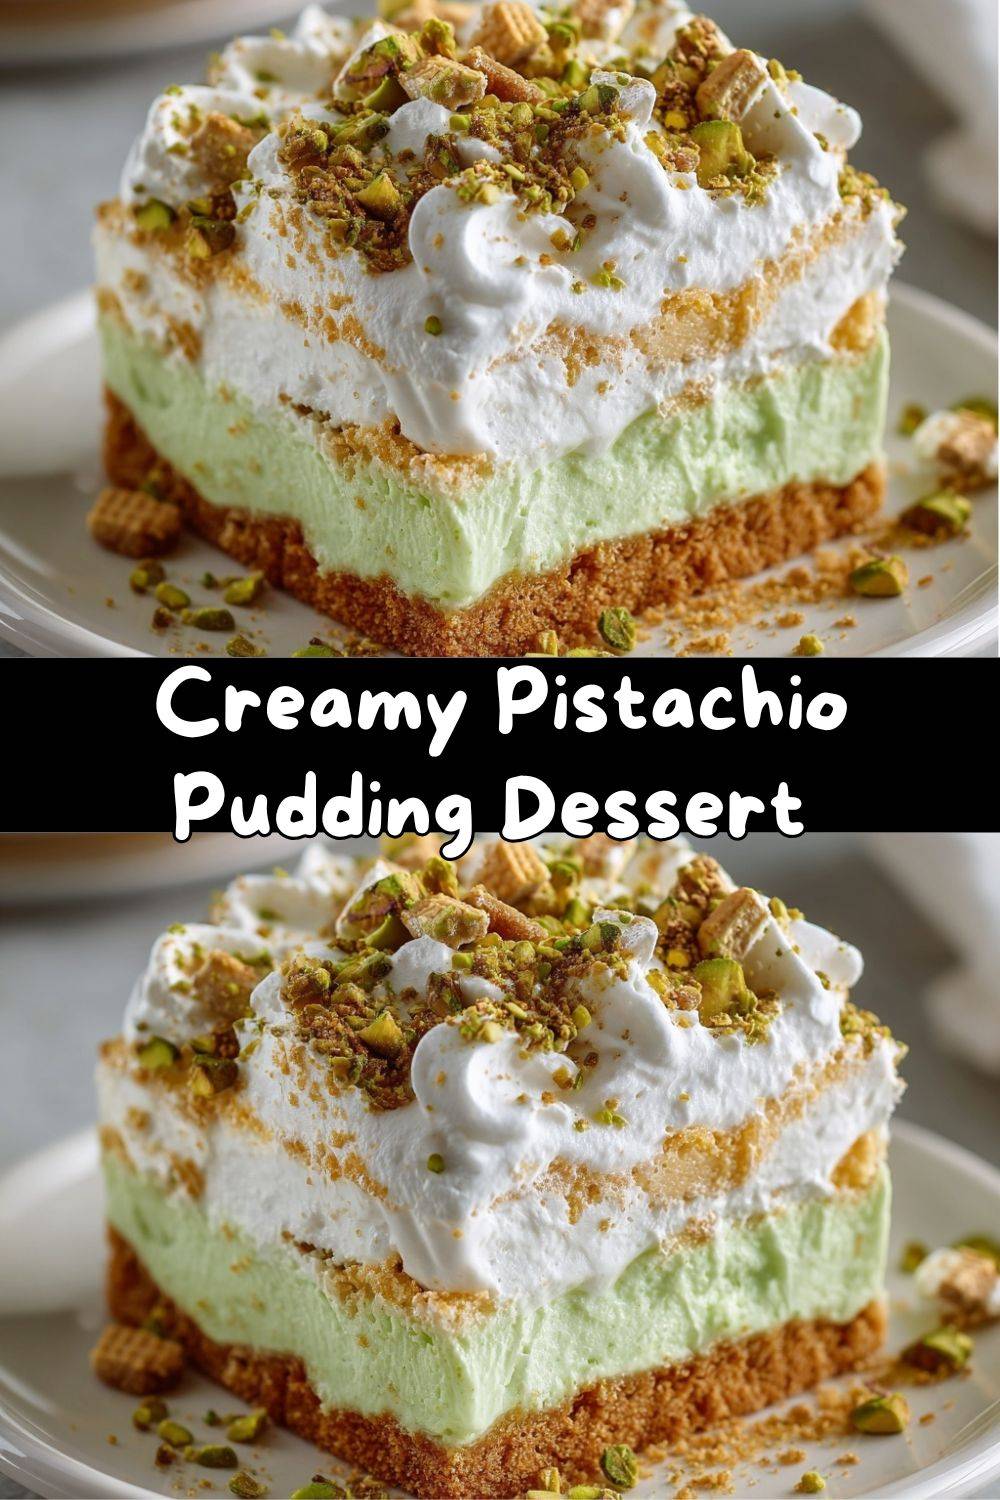
Picture this: a buttery, crumbly cookie crust. A cloud-like layer of sweetened cream cheese fluff. A dreamy, vibrant pistachio pudding that sets up perfectly creamy, not firm. And a final crown of billowy whipped topping. Each spoonful is a textural party, and the whole thing comes together in about 20 minutes of hands-on time. Seriously. It’s the hero of potlucks, the star of spring brunches, and the secret weapon for when surprise guests are on their way. It’s the dessert that says, “I’m a culinary genius who has it all together,” while whispering, “Psst…I made this in my pajamas.” So, grab your favorite mixing bowl and let’s make some magic—no oven required.
My Pistachio-Pudding Epiphany: A Tale of Grandmas and Grocery Stores
My love affair with this dessert started not in culinary school, but in the fluorescent glow of my grandma’s local grocery store. I was maybe ten, and our mission was “special dessert.” She bypassed the fancy bakery case and headed straight for the pudding aisle, her eyes twinkling. She grabbed a box of instant pistachio pudding mix, and I was fascinated. “It’s green!” I whispered. “It’s magic,” she winked back.
Back in her cozy kitchen, she let me crush the vanilla wafers with a rolling pin (therapeutic chaos), and she showed me how to “fold” whipped topping into cream cheese so it stayed light and fluffy. As we layered it all into her trust glass dish, she told me about the first time she’d made it for my grandpa. “He said it tasted like springtime,” she said. When we finally dug in after what felt like an eternity of chilling, I understood. It wasn’t just pudding. It was a creamy, cool, happy-making creation that felt like a celebration. Every time I make it now, I’m right back there with her, covered in cookie crumbs, learning that the best recipes are often the simplest ones, made with plenty of love and a box of instant magic.
Ingredients: Your Blueprint for Dreamy, No-Bake Success
Here’s everything you need to build this layered wonder. I’ve added my chef-y notes and swaps so you can make it your own!
- Crust:
- 1 ½ cups crushed graham crackers or vanilla wafers: Grahams give a honey-kissed, sturdy base. Vanilla wafers are my nostalgic favorite—they create a sweeter, more delicate crust that tastes like childhood. Chef’s Insight: A food processor makes quick work of this, but a zip-top bag and a rolling pin is a fantastic stress-reliever!
- ¼ cup melted butter: This is the glue! Unsalted is best so you control the salt level, but salted works in a pinch and adds a nice contrast to the sweetness.
- Cream Cheese Layer:
- 8 oz cream cheese (softened): CRUCIAL — let it sit on the counter for a good hour. Room-temperature cream cheese blends smoothly, preventing a lumpy layer. Full-fat is dreamiest here.
- 1 cup powdered sugar: Also called confectioners’ sugar. It dissolves instantly, creating a silky-sweet blend. No gritty texture allowed!
- 1 cup whipped topping (like Cool Whip) or freshly whipped cream: The stabilizer in whipped topping helps this layer hold its shape beautifully for days. For a pure, from-scratch vibe, whip ½ cup of heavy cream with 1 tbsp of powdered sugar to soft peaks and fold it in.
- Pistachio Pudding Layer:
- 1 (3.4 oz) box instant pistachio pudding mix: The star of the show! That iconic flavor and color. I haven’t found a suitable homemade swap that replicates it perfectly, so we’re embracing the classic box magic here.
- 2 cups cold milk: The colder, the better. Whole milk gives the richest, creamiest set. For a lighter version, 2% works. Do not use non-dairy milks here (like almond or oat) as they often won’t allow the pudding to set properly.
- Topping & Garnish:
- 1 cup whipped topping: For that gorgeous, fluffy finish.
- Optional Garnishes: Chopped salted pistachios (for crunch and pretty contrast), mini marshmallows, a sprinkle of crushed cookies, or even a drizzle of melted white chocolate.
Step-by-Step Instructions: Let’s Build Your Dream Dessert
Follow these steps, and you really can’t go wrong. I’ve tucked my favorite kitchen hacks right in here with you.
- Prep Your Pan & Make the Crust: Grab a 9×9-inch square baking dish. For super easy removal and clean slices, line it with parchment paper, letting the edges hang over two sides. In a medium bowl, stir the crushed cookies and melted butter until it looks like wet sand. Dump it into your prepared dish and press it down firmly and evenly with the bottom of a measuring cup or glass. This compact layer is the foundation for everything else! Pop it in the fridge for 15 minutes to set. Chef’s Hack: If you’re in a hurry, 10 minutes in the freezer works wonders.
- Create the Cloud (Cream Cheese Layer): In a large bowl, using a hand mixer or stand mixer fitted with the paddle attachment, beat the softened cream cheese on medium speed until it’s completely smooth and lump-free, about 1 minute. Scrape down the bowl. Add the powdered sugar and beat on low until incorporated, then bump up to medium and beat for another minute until fluffy. Now, here’s the key to a light layer: add the 1 cup of whipped topping. Use a rubber spatula to fold it in gently—scoop from the bottom and turn over the top—until no white streaks remain. Do not beat or you’ll deflate the air and make it dense. Spread this fluffy heaven evenly over your chilled crust.
- Whip Up the Pistachio Magic: In another bowl, pour in the 2 cups of ice-cold milk. Sprinkle the entire box of instant pudding mix on top. Immediately start whisking vigorously by hand (or use a hand mixer on low) for a full 2 minutes. It will thicken right before your eyes! You want it to be the consistency of thick, luscious paint. Let it sit for just 1-2 minutes to thicken a tad more, then pour and carefully spread it over the cream cheese layer. Work gently so you don’t disturb the fluffy layer beneath.
- The Final Flourish: Dollop the remaining 1 cup of whipped topping over the pudding layer and spread it into an even, pretty cloud. This is your canvas! Sprinkle with chopped pistachios or your chosen garnish.
- The (Hardest) Part: The Chill: Cover the dish and refrigerate for at least 2 hours, but honestly, 4 hours or overnight is even better. This time allows all the layers to firm up and meld their flavors perfectly, making it sliceable and sublime. Trust me on this one—it’s worth the wait!
Serving Suggestions: How to Plate Your Masterpiece
This dessert is stunning right in the dish, but a little presentation flair makes it extra special! For clean, beautiful squares, use a sharp knife dipped in hot water and wiped dry between each cut. You can lift entire slices out easily using the parchment paper sling. For a fun, individual touch, layer the components in clear glasses or mason jars for parfaits—just chop the crust ingredients finer for easy layering. It’s perfect as-is, but a cup of strong coffee or a glass of cold milk is its ideal partner. For a dinner party, garnish each plate with a single whole pistachio or a tiny mint leaf for a pop of color.
Recipe Variations: Make It Your Own!
Once you’ve mastered the classic, the flavor playground is open! Here are a few of my favorite twists:
- Chocolate-Pistachio Swirl: Add 2 tbsp of cocoa powder to the graham cracker crust. You can also swirl ¼ cup of chocolate syrup into the cream cheese layer before adding the pudding.
- Tropical Escape: Use crushed Nilla Wafers for the crust. Fold ½ cup of crushed pineapple (well-drained) and ¼ cup of shredded sweetened coconut into the cream cheese layer.
- Berry Bliss: After spreading the pudding layer, arrange a single layer of fresh raspberries or sliced strawberries on top, then add the final whipped topping layer to create a hidden berry surprise.
- Lemon-Pistachio Zing: Add the zest of one lemon to the cream cheese layer for a bright, citrusy contrast that cuts the sweetness beautifully.
- Dietary Swaps: Use gluten-free cookies for the crust. For a lower-sugar version, try a sugar-free pudding mix and swap the whipped topping for sugar-free whipped topping. (Note: The cream cheese layer will still have powdered sugar).
Chef’s Notes: The Evolution of a Family Favorite
This recipe has lived in my recipe box for over 15 years, scribbled on a notecard that now has a permanent smear of something unidentifiable (probably butter) on it. It’s evolved from my grandma’s strict vanilla-wafer version to my own playground. I once accidentally used salted pistachios on top for a church potluck, and the rave reviews were overwhelming—that salty-sweet combo is now mandatory for me! The biggest lesson? The chilling time is non-negotiable. I’ve tried to sneak a taste early, and while it’s delicious, it’s a soupy mess. Patience, my friends, is the secret ingredient not listed on the box.
FAQs & Troubleshooting
Q: My pudding layer is still runny after 2 hours. What happened?
A: The most common culprit is not whisking for the full 2 minutes. Instant pudding needs that vigorous activity to activate the thickeners. Also, ensure your milk is very cold. If it’s still too soft, just give it more chilling time—often 4 hours fixes everything.
Q: Can I make this dessert ahead of time?
A: Absolutely! It’s a make-ahead dream. Prepare it completely, cover tightly, and refrigerate for up to 2 days. Add any crunchy garnishes (like nuts) right before serving so they stay crisp.
Q: What can I use instead of whipped topping (Cool Whip)?
A> You can use an equal amount of freshly whipped cream. For the cream cheese layer, whip ½ cup heavy cream + 1 tbsp sugar to soft peaks and fold in. For the top, whip another ½ cup cream + 1 tbsp sugar to stiff peaks. Note: The dessert will be slightly softer but utterly delicious.
Q: My cream cheese layer is lumpy. Can I fix it?
A> Prevention is key—really ensure your cream cheese is at room temperature. If you have small lumps, you can try pressing the mixture through a fine-mesh sieve, but it’s a bit of a project. For next time, beat the cream cheese alone until it’s completely smooth before adding anything else.
Nutritional Information (Approximate)
This information is an estimate per serving (based on 12 servings, using whole milk and whipped topping, without extra garnishes). Please note, nutritional values can vary based on specific brands and measurements used.
- Calories: ~250
- Total Carbohydrates: 22g
- Total Fat: 15g
- Saturated Fat: 9g
- Sugar: 16g
- Protein: 3g
For dietary-specific concerns, always calculate using the exact ingredients you use. This dessert is a treat best enjoyed in the context of a balanced diet—perfect for sharing and savoring!
Final Thoughts: Your No-Bake Victory Awaits
And there you have it—my beloved, no-fuss, always-impressive Creamy Pistachio Pudding Dessert. It’s more than just layers in a pan; it’s a ticket to nostalgia, a guarantee of smiles, and proof that the most satisfying cooking projects don’t require heat. I hope this recipe finds its way into your regular rotation, becoming a requested favorite at your family table just like it is at mine. Remember, the best kitchens are filled with laughter, a little mess, and the promise of something delicious waiting in the fridge. Now, go forth and make something wonderful! And don’t forget to tag me @TastyChow if you share it—I love seeing your creations.
With a full heart and a whisk in hand,
— Emily 🥄💚