Obsessed-Worthy Crispy Feta Fried Eggs You’ll Crave Daily
Hey there, friend! Let’s talk about breakfast magic. You know the kind—the sort of recipe that feels like a secret handshake among food lovers, the one you see pop up all over your social feeds and think, “Okay, I *need* to know what that’s about.” Well, pull up a stool and get ready, because I’m about to let you in on one of my all-time favorite morning (or let’s be real, anytime) rituals: Crispy Feta Fried Eggs.
This isn’t just another egg recipe. This is a textural revelation. Imagine this: salty, crumbled feta hits a hot pan and transforms into a golden, lacy, irresistibly crispy nest. Then, you crack a perfect egg right into the center. As it cooks, the whites set tenderly, the yolk stays gloriously runny, and that feta crust becomes a savory, crunchy base that will absolutely ruin all other eggs for you. I’m not being dramatic—I’m being honest!
We’re taking this masterpiece and serving it up on a warm tortilla or a slice of crusty sourdough, slathered with creamy, smashed avocado, a zing of pickled onions, and a fiery kiss of chili oil. It’s a symphony of creamy, crispy, spicy, and tangy that comes together in about five minutes flat. It’s the hero your busy mornings have been waiting for, and I am so thrilled to show you how it’s done. Let’s make some kitchen magic!
The Little Greek Taverna That Started It All
I’ll never forget the first time I experienced the crispy feta magic. It wasn’t in a fancy restaurant or a culinary school demo. It was in a tiny, sun-drenched taverna on a backstreet in Crete, during a much-needed getaway after a particularly chaotic catering season. My husband and I were the only tourists there, surrounded by locals sipping strong coffee and chatting animatedly.
We pointed to a dish on the menu we couldn’t pronounce, and what arrived was a sizzling cast-iron skillet. In it were two eggs, nestled in a golden, bubbling cheese crust, served with a hunk of bread for dipping. I took one bite and my eyes literally widened. The contrast of the salty, crispy feta with the rich, runny yolk was a flavor bomb I didn’t know I needed. I must have looked utterly blissed out because the old woman who ran the place came over, patted my shoulder, and said something in Greek with a knowing wink. That simple, perfect dish, made with so much heart, is what Tasty Chow is all about. I’ve put my own spin on it, of course, but every time I make these eggs, I’m transported right back to that little table, reminded that the best food memories are often the simplest ones.
Gather Your Ingredients: The Dream Team
This recipe is beautifully simple, so the quality of your ingredients really shines through. Here’s what you’ll need to create this masterpiece:
- 2 large eggs: The stars of the show! I always recommend getting the best you can afford—pasture-raised if possible. Their yolks are richer and more vibrant, making that runny center pure liquid gold.
- 1½ oz (about 40g) feta cheese, crumbled: This is our crispy-making magic dust. A block of feta in brine will give you the best flavor and texture, but pre-crumbled works in a pinch. Chef’s Insight: The saltiness of the feta is key, so we rarely need to add extra salt to the eggs!
- 2 small tortillas or slices of toasted sourdough: Your choice of vehicle! I love the soft, pliable texture of a warm tortilla for a wrap-style situation, but the sturdy, chewy crunch of a good sourdough toast is equally divine.
- ½ avocado, smashed: Our creamy, cool base. A ripe but still slightly firm avocado is perfect here—it smashes beautifully without turning to mush.
- Cooking oil spray or olive oil spray: Just a light spritz to prevent any sticking. I keep a refillable bottle of extra virgin olive oil for this—it adds a lovely fruity note.
- Pinch of dried oregano: A tiny sprinkle adds a classic, aromatic Mediterranean flair that pairs wonderfully with the feta.
- Red pepper flakes to taste: For a little background heat. Feel free to adjust to your spice tolerance!
- Squeeze of lemon juice: A bright squeeze mixed into the avocado keeps it from browning and cuts through the richness of the egg and cheese.
- Garnish: pickled red onions, drizzle of chili oil: The grand finale! The sharp, tangy crunch of the pickled onions and the spicy, savory depth of the chili oil are non-negotiable for taking this from great to “OH WOW.”
Let’s Get Cooking: Your Step-by-Step Guide to Crispy Perfection
Ready? This comes together faster than you can decide what to watch on Netflix. Let’s do this!
- Heat Your Pan: Place a good nonstick skillet over medium heat. Let it get properly warm—this is crucial for that crispy feta crust. Give it a light spray with your oil. Chef’s Hack: To test if the pan is ready, flick a tiny drop of water into it. If it sizzles and dances, you’re good to go!
- Create the Feta Nests: Sprinkle your crumbled feta into two neat, small circles in the pan, leaving a little space between them. You’re essentially building a little nest for your eggs. Let the feta sizzle for about 30 seconds. You’ll hear it and see it start to melt and form a lacy base. Pro Tip: Don’t touch it! Let it do its thing and form that beautiful crust.
- Add the Eggs: Now, carefully crack one egg directly into the center of each feta nest. Try to keep the yolk intact for that gorgeous runny center. This is where the magic happens—the egg and cheese become one!
- Cover and Cook to Perfection: This is the secret weapon! Pop a lid on the skillet. This traps the heat and gently cooks the top of the egg white, so you don’t end up with an uncooked, snotty top and an overcooked bottom. Let them cook for 2-3 minutes. You’re looking for the whites to be completely set, the edges of the feta to be deep golden and crisp, and the yolk to still be jiggly and soft.
- Prep Your Base: While the eggs are working their magic, toast your bread or warm your tortillas. In a small bowl, smash your avocado with that squeeze of lemon juice, a pinch of red pepper flakes, and maybe a crack of black pepper. Chef’s Commentary: I like to leave my avocado a little chunky for extra texture!
- The Grand Assembly: Spread your lemony avocado generously onto your warm tortilla or toast. Then, using a thin spatula, gently lift each crispy feta egg and place it proudly on top of the avocado.
- Finish with Flair: Now, for the party on top! Scatter over those vibrant pink pickled onions, drizzle generously with that spicy chili oil, and finish with a final pinch of dried oregano for that aromatic touch. And just like that, you’re a breakfast superstar.
How to Serve Your Masterpiece
Presentation is part of the fun! I love serving these eggs open-faced on a brightly colored plate so you can see all the beautiful layers. If you’ve used tortillas, you can absolutely fold them over into a hearty breakfast taco, but I’m team “knife and fork” for this one because I don’t want to risk breaking that perfect yolk prematurely.
This dish is a complete meal in itself, but if you’re feeding a crowd or want to make it extra special, here are a few of my favorite sides:
- A simple arugula salad with a lemon vinaigrette to add a peppery bite.
- A side of crispy hash browns or breakfast potatoes for the ultimate carb-on-carb joy.
- Fresh fruit like berries or melon to balance the richness.
And don’t forget a big mug of your favorite coffee or a freshly squeezed glass of orange juice. This is a meal worth savoring.
Mix It Up! Delicious Recipe Variations
One of the best things about this recipe is its versatility. Once you’ve mastered the basic technique, the flavor world is your oyster! Here are a few of my favorite twists:
- The Green Goddess: Before adding the feta, sauté a handful of fresh spinach or kale in the pan until wilted. Then, create your feta nests on top of the greens for a veggie-packed power-up.
- The Hummus Hustle: Swap the avocado for a thick swipe of your favorite hummus. The creamy, garlicky flavor is a phenomenal base for the crispy eggs. Top with a sprinkle of smoked paprika.
- Spicy ‘Nduja Kick: For the meat lovers, tear off a teaspoon of spicy ‘nduja sausage and scatter it around the feta as it cooks. It will render its fiery, flavorful oil and create an incredible depth of flavor.
- Dairy-Free Delight: You can still get that crispy effect with a firm, brined dairy-free feta alternative. The result is slightly different but still deliciously crunchy and satisfying.
- Herbaceous Dream: Mix finely chopped fresh herbs like dill, chives, or parsley right into the crumbled feta before you add it to the pan. It creates a beautifully fragrant and colorful crust.
Chef Emily’s Kitchen Notes
Oh, this recipe. It has seen me through so many sleepy mornings and lazy weekend brunches. I’ve definitely had my share of kitchen fails with it, too—like the time I got a phone call, got distracted, and turned my beautiful lacy feta into a dark, salty hockey puck. We’ve all been there! The key is a watchful eye and trusting your instincts.
Over time, I’ve learned that the type of pan really does matter. A well-seasoned cast-iron skillet gives an unbeatable, restaurant-quality sear, but a reliable nonstick is your best friend for guaranteed no-stick success. This recipe has evolved from that simple taverna version to the loaded, flavor-packed creation you see today, all because I love playing with textures and toppings. Don’t be afraid to make it your own—that’s what cooking is all about!
FAQs & Troubleshooting: Your Questions, Answered!
Q: My feta isn’t getting crispy, it’s just melting into a puddle. What am I doing wrong?
A: The most common culprit here is heat! Your pan might not be hot enough when you add the feta. Make sure it’s properly preheated over a solid medium heat. Also, be sure you’re using real crumbled feta and not a soft “feta spread” which has a higher moisture content.
Q: Can I make this for a crowd?
A: Absolutely! You can easily double or triple this recipe. Just use a larger skillet (or two skillets at once) and make sure you don’t overcrowd the pan, as this will steam the eggs instead of frying them. You want each feta nest to have its own personal space to crisp up.
Q: My egg yolk broke! Is it ruined?
A> Not at all! It will still taste incredible. A broken yolk just means you’ll have more of that golden goodness mingling with the crispy feta. It’s a happy accident. For a higher success rate, crack each egg into a small ramekin first, then gently pour it from the ramekin into the feta nest.
Q: I don’t have a lid for my skillet. How can I cook the tops of the eggs?
A> No worries! You can use a baking sheet or even a large heat-proof plate to cover the pan. The goal is just to trap the steam. Alternatively, you can carefully spoon a little of the hot oil from the pan over the tops of the eggs to set the whites.

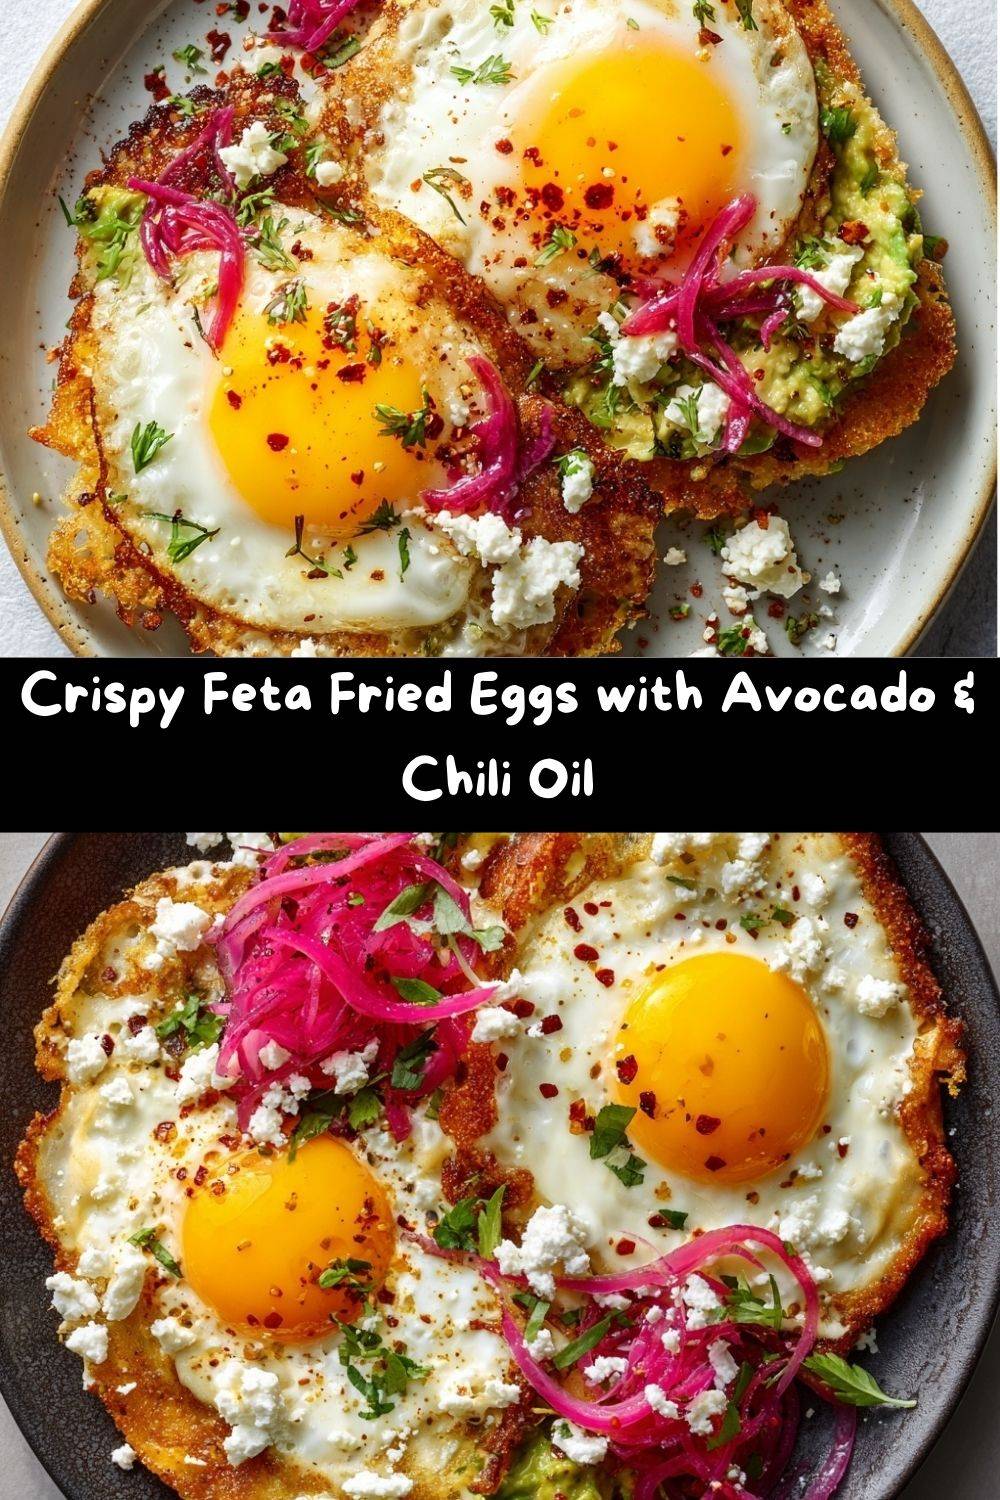
Crispy Feta Fried Eggs with Avocado & Chili Oil
- Total Time: 5 minutes
- Yield: 2 1x
Description
This viral recipe is crispy, creamy, and packed with bold Mediterranean flavor. The magic happens when crumbled feta hits a hot pan, forming a golden, lacy crust under a perfectly fried egg. Served on toasted bread or a warm tortilla with smashed avocado, pickled onions, and chili oil—this dish is fast, fiery, and full of texture.
Ingredients
2 large eggs
1½ oz (40g) feta cheese, crumbled
2 small tortillas or slices of toasted sourdough
½ avocado, smashed
Cooking oil spray or olive oil spray
Pinch of dried oregano
Red pepper flakes to taste
Squeeze of lemon juice
Garnish: pickled red onions, drizzle of chili oil
Optional twist: top with microgreens or add a swipe of hummus
Instructions
Heat a nonstick skillet over medium heat. Lightly spray with oil.
Sprinkle crumbled feta into two small circles in the pan. Let sizzle for 30 seconds.
Crack an egg onto each feta nest. Cover and cook 2–3 minutes until whites are set and edges are golden and crisp.
Meanwhile, toast bread or warm tortillas.
Smash avocado with a splash of lemon juice, salt, and a pinch of chili flakes.
Assemble: Spread avocado on toast/tortilla, top with crispy feta eggs.
Finish with pickled onions, chili oil drizzle, and a pinch of oregano.
- Cook Time: 5 minutes
Nutrition
- Calories: 290 / Serving
- Fat: 21g / Serving
- Carbohydrates: 13g / Serving
- Protein: 12g / Serving
A Quick Look at the Nutrition
I’m all about balance and enjoying delicious food that makes you feel good! This dish is a fantastic source of high-quality protein from the eggs, keeping you full and satisfied throughout the morning. The healthy monounsaturated fats from the avocado are great for heart health and help your body absorb all the fat-soluble vitamins. The feta provides a calcium boost and a powerful savory punch.
While I’m not a registered dietitian, here’s a general breakdown per serving (approximate and can vary based on specific ingredients used):
- Calories: ~290
- Protein: 12g
- Carbohydrates: 13g
- Fat: 21g
Remember, you can easily adjust this to fit your needs—use one egg, less feta, or load up on more veggies! It’s a wonderfully flexible recipe.
Final Thoughts from My Kitchen to Yours
Well, my friend, there you have it—my absolute obsession, the Crispy Feta Fried Egg. It’s more than just a recipe; it’s a five-minute ticket to a truly joyful and delicious meal. It’s proof that you don’t need a lot of time or fancy ingredients to create something that feels special and restaurant-worthy right in your own kitchen.
I hope this recipe becomes a fast favorite in your home, just like it is in mine. I hope it saves you on those hectic weekday mornings and becomes your go-to for a luxuriously lazy Saturday. Most of all, I hope it reminds you that cooking can be fun, easy, and incredibly rewarding.
So, did you make it? I’d love to see your creation! Tag me @TastyChowEmily on Instagram so I can cheer you on. Now, go forth and get your crispy feta on! Your taste buds will thank you.
With a full heart and a happy kitchen,
— Emily