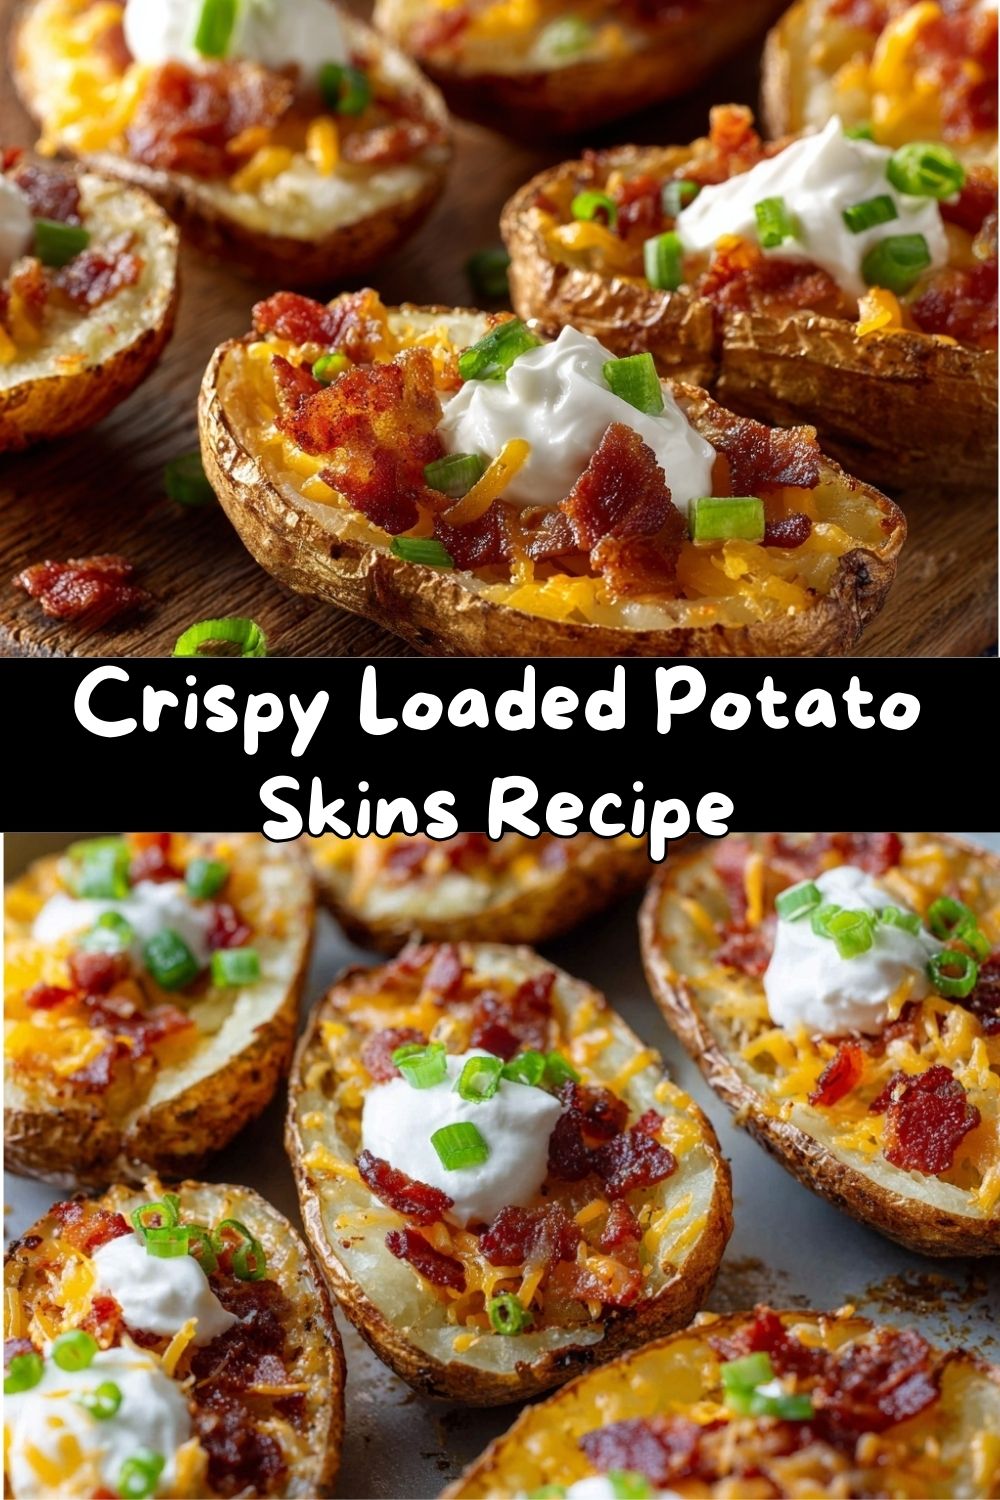
The Irresistible Crunch & Melty Magic of Loaded Potato Skins
Hey friends! Emily here, from my flour-dusted kitchen to yours. Let’s talk about a universal truth: the first appetizer to vanish from any party platter is always the potato skins. That perfect, crispy vessel, cradling a molten river of cheese, studded with salty bacon, and finished with a cool, creamy dollop… it’s pure, unadulterated joy on a plate. If you’ve only ever ordered these at a sports bar, you are in for the happiest kitchen revelation of your life. Making crispy loaded potato skins at home is not just easy—it’s a game-changer.
This recipe is my ultimate party superhero. It’s scalable, make-ahead friendly, and has that magical “wow” factor that makes everyone think you fussed for hours. Spoiler: you mostly let the oven do the work. We’re going for maximum crunch, maximum flavor, and minimum stress. Whether you’re gearing up for game day, hosting a casual get-together, or just treating yourself to a spectacular snack, these potato skins are your answer. So, tie on that apron (the messy one is totally acceptable), preheat that oven, and let’s transform a humble potato into the life of the party. Get ready for that unforgettable crunch!
My Grandma Marge and the First “Fancy” Appetizer
My love for potato skins is deeply rooted in nostalgia. Picture this: It’s the late 90s, and my Grandma Marge, a woman who believed “fancy” meant using the good china for meatloaf, decided to host her bridge club. For her, this was the culinary Olympics. She pored over her collection of clipped magazine recipes and landed on “Loaded Potato Skins.” To my eight-year-old eyes, it was the most sophisticated food I’d ever seen.
I was her official sous-chef, tasked with carefully brushing each halved potato with oil—a job I took with grave seriousness. I remember the awe of watching the hollowed skins come out of the oven, transformed into golden, crispy cups. The smell of cheddar melting over crispy bacon is literally the smell of my childhood happiness. When her friends arrived, they raved. Grandma beamed with pride, giving me a little wink. That day, I learned a powerful lesson: the best food isn’t about being complicated; it’s about creating a moment of shared, delicious delight. Every time I make these, I think of her, and I hope this recipe creates a few happy, crunchy memories in your kitchen, too.
Gathering Your Flavor Arsenal
Here’s everything you’ll need to create these crispy wonders. I’ve added my little chef notes next to each one—because knowing the why makes you a more confident cook!
- 4 medium-large Russet potatoes: Russets are the MVP here. Their thick, sturdy skins get super crispy, and their starchy interior gives us that perfect fluffy texture. Give them a good scrub!
- 2 tbsp olive oil: For that beautiful, all-over crisp. A high-smoke-point oil like avocado or canola works great too.
- 1/2 tsp garlic powder: We’re adding flavor to the skin itself! Onion powder or smoked paprika are fabulous friends here if you want to mix it up.
- Salt & pepper to taste: Season every layer. I use kosher salt for its clean flavor.
- 1 1/2 cups shredded sharp cheddar cheese: Chef Insight: Buy a block and shred it yourself! Pre-shredded cheese has anti-caking agents that can make melting less smooth. The sharper the cheddar, the bigger the flavor punch.
- 6 slices thick-cut bacon, cooked and crumbled: The salty, smoky crunch factor. For a shortcut, grab pre-cooked bacon, but frying your own renders that delicious fat (save it for roasting veggies!).
- 1/2 cup sour cream, for topping: The cool, creamy contrast is essential. Full-fat is my pick for richness, but Greek yogurt is a stellar tangy swap.
- 2-3 green onions, thinly sliced: A pop of fresh color and a mild, oniony bite. Chives are a gorgeous alternative.
Step-by-Step to Crispy Perfection
Follow these steps, and you’ll be a potato skin pro in no time. I’m chatting you through each one with all my favorite tips!
- Bake the Potatoes to Tenderness: Preheat your oven to 400°F (200°C). Using a fork, prick each potato about 8-10 times all over. Chef Hack: This lets steam escape so they don’t explode! Don’t skip it. Place them directly on the oven rack (with a baking sheet on the rack below to catch any drips) for 45-60 minutes, until a fork slides in easily. Baking them dry (no foil!) is key for a strong, crispable skin.
- Cool, Cut, and Scoop: Let the potatoes cool just until you can handle them. Cut each one in half lengthwise. Now, the fun part: scooping! Use a spoon to carefully remove the fluffy potato interior, leaving a sturdy 1/4-inch border attached to the skin. Pro Tip: Save that scooped-out potato! It’s perfect for mashed potatoes, soup thickener, or killer hash browns tomorrow.
- Season and Crisp the Shells: Brush the inside and outside of each potato shell generously with olive oil. This is the secret to all-over crunch. Sprinkle the insides evenly with garlic powder, salt, and pepper. Place them skin-side up on a wire rack set over a baking sheet. This allows hot air to circulate for maximum crispiness on all sides. Bake for 10 minutes.
- Flip and Crisp Again: Carefully flip the skins so they are skin-side down. You’ll see they’re already getting golden and firm. Bake for another 8-10 minutes until they are uniformly crispy and browned. They should sound hollow when tapped.
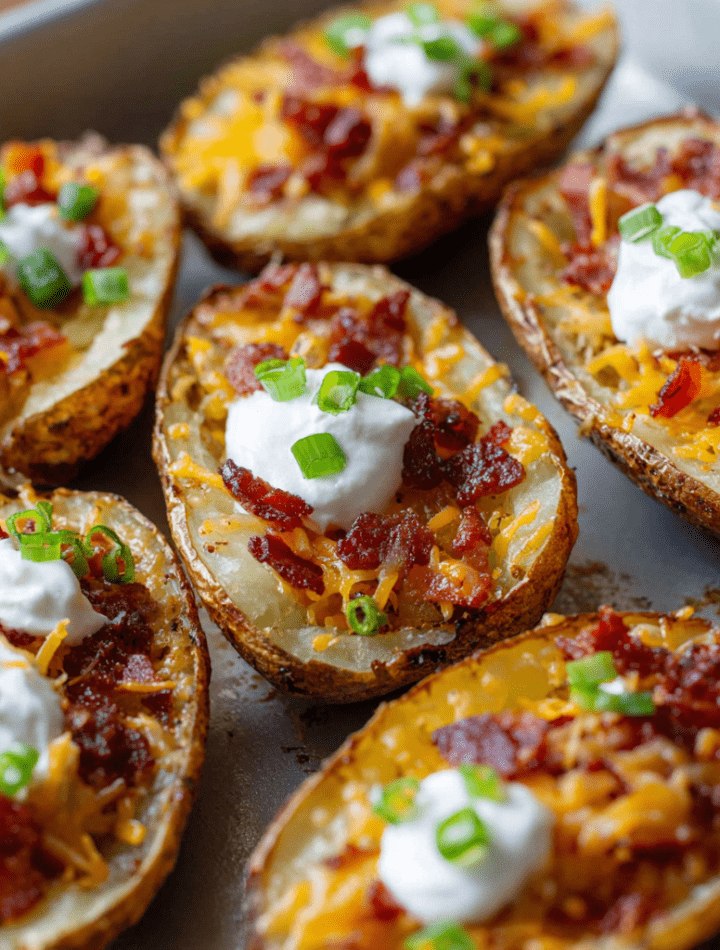
- The Load-Up & Melt: Now, the magic! Divide the shredded cheese among the crispy shells, then top with the crumbled bacon. Return to the oven for 5-7 minutes, just until the cheese is gloriously bubbly and melted.
- The Finishing Touches: Pull your masterpiece from the oven. Let them cool for just a minute (that cheese is lava-hot!). Then, add a dollop of cool sour cream and a generous sprinkle of fresh green onions. Serve immediately and listen for the happy sighs.
How to Serve These Superstar Skins
Presentation is part of the fun! I like to arrange them on a large wooden board or a rustic platter. Scatter a few extra green onions or a little pile of leftover bacon crumbles in the center for garnish. For dipping, I often serve a small bowl of extra sour cream or even a quick chipotle ranch on the side.
These are the ultimate finger food, so have plenty of napkins ready! They pair beautifully with a crisp, cold beer, a citrusy margarita, or even a simple sparkling water with lime. For a full spread, team them up with my Chunky Guacamole, some zesty Buffalo Cauliflower Bites, and a big, fresh veggie platter.
Get Creative: 5 Flavor Twists to Try
The basic formula is a blank canvas! Once you’ve mastered the classic, play with these fun variations:
- BBQ Chicken: Swap the bacon for shredded rotisserie chicken tossed in your favorite BBQ sauce. Top with cheese, bake, and finish with a drizzle of extra BBQ and cilantro.
- Fiesta Style: Use a Monterey Jack and pepper jack cheese blend. Top with black beans, corn, and diced jalapeños before baking. Finish with pico de gallo, avocado, and a squeeze of lime.
- Buffalo Blue Cheese: Toss the scooped-out potato bits with a little buffalo sauce and shredded chicken, then refill the skins. Top with blue cheese crumbles and mozzarella, bake, and finish with a celery stick and ranch.
- Loaded Veggie: Skip the bacon. Sauté mushrooms, bell peppers, and spinach, then mix with the cheese for the filling. A perfect meat-free option that’s still packed with flavor.
- Break-for-Brunch: Fill with a mix of cheddar and Gouda. After baking, top each with a fried or poached egg and a dash of hot sauce. Game-changing brunch appetizer!
Chef Emily’s Kitchen Notes
This recipe has evolved from my Grandma’s classic over years of testing (and many, many taste tests!). My biggest hack? The wire rack for baking. It was a total game-changer for achieving that shatteringly crisp texture on the entire skin, not just the edges.
A funny story: I once catered a small party and quadrupled this recipe. I was so focused on the filling I completely forgot to season the skins before the second bake. We had to do a frantic, post-crisp seasoning shake-up. They were still delicious (cheese and bacon save everything), but I learned that layering your seasoning is non-negotiable for the best flavor! Don’t be like Past Emily. Season each step.
FAQs & Quick Troubleshooting
Q: Can I make these ahead of time?
A: Absolutely! You can bake and scoop the potatoes up to a day ahead. Store the hollowed skins in the fridge. Let them come to room temp before the crisping step. You can also fully crisp the shells and store them at room temp for a few hours before the final fill-and-melt.
Q: My skins aren’t getting crispy. What did I do wrong?
A: The most common culprit is not enough oil, or skipping the wire rack. The oil is essential for browning, and the rack prevents steaming. Also, make sure your oven is fully preheated!
Q: What’s the best way to reheat leftovers?
A: To maintain crispness, always reheat in the oven or an air fryer (about 350°F for 5-8 mins). The microwave will make them soggy.
Q: Can I use a different type of potato?
A: Russets are really best for their thick skin. Yukon Golds have thinner, more delicate skins that won’t crisp up the same way.
A Quick Nutritional Glance
While these are definitely a treat, it’s helpful to know what’s on your plate! This info is for two potato skin halves (one full potato), calculated using full-fat ingredients.
Approximate Nutrition (per serving of 2 halves): Calories: ~320 | Protein: 12g | Fat: 19g | Saturated Fat: 8g | Carbohydrates: 23g | Fiber: 2g | Sugar: 2g | Sodium: 480mg
Dietary Swaps: For a lighter version, use reduced-fat cheese, turkey bacon, and light sour cream. To boost fiber, leave a little more potato on the skin. Remember, these are meant to be a fun, indulgent appetizer—enjoy them as part of a balanced meal or celebration!
Your New Go-To Party Hero
And there you have it, my friends—the complete guide to truly incredible, Crispy Loaded Potato Skins. This recipe is more than just a list of ingredients; it’s a passport to becoming the appetizer hero in your own kitchen. It’s about the satisfying crunch, the shared smiles, and the simple joy of creating something incredibly delicious with your own two hands.
I hope you make them, love them, and put your own spin on them. Tag me on social @TastyChow if you do—I love seeing your kitchen creations! Now, go forth and get crispy. Your next party (or just your next Tuesday night) is about to get a whole lot tastier.
With love and a full baking sheet,
Emily 🥔❤️