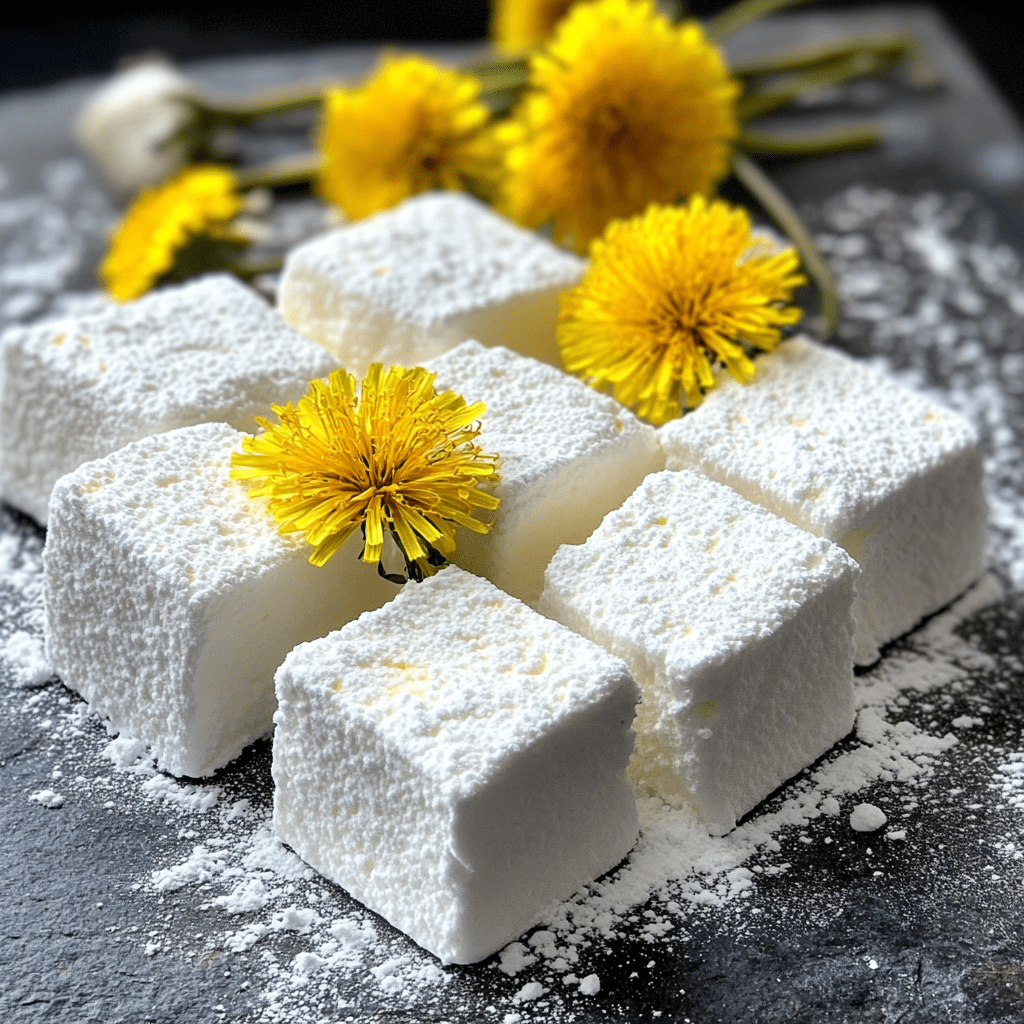
🌼🍯 Dandelion & Honey Marshmallows (No Corn Syrup!) – A Recipe Full of Childhood Magic
One bright morning, when the spring sun painted the grass with golden hues, my grandmother handed me a small wicker basket and pointed towards the cheerful carpet of dandelions decorating our backyard. With a secretive smile, she leaned down and whispered, “We’re not just picking flowers—we’re brewing magic!” I must admit, back then, eight-year-old me had no clue what she meant. But boy, did the magic unfold! 🌼✨
We spent that sunny afternoon carefully plucking yellow petals off each flower—laughing together, sipping lemonade, and chatting about everything under the sun. Later, in our cozy country kitchen, those petals transformed into something sweet, fluffy, and exceedingly delightful—marshmallows kissed by honey and infused with the delicate fragrance of dandelions. Today, I’m sharing that incredible memory with you by teaching you how to create your own batch of artisan Dandelion & Honey Marshmallows. Trust me: this simple, corn syrup-free treat is an absolute showstopper!
Why You’ll Love These Dandelion & Honey Marshmallows 😊:
– Corn syrup-free recipe sweetened naturally with honey.
– Amazingly soft, fluffy, and melt-in-your-mouth delicious.
– Infused with gentle floral aroma of fresh-picked dandelion petals.
– Perfect as homemade edible gifts or a delightful treat served with tea or hot chocolate.
Ready to channel your inner kitchen magician? I promise, this is easier than you think. Let’s dive right in!
👩🍳 Ingredients (Makes about 25 marshmallows):
Before we begin, let’s gather our ingredients first:
– 1 cup dandelion petal tea (divided—recipe below!)
– 3 tbsp grass-fed gelatin (I highly recommend Vital Proteins)
– 1 cup good-quality honey
– A pinch of salt
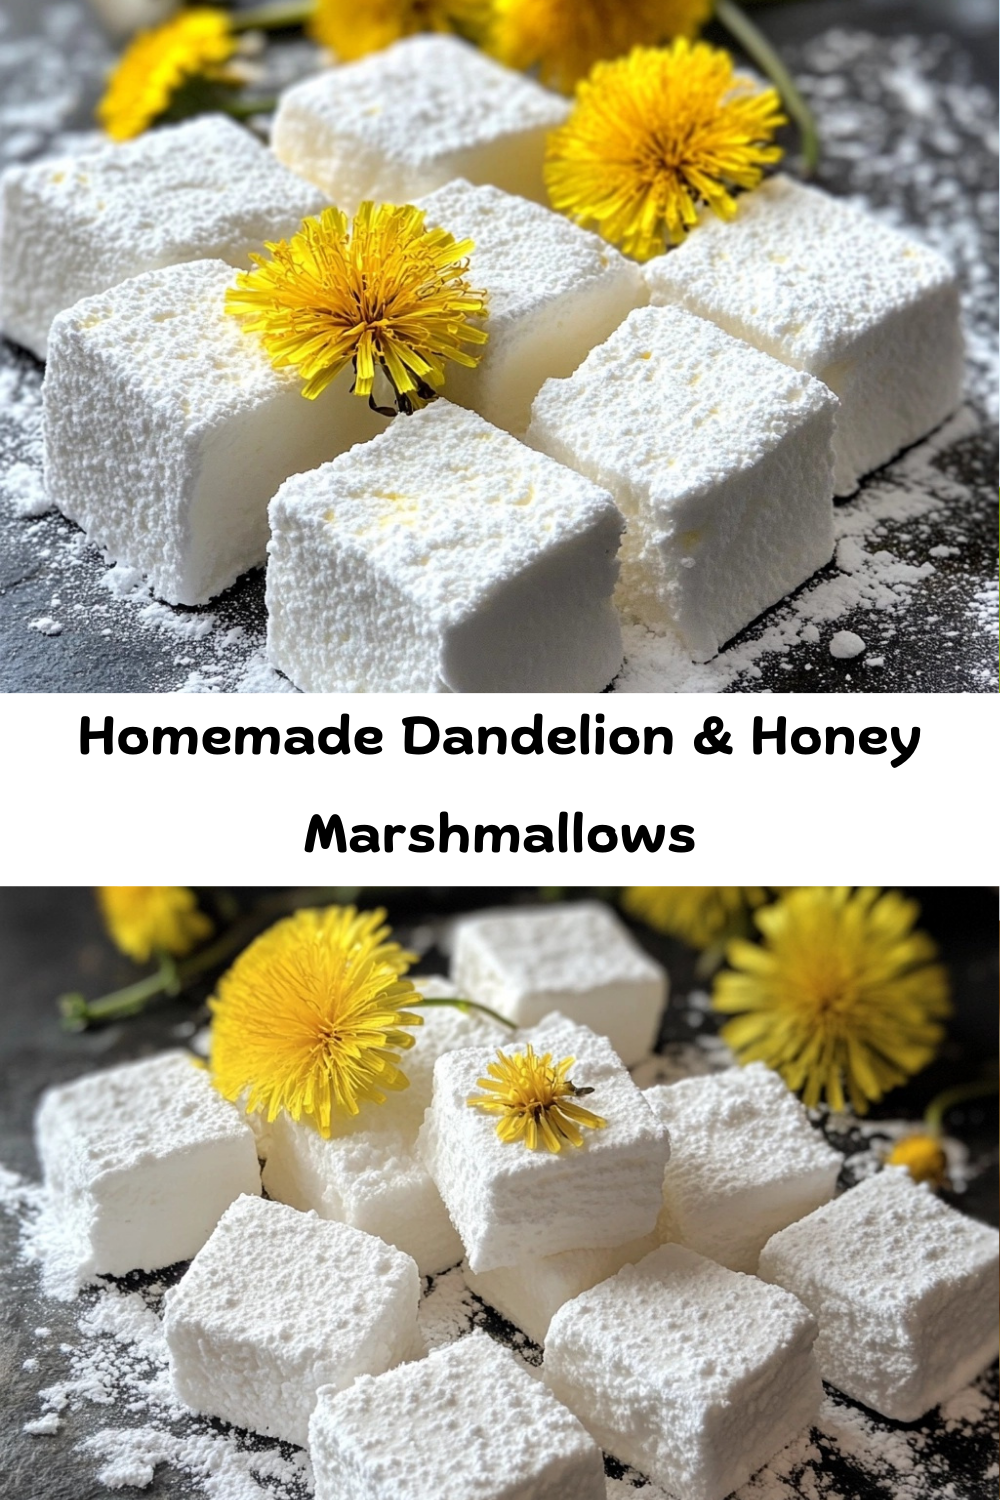
– 1 cup powdered sugar or arrowroot powder (for dusting)
🛠️ You’ll Also Need:
– Stand mixer (Makes the fluffing-up part wayyyy easier!)
– Candy thermometer (This little buddy makes sure we nail the consistency!)
– A 9×9 inch square baking pan
🌼 First Things First: How to Make Dandelion Tea:
Before you start marshmallow-making magic, creating a flavorful dandelion tea is crucial! Remember—use only the sunny yellow petals, no green parts!
– Pick approximately 1/2 cup dandelion flowers from an unsprayed area.
– Gently pluck petals away from the green base.
– In a mug or bowl, pour 1 cup boiling water over the 1/2 cup petals.
– Steep gently for 15 minutes, then thoroughly strain.
And voilà—golden, floral, honey-hued tea that’s perfect for marshmallows!
🔥 Step-by-Step Instructions to Dandelion & Honey Marshmallow Heaven:
Now you’ve got your prep work done—time to put your chef’s hat on and start whipping up these fluffy little pillows of happiness!
Step 1: Bloom the Gelatin
Grab your stand mixer’s bowl and pour ½ cup cooled dandelion tea into it. Sprinkle gelatin evenly over the tea’s surface and simply let it rest 10 minutes. This ‘blooms’ the gelatin, prepping for fluffed magic later.
Step 2: Make the Honeysweet Syrup
In a saucepan over medium-high heat, combine honey, salt, and the leftover ½ cup dandelion tea. Heat gently until the temperature hits exactly 240°F (soft ball stage) using your handy candy thermometer. This usually takes about 8–10 minutes. Don’t rush! Candy making is all patience and precision.
Step 3: Whip It Up (and Watch Magic Happen!)
Start your mixer on low-speed, breaking up that gelatin bloom you’ve just created. With it running, carefully and gradually pour the hot syrup in a steady stream into the bowl. Slowly increase the mixer speed until you reach high, whipping continuously for 6–10 minutes. You’ll soon witness the marshmallow fluff morphing into a thick, glossy, pale-white masterpiece.
Step 4: Set Your Marshmallows
Grease a 9×9 inch pan and generously dust it with powdered sugar or arrowroot powder. Quickly transfer your marshmallow fluff into the pan, spreading evenly using a lightly greased spatula. After smoothing it nicely, let it rest uncovered at room temperature for 4–6 hours—or ideally overnight if you can resist the temptation!
Step 5: Slice and Dust
Time to reveal your beautiful marshmallow creation! Dust a clean cutting surface with powdered sugar or arrowroot powder. Carefully ease your marshmallow slab onto the surface. Cut into neat little squares (a pizza cutter or sharp knife works wonderfully). Roll and coat each side lightly with more powdered sugar or arrowroot. Ta-da—you’ve done it!
Step 6: Store Properly
Store these spring-inspired marshmallows in an airtight container. They’re freshest in the first two days—but if you wanna keep enjoying them longer, they freeze exceptionally well (up to 2 months!). Yum!
🌿 Serving Suggestions & Fun Ideas:
– Serve in a steaming cup of tea or hot cocoa for instant gourmet comfort.
– Gift-wrapped in decorative bags tied with twine for thoughtful, homemade gifts.
– Pair with s’mores fixings around a springtime bonfire (These toasted marshmallows are terrifically divine!).
– Pop on top of cupcakes for magical floral flair!
🌟 Pro Tips from Your Chef Friend:
– Always pick dandelions from pesticide-free areas (ideally your own yard!).
– Remember, use the petals only—no green bits—to avoid bitterness.
– Keep moisture and humidity at bay when making marshmallow candies and keep your workspace dry.
– Dust with powdered sugar generously—trust me, it’ll help prevent sticking.
📋 Nutrition Information per Marshmallow:
– Calories: 65
– Carbs: 17g
– Sugars: 16g
– Protein: 1g
Discover joy in creating magic-filled treats while keeping recipes natural, health-conscious, and deliciously playful. From my kitchen to yours, happy marshmallow-making, my friends!