Dutch Apple Pie: The Cozy, Crumbly Slice of Heaven You Deserve
Hey there, friend! Chef Emily here, waving from my flour-dusted kitchen. Is there anything in this world that smells more like pure, unadulterated joy than an apple pie baking in the oven? That sweet, spiced aroma just seems to hug every corner of the house, promising something seriously delicious is on the way. Today, we’re ditching the fuss of a lattice top and diving headfirst into my absolute favorite autumn (okay, let’s be real, any-season) dessert: the glorious Dutch Apple Pie.
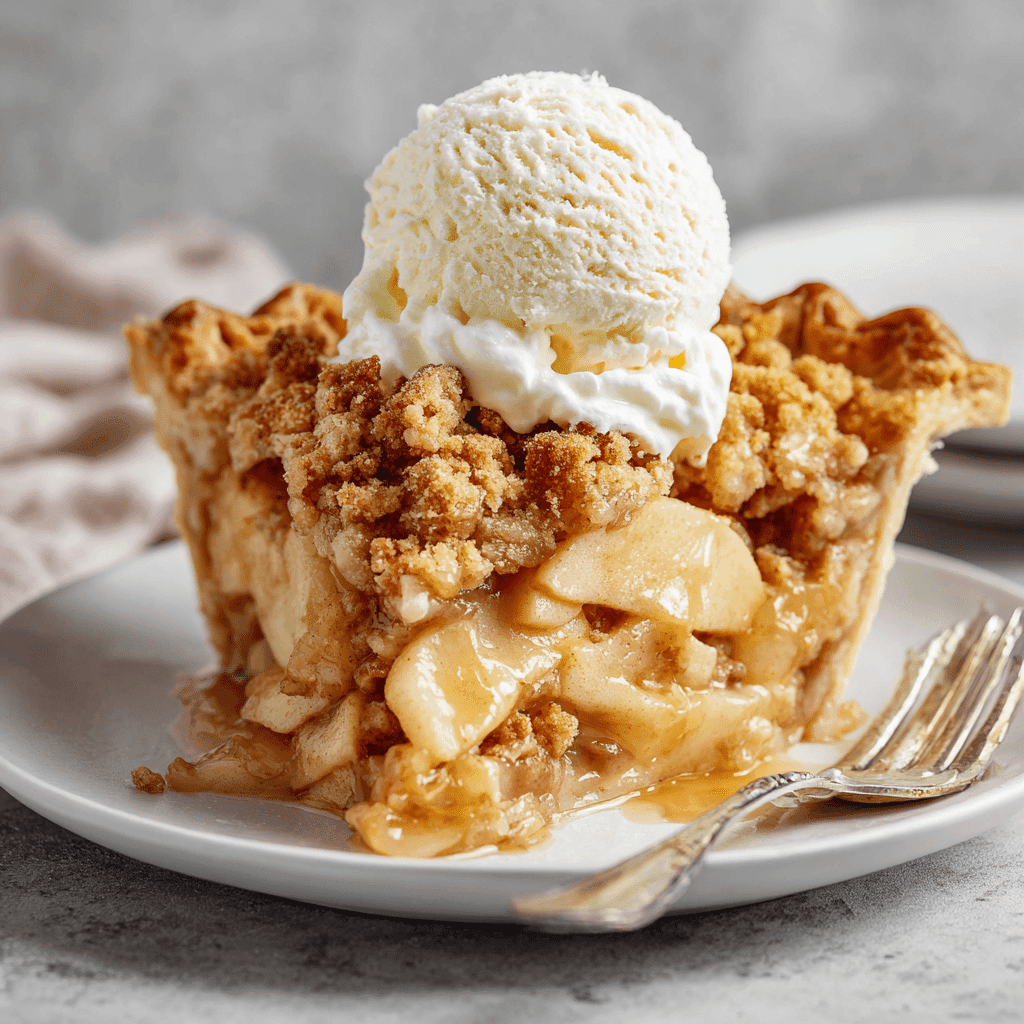
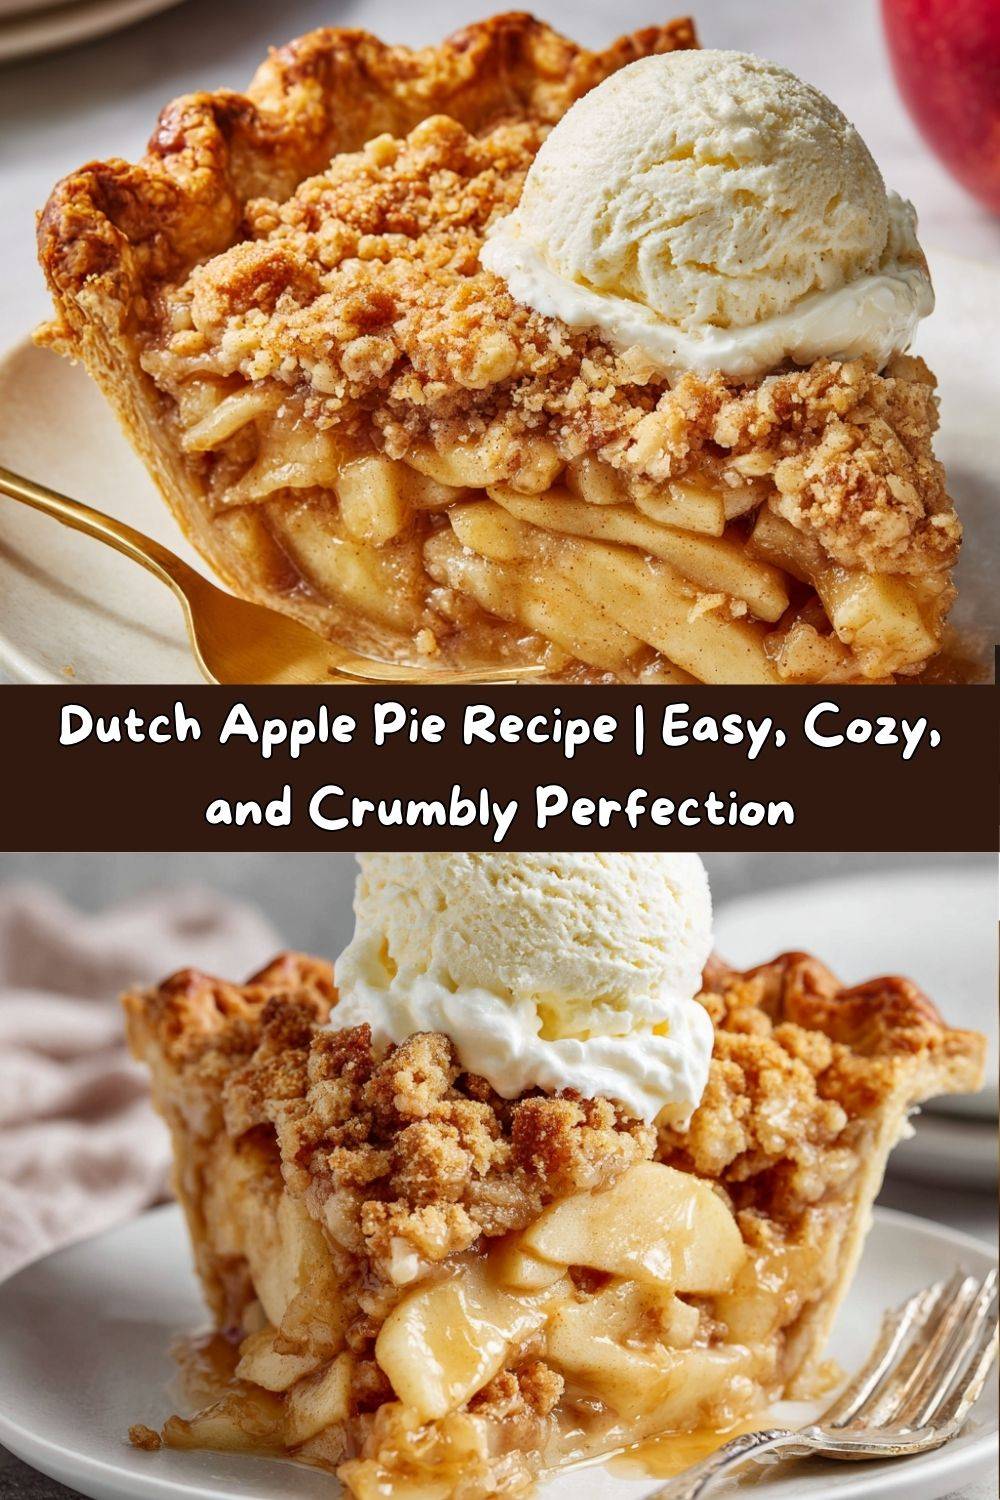
Now, if you’ve never had the pleasure, let me paint you a picture. Imagine this: a flaky, buttery pie crust cradling a warmly spiced, tender apple filling. But instead of a second crust on top, we blanket those juicy apples in a thick, buttery, sugary crumble topping that bakes up into glorious golden nuggets of crunch. It’s the perfect textural party in your mouth—soft, crisp, and crumbly all at once.
This isn’t just a pie; it’s a mood. It’s the pie you bring to a potluck when you want to be the hero. It’s the pie you bake on a rainy Sunday just because. It’s comfort, coziness, and celebration, all baked into one beautiful 9-inch dish. And the best part? It’s surprisingly simple to make. So, tie on your favorite apron (the messy one is always the best), and let’s make a memory together. This Dutch Apple Pie recipe is about to become your new secret weapon.
A Slice of Memory: My Grandma’s “Oopsie” Pie
This recipe always takes me right back to my grandma’s kitchen. She was a phenomenal baker, but she was also the queen of “making it work.” One Thanksgiving, she was running behind schedule (as grandmas often are when feeding a small army) and realized she didn’t have enough pastry dough or the patience to weave a fancy top crust for her apple pie.
Without missing a beat, she looked at her bowl of apple filling, then at the jar of flour, sugar, and the stick of butter on the counter. She gave me a mischievous wink and said, “Watch this, Emmy.” She quickly mashed the butter into the flour and sugar with her fingers, creating a shaggy, sandy mixture. She sprinkled it haphazardly over the apples and popped it in the oven. “We’ll call it a ‘crumble pie,’” she declared.
That “oopsie” pie was the first thing to disappear from the table. It was less formal, more rustic, and had this incredible buttery crunch we all went crazy for. It taught me a beautiful lesson that I carry in my kitchen every day: the best recipes often come from a place of love and improvisation, not perfection. This Dutch Apple Pie is my perfected version of her happy accident, and I know she’d be proud.
Gathering Your Cast of Characters: The Ingredients
Let’s talk ingredients! Using great-quality components is the first step to a show-stopping pie. Here’s everything you’ll need, along with my little chef-y insights to set you up for success.
For the Apple Filling:
- 6–7 cups peeled and sliced apples (about 6-7 medium apples) – This is the star! I love a mix of Granny Smith (for their tartness and structure that holds up to baking) and Honeycrisp (for their incredible sweetness and juiciness). Chef’s Tip: No need to be fancy! A bag of pre-sliced apples works in a pinch on a busy day.
- 2/3 cup (134g) granulated sugar – Sweetens the deal. If your apples are super sweet, you can reduce this by a tablespoon or two.
- 1 tsp ground cinnamon – The warm, cozy spice we all know and love. Don’t be shy!
- 1/4 tsp ground nutmeg – Cinnamon’s best friend. It adds a wonderful depth of flavor. Freshly grated nutmeg is a game-changer if you have it.
- 1/8 tsp salt – Crucial! It enhances all the other flavors and balances the sweetness. Never skip the salt.
- 2 tbsp (16g) all-purpose flour – This is our thickening agent. It soaks up the juices from the apples as they bake, preventing a soupy filling. Cornstarch or tapioca starch work great as a 1:1 substitute.
- 1 tbsp lemon juice – A bright splash of acidity keeps the apples from browning and cuts through the richness. Bottled is fine, fresh is fabulous.
For the Crust:
- 1 9-inch unbaked pie shell – I’m a firm believer in “you do you” here. A homemade all-butter crust is divine, but a good-quality store-bought crust is a fantastic, time-saving option. No judgment from me! Keep it chilled until you’re ready to use it.
For the Crumble Topping (The BEST Part!):
- 1 cup (124g) all-purpose flour – The base of our crumble.
- 1/2 cup (100g) brown sugar – I use light brown for its lovely molasses flavor, but dark brown will give you an even deeper, almost caramel-like note. Pack it firmly into your measuring cup!
- 1/2 cup (113g) unsalted butter, cold and cubed – COLD is the magic word here. It’s the key to getting a crumbly, not pasty, texture. I pop my cubed butter in the freezer for 10 minutes before I start. Substitution Tip: For a dairy-free version, use a high-quality vegan butter stick, also very cold.
- Optional twist: 1/4 cup chopped walnuts or old-fashioned oats – I highly recommend this! The walnuts add a fantastic crunch, and the oats give it a wholesome, hearty feel. Feel free to get creative with pecans or even shredded coconut.
Let’s Get Baking: Your Step-by-Step Guide to Pie Perfection
Ready to create some magic? Follow these steps, and you’ll have a perfect Dutch Apple Pie. I’ve packed each step with my best tips and hacks to ensure your success.
- Preheat and Prep: Fire up your oven to 375°F (190°C). Place a rack in the center position for even baking. This is also a great time to take your unbaked pie crust out of the fridge if it’s been chilling. Chef’s Hack: I like to place a baking sheet on the oven rack while it preheats. Placing the pie dish on the hot sheet pan immediately starts cooking the bottom crust, helping to prevent a soggy bottom!
- Create the Filling: In a large bowl, combine your sliced apples, granulated sugar, cinnamon, nutmeg, salt, flour, and lemon juice. Now, get in there with your hands (clean, of course!) and toss, toss, toss until every single apple slice is beautifully coated in the spiced, sugary mixture. Set this aside while you make the topping. Letting it sit for 10 minutes helps the apples start releasing their juices, which the flour will then absorb.
- Assemble the Base: Gently press your pie crust into your 9-inch pie dish if it isn’t already. Flute or crimp the edges if you’re feeling fancy. Now, give your apple mixture one more good toss and pour it all into the unbaked pie shell, including any juicy bits at the bottom of the bowl. Spread it into an even layer, piling the apples slightly higher in the center.
- Make the Dreamy Crumble Topping: In a separate medium bowl, whisk together the 1 cup of flour and 1/2 cup of packed brown sugar. Add your very cold, cubed butter. Now, using a pastry cutter, two forks, or (my personal favorite method) your clean fingertips, work the butter into the flour mixture. Pinch and rub the ingredients together until you have a mixture that resembles coarse, sandy crumbs with some larger, pea-sized clumps. Those clumps are gold—they’ll bake up into those delicious crunchy bits. If you’re using nuts or oats, stir them in now. Chef’s Pro Tip: For an extra-flaky topping, pop the whole bowl of crumble into the fridge for 10 minutes before sprinkling it on the pie.
- Top It Off: Take handfuls of your crumble topping and sprinkle it evenly over the mountain of apples. Don’t press it down! We want it to stay nice and loose for maximum crumble factor. Cover the apples completely, right out to the edges of the crust.
- Bake to Golden Bliss: Carefully place your pie on the preheated baking sheet (if using) and into the oven. Bake for 50-60 minutes. You’re looking for a deep golden brown topping and visible bubbling apple juices around the edges. The filling should feel tender when poked with a knife through a gap in the topping. Watchful Eye: If the topping is getting too dark around the 40-minute mark, simply tent the whole pie loosely with a piece of aluminum foil. This will protect the top while the filling finishes cooking.
- The Hardest Part: Wait! I know, I know. The smell is intoxicating, and you want to dive right in. But resist! Place the baked pie on a wire cooling rack and let it cool for at least 3-4 hours. This waiting period is non-negotiable for a perfect slice. It allows the filling to set up properly. If you cut into it while it’s hot, it will be a delicious but soupy mess. Trust me on this!
How to Serve Your Masterpiece
Okay, the pie has cooled. It’s time for the grand finale! For the absolute classic, can’t-be-beat experience, serve your Dutch Apple Pie slightly warm or at room temperature.
Use a sharp, thin knife to cut clean slices. A pie server or a small offset spatula is your best friend for lifting out that first perfect piece. Now, the mandatory accessory: a giant scoop of vanilla ice cream. The contrast of the warm, spiced apples and the cold, creamy ice cream is a match made in dessert heaven. The ice cream will slowly melt into the nooks and crannies of the crumble topping… it’s pure magic.
Not an ice cream person? A generous dollop of freshly whipped cream or even a drizzle of warm caramel sauce are also incredible choices. For a cozy breakfast treat (yes, I give you full permission), enjoy a slice with a hot cup of coffee or tea. No matter how you serve it, serve it with a smile.
Get Creative: Delicious Recipe Variations
Once you’ve mastered the classic, have fun playing with flavors! Here are a few of my favorite twists:
- Pear & Ginger Twist: Substitute half of the apples for ripe but firm pears (like Bosc or Anjou). Add 1 tablespoon of finely minced crystallized ginger or 1/2 teaspoon of ground ginger to the filling for a warm, zesty kick.
- Salty-Sweet Caramel Apple: After placing the apples in the crust, drizzle 1/4 cup of good-quality caramel sauce over them before adding the crumble topping. Sprinkle the finished baked pie with a few flakes of sea salt. *Chef’s kiss*
- Berry Apple Bliss: Add 1 cup of fresh or frozen (don’t thaw) cranberries or blueberries to the apple mixture. The tart berries create a wonderful flavor contrast and a gorgeous color.
- Gluten-Free Goodness: Use a certified gluten-free 1:1 baking flour blend for both the filling thickener and the crumble topping. For the crust, use a store-bought gluten-free pie shell or your favorite GF recipe.
- Oatmeal Cookie Crumble: Replace 1/4 cup of the flour in the topping with old-fashioned oats and add a pinch of cloves. It tastes just like the top of an oatmeal cookie!
Chef Emily’s Notes from My Kitchen to Yours
This recipe has been through so many iterations in my kitchen! I’ve learned a few things along the way. First, the type of apple truly matters. I once made this with only Red Delicious apples (it was all I had!) and they turned to complete mush. Stick with the Granny Smith/Honeycrisp combo for the best texture.
Second, I am a huge advocate for the “make-ahead.” You can prepare the crumble topping up to 3 days in advance and keep it in a zip-top bag in the fridge. You can also peel and slice your apples a day ahead; just keep them submerged in a bowl of water with a big squeeze of lemon juice to prevent browning. Drain and pat them very dry before using. This pie is a fantastic candidate for freezing, too! Bake it completely, cool it completely, wrap it tightly in plastic and foil, and freeze for up to 3 months. Thaw on the counter and reheat gently in the oven.
Print
Dutch Apple Pie (Apple Crumble Pie)
- Total Time: 1 hr
- Yield: 1 9-inch Pie) 1x
Description
This Dutch-style apple pie is all about layers—flaky crust, juicy spiced apples, and a buttery crumble topping. It’s comfort in a slice and a perfect blend of soft, crisp, and crumbly textures. Serve warm with vanilla ice cream or whipped cream for a truly classic dessert moment.
Ingredients
Filling
6–7 cups peeled and sliced apples (Granny Smith, Honeycrisp, or mix)
2/3 cup (134g) granulated sugar
1 tsp ground cinnamon
1/4 tsp ground nutmeg
1/8 tsp salt
2 tbsp (16g) all-purpose flour
1 tbsp lemon juice
Crust
1 9-inch unbaked pie shell (homemade or store-bought)
Crumble Topping
1 cup (124g) all-purpose flour
1/2 cup (100g) brown sugar
1/2 cup (113g) unsalted butter, cold and cubed
Optional twist: Add 1/4 cup chopped walnuts or oats for crunch
Instructions
Preheat oven to 375°F (190°C).
In a large bowl, toss apples with sugar, cinnamon, nutmeg, salt, flour, and lemon juice. Set aside.
Pour apple mixture into unbaked pie crust.
For crumble, mix flour and brown sugar. Cut in cold butter until coarse crumbs form. Stir in nuts or oats if using.
Sprinkle crumble over apples evenly.
Bake 50–60 minutes, until topping is golden and filling is bubbly. Tent with foil if topping browns too quickly.
Cool before slicing.
- Prep Time: 20 minutes
- Cook Time: 55 minutes
Nutrition
- Calories: 390 Per Slice
- Fat: 18g Per Slice
- Carbohydrates: 56g Per Slice
- Protein: 3g Per Slice
FAQs & Troubleshooting: Your Questions, Answered!
Q: My filling came out too runny. What went wrong?
A: Two likely culprits: the pie was cut before it had time to cool, or the apples released too much juice. Be patient and let your pie rest at least 3–4 hours before slicing. Also, stick to baking apples like Granny Smith and Honeycrisp, and don’t skip the flour (or cornstarch) thickener—it’s the glue that holds the filling together.
Q: The crumble topping melted into a flat layer. How do I keep it crumbly?
A: Cold butter is key! Make sure your butter cubes are well chilled before mixing, and pop the topping in the fridge for 10 minutes if your kitchen is warm. Those pea-sized clumps are what turn into the perfect golden nuggets of crunch.
Q: Can I make Dutch Apple Pie ahead of time?
A: Absolutely. You can prep the crumble topping up to 3 days ahead (store it in the fridge) and slice your apples a day in advance (keep them in lemon water until ready to use, then drain and dry). The baked pie also freezes beautifully for up to 3 months—just cool completely, wrap tightly, and thaw on the counter before gently reheating.
Q: What’s the best way to reheat leftover pie?
A: I like to pop slices into a 300°F (150°C) oven for about 10–15 minutes. This brings back the crispness of the crumble and warms the apples without making the crust soggy. The microwave works in a pinch, but the topping won’t stay as crunchy.
Q: Can I make this pie gluten-free or dairy-free?
A: Yes! Use a 1:1 gluten-free baking flour blend for both the filling thickener and crumble topping, and a gluten-free pie shell. For dairy-free, swap the butter with a high-quality vegan butter stick (cold, just like the regular version). You’ll still get that delicious crumbly topping.
Q: How do I keep the bottom crust from getting soggy?
A: A few tricks: bake the pie on a preheated baking sheet to help the bottom cook through quickly, avoid overly juicy apples, and don’t skip the flour in the filling. If you want extra insurance, brush the unbaked crust with a thin layer of beaten egg white before adding the filling—this creates a moisture barrier.
Final Thoughts: A Slice of Cozy Joy
Dutch Apple Pie is more than dessert—it’s a memory, a hug, a cozy slice of nostalgia that somehow feels right in every season. Whether you’re baking it for a holiday table, a weekend gathering, or simply because you’ve got a bowl of apples begging to be transformed, this pie never disappoints.
What makes it shine isn’t just the tender spiced filling or the buttery, flaky crust—it’s that crumbly, golden topping that crunches just enough to contrast the soft apples beneath. It’s rustic, it’s unfussy, and it always earns a spot as the first pie to disappear from the dessert table.
And remember, pie is forgiving. Don’t stress if your slices aren’t bakery-perfect—this is the kind of dessert that’s meant to be shared, messy scoops and all, with people you love. Pair it with a scoop of vanilla ice cream or a dollop of whipped cream, and you’ve got yourself the ultimate treat.
So here’s my invitation: bake this pie, let the scent fill your kitchen, and create your own “oopsie” moment that just might turn into a family tradition. I promise, every buttery, spiced bite will be worth it.
With love (and pie crumbs),
Emily
