Your New Favorite Comfort Food: The Easy Grilled Cheese Burrito (A Taco Bell Copycat!)
Hey there, friend! Let’s talk about cravings. You know the ones—those deep, persistent, “I-can-almost-taste-it” kind of cravings. For me, lately, it’s been for that gloriously over-the-top, cheese-crusted marvel from Taco Bell: the Grilled Cheese Burrito. That perfect, crispy exterior giving way to a steaming, savory, saucy interior? It’s a whole mood.
But what if I told you that you don’t need to hop in the car or navigate a drive-thru menu to get your fix? What if you could create a version that’s even more flavorful, made with ingredients you love, right in your own kitchen? Grab your favorite apron (the one that’s seen some stuff, just like mine), because we’re about to make some magic happen.
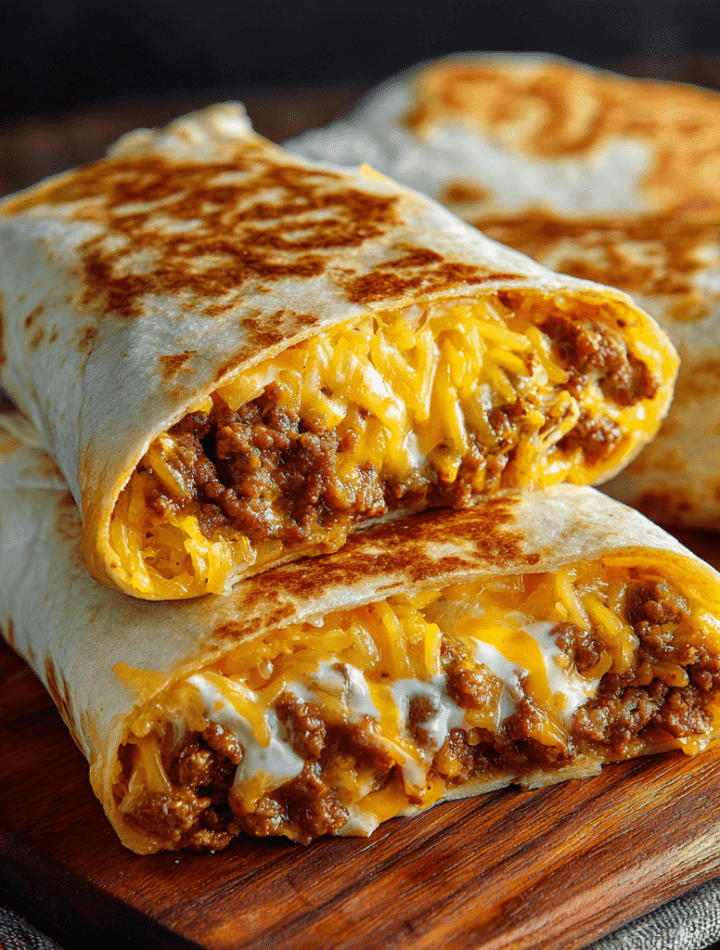
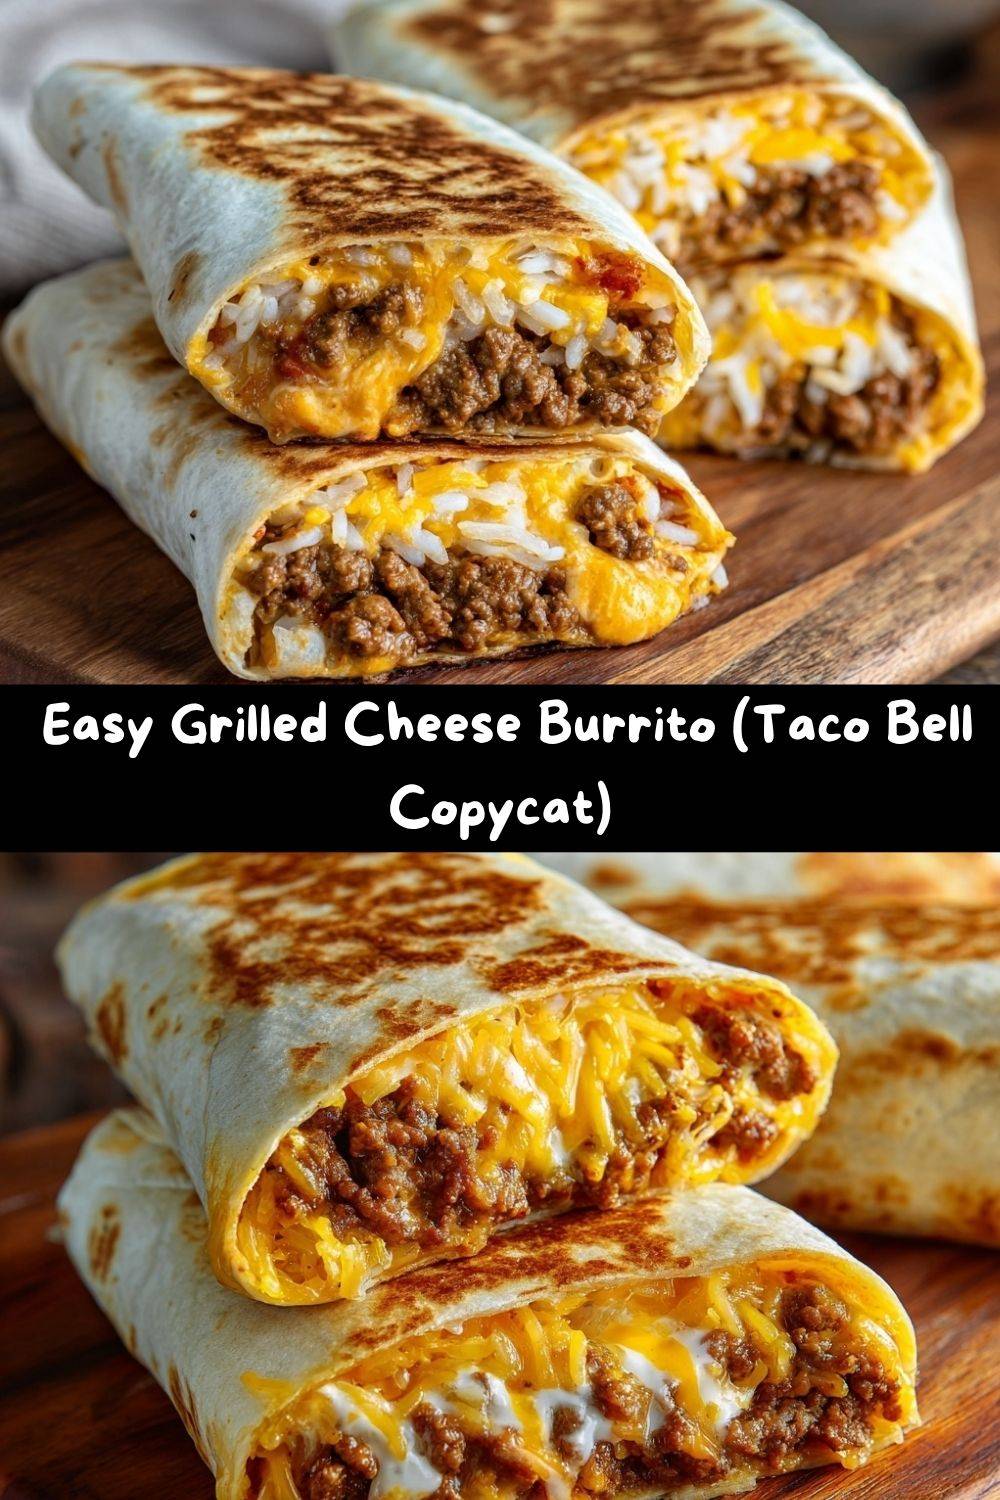
This Grilled Cheese Burrito recipe is my homemade love letter to that fast-food favorite. We’re talking a soft flour tortilla stuffed with seasoned beef, fluffy rice, creamy sauces, and not one, but two kinds of melty cheese. Then, we take it to a whole new level by grilling it in a crispy, lacy cheese crust. It’s quick, it’s budget-friendly, and it’s guaranteed to turn an ordinary weeknight into a full-blown fiesta. Let’s get cooking!
The Story Behind the Craving: A Late-Night Kitchen Revelation
This recipe takes me right back to my culinary school days. After a long night of classes, my friends and I would often find ourselves huddled around a tiny table, unwrapping a very specific, very cheesy fast-food burrito. It was our ultimate comfort food—a reward for a long day and fuel for the late-night study sessions to come.
One night, staring at that perfectly grilled tortilla, I had a lightbulb moment. “I bet I can make this at home,” I declared, my mouth still full. My friends laughed, but the challenge was set. The next day, I raided my fridge and got to work. My first attempt was… a cheesy leaky mess. The second was better, but the cheese crust wasn’t right. It took a few tries (and a few more “research” trips for “inspiration”), but I finally cracked the code. That moment of pulling a perfectly golden, outrageously cheesy burrito off my own griddle was pure triumph. It tasted like nostalgia, but better, because I made it with my own two hands.
Gathering Your Flavor Arsenal
Here’s everything you’ll need to create these cheesy masterpieces. Don’t be afraid to mix and match based on what you have!
- 1 lb Ground Beef: I like using an 80/20 blend for the best flavor, but leaner beef works great too! For a twist, try ground chicken, turkey, or even a plant-based ground meat.
- 1 Packet Taco Seasoning: The flavor shortcut we all know and love. Using a homemade mix of chili powder, cumin, and paprika is fantastic, but no judgment here—the packet is a weeknight hero.
- 1 Cup Cooked White Rice: This is the filler that makes the burrito so satisfying. Pro-Tip: Use day-old rice! It’s less sticky and holds its texture better. Brown rice or cilantro-lime rice are awesome substitutes.
- ½ Cup Sour Cream: Our cool, creamy element that cuts through the richness. Greek yogurt is a fantastic, protein-packed alternative.
- ½ Cup Nacho Cheese Sauce: The key to that iconic, velvety cheese pull. You can find it in a jar, or get fancy and make your own from a block of American cheese and a splash of milk!
- ¼ Cup Chipotle Sauce: This brings the smoke and the spice! If you’re sensitive to heat, a milder salsa or even a creamy cilantro sauce would be delicious.
- 1 Cup Shredded Cheddar Cheese: For that sharp, classic flavor. I always recommend shredding your own cheese from a block—it melts so much more smoothly than the pre-shredded stuff (which has anti-caking agents).
- 1 Cup Shredded Mozzarella Cheese: The ultimate melty cheese! Its gooey factor is unmatched. A Monterey Jack blend would also be perfect here.
- 4 Large Flour Tortillas (Burrito-size): The bigger, the better! It gives you more room for all that goodness. Warming them up for 15 seconds in the microwave makes them pliable and less likely to tear.
- Butter or Oil, for Grilling: Butter gives you that gorgeous golden-brown color and rich flavor, but a neutral oil like avocado or canola works beautifully too.
Let’s Build the Ultimate Grilled Cheese Burrito!
Okay, team! It’s assembly line time. Follow these steps, and you’ll be a burrito-rolling pro in no time.
- Cook the Beef: In a large skillet over medium heat, cook your ground beef until it’s beautifully browned and no pink remains. Drain off any excess fat—this is a crucial step to prevent a greasy burrito. Now, stir in your taco seasoning along with the amount of water the packet calls for (usually about ¾ cup). Let it simmer for 3-5 minutes until the sauce thickens and clings to the beef. Give it a taste—does it need anything? A pinch more salt? Perfect. Set it aside.
- Warm Your Tortillas: This is my number one tip for a burrito that doesn’t crack! Place your tortillas on a plate and cover them with a damp paper towel. Microwave them for 20-30 seconds until they’re warm and soft. This makes them incredibly flexible and ready for action.
- The Art of the Assembly: Lay a warm tortilla flat on your work surface. In the lower third of the tortilla (closer to you), start building your layers. First, a scoop of rice, then a generous helping of the seasoned beef. Next, drizzle on your sour cream, nacho cheese, and chipotle sauce. Chef’s Hack: Try to keep the wetter ingredients (the sauces) in the center, surrounded by the beef and rice. This creates a barrier and helps prevent a soggy tortilla!
- The Cheese & The Roll: Now for the main event—sprinkle a hearty handful of your cheddar and mozzarella blend right over the fillings. To roll, fold the sides of the tortilla inward over the filling, then lift the bottom edge up and over, tucking it tightly as you roll away from you into a snug burrito. If you have any escaping fillings, just gently push them back in. It’s a burrito, not a surgery—a little mess is part of the charm!
- Create the MAGIC Cheese Crust: This is the step that makes it a GRILLED Cheese Burrito! Heat a non-stick skillet or griddle over medium heat. Lightly brush it with butter or oil. Now, here’s the secret: sprinkle a thin, even layer of your cheddar-mozzarella blend directly onto the hot skillet, about the size of your burrito. Immediately place your burrito, seam-side down, right on top of that melting cheese. Let it grill for 2-3 minutes, until the cheese underneath is golden brown and crispy and has fused to the tortilla.
- The Grand Flip: Carefully flip the burrito over. You should see a gorgeous, lacy, cheese skirt clinging to it. Let the other side grill for another 2-3 minutes until it’s also golden and crisp. Repeat this glorious process with the remaining burritos.
- Rest and Serve: Let your burritos rest for a minute or two on a cutting board before slicing them in half diagonally. This allows the fillings to set slightly, so they don’t all come tumbling out when you take that first, glorious bite.
How to Serve Your Masterpiece
You could absolutely just eat this straight off the griddle, and I would totally understand. But if you want to make it a full meal, here are a few of my favorite ways to serve it up!
The Classic Platter: Slice that burrito in half to show off all the beautiful layers inside. Serve it with a side of hearty chips and your favorite salsa for dipping. A little extra dollop of sour cream and a sprinkle of fresh chopped cilantro on top never hurt anybody!
The “Fiesta in a Bowl”: Turn your burrito into a burrito bowl! Unroll it over a bed of crisp shredded lettuce, add a scoop of guacamole, and maybe some pickled jalapeños. It’s a deconstructed version that’s just as fun to eat.
The Ultimate Game Day Spread: Make a whole batch of these, slice them into smaller pinwheels, and secure them with toothpicks for the perfect, shareable game-day appetizer. Your friends will lose their minds.
Get Creative! 5 Tasty Twists on the Classic
Once you’ve mastered the basic blueprint, the world is your burrito! Here are a few ways to mix things up.
- The “Fiesta Veggie”: Ditch the meat and sauté a mix of bell peppers, onions, black beans, and corn with taco seasoning. It’s a colorful, satisfying, and delicious vegetarian option.
- The Spicy Diablo: For my heat-seekers! Mix some chopped canned chipotles in adobo into your sour cream, use a spicy pepper jack cheese, and add a few slices of fresh jalapeño inside the burrito before grilling.
- The Breakfast Burrito Bonanza: Who says this is just for dinner? Fill it with scrambled eggs, crispy bacon or sausage, diced potatoes, and of course, plenty of cheese. The grilled cheese crust is a game-changer for breakfast.
- The Lighter “Life”: Use ground turkey or chicken, low-fat cheese, and Greek yogurt. Swap the white rice for cauliflower rice to cut down on carbs without sacrificing flavor.
- The Fully Loaded Supreme: Go all out! Add a layer of refried beans, some creamy guacamole, and a handful of crunchy shredded lettuce right before you roll it up. It’s a massive, restaurant-style burrito experience.
Emily’s Kitchen Confidential
This recipe has been a fun one to evolve over the years. I remember the first time I tried the “cheese-on-the-griddle” method; I was so nervous it would be a sticky disaster. But when I lifted that first burrito to reveal a perfect, crispy, cheesy skirt, I did a little happy dance right there in my kitchen. My dog, Biscuit, was very confused but highly supportive.
My biggest lesson learned? Don’t overstuff! It’s so tempting to pack in every last bit of filling, but a slightly less-full burrito is infinitely easier to roll and grill without any blowouts. Trust me, there’s plenty of flavor in there even if you show a little restraint.
Your Grilled Cheese Burrito Questions, Answered!
Q: My burrito keeps falling apart when I try to roll it! Help!
A: No worries! This is the most common hurdle. First, make sure your tortillas are warm—this is non-negotiable. Second, don’t overfill it. Leave a good 2-inch border around the edges. And third, practice that tight tuck and roll. You’ve got this!
Q: Why is my cheese crust burning before the burrito is warm inside?
A: Your heat is likely too high! We’re going for a golden-brown crust, not a black one. Keep your skillet at a steady medium heat. This gives the inside time to heat through while the cheese outside crisps up perfectly.
Q: Can I make these ahead of time?
A: You can assemble them ahead of time! Wrap the rolled-but-ungrilled burritos tightly in plastic wrap and refrigerate for up to a day. When you’re ready, let them sit at room temp for 15 minutes, then grill as directed. You may need to add a minute or two to the cooking time since they’re starting cold.
Q: My fillings are leaking out during grilling. What did I do wrong?
A: This usually happens if the seam isn’t sealed properly. Make sure you’re rolling it tightly, and that the weight of the burrito itself is holding the seam down on the griddle. A little leak is normal, but if it’s a full-on breach, try using a bit less filling next time.
Let’s Talk Nourishment
I’m a firm believer that all food fits into a happy, balanced life, and that includes gloriously cheesy burritos! While this is definitely a comfort food, it also packs a good amount of protein from the beef and cheese to keep you full and satisfied.
Here’s a rough estimate per burrito (assuming 4 burritos and using 80/20 beef): ~580 calories | 32g protein | 32g fat | 42g carbs.
Remember, these numbers can vary widely based on your specific ingredients (leaner meat, low-fat dairy, etc.). If you’re watching your intake, my “Lighter ‘Life'” variation above is a great place to start! The beauty of cooking at home is that you have total control over what goes into your food.
You Did It! Now, Chow Down.
And there you have it! Your very own, homemade, better-than-takeout Grilled Cheese Burrito. I hope this recipe brings as much joy and cheesy satisfaction to your kitchen as it has to mine.
This isn’t just about replicating a fast-food item; it’s about the fun of creating something incredibly delicious with your own hands. It’s about that moment you present a plate of these golden, cheesy wonders to your family or friends and see their faces light up. That’s the real magic of cooking.
Until next time, keep your spatulas close and your cheese closer.
— Emily 🧀