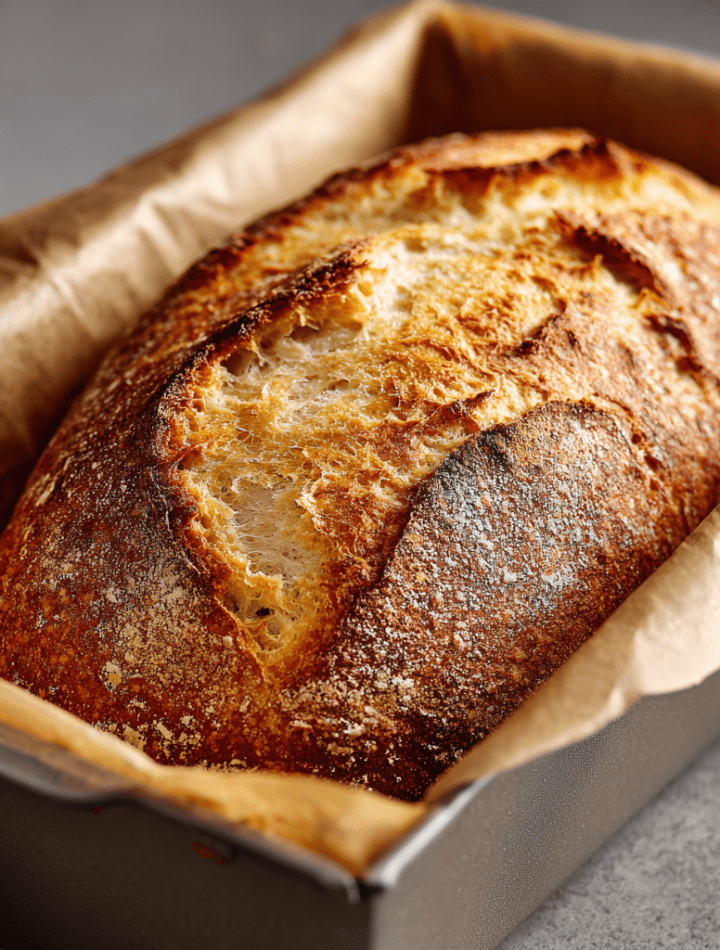
Your New Favorite Loaf: Sourdough Loaf Pan Bread
Hey there, my fellow food lover! Let me ask you a question. Have you ever gazed longingly at a gorgeous, blistered, crusty loaf of artisan sourdough and thought, “I wish I could make that, but my kitchen looks nothing like a professional bakery”? Or maybe you’ve mastered the round boule but dream of a sandwich-friendly slice that actually fits in your toaster? If you nodded yes to any of that, my friend, you are in for the most delicious treat.
Today, we’re throwing tradition a little curveball and baking our sourdough in a classic loaf pan. Yes, you read that right! This method is my absolute secret weapon for achieving that dreamy, soft-yet-chewy interior and a shatteringly crisp crust, all in a perfectly uniform shape that makes for the best toast, sandwiches, and avocado vehicles you’ve ever seen. Forget wrestling with a scorching-hot Dutch oven; this approach is straightforward, forgiving, and consistently brilliant. So, tie on your favorite messy apron, dust your hands with a little flour, and let’s bake a loaf that will completely change your sourdough game.

A Happy Accident in a Tiny Apartment Kitchen
This recipe was born out of pure necessity (and maybe a little bit of a baking mishap). Back in my first post-culinary-school apartment, my kitchen was so small you could practically stir a pot on the stove while sitting on the couch. Counter space was a myth, and my prized possession—a giant, enameled cast-iron Dutch oven—barely fit in the miniature oven. One day, in the middle of a vigorous stretch-and-fold session, my dough decided it had a mind of its own. It was too slack, too relaxed, and utterly refused to hold a tight boule shape for its final proof. In a moment of “what do I have to lose?” inspiration, I gently scooped it up, plopped it into my trusty, greased loaf pan, and crossed my fingers.
The next morning, I preheated my tiny oven, slid in the pan, and held my breath. What emerged was nothing short of magic. The crust was impossibly crisp and golden, the ear was dramatic, and the crumb? Oh, the crumb was soft, airy, and perfectly even. It was the ultimate sandwich bread with the soul of a rustic artisan loaf. That happy accident became a cornerstone of my baking routine, and it’s the joyful little secret I’m so excited to share with you today.
Gathering Your Simple, Stellar Ingredients
One of the best things about sourdough is its beautiful simplicity. You only need four core ingredients to create something truly extraordinary. Here’s what you’ll need and why each one matters:
- 100 g Active Sourdough Starter: This is the heart and soul of your bread! Make sure your starter is bubbly, fragrant, and has recently peaked after a feeding. If it sinks in water or smells overly acidic, it might be past its prime. A happy, active starter is non-negotiable for a good rise.
- 375 g Warm Water: I use warm water (around 80-85°F) to give the fermentation process a cozy little kickstart. The temperature helps wake up the wild yeast and gets everything moving. If your kitchen is particularly cold, this is a great chef’s hack to keep things on schedule.
- 11 g Fine Sea Salt or Himalayan Salt: Salt does more than just add flavor; it strengthens the gluten structure and regulates the yeast activity. Don’t be tempted to skip it or add it too early, as it can hinder the initial fermentation. We add it after the autolyse for a reason!
- 550 g Bread Flour or All-Purpose Flour: Bread flour, with its higher protein content, will give you a chewier, more structured crumb with a better rise. All-Purpose flour works wonderfully too, yielding a slightly softer, more tender loaf. It’s a matter of personal preference, so use what you have! I often use a 50/50 blend for the perfect balance.
Let’s Bake! Your Step-by-Step Guide to Loaf Pan Glory
Ready to get your hands doughy? Follow these steps, and don’t forget to read my little chef’s notes along the way—they’re packed with the tips that make all the difference!
- Mix & Autolyse (Rest for 30 minutes): In a large bowl, combine your 550g of flour and 375g of warm water. Mix with a sturdy spatula or your hands until no dry bits of flour remain. The dough will be shaggy and sticky—that’s perfect! Now, walk away. Let it rest, covered, for 30 minutes. This “autolyse” (a fancy word for a simple rest) allows the flour to fully hydrate, making the gluten strands relax and develop. You’ll be amazed at how much smoother the dough is when you return.
- Incorporate Starter & Salt: Add your 100g of active starter and 11g of salt to the top of the rested dough. Now, get in there with wet hands (this prevents sticking!) and gently squish, fold, and turn the dough for about 5-7 minutes until the starter and salt are fully incorporated. It will feel messy at first, but trust the process. You’re building the foundation of your gluten network.
- Bulk Fermentation (3-5 hours, with stretches and folds): This is where the magic happens! Over the next few hours, your dough will transform. For the first 2-3 hours, perform a series of “coil folds” or “stretch and folds” every 30 minutes. To do a coil fold, wet your hands, reach under one side of the dough, stretch it upwards, and fold it over the center. Rotate the bowl 90 degrees and repeat three more times. You’ll feel the dough becoming stronger, smoother, and holding its shape with each fold. After the last fold, let it rest undisturbed until it has increased in volume by about 50-100% and looks nice and puffy with a few surface bubbles.
- Shape & Cold Proof (Overnight, 10-12 hours): Lightly flour your work surface and gently turn the dough out. Being gentle is key here—you want to preserve all those lovely air bubbles. Gently shape it into a loose log, let it rest for 20 minutes (this is the “bench rest”), then do a final tight shape. Place the dough seam-side down into a generously greased or parchment-lined standard 9×5 inch loaf pan. Cover it tightly with plastic wrap or a reusable cover and pop it into the refrigerator for its long, cold beauty sleep. This slow fermentation is what develops that incredible, complex sourdough flavor.
- Preheat & Score (Morning of Baking): The next morning, preheat your oven to a hot 425°F (220°C). Take your loaf pan directly from the fridge. The dough will be cold and firm, which makes scoring a breeze! Using a sharp lame, razor blade, or even a very sharp knife, make one long, confident slash down the center of the loaf, about ½-inch deep. This gives the steam an escape route and allows for a beautiful “oven spring.”
- Bake with Steam (Covered for 30 minutes): To create that crispy crust, we need steam. The easiest way? Cover the entire loaf pan tightly with aluminum foil, or place an inverted second loaf pan of the same size directly on top to create a mini-oven. Bake covered for 30 minutes. This traps the steam released from the dough, allowing the crust to expand and stay supple before setting.
- Finish Bake (Uncovered for 15 minutes): After 30 minutes, carefully remove the foil or the top pan. You’ll see a pale, slightly risen loaf. Now, let it bake uncovered for another 15-20 minutes until it’s a deep, glorious golden brown and the internal temperature reads 205-210°F (96-99°C) when measured with a digital thermometer.
- Cool (The Hardest Part!): Immediately turn the loaf out of the pan onto a wire rack. I know it’s tempting, but you must let it cool completely before slicing—at least 2-3 hours. Slicing into a warm loaf stops the cooking process and can leave you with a gummy, sticky crumb. I promise, the wait is worth it for that perfect texture!
How to Serve Your Masterpiece
Congratulations, you beautiful baker, you! Now, what to do with this golden-brown work of art? The possibilities are endless, but here are a few of my favorite ways to enjoy it:
- The Ultimate Toast: This is its true calling. The even shape means every slice fits perfectly in the toaster. Slather a slice with good butter and a sprinkle of flaky sea salt, or go for your favorite jam or avocado mash.
- Sandwich Supreme: This bread has the structural integrity to hold up to the juiciest of fillings without getting soggy. Think classic turkey and cheese, a towering BLT, or a hearty veggie and hummus situation.
- Soup’s Best Friend: A thick, crusty slice is the perfect tool for mopping up the last bits of a creamy tomato soup or a hearty stew.
- Simple & Elegant: Sometimes, the best way is the simplest. Tear off a warm chunk (after it’s cooled, of course!) and dip it into a small dish of high-quality olive oil and balsamic vinegar.
Get Creative! Flavor Twists & Dietary Swaps
Once you’ve mastered the basic loaf, the fun really begins. Here are a few ways to make it your own:
- Seeded & Grains: During the initial mix, add ½ cup of a mix of seeds like sunflower, pumpkin, flax, and sesame. Soaking them in a little hot water for 15 minutes first will prevent them from sucking moisture out of your dough.
- Garlic & Herb: Add 2 teaspoons of dried Italian herbs and 1-2 cloves of finely minced garlic when you add the salt. For a more intense flavor, you can also sauté the garlic in a little olive oil first.
- Whole Wheat Version: Substitute up to 50% of the all-purpose flour with whole wheat flour. Keep in mind that whole wheat absorbs more water, so you may need to add an extra 20-30g of water during the initial mix.
- Cheesy Pull-Apart: During the shaping phase, roll the dough out into a rectangle, sprinkle generously with 1 cup of shredded sharp cheddar or gruyère, roll it up like a cinnamon roll, and then place it in the pan. You’ll get gorgeous cheesy layers in every slice.
- Gluten-Free Option: While not a direct 1:1 swap, you can make a fantastic gluten-free version using a dedicated GF sourdough starter and a robust gluten-free bread flour blend (like Caputo Fioreglut or Bob’s Red Mill). The method remains largely the same!
Chef Emily’s Kitchen Notes
This recipe has been my faithful companion for years, and it’s evolved with me. I’ve learned that sourdough is less about rigid rules and more about feeling the dough. Is it a warm, humid day? Your bulk fermentation might be faster. Is your kitchen chilly? It might need an extra hour. Learn to read the dough, not just the clock. The first time I made this, I was so nervous I checked the oven window every two minutes. Now, I know the rhythm by heart—the smell that tells me it’s almost done, the hollow sound when I tap the bottom. It’s a living, breathing (well, fermenting) thing, and that’s the joy of it. Don’t be afraid to make it yours.
Your Sourdough Questions, Answered!
I’ve gotten thousands of questions on sourdough over the years. Here are the most common ones for this loaf:
- Q: My bread is too dense. What happened?
A: This is usually due to one of three things: 1) Your starter wasn’t active and bubbly enough. Always do the float test! 2) You under-proofed the dough and didn’t let it rise enough during bulk fermentation. 3) You sliced into it while it was still warm. Patience is a virtue in baking! - Q: Can I skip the overnight cold proof?
A: You can do a room-temperature proof for 2-4 hours after shaping until it looks puffy and has risen slightly above the pan lip. However, the cold proof is a game-changer for flavor development and makes the dough much easier to score. I highly recommend it! - Q: My crust isn’t very crispy. Why?
A: The steam phase is crucial! Make sure your pan is tightly covered for the first 30 minutes. Also, ensure your oven is fully preheated and that you’re baking the loaf uncovered for the final 15 minutes to allow the crust to fully crisp and color. - Q: How do I store the bread?
A: Once completely cool, store it cut-side down on a cutting board for a day or two for the best crust. For longer storage, place it in a paper bag inside a plastic bag, or slice and freeze it for up to 3 months. Just pop frozen slices straight into the toaster!
A Quick Note on Nutrition
While I’m all about the flavor and the joy of baking, I know many of you are curious about what’s in your food! This is a rough estimate per slice (assuming 12 slices per loaf), but it can vary based on your specific ingredients.
- Calories: ~160
- Protein: 5g
- Carbohydrates: 32g
- Fat: 0.5g
- Fiber: 1g
Remember, this is real food, made with simple, wholesome ingredients. It’s a source of complex carbohydrates and, thanks to the fermentation process, may be easier to digest for some people compared to commercial yeast breads. It’s a nourishing staple you can feel great about sharing with your family.
You Did It! Now, Go Bake Again.
Look at you! You’ve just baked a stunning, professional-looking loaf of sourdough bread. I am so incredibly proud of you. This recipe is a testament to the fact that you don’t need fancy equipment or a professional kitchen to create something truly magical. All you need is a little flour, water, salt, a bubbly starter, and a whole lot of heart.
— Emily 🧡