When a Chocolate Craving Calls, This Cake Answers
Hey there, friend! Let’s have a little heart-to-heart. You’re scrolling through recipes, maybe with a cup of coffee in hand, and a specific kind of hunger hits. It’s not just any hunger—it’s a deep, soul-level yearning for a slice of rich, decadent chocolate cake. The kind that makes you close your eyes for a second after the first bite. But then… reality checks in. Maybe you’re watching your carbs, or eggs aren’t your friend, or dairy has decided to be the villain in your food story. Suddenly, that dream feels miles away.
I’ve been there, standing in my kitchen with that same longing. And let me tell you, I’m not one to let a little thing like dietary restrictions stand between me and a fantastic dessert. That’s why I’m so ridiculously excited to share this recipe with you today. This isn’t just a “good for you” cake. This is a legitimately, wonderfully, deliciously amazing chocolate cake that happens to be egg-free, low-carb, grain-free, and dairy-free. It’s my modern, nutrient-smart take on the classic “Wacky” or “Crazy” cake our grandmas made, and it’s about to become your new best friend.
We’re baking it up with a magical, nut-free flour you might not have tried yet, sweetening it without the sugar spike, and keeping it so unbelievably moist and tender, you’ll be doing a little happy dance right there by the oven. So, tie on your favorite apron (the messy one with the stories, of course), and let’s make something delicious that loves you back.
The Story Behind the “Crazy”
This recipe has a special place in my heart, and it all goes back to my Grandma Rose. She wasn’t a fancy chef, but she was a kitchen wizard. Her signature move was a “Depression Era” or “Wacky Cake” that she could whip up with just a bowl and a spoon, no eggs or butter in sight. I remember watching her, a whirlwind of flour and laughter, draw lines in the dry ingredients right in the pan, pour vinegar and oil into the trenches, and create this wild, bubbling volcano before mixing it all into a batter. It felt like kitchen magic, and the chocolatey result was pure love.
My version is a little nod to her resourceful spirit. While her cake was born from necessity, mine is designed for our modern needs—keeping that same fuss-free, mix-in-one-bowl joy but giving it a makeover with ingredients that make our bodies feel as good as our taste buds. Every time I make it, I think of her, and I hope this recipe becomes a part of your own kitchen story, too.
Gathering Your Happy Ingredients
Here’s the dream team! The beauty of this cake is in its simple, powerful ingredients. Let’s break them down so you feel like a pro before we even start mixing.
- 1 ½ cups (≈150 g) Sesame Flour: This is our star! It’s a fantastic, nutrient-dense, nut-free flour that gives the cake a wonderfully tender crumb and a subtle, almost nutty background note that pairs perfectly with chocolate. Chef’s Insight: If you can’t find sesame flour, sunflower seed flour is a great nut-free alternative. Just note that it can sometimes react with baking soda and turn things green (harmless, but surprising!). For a non-nut-free option, almond flour works beautifully, but you may need to add a tablespoon or two more as it can be more absorbent.
- ¼ cup (≈25 g) Unsweetened Dark Cocoa Powder: Don’t be shy here! Using a high-quality cocoa powder makes all the difference in achieving that deep, rich chocolate flavor we’re craving.
- 1 ½ tsp Baking Powder: This is our leavening hero, giving the cake its perfect lift and light texture without any eggs.
- ¼ tsp Salt: A must! Salt is the ultimate flavor enhancer. It makes the chocolate taste more chocolaty and balances the sweetness.
- ½ cup (≈100 g) Powdered Erythritol: I prefer powdered for a smoother texture, but your favorite granulated sugar-free sweetener will work. Just blitz it in a blender for a few seconds if it’s granulated to get that powdery consistency. Substitution Tip: Monk fruit blend or allulose also work wonderfully here.
- 1 tsp Vanilla Extract: The classic flavor backbone. It rounds out all the other flavors beautifully.
- 2 tbsp Cocoa Nibs or Chopped Very Dark Chocolate (optional): I highly recommend this! It gives little pockets of intense chocolatey crunch or melty goodness. It’s a game-changer for texture.
- 1 cup (≈240 ml) Unsweetened Almond Milk: Our liquid base! Any plant-based milk you love will work—cashew, macadamia, or even hemp milk. The goal is something neutral and unsweetened.
- 2 tbsp (≈30 ml) Neutral Oil: Avocado oil or light olive oil are my go-tos. They provide moisture and richness without adding a strong flavor. Melted coconut oil works too if you don’t mind a slight coconut taste.
- Optional Flavour Twist: ½ tsp Orange Zest or ¼ tsp Peppermint Extract: Feel like getting fancy? A little orange zest makes it taste like a chocolate orange treat, and a dash of peppermint extract turns it into a cool, refreshing delight.
Let’s Bake! Your Foolproof Steps to Chocolate Heaven
Ready for the fun part? This is where the magic happens. I’ll walk you through every step, just like I would if you were here in my kitchen with me.
- Preheat and Prep: First things first, get that oven heating to a cozy 350°F (175°C). While it’s warming up, grab your 9-inch round cake pan or an oven-safe skillet. Give it a good greasing with a little extra oil or a spritz of cooking spray. For absolute peace of mind, I like to line the bottom with a round of parchment paper. It’s my little insurance policy for a perfect, easy release every single time.
- The Dry Team Unites: In a large mixing bowl, add your sesame flour, dark cocoa powder, baking powder, salt, and powdered erythritol. Now, take a whisk and give it a really good, enthusiastic whisking! We’re not just mixing; we’re aerating the flour and making sure every single powdery ingredient is best friends with the others. No one wants a pocket of baking powder in their final bite. Chef’s Hack: If you have a sifter, feel free to sift them together. It makes for an incredibly light and lump-free batter.
- Bring in the Wet Crew: Now, pour in the vanilla extract, almond milk, and your neutral oil. If you’re using one of the fun flavor twists, add it in now too. Grab your spatula or switch to a spoon, and mix everything together. You’ll see the batter come together smoothly and beautifully. Don’t overmix! Just stir until you no longer see any dry streaks of flour. Watch for this: The batter will be thinner than a traditional cake batter, and that’s perfectly normal. It’s what helps keep it so moist!
- Fold in the Fun: This is the time for those cocoa nibs or chopped dark chocolate. Gently fold them into the batter until they’re evenly distributed. They’re like little hidden treasures waiting to be discovered.
- Bake to Perfection: Pour the batter into your prepared pan and smooth out the top with the back of your spatula. Slide it into the middle of your preheated oven and set your timer for 25 minutes. The Golden Rule: The cake is done when the top is set and a toothpick inserted into the center comes out with a few moist crumbs clinging to it. We do NOT want a completely clean toothpick—that means the cake is overbaked and will be dry. If it comes out with wet batter, give it another 3-5 minutes and test again. Total bake time is usually 25-30 minutes.
- The All-Important Cool Down: I know, I know, the smell is intoxicating and you want to dive in face-first. But patience, my friend! Let the cake cool in the pan on a wire rack for about 10 minutes. This allows it to set up and firm up a bit. After 10 minutes, carefully run a knife around the edge and invert it onto the rack to cool completely. This step is crucial for the perfect texture.
How to Serve Your Masterpiece
Alright, the cake is cooled, and the moment of glory has arrived! How you serve it can take it from a simple snack to a show-stopping dessert.
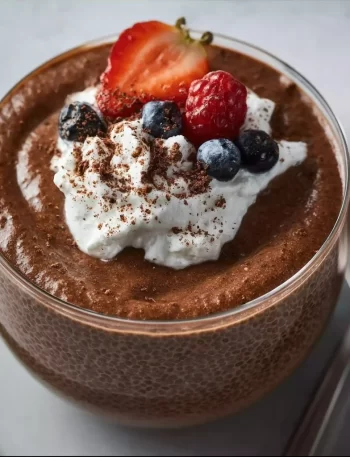
My absolute favorite way is to keep it rustic and beautiful. Place the whole cake on a cake stand or a simple plate. Take a can of full-fat coconut milk that you’ve chilled in the fridge overnight, scoop out the solid cream, and whip it with a hand mixer until it’s fluffy and dreamy. Add a splash of vanilla and a touch of your sweetener if you like. Pile that cloud of coconut whipped cream right on top of the cake.
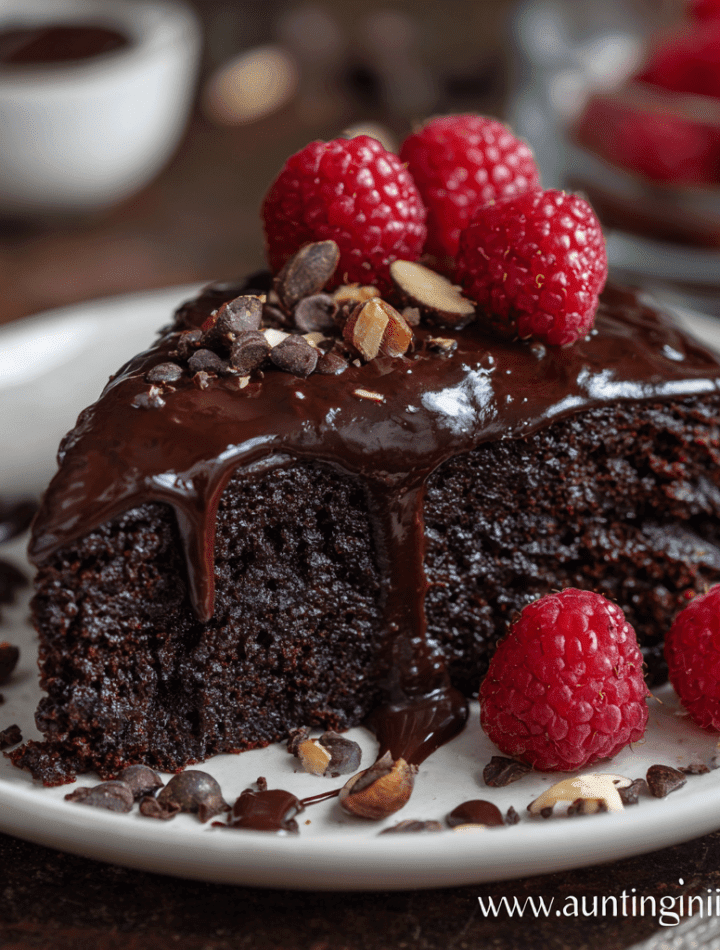
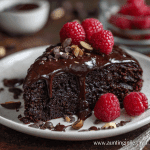
Now, for the color! Scatter a generous handful of fresh, vibrant berries over the top—raspberries and sliced strawberries are a match made in heaven with chocolate. For the final touch, dust the whole thing with a little extra cocoa powder or a sprinkle of those crunchy cocoa nibs. Slice, serve, and watch the smiles appear.
It’s also divine all on its own, maybe with a hot cup of coffee or a glass of unsweetened almond milk. You do you!
Make It Your Own: Fun Flavor Twists
Once you’ve mastered the base recipe, the playground is open! Here are a few of my favorite ways to mix it up.
- Chocolate Orange Bliss: Add the zest of one whole orange to the batter. The combination of dark chocolate and bright, sunny orange is absolutely divine.
- Peppermint Patty Cake: Stir in ¼ tsp of peppermint extract (be careful, it’s potent!) along with the vanilla. For serving, you could even crush a few sugar-free peppermints and sprinkle them on the whipped cream.
- Mexican Spiced Chocolate: Feeling adventurous? Add a pinch (about ⅛ tsp) of cayenne pepper and ½ tsp of cinnamon to the dry ingredients. It creates a warm, complex flavor that’s incredibly sophisticated.
- Chocolate Chip “Blondie” Version: Omit the cocoa powder and replace it with an additional ¼ cup of sesame flour. Fold in sugar-free chocolate chips for a vanilla-based treat that’s just as magical.
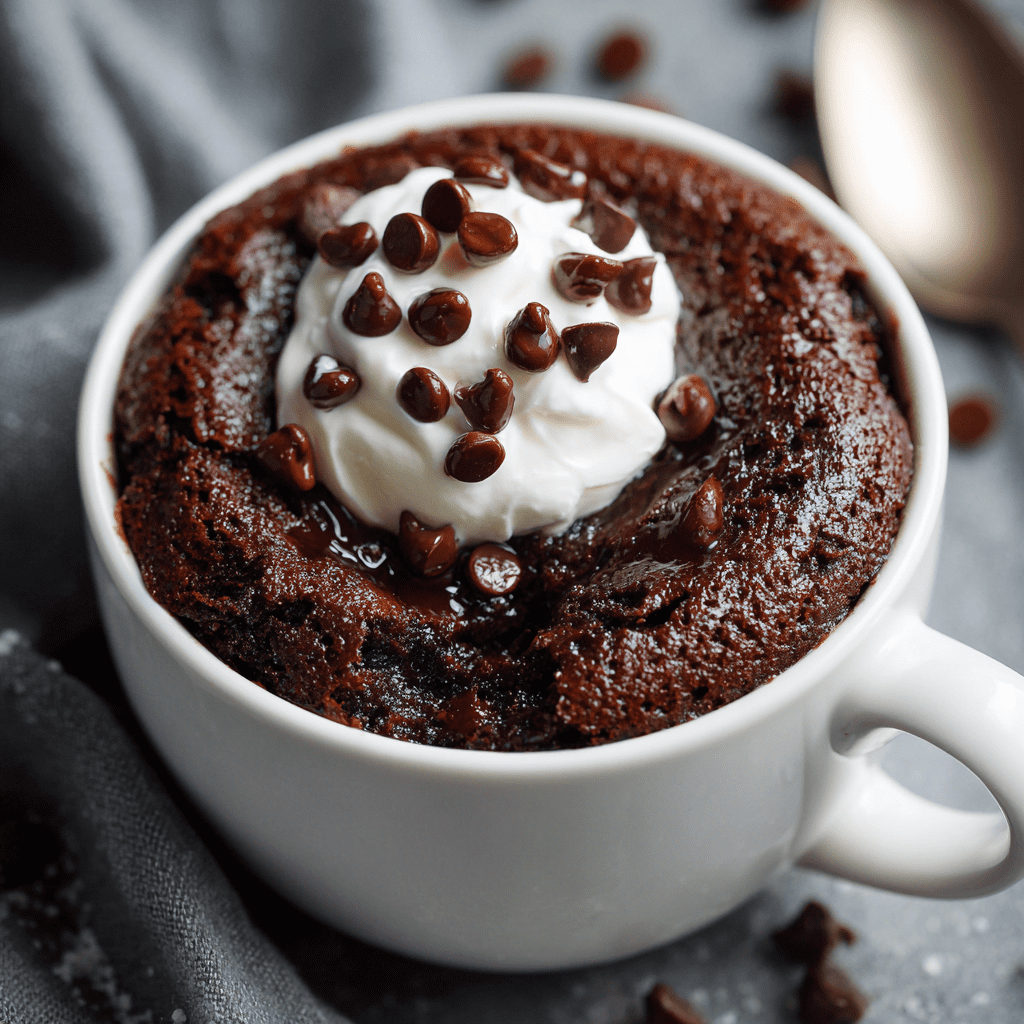
- Single-Serve Mug Cake: Craving a instant portion? Mix 3 tbsp of this dry mix (keep a batch pre-mixed in your pantry!) with 2 tbsp almond milk and 2 tsp oil in a mug. Microwave for 60-90 seconds, and enjoy straight from the mug.
From My Kitchen to Yours: A Few Extra Secrets
This recipe has evolved so much since the first time I tested it. The first version was… let’s just say a little *too* dense. A doorstop, perhaps! But through happy accidents, I discovered that whipping the batter less and trusting the thinner consistency was the key to a lighter crumb.
One of my favorite kitchen memories is when my nephew, who has multiple food allergies, tried this cake for the first time. The look of pure, unadulterated joy on his face—the kind you usually only see with “regular” cake—made all the experimentation worth it. It’s recipes like this that remind me why I love my job: food is love, and everyone deserves to feel that.
Your Questions, Answered!
I’ve gotten a lot of questions about this cake over time, so here are the answers to the most common ones.
- Q: My cake is a little dense in the middle. What happened?
A: This usually means it needed just a few more minutes in the oven. Ovens can vary, so trust the toothpick test more than the timer. A few moist crumbs are good; wet batter is not. Also, make sure your baking powder is fresh! If it’s past its prime, it won’t give the cake the lift it needs. - Q: Can I make this into cupcakes?
A: Absolutely! This batter will make about 9 perfect cupcakes. Line a muffin tin with liners, fill them ⅔ of the way full, and bake for 18-22 minutes, using the same toothpick test. - Q: Why did my cake sink in the center after baking?
A: This can happen if the cake is underbaked, if the oven door was opened too early and too often, or if there was a bit too much leavening. Make sure your measurements are accurate and try to resist peeking until the last 5 minutes of the bake time! - Q: How should I store leftovers?
A: Because it’s so moist, it keeps wonderfully! Just store it in an airtight container at room temperature for 2 days, or in the fridge for up to 5 days. You can also freeze individual slices wrapped in plastic wrap for a quick future treat.
Egg‑Free Low‑Carb Chocolate “Crazy” Cake : Grain‑Free, Nut‑Free & Dairy‑Free
- Total Time: 40 minutes
- Yield: 6 1x
Description
You know that nostalgic “wacky cake” from back in the day — no eggs, no dairy, no fuss? This version channels that spirit but gives it a low‑carb, grain‑free makeover. It’s perfect for when you want something fun and chocolatey, but still a little kinder to your body and food sensitivities. Bake it in a small pan or skillet, top it with whipped coconut cream and berries, and let the joy happen.
Ingredients
1 ½ cups (≈ 150 g) sesame flour (or your preferred grain‑free flour alternative)
¼ cup (≈ 25 g) unsweetened dark cocoa powder
1½ tsp baking powder
¼ tsp salt
½ cup (≈ 100 g) powdered erythritol (or preferred sugar‑free sweetener)
1 tsp vanilla extract
2 tbsp cocoa nibs or chopped very dark chocolate (optional for texture)
1 cup (≈ 240 ml) unsweetened almond milk (or other plant‑milk)
2 tbsp (≈ 30 ml) neutral oil (e.g., avocado oil or light olive oil)
Optional flavour twist: ½ tsp orange zest or ¼ tsp peppermint extract
Instructions
Pre‑heat your oven to 350 °F (175 °C). Grease a 9‑inch round cake pan or a similar size skillet and line the bottom with parchment if you like.
In a large bowl, whisk together sesame flour, cocoa powder, baking powder, salt and powdered erythritol until well combined.
Add vanilla extract, almond milk, and oil (plus the orange zest or peppermint extract if using). Mix until you get a smooth batter. If you’re using cocoa nibs or dark‑chocolate pieces, fold them in now.
Pour the batter into the prepared pan. Smooth the top. Bake for about 25‑30 minutes, or until a toothpick inserted into the center comes out with just a few moist crumbs (we don’t want dry).
Let the cake cool in the pan for about 10 minutes, then transfer to a wire rack to cool further.
Serve with a dollop of whipped coconut cream (just whip chilled full‑fat coconut cream with a splash of vanilla), top with fresh berries and a light sprinkle of cocoa or extra cocoa nibs for crunch.
- Prep Time: 10 minutes
- Cook Time: 30 minutes
Nutrition
- Calories: 210 / Serving
- Fat: 15g / Serving
- Carbohydrates: 4-6g / Serving
- Protein: 5g / Serving
A Quick Peek at the Nutrition
I always like to have a general idea of what I’m eating, and I bet you do, too! Here’s a rough breakdown per serving (based on the cake serving 6 people, without toppings). Remember, these are estimates and can vary based on your specific ingredient brands.
Prep Time: ~10 mins | Bake Time: ~25-30 mins | Total Time: ~35-40 mins | Serves: 6
Estimated Calories per Serving: ~210 | Fat: ~15g | Net Carbs: ~4-6g | Protein: ~5g
The beauty of this cake is that it’s packed with healthy fats from the sesame flour and oil, which helps keep you satisfied. The net carbs stay low thanks to the sugar-free sweetener and high-fiber, grain-free flour. It’s a treat you can truly feel good about enjoying.
You Did It! Now, Savor Every Bite.
Look at you, you brilliant baker! You’ve just created a chocolate cake that’s as kind to your body as it is to your taste buds. You’ve navigated alternative flours, mastered the egg-free crumb, and filled your kitchen with the unforgettable aroma of baking chocolate.
This is more than just a recipe; it’s a reminder that with a little creativity, no one has to miss out on the joy of a truly great dessert. I hope this Egg-Free Low-Carb Chocolate “Crazy” Cake finds its way into your regular rotation, for quiet Tuesday nights and celebratory weekends alike.