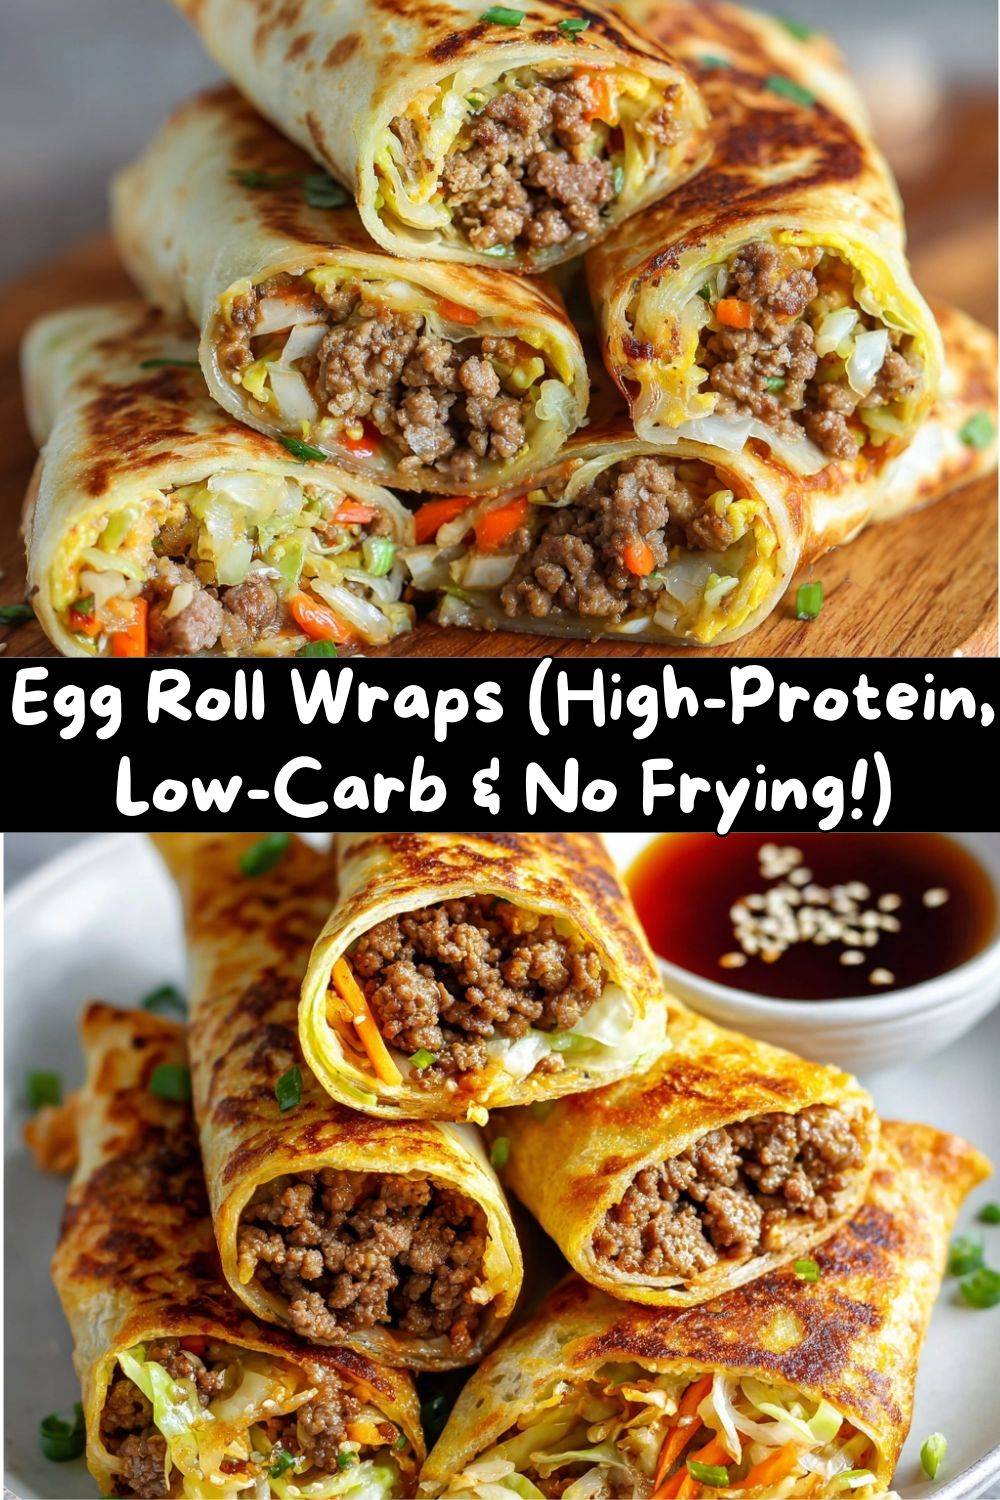
Egg Roll Wraps: Your New High-Protein, Low-Carb Obsession
Hey there, kitchen friend! Let’s talk about one of life’s great cravings: that perfect, crispy, savory egg roll. You know the one. It’s the star of every takeout container, with its crunchy shell and that magical, steaming-hot filling that’s pure comfort in a bite. But let’s be real—deep-frying at home can feel like a whole production, and sometimes you want all that flavor without the post-meal “why did I eat three of those?” feeling. (No? Just me?)
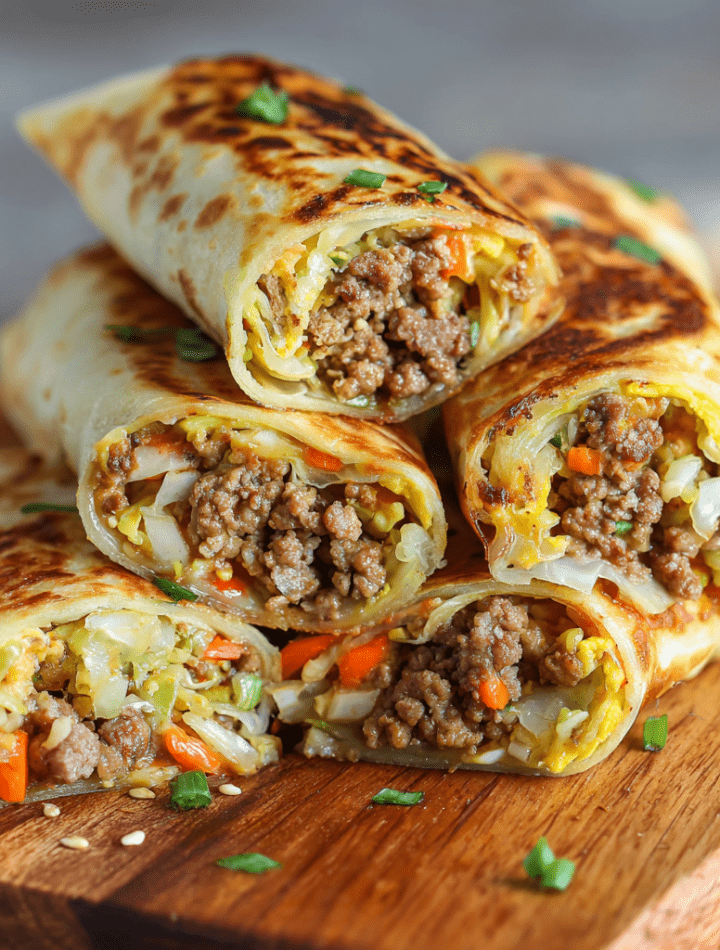
What if I told you we could capture every bit of that delicious, savory joy in a wrap that’s not just lighter, but packs a serious protein punch to keep you full and fueled? Enter my Egg Roll Wraps. This is our clever, kitchen-hack answer. We’re ditching the deep fryer and the dough altogether. Instead, we’re using simple, whisked eggs to create soft, pliable wraps that cradle a classic seasoned meat and cabbage filling.
The result? A handheld, high-protein, low-carb meal that’s perfect for lunchboxes, meal prep magic, or a satisfying snack that actually tastes like a treat. It’s fun to make, endlessly customizable, and proof that eating well doesn’t mean sacrificing big, bold flavor. So, tie on that (probably already messy) apron, and let’s turn some everyday ingredients into something seriously special.
My Grandma’s Wok & The Egg Roll Epiphany
This recipe has its roots in my grandma’s tiny, always-warm kitchen. She didn’t make traditional egg rolls, but she had a magical way with eggs and a giant, well-seasoned wok. I’d stand on a step stool, mesmerized, as she’d swirl a beaten egg into a thin, golden sheet for her famous “egg foo young.” The technique—that confident swirl, the gentle flip—stuck with me.
Years later, in culinary school, I was deep in a “deconstruct and rebuild” phase. I wanted the soul-satisfying essence of an egg roll without the heaviness. Staring at a bowl of eggs and a skillet of savory turkey and cabbage, my grandma’s technique popped into my head. What if the egg was the wrap? The first few attempts were… rustic. Let’s just say my “wraps” looked more like scrambled egg blankets. But the flavor was there—that perfect, savory, gingery bite. After a little practice (and lowering the pan heat!), I nailed it. Now, every time I make these, I think of her and that sizzling wok. It’s my little nod to her kitchen wisdom, remixed for the way we eat today.
What You’ll Need: Simple Ingredients, Big Flavor
Here’s the beautiful part: you likely have most of this in your kitchen right now. This isn’t about fancy ingredients; it’s about making them sing together.
For the Savory Filling:
- 1/2 lb ground turkey, chicken, or beef: I usually grab lean ground turkey for a super light option, but 85/15 ground beef brings incredible richness. Chicken is a great middle ground! Chef’s Insight: For maximum flavor, don’t drain all the fat if using beef—it’s liquid gold for sautéing the veggies.
- 2 cups shredded cabbage or coleslaw mix: The ultimate time-saver! The pre-bagged coleslaw mix (just cabbage and carrots) is my weeknight hero. No shredder needed. Sub Tip: Swap in bagged broccoli slaw for a different crunch or use finely chopped kale for a heartier green.
- 1/2 small carrot, grated (optional): Adds a touch of sweetness and color. Already included if you’re using a coleslaw mix!
- 1 tsp sesame oil: This is non-negotiable for that authentic, nutty aroma. Don’t cook the meat in it (it can burn), but add it to the veggies.
- 1 tbsp soy sauce or coconut aminos: Our salty, umami backbone. I use low-sodium soy sauce. Coconut aminos are a fantastic gluten-free, slightly sweeter alternative.
- 1/2 tsp garlic powder & 1/2 tsp ground ginger: The dynamic duo of flavor! Powdered works beautifully here for even distribution. Fresh Hack: If you have it, 1 clove of fresh minced garlic and 1 tsp of freshly grated ginger will make your kitchen smell unbelievable.
- Salt and pepper to taste: Season in layers! A pinch when cooking the meat, then adjust at the end after adding the soy sauce.
For the Egg Wraps:
- 4 large eggs (1 per wrap): The star of the show! Make sure they’re at room temperature for thinner, more even wraps. Pro Tip: A tiny splash of water (about 1 tsp per egg) whisked in can make them even more tender.
- Pinch of salt and pepper: Seasons the wrap itself. Don’t skip it!
- Oil or butter for the pan: A light brush of neutral oil (like avocado or canola) or a tiny pat of butter for each wrap. Butter gives a gorgeous flavor, but oil gives a more reliable non-stick surface.
Let’s Get Cooking: Your Step-by-Step Guide
Ready to roll? (Pun intended!) Follow these steps, and you’ll be a pro in no time. I’m sharing all my little hacks along the way.
- Cook the Filling First. In a large skillet or wok over medium-high heat, add your sesame oil. Toss in the ground meat, breaking it up with a wooden spoon. Sprinkle the garlic powder, ginger, salt, and pepper right over the meat. This lets the spices toast and cling to the meat as it browns, building a flavor base. Cook until it’s just about cooked through, about 5-6 minutes. Chef’s Hack: Don’t stir constantly! Let the meat get a little sear in spots for extra flavor.
- Veggie Time! Add your shredded cabbage (and fresh carrot, if using) and the soy sauce to the skillet. The pan will sizzle wonderfully. Toss everything together and sauté for 4-5 minutes, until the cabbage has wilted and softened but still has a slight crunch. You want texture, not mush! Taste it—this is your moment to adjust seasoning. Set the filling aside in a bowl. Important Tip: Let it cool slightly while you make the wraps. A super-hot filling will make your delicate egg wraps soggy.
- Master the Egg Wrap. This is the fun part! Whisk ONE egg with a tiny pinch of salt and pepper in a small bowl. Heat a small (6-8 inch) nonstick skillet or crepe pan over medium-low heat. This is key! Too hot, and the egg will bubble and set too thick. Add just a tiny bit of oil or butter and swirl to coat. Pour the whisked egg into the center and immediately lift the pan off the heat, swirling it so the egg coats the bottom in a thin, even circle. Return to heat.
- The Flip. Cook for about 45-60 seconds until the top looks fully set and the edges might start to lift. Here’s my favorite trick: Use a thin, flexible silicone spatula to gently loosen the edges, then get under the center. With confidence (you’ve got this!), flip it over. It only needs 15-20 seconds on the second side. Slide it onto a plate. Repeat with the remaining eggs, re-greasing the pan lightly each time. No-Stress Note: If one tears? No biggie! Call it a “test wrap” and snack on it. The next one will be perfect.
- Assemble & Roll. Place an egg wrap on a clean surface. Spoon about 1/4 of the filling onto the lower third of the wrap. Fold the bottom edge up over the filling, fold in the sides (like a burrito!), and roll it up tightly. Place it seam-side down. Repeat! You can also fold them taco-style if that’s easier. They’re forgiving.
How to Serve Your Masterpiece
Presentation is part of the fun! I love serving these on a bright, colorful platter, cut in half on a diagonal to show off that beautiful spiral of filling inside. Sprinkle with a few sesame seeds or thin slices of green onion for a restaurant-worthy touch.
But let’s talk DIPPING SAUCES. This is where personality shines.
- Classic Duo: Simple soy sauce and a dish of sweet chili sauce.
- Creamy Dream: Mix 2 tbsp mayo with 1 tsp sriracha and a squeeze of lime for a spicy, tangy kick.
- Zesty & Bright: A quick ponzu sauce or a mix of rice vinegar and a dash of sesame oil.
Serve them right away while the egg wraps are soft and warm. They’re also fantastic for meal prep! Let the filled wraps cool completely, then store in an airtight container in the fridge for up to 3 days. They’re delicious cold, or you can gently reheat them in a toaster oven or air fryer for a few minutes to re-crisp the outside.
Make It Your Own: 5 Tasty Twists
Once you’ve mastered the basic formula, the world is your egg-wrapped oyster! Here are some of my favorite spins.
- Pork & Shrimp Celebration: Use ground pork and add 1/4 cup of finely chopped cooked shrimp to the filling. Add a dash of fish sauce with the soy sauce for incredible depth.
- Vegetarian “Buddha Bowl” Style: Swap the meat for 1 cup of cooked, crumbled firm tofu or tempeh. Add diced mushrooms and bell peppers to the cabbage for extra heartiness.
- Breakfast Egg Roll Wrap: Fill with scrambled eggs, crumbled cooked breakfast sausage, and a bit of cheddar cheese. Serve with hot sauce! A whole new way to “wrap” your breakfast.
- Spicy Korean-Inspired: Use ground beef and season the filling with 1 tbsp of gochujang (Korean chili paste) mixed with the soy sauce. Top with kimchi after rolling!
- Keto “Everything Bagel”: Add 1 tbsp of everything bagel seasoning to the egg before you whisk it for the wrap. Fill with a cream cheese and smoked salmon mixture instead of the meat filling.
Chef Emily’s Notebook
This recipe has truly evolved in my kitchen. The first version was so basic—just turkey and cabbage. Now, my fridge clean-out often ends up as an “experimental egg wrap.” Leftover rotisserie chicken? Shred it in. Last bit of broccoli? Chop it fine. It’s a fantastic template.
A funny story: I once tried to make a giant “family-sized” wrap using four eggs at once in a huge pan. It was a disaster of epic, un-flippable proportions. My husband still calls it “The Egg Blanket Incident.” The moral? Stick to one-egg-per-wrap. Some kitchen experiments are best left as funny memories (and a big plate of scrambled eggs with filling mixed in!).
Your Questions, Answered
Q: My egg wraps are sticking/tearing! Help!
A: The #1 culprit is heat and pan type. Ensure you’re on medium-low and using a quality nonstick skillet. Let the egg set fully before trying to flip. A thin layer of fat (oil/butter) for each wrap is also essential.
Q: Can I make these ahead of time?
A: Absolutely! Cook the filling and make the wraps up to 2 days ahead. Store separately in the fridge. Assemble just before eating, or assemble and reheat gently. The wraps can get a tad soft if stored assembled, but they still taste great.
Q: The filling is a bit watery. How do I fix that?
A> Cabbage releases water as it cooks. Two fixes: 1) After sautéing, let the filling sit in the colander for a few minutes to drain excess liquid. 2) Crank the heat to high for the last 60 seconds of cooking the veggies to quickly evaporate the moisture.
Q: What’s the best way to reheat these?
A> To maintain texture, avoid the microwave. A toaster oven or air fryer at 350°F for 3-4 minutes is perfect. You can also re-crisp them seam-side down in a dry nonstick skillet over medium heat for a minute on each side.
A Quick Note on Nutrition
I’m a chef, not a certified nutritionist, but I love knowing what’s fueling my body! The info below is a close estimate per wrap, using 93% lean ground turkey and a standard large egg. Remember, variations will change these numbers.
Approximate Nutrition Per Wrap: Calories: ~180 | Protein: ~15g | Total Carbohydrates: ~4g | Dietary Fiber: ~1g | Total Fat: ~10g
The beauty here is in the high protein-to-carb ratio. The protein from the eggs and ground meat helps keep you full and satisfied, while keeping the carbs low makes this a fit for many eating styles. Using more veggies will add fiber and volume without many calories. It’s a balanced, wholesome meal that truly satisfies a craving.
Final Thoughts from My Kitchen to Yours
And there you have it! My love letter to the classic egg roll, remixed for our busy, flavor-loving lives. These wraps prove that a few simple ingredients and a little technique can create something that feels special, nourishing, and downright delicious.
I hope this recipe becomes a trusted friend in your weekly rotation—a blank canvas for your own fridge discoveries and flavor adventures. The most important ingredient is always the joy you bring to the process. So don’t stress about a perfect flip or a picture-perfect roll. Just enjoy the sizzle, the smell, and the satisfaction of creating something awesome with your own two hands.
If you make these, I’d be over the moon if you tagged me @TastyChow so I can see your creations! Now, go grab