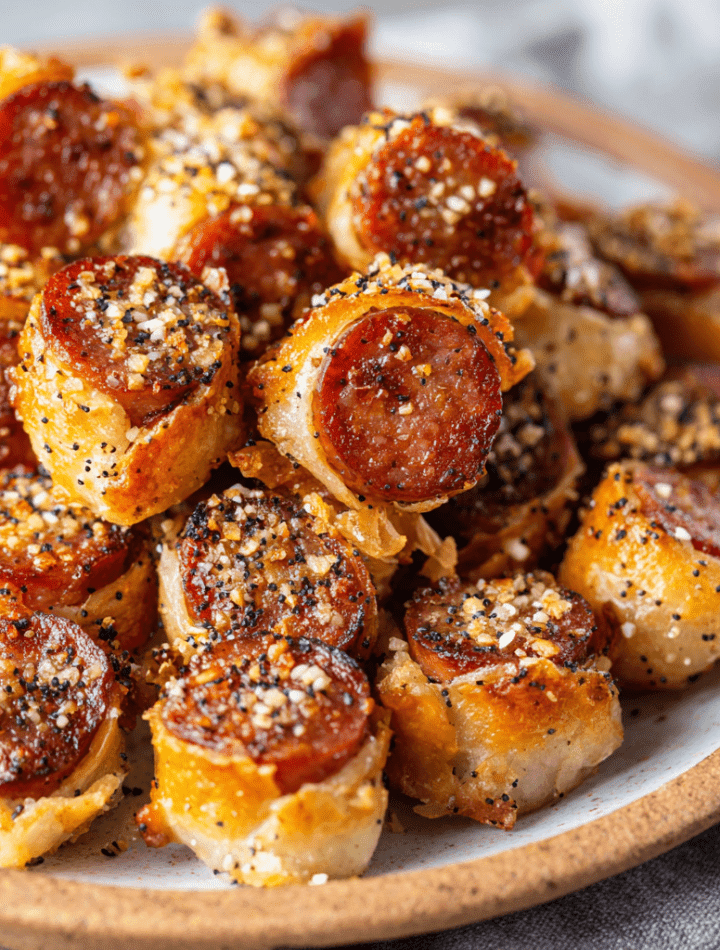
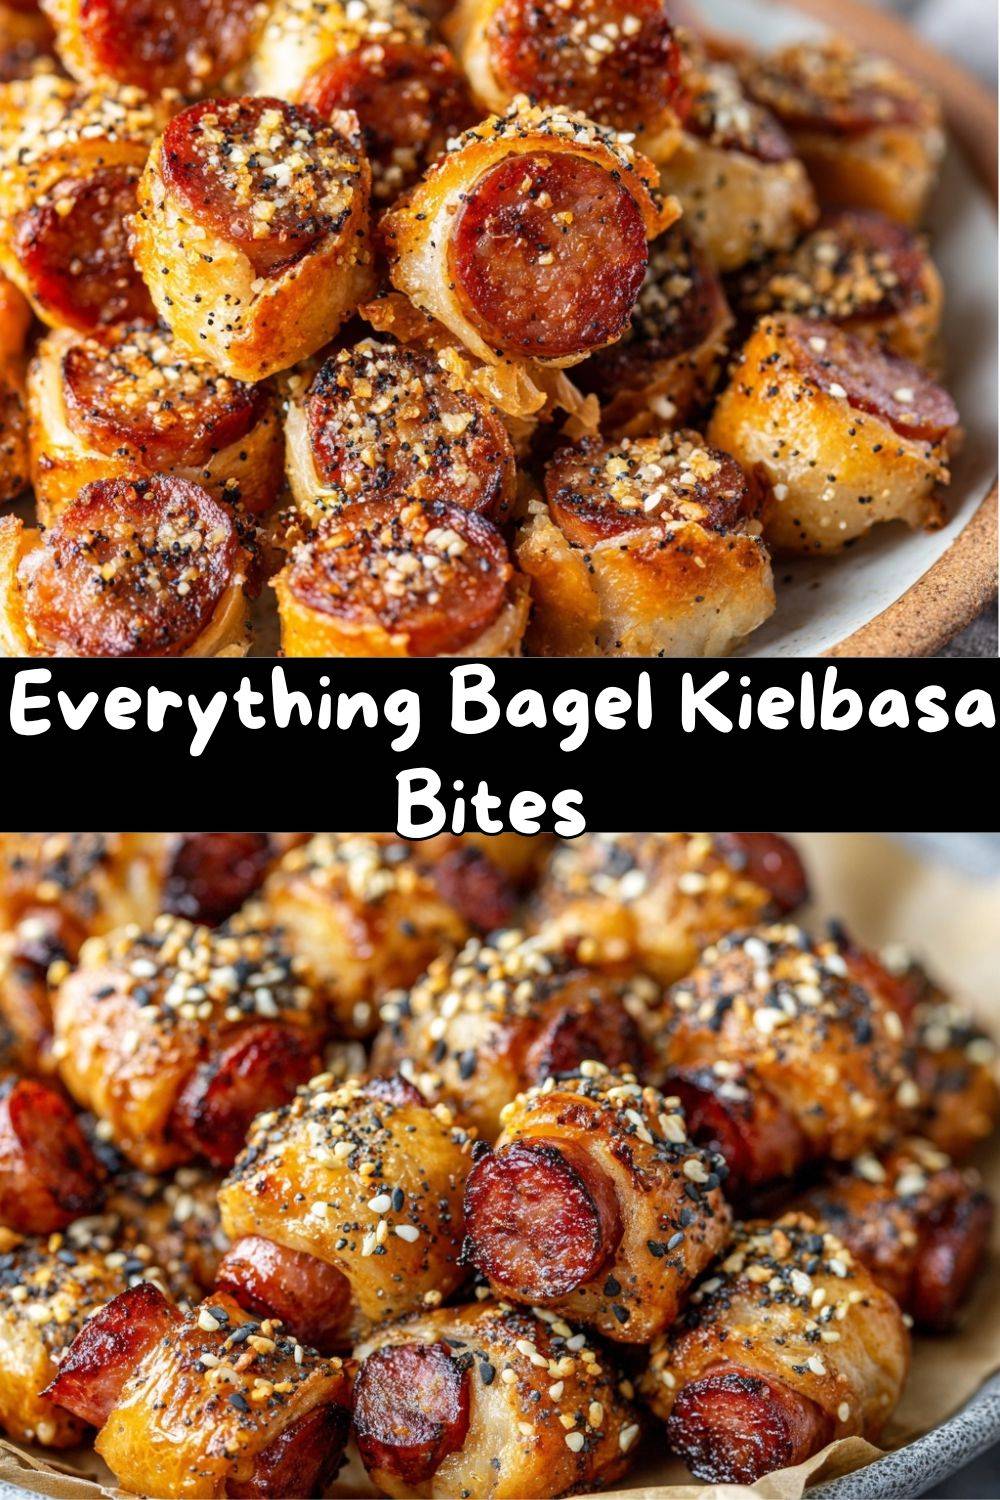
The Easiest, Most Addictive Party Bite You’ll Ever Make
Hey, friend! Grab a seat and maybe a napkin, because I’m about to introduce you to your new favorite party trick: Everything Bagel Seasoning Kielbasa Bites. Picture this: juicy, smoky kielbasa hugged by a flaky, buttery crescent roll crust, all rolled in that iconic, crunchy, savory-sesame-garlic-oniony-everything-goodness. Now picture making it with just three ingredients and about 20 minutes of your time. Are you smiling yet? I am!
In my world, the best recipes are the ones that look like you fussed for hours but secretly required minimal effort and maximum flavor. These little bites are the undisputed champions of that category. They’re the appetizer that disappears before the main course even hits the table, the snack that has everyone hovering around the oven asking, “Are they done yet?” Whether you’re hosting the big game, need a last-minute potluck hero, or just want a seriously satisfying treat for movie night, this recipe has your back. It’s comfort food in party clothes, and I am so excited for you to try it. Let’s turn your kitchen into the most popular spot in the house!
My Grandmother’s Secret Weapon & Why Simplicity Wins
This recipe always makes me think of my Grandma Betty. She wasn’t a fancy chef, but she was a wizard of “making something out of nothing.” Her secret weapon for unexpected guests? A can of biscuits and a pack of hot dogs, transformed into “pigs in blankets” in her toaster oven. The joy on her face when we kids devoured them was pure magic. It wasn’t about the ingredients; it was about the feeling—the warmth, the welcome, the effortless love on a plate.
My Everything Bagel Kielbasa Bites are a direct descendant of that spirit. I’ve just given it a little “Emily” twist, swapping in heartier kielbasa and crowning it with my current seasoning obsession. It’s a nod to that nostalgic, no-fuss joy, but dialed up for our modern, flavor-loving taste buds. Every time I make them, I remember that the best food isn’t about complication; it’s about connection. And something this delicious has a magical way of bringing people together.
Your Flavor Lineup: It’s All About Quality & Swaps!
Here’s the beautiful shortlist. The magic happens in how you choose and use them! Don’t just grab and go—read my little chef notes. They make all the difference.
- 24 oz Smoked Kielbasa: This is your flavor anchor! I prefer a good-quality, fully cooked smoked kielbasa for its robust, garlicky, and peppery notes that stand up to the dough and seasoning. Chef’s Insight: You can find it in a horseshoe shape or in links. If using links, just slice them to match the size. For a twist, try andouille sausage for a spicy kick or a smoked turkey kielbasa for a slightly lighter option.
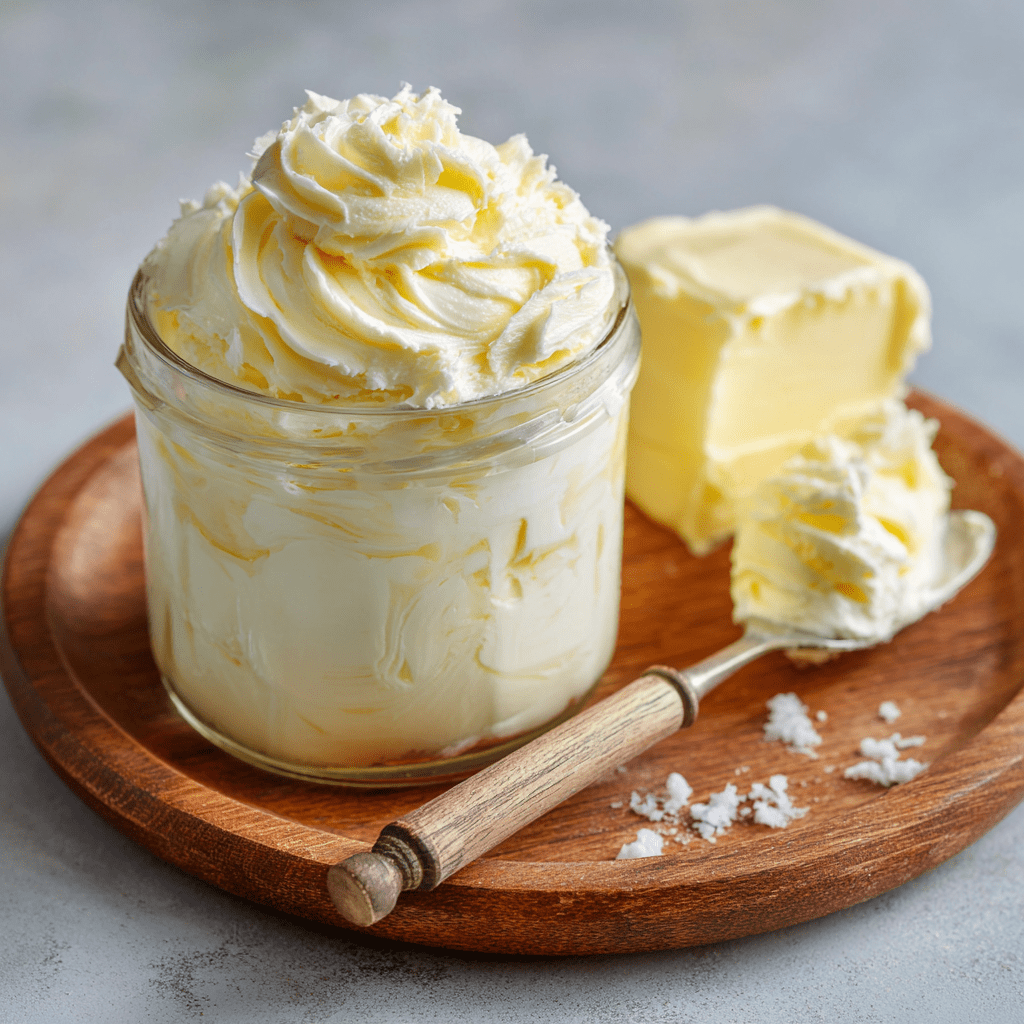
- 2 cans (8-count each) Crescent Roll Dough: The flaky, buttery vehicle for our delicious cargo. The canned stuff is perfect here for its convenience and consistent puff. Substitution Tip: In a pinch, you can use a sheet of puff pastry, cut into strips. For a different texture, refrigerated biscuit dough (the “flaky layers” kind) works too—just flatten each biscuit slightly before wrapping.
- 2–3 tsp Everything But The Bagel Seasoning: The superstar! This blend of sesame seeds, poppy seeds, garlic, onion, and salt is a flavor explosion. Chef’s Insight: Don’t be shy here! A generous sprinkle is key for that iconic crunch and taste. You can find it at almost any grocery store now, or make your own blend if you’re feeling crafty.
Let’s Build Some Bites: Step-by-Step with Chef Emily
Ready to get your hands a little doughy? It’s the fun part! Follow these steps, and you’ll be a pro in no time.
- Preheat & Prep: Fire up your oven to 375°F (190°C). This is the sweet spot for getting the crescent dough perfectly golden without burning the seasoning. Line a baking sheet with parchment paper or a silicone mat. Chef Hack: The liner isn’t just for easy cleanup—it prevents any cheese or fat that might seep from the kielbasa from sticking horribly. Trust me on this one!
- Slice & Dice: Grab your kielbasa and slice it into 1½-inch pieces. Think “two-bite size.” Now, pop open those cans of crescent dough (that “poof” never gets old!). Unroll the dough and separate it along the perforated triangle lines. Using a sharp knife or a pizza cutter, slice each triangle lengthwise into 2 or 3 long, skinny strips. Chef’s Commentary: Thinner strips mean more flaky layers wrapping around your kielbasa. It’s a good thing!
- Wrap It Up: Take one dough strip and start wrapping it around a piece of kielbasa, starting at one end and spiraling down to the other. No need to be perfect—rustic is charming! Pinch the end of the dough to seal it onto the bite. Place it on your prepared baking sheet with the seam side down. This helps it stay sealed while baking. Repeat with all your pieces, spacing them about an inch apart. Little Tip: If the dough gets too soft or sticky, just dust your fingers with a tiny bit of flour.
- The Seasoning Shower: This is where the personality comes in! Generously sprinkle your Everything Bagel Seasoning over the top of each wrapped bite. Get the sides if you can. You want a good, flavorful coating on every surface. Chef Hack: For extra adherence and richness, you can give the bites a very light brush with an egg wash (1 egg beaten with 1 tbsp water) *before* sprinkling the seasoning. It gives a deeper golden brown finish.
- Bake to Golden Perfection: Slide that sheet pan into your preheated oven and bake for 12 to 15 minutes. You’re looking for the dough to be puffed up and a beautiful deep golden brown. The smell will be irresistible. Chef’s Watch-Out: Ovens vary! Start checking at 12 minutes. If the dough is golden but you want a crispier bite, give it another minute or two.
- The (Hardest) Final Step – Cool Slightly: Remove the pan from the oven. I know, I know—you want to grab one immediately! But let them cool on the pan for about 3-5 minutes. This allows the dough to set just a bit so it doesn’t deflate when you pick it up, and it saves your guests from a molten-hot kielbasa surprise. Then, transfer to a serving platter and get ready for the compliments!
How to Serve These Like a Pro (It’s Easy, I Promise!)
Presentation is part of the fun! Don’t just dump these beauties in a bowl. Give them the stage they deserve. I love piling them high on a rustic wooden board or a simple white platter—it lets their golden color and that gorgeous seasoning really pop. Tuck a few small bowls of dipping sauces right in the middle or off to the side.
Speaking of dips, this is where you can really customize! Mustard is a classic pairing with kielbasa. Offer a variety: a grainy Dijon, a spicy brown, and maybe a sweet honey mustard. But my personal favorite? A warm cheese dip. A quick beer cheese sauce or even a simple bowl of warmed garlic-herb cream cheese takes these bites into absolute dream territory. Add some cornichons, pepperoncini, or carrot sticks on the side for a little freshness and color. Now that’s a party plate!
Get Creative! 5 Fun Twists on the Classic
Once you’ve mastered the original, the playground is open! Here are a few of my favorite ways to mix things up:
- Spicy Everything: Use a spicy kielbasa or andouille sausage. Add a pinch of red pepper flakes to the Everything Bagel Seasoning before sprinkling.
- Sweet & Savory Pretzel Bites: Before baking, brush bites with melted butter and sprinkle with coarse salt. After baking, while still warm, give them another light butter brush and roll in everything bagel seasoning mixed with a teaspoon of brown sugar. Thank me later.
- Pizza Party Version: Swap the Everything seasoning for a blend of grated Parmesan, dried oregano, and garlic powder. After baking, serve with a side of warm marinara for dipping.
- “Reuben” Bites: Use smoked turkey kielbasa. Before wrapping, place a tiny piece of Swiss cheese and a dab of drained sauerkraut against the kielbasa, then wrap with the dough. Serve with Thousand Island dressing for dipping.
- Breakfast-for-Dinner Bites: Use cooked breakfast sausage links (cut to size). Wrap as directed, but season the bites with everything bagel seasoning and a little everything bagel seasoning. Perfect with a maple-mustard dip.
From My Kitchen to Yours: A Few Parting Tips
This recipe has become such a staple in my entertaining rotation that I’ve lost count of how many times I’ve made it. It’s evolved from a simple experiment to a trusted friend. I’ve learned that letting the wrapped bites sit on the counter for 5-10 minutes before baking (while the oven preheats) helps the dough relax and can prevent leaking. I’ve also been known to make a double batch and freeze half before baking—just assemble, place on a parchment-lined sheet, freeze solid, then toss in a freezer bag. Bake from frozen, adding 3-5 extra minutes. It’s a lifesaver! The biggest laugh in my kitchen? The time I used “jumbo” crescent rolls and didn’t cut the strips thin enough, resulting in giant, dough-monster bites that were still delicious but hilariously oversized. We called them “Kielbasa Logs” and ate them with a knife and fork. Even the “failures” are tasty around here!
Your Questions, Answered!
Q: My crescent dough unraveled/un-puffed in spots while baking. What happened?
A: This usually means the seal wasn’t quite tight enough, or the seam wasn’t placed firmly down on the baking sheet. Make sure to really pinch that tail end of dough onto the bite. Placing it seam-side down acts as a little weight to hold it shut. Also, avoid over-stretching the dough as you wrap.
Q: Can I make these ahead of time?
A: Absolutely! You can assemble the bites completely (wrap and season) up to 24 hours in advance. Cover the baking sheet tightly with plastic wrap and refrigerate. When you’re ready, bake straight from the fridge—you might need an extra minute or two in the oven.
Q: I can’t find Everything Bagel Seasoning. What can I use instead?
A> No problem! Make a quick blend: mix together 1 tsp each of white sesame seeds, black sesame seeds (or just more white), poppy seeds, dried minced garlic, and dried minced onion. Add ½ tsp of coarse salt (like kosher salt). That’s your DIY everything mix!
Q: What’s the best dip for these?
A> My top three are: 1) Spicy Brown Mustard (classic and easy), 2) Garlic Herb Cream Cheese (just soften cream cheese and stir in minced garlic, chives, and a pinch of salt), and 3) a Quick Beer Cheese Dip (melt together cream cheese, shredded cheddar, a splash of beer, and a dash of Worcestershire sauce over low heat until smooth).
A Quick Nutritional Glance
While these are firmly in the “treat yourself” category of appetizers, it’s always good to know what you’re enjoying! Please note: these are approximate estimates based on the specific brands and quantities I used, and your exact numbers may vary. This info is for one bite (recipe makes about 16).
Per Bite: Calories: ~110 kcal | Protein: 5g | Fat: 8g | Carbohydrates: 7g | Sodium: ~320mg
The kielbasa provides the protein and a good amount of the fat, while the crescent dough brings the carbohydrates and that delightful flakiness. The sodium comes primarily from the kielbasa and the seasoning blend. If you’re watching sodium, you can look for a lower-sodium kielbasa and be a bit lighter-handed with the seasoning sprinkle. Remember, balance is key! Enjoy a few of these delicious bites alongside some fresh veggies or a crisp salad.
You’ve Got This! Now Go Impress Someone (Even If It’s Just You)
And there you have it! The secret to the easiest, most crowd-pleasing appetizer in your future. I hope this recipe brings as much joy and ease to your table as it has to mine. Remember, cooking is about sharing, experimenting, and having fun. If your bites aren’t perfectly symmetrical or you use a different mustard than I did, you’re doing it right. You’re making it your own.
So, the next time you hear the doorbell ring and panic for a second, just smile, grab your three ingredients, and get wrapping. In less time than it takes to decide what to watch on TV, you’ll have a platter of hot, savory, irresistible goodness that says “Welcome, I’m glad you’re here” better than any words ever could. Now get in that kitchen and make something delicious! And be sure to tell me all about it. Tag me or send me a pic—I love seeing your creations.
Happy cooking, friend!
— Emily 🧡