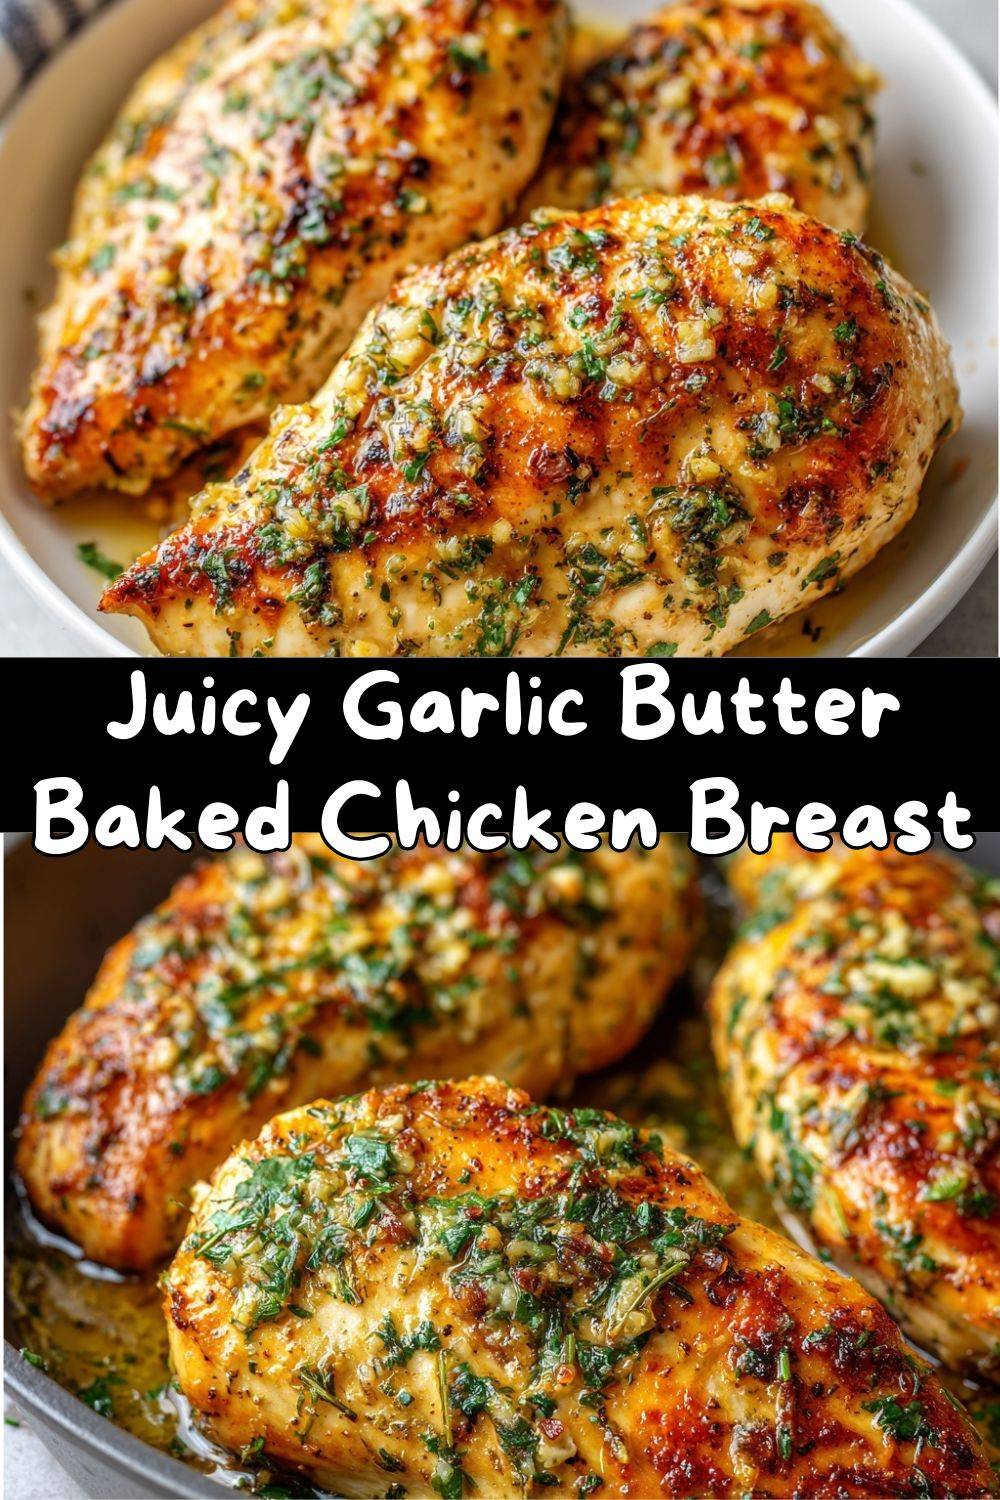
The Garlic Butter Baked Chicken Breast That Will Save Your Weeknights (And Your Soul)
Hey there, friend! Grab a seat at the kitchen island and let’s talk about something important: the eternal quest for a weeknight dinner that’s both incredibly delicious and shockingly easy. You know the feeling. It’s 5:30 PM, stomachs are rumbling, and you’re staring into the fridge hoping for inspiration to magically appear. Well, consider this your sign. Today, we’re making my absolute go-to: Juicy Garlic Butter Baked Chicken Breast.
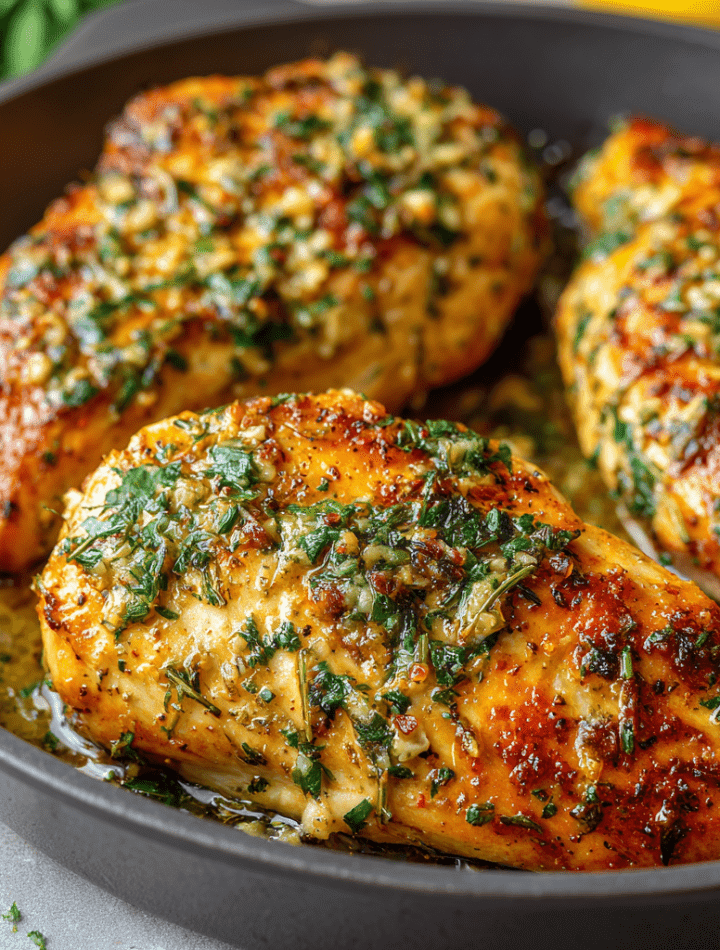
I’m not talking about dry, sad, flavorless chicken. I’m talking about succulent, tender breasts bathed in a golden, garlic-infused butter that sizzles and bubbles in the oven, filling your kitchen with an aroma that’s basically a warm welcome home. This recipe is my little black dress of dinners—simple, reliable, endlessly adaptable, and always a hit. It requires just a handful of pantry staples, one dish, and about 30 minutes from fridge to table.
The best part? It’s naturally gluten-free, low-carb, and keto-friendly without ever tasting like “diet food.” This is pure, unadulterated comfort food that happens to fit into a healthy lifestyle. It’s the recipe I send to friends who claim they “can’t cook chicken,” because this method? It’s foolproof. So, tie on your favorite apron (the one with the stains that tell stories), and let’s make something that will have everyone asking for seconds.
Why This Chicken? A Tale of Trial, Error, and Garlic Breath
This recipe wasn’t born in culinary school. Oh no. It was born out of desperation on a rainy Tuesday about six years ago. I had two sad-looking chicken breasts, a half-stick of butter, and a serious case of the “I don’t wanna cook” blues. My grandma’s voice popped into my head: “Emily, good food doesn’t have to be complicated. It just has to be made with a little attention.”
I remember her teaching me to make pan-fried chicken cutlets, always emphasizing that moment when you add butter to the pan with garlic. The sound, the smell—it was culinary magic. I wanted that same deep, nutty, aromatic flavor, but with the hands-off ease of the oven. So I whisked that garlic into melted butter, poured it over the chicken, and crossed my fingers. What came out of the oven was a revelation. The butter basted the chicken as it baked, keeping it impossibly moist, while the garlic mellowed and caramelized into something sweet and fragrant. It was a “text the family group chat immediately” kind of moment. This recipe is that happy accident, perfected over hundreds of repeats, and now, I’m so excited to share it with you.
Your Flavor Arsenal: Simple Ingredients, Explained
Here’s everything you need. I’ve included my little chef insights for each because knowing the “why” makes you a more confident cook!
- 2 large boneless, skinless chicken breasts (about 1.5 lbs total): Look for breasts that are roughly the same size so they cook evenly. Chef’s Insight: If yours are massive or uneven, see my pro-tip in the instructions! You can also use chicken thighs—they’re even harder to overcook and will need a few extra minutes in the oven.
- 2 tablespoons unsalted butter, melted: This is our flavor vehicle and our moisture-locker. Unsalted lets you control the seasoning. Substitution Tip: Ghee or a high-quality olive oil work beautifully for a dairy-free version.
- 3 cloves garlic, minced: Fresh is best here! The oven heat transforms sharp, raw garlic into a sweet, mellow paste. Chef’s Hack: Use a microplane to grate the garlic directly into the butter—it creates almost a paste that coats the chicken more evenly.
- 1 teaspoon Italian seasoning: This convenient blend is like a little flavor party of oregano, thyme, basil, and rosemary. Substitution Tip: No blend? Use ½ tsp dried oregano and ½ tsp dried basil.
- 1/2 teaspoon paprika: It adds a subtle sweetness and a gorgeous golden-red color. Smoked paprika is a fantastic swap for a deeper, campfire-kissed flavor.
- 1/2 teaspoon salt: Crucial for bringing out all the flavors. Don’t skip it! I use fine sea salt.
- 1/4 teaspoon black pepper: Freshly cracked is always ideal for the brightest flavor.
- Optional: Chopped fresh parsley and a lemon wedge: The “confetti and confetti launcher” for serving. The bright, fresh parsley and a hit of acidic lemon juice right at the end elevate the entire dish from great to “wow.”
Let’s Get Baking: Your Foolproof Roadmap to Juicy Chicken
Follow these steps, and you’re guaranteed perfection. I’ve sprinkled in my favorite hacks along the way!
- Preheat & Prep: Crank your oven to 400°F (200°C). This hot temperature gives us a nice cook on the outside while keeping the inside tender. Lightly grease your baking dish—a ceramic or glass dish about 9×13 inches is perfect. Little Chef Hack: A quick spritz of olive oil spray does the trick, or use a paper towel to wipe a tiny bit of your melted butter around the dish.
- Chicken TLC: Take your chicken breasts and pat them completely dry with paper towels. This is the #1 secret to getting good browning and helping the butter mixture stick! Place them in your prepared dish. Pro-Tip Alert! If your breasts are very thick or uneven, place them between two pieces of plastic wrap and gently pound the thicker end with a rolling pin or skillet until they’re an even thickness. This ensures they cook at the same rate.
- Create the Magic Sauce: In a small bowl, mix the melted butter, minced garlic, Italian seasoning, paprika, salt, and pepper. Whisk it until it’s a beautiful, fragrant, speckled sauce. Give it a taste on a spoon (it’s safe, the garlic cooks in the oven!). Adjust salt if needed.
- The Butter Bath: Pour or spoon the garlic butter sauce over the chicken breasts. Use your hands or a pastry brush to make sure every single inch is gloriously coated. Don’t waste a drop—let all those goodies settle in the bottom of the dish, too. They’ll become a dipping sauce later!
- Bake to Perfection: Slide the dish into your preheated oven. Bake for 20-25 minutes. The exact time depends on the size of your breasts. The only way to know for sure? Use a meat thermometer. Insert it into the thickest part—it should read 165°F (75°C). The butter will be bubbling, and the chicken will be beautifully golden. Chef’s Promise: A thermometer is the best $15 you’ll ever spend. It banishes dry chicken forever.
- The Crucial Rest: Once out of the oven, let the chicken rest in the dish for 5 full minutes. I know it’s hard to wait! But this allows the juices, which have rushed to the surface during cooking, to redistribute back throughout the meat. If you cut it immediately, all those precious juices will run out onto the cutting board. Patience = juiciness.
- Finish & Serve: After resting, slice the chicken against the grain. Plate it, and be sure to drizzle or spoon over any of that incredible buttery, garlicky sauce left in the baking dish. Top with a shower of fresh chopped parsley and a squeeze of lemon juice for that perfect finishing touch.
How to Serve Your Masterpiece
This chicken is the ultimate team player! Here’s how I love to plate it up:
For a classic, comforting plate, slice the chicken and fan it over a bed of creamy mashed cauliflower (my keto fave) or fluffy mashed potatoes. Spoon all that garlic butter pan sauce right over the top. Add a simple side of steamed green beans or roasted asparagus to round out the meal.
Feeling like a hearty salad? Slice the baked chicken breast and arrange it atop a big bowl of crisp romaine or spinach. Add cherry tomatoes, cucumbers, avocado, and a sprinkle of feta. Use the pan juices (once slightly cooled) as the base for an incredible warm vinaigrette—just whisk in a little extra lemon juice or vinegar.
Meal prep champion? Bake the chicken, let it cool, and slice or chop it. Store it in an airtight container with the sauce. It’s perfect for quick lunch bowls with cauliflower rice and veggies, or as a high-protein topping for a lunchtime salad all week long.
Mix It Up! 5 Delicious Twists
Once you’ve mastered the base, the world is your flavor oyster! Try one of these easy variations:
- Sun-Dried Tomato & Parmesan: Add 2 tbsp finely chopped sun-dried tomatoes and 2 tbsp grated Parmesan cheese to the butter mixture. Sprinkle extra Parmesan over the chicken in the last 5 minutes of baking.
- Lemon Herb: Add the zest of one lemon and 1 tsp of fresh chopped thyme or dill to the butter sauce. Serve with extra lemon wedges.
- Spicy Cajun: Swap the Italian seasoning and paprika for 1.5 teaspoons of your favorite Cajun or Creole seasoning blend. Kick it up with a pinch of cayenne if you dare!
- Caprese Style: After baking and resting, top each breast with a slice of fresh mozzarella and a halved cherry tomato. Pop under the broiler for 1-2 minutes until melted. Finish with fresh basil.
- Dairy-Free/Paleo: Substitute the butter with extra-virgin olive oil or avocado oil. The flavor profile changes slightly but remains utterly delicious.
Emily’s Kitchen Notes & Stories
This recipe has been my faithful companion for years. It’s evolved from that first simple experiment to include the paprika (a reader’s suggestion—thank you, Susan from Idaho!) and the mandatory rest time (learned after one too-hungry, too-early slice). I’ve made it for first dates, for sick friends, and for myself on countless “treat yo’ self” nights with a side of roasted broccoli. It never fails.
My biggest lesson? Don’t fear the butter. It’s not just fat; it’s a conductor of flavor and the key to that luxurious, juicy texture. And remember, your garlic won’t taste sharp—the oven heat sweetens it beautifully. So go ahead, use that third clove. I won’t tell.
Your Questions, Answered
Q: My chicken always turns out dry. What am I doing wrong?
A: The most common culprits are overcooking and skipping the rest. A meat thermometer is your best friend to avoid overcooking. Pull it at 165°F, and let it rest! Also, pounding thicker breasts to an even size prevents the thin end from drying out while the thick end cooks.
Q: Can I use frozen chicken breasts?
A> I highly recommend thawing them first. Pat them extra dry. If you must cook from frozen, you’ll need to significantly increase the baking time (often doubling it), and the texture may not be as ideal. Thaw in the fridge overnight for best results.
Q: How long does leftover chicken keep?
A: Stored in an airtight container with the pan juices, it will keep beautifully in the fridge for 3-4 days. It’s fantastic cold in salads or reheated gently in a skillet with a splash of broth to keep it moist.
Q: Can I make this with chicken thighs?
A: Absolutely! Bone-in, skin-on thighs are incredibly flavorful. You may want to increase the butter and seasoning slightly. Bake at the same temperature, but they will likely need 30-35 minutes until the internal temp reaches 165°F and the skin is crispy.
Nutritional Information*
This information is for one serving (½ of a large chicken breast with the butter sauce), based on the exact ingredients listed. The optional lemon and parsley are not included.
- Calories: 290
- Protein: 33g (Excellent source! This helps keep you full and satisfied.)
- Fat: 17g (The majority comes from the butter, providing rich flavor and aiding in the absorption of the fat-soluble vitamins from the garlic and herbs.)
- Carbohydrates: 1g
- Fiber: 0g
- Sugar: 0g
- Keto-Friendly: Yes! With only 1g net carb per serving, it fits perfectly into a keto or low-carb lifestyle.
- Gluten-Free: Yes, naturally.
*Please note: Nutritional info is an estimate calculated using a third-party tool. Values can vary based on the specific brands and sizes of ingredients you use.
Go Forth and Bake That Chicken!
And there you have it, my friend—your new secret weapon for easy, healthy, and downright delicious dinners. This Garlic Butter Baked Chicken Breast proves that you don’t need a long ingredient list or complicated techniques to make a meal that feels special. It’s about taking a few good things and treating them with a little love (and butter).
I hope this recipe finds its way into your regular rotation, becoming a reliable friend in your kitchen just like it is in mine. When you make it, I’d love to hear about it! Tag me on social @TastyChow or leave a comment on the blog. Nothing makes me happier than seeing your creations.
Now, go preheat that oven. Your juicy, garlicky, buttery chicken awaits. Happy cooking!
— Emily 🧡