Your New Favorite Holiday Side Dish is Here! 🎉
Hey there, my fellow food lovers! Chef Emily here, waving at you from my kitchen, which I can guarantee is currently dusted with a light snowfall of panko breadcrumbs and filled with the incredible, mouthwatering aroma of roasting garlic. Is there anything better? If your holiday table has been longing for a side dish that steals the show, that has everyone asking, “Wait, is this really green bean casserole?”, then my friend, you are in for the most delicious treat.
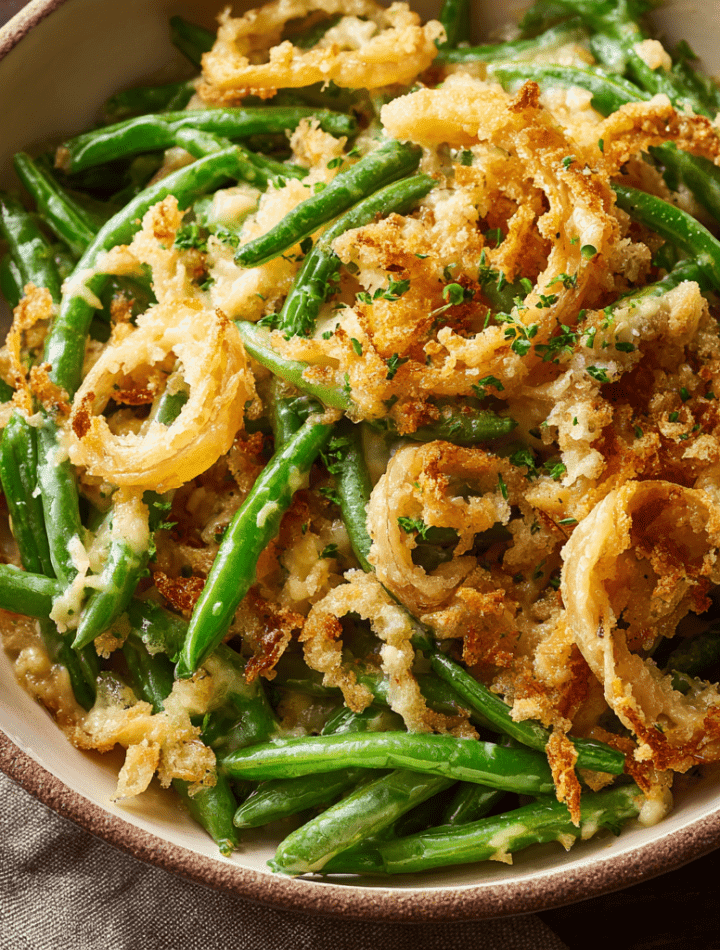
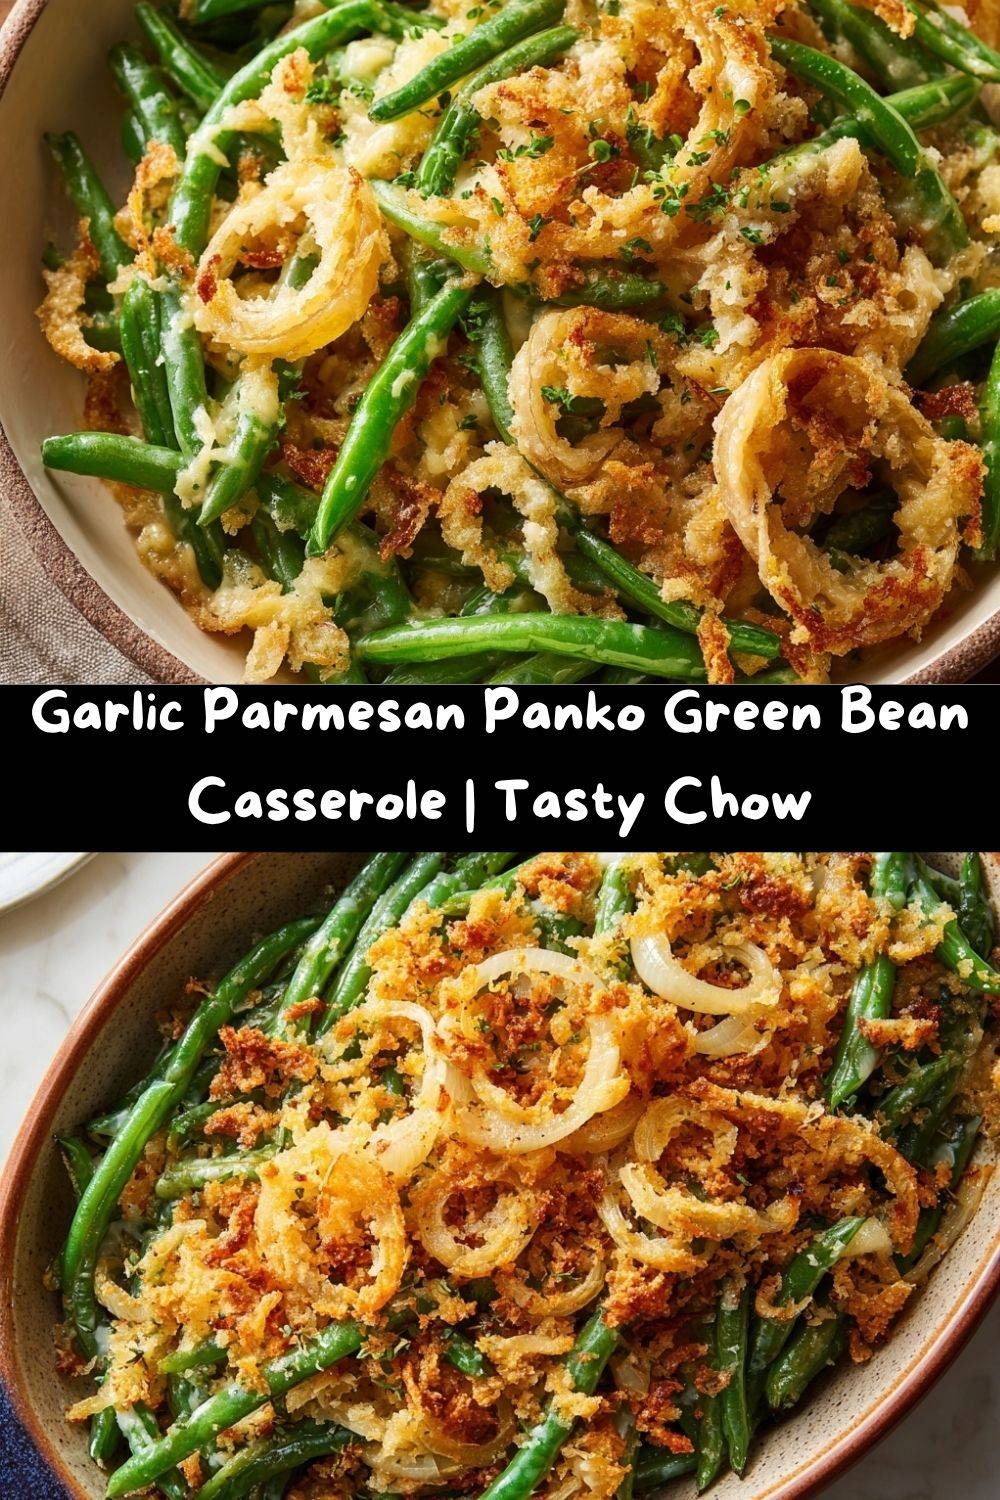
We all know and love the classic version—it’s a cozy, nostalgic pillar of potlucks and holiday feasts. But today, we’re giving it a serious glow-up. We’re swapping out the canned fried onions for a homemade, gloriously crunchy, buttery, garlic-parmesan panko topping that will have your guests swooning. This version is fresher, cheesier, and has that gourmet touch that makes it feel special, without being fussy or complicated. It’s still the comforting, creamy, soul-warming casserole you crave, just dressed in its Sunday best. So, tie on your favorite apron (the messy one with all the stories), and let’s make a dish that’s about to become a new tradition in your home.
A Casserole That Tastes Like a Hug 🤗
This recipe didn’t start in a fancy test kitchen; it started with a happy accident and a serious craving. A few years ago, I was in a frantic pre-Thanksgiving panic. I’d promised to bring the green bean casserole, but my heart sank when I realized I’d completely forgotten to buy the iconic canned fried onions. The grocery store was a madhouse—there was no way I was going back. So, I took a deep breath and looked at what I did have: a sleeve of panko, a big block of parmesan, and a head of garlic that was begging to be used.
I toasted that panko in butter with minced garlic, stirred in the parm, and held my breath as it came out of the oven. The result? Pure magic. The topping was a million times better—deeper in flavor, with a satisfying crunch that held up against the creamy sauce. It was a reminder that sometimes the best recipes are born from a little bit of chaos and a whole lot of love. Now, I wouldn’t make it any other way. It’s my little kitchen secret, and I’m so thrilled to share it with you.
Gathering Your Flavor Arsenal 🧄🧀
Here’s everything you’ll need to create this masterpiece. I’ve included some of my favorite chef insights and swaps so you can make it your own!
- 1 ½ lbs fresh green beans, trimmed: Fresh is fantastic for that perfect crisp-tender bite! Chef’s Tip: You can absolutely use 4 cups of frozen green beans in a pinch—no shame! Just thaw and pat them dry to avoid a watery sauce.
- 2 tbsp butter: The rich, savory base for our creamy sauce. Unsalted is best so we can control the salt level.
- 1 small onion, diced: This builds a sweet, aromatic foundation. A yellow or white onion works perfectly here.
- 2 cloves garlic, minced: Because more garlic is always the answer. Freshly minced will give you the best, brightest flavor.
- 2 tbsp all-purpose flour: This is our thickening agent to create a luscious, velvety sauce.
- 1 cup milk: Whole milk will give you the richest sauce, but 2% works great too. For a heavier creaminess, you could use half-and-half.
- 1 cup chicken or veggie broth: This adds a ton of savory depth. Use low-sodium if possible!
- 1 cup shredded Gruyère or sharp cheddar: Gruyère is my top choice for its nutty, complex flavor that feels fancy, but a good sharp cheddar is a delicious, melty, and more accessible alternative.
- ½ tsp black pepper & Salt, to taste: Season in layers! Taste as you go.
- ¼ tsp nutmeg (optional): A tiny pinch might sound weird, but it’s a classic secret weapon in creamy sauces—it adds a warm, subtle complexity that makes the cheese sing.
For The Iconic Topping:
- 1 ½ cups panko breadcrumbs: The star of the show! Panko is lighter and flakier than regular breadcrumbs, giving us an unparalleled CRUNCH.
- 3 tbsp butter: For toasting the panko to golden-brown perfection.
- 2 cloves garlic, minced: Yes, more garlic. We’re infusing the butter with garlicky goodness.
- ½ cup grated parmesan: Use the good stuff you grate yourself from a block! It melts and toasts so much better than the pre-shredded kind.
- 1 tbsp fresh parsley, chopped: For a pop of fresh color and flavor right at the end.
Let’s Build the Dream Casserole, Step-by-Step! 👩🍳
Don’t let the steps intimidate you—this is a fun, straightforward process. I’ll walk you through every part with all my best tips!
Step 1: Blanch Those Beans!
Bring a large pot of salted water to a rolling boil. While you’re waiting, get a large bowl of ice water ready—this is called an “ice bath” and it’s our key to keeping the beans bright green and perfectly crisp. Add the trimmed green beans to the boiling water and cook for just 3-4 minutes. You want them to be tender but still have a serious snap! Immediately drain them and plunge them into the ice bath to stop the cooking process. This step is a total game-changer for texture. Drain again and set aside.
Step 2: Create the Creamy, Dreamy Sauce
Preheat your oven to 375°F (190°C). Now, in a large skillet or Dutch oven, melt the 2 tablespoons of butter over medium heat. Add the diced onion and cook for about 5 minutes until it becomes soft and translucent. Add the 2 cloves of minced garlic and cook for just one more minute until fragrant—be careful not to burn it! Sprinkle the flour over the onions and garlic and stir constantly for about a minute to cook out the raw flour taste. This is our roux!
Now, slowly pour in the milk and broth while whisking constantly. This prevents lumps and ensures a silky-smooth sauce. Let the mixture simmer for 3-5 minutes, whisking often, until it thickens nicely enough to coat the back of a spoon. Remove the skillet from the heat and stir in the shredded cheese, black pepper, nutmeg, and salt. Taste it! This is your chance to adjust the seasoning. Stir until the cheese is completely melted and glorious.
Step 3: Bring It All Together
Add the blanched green beans to the cheese sauce and gently fold everything together until every single bean is coated in that creamy goodness. Pour the entire mixture into a 2-quart baking dish and spread it out evenly.
Step 4: Make The Topping That Will Change Your Life
In a medium skillet, melt the 3 tablespoons of butter over medium heat. Add the 2 cloves of minced garlic and cook for 30 seconds until you can smell that amazing aroma. Add the panko breadcrumbs and stir constantly for 2-3 minutes until they turn a beautiful light golden brown. Remove the skillet from the heat immediately—they will continue to toast from the residual heat. Stir in the grated parmesan and chopped parsley. Congratulations, you just made magic.
Step 5: Top & Bake to Perfection
Sprinkle the garlic-parmesan panko mixture evenly over the top of the green bean and sauce mixture. Don’t pat it down—we want it loose and fluffy for maximum crunch. Pop that beautiful dish into your preheated oven and bake for 20-25 minutes, until the sauce is bubbly around the edges and the topping is a deep, irresistible golden brown.
How to Serve This Show-Stopping Side 🍽️
This casserole is the ultimate team player on your holiday table, but it deserves a grand entrance! Let it rest for about 5-10 minutes after pulling it out of the oven. This allows the sauce to set just slightly, making it easier to serve up perfect scoops.
I love serving it right from the baking dish at the table—that gorgeous, golden-brown topping is part of the presentation! Use a large serving spoon to get underneath that crispy top and scoop down to get all the layers: the crunchy panko, the creamy sauce, and the tender green beans. It’s the perfect companion to your roasted turkey, honey-glazed ham, or even a prime rib roast. For a lighter pairing, it’s fantastic next to a simple roasted chicken or pork chops. Honestly, it’s so good you might just want to eat it straight from the dish with a fork—no judgment here!
Make It Your Own! 5 Delicious Twists 🔄
One of the best things about cooking is making a recipe work for you! Here are a few of my favorite ways to mix it up.
- Mushroom Lover’s Dream: Sauté 8 oz of sliced cremini mushrooms with the onions for an earthy, umami-packed version. It’s a classic flavor pairing that never fails.
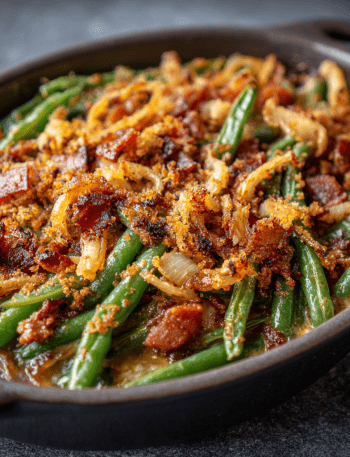
- Bacon Bliss: Because bacon makes everything better. Cook 6 slices of bacon until crispy, crumble it, and stir half into the sauce with the green beans. Use the other half to mix into the panko topping for an outrageous smoky crunch.
- Make It Light(er): Use a light milk (like 1% or 2%) and low-sodium broth. You can also reduce the butter in the topping by 1 tbsp and add a spritz of olive oil cooking spray to help the panko brown.
- Spicy Kick: Add a pinch of cayenne pepper or red pepper flakes to the cheese sauce for a subtle, warming heat that cuts through the richness.
- Cheese Swap: Try different melting cheeses! Fontina is wonderfully creamy, Monterey Jack is mild and melty, and even a smoked gouda would add an incredible depth of flavor.
Chef Emily’s Kitchen Confidential 🗒️
This recipe has become such a staple in my home that it’s evolved a little over the years. I once, in a fit of experimentation, tried to add a sprinkle of lemon zest to the topping. My family looked at me like I had three heads! It wasn’t bad, but it definitely taught me that some classic flavors are classic for a reason. Stick with the garlic-parm-panko trifecta—it’s a winner.
My biggest pro-tip? Don’t skip the blanching step for fresh beans. I know it’s tempting to just throw them in raw, but blanching ensures they’re perfectly cooked and not squeaky or tough after baking. It’s the little details that elevate a good casserole to a great one. This dish is all about love and a little bit of crunch!
Your Questions, Answered! ❓
Q: Can I make this casserole ahead of time?
A: Absolutely! You can assemble the entire casserole (green beans + sauce + topping) up to a day in advance. Cover it tightly with plastic wrap and store it in the fridge. When you’re ready, bake it straight from the fridge—you might just need to add 5-10 extra minutes to the baking time since it will be cold.
Q: My sauce seems too thin! How can I thicken it?
A: No worries! If your sauce hasn’t thickened after simmering, let it cook for another 2-3 minutes, stirring constantly. If it’s still too thin, make a quick slurry by mixing 1 teaspoon of cornstarch with 1 tablespoon of cold water. Whisk this into the simmering sauce and it should thicken up almost instantly.
Q: My topping is burning before my casserole is bubbly. Help!
A: This is a common oven quirk! If you see the topping getting too dark too fast, simply lay a loose piece of aluminum foil over the top for the remainder of the baking time. This will protect the panko while allowing the heat to penetrate and bubble the sauce.
Q: Can I use French fried onions AND the panko topping?
A: You are a genius. Yes, you can! For the ultimate crunch experience, make the garlic-parmesan panko topping as directed and then mix in a half-cup of French fried onions right before sprinkling it over the casserole. It’s the best of both worlds!
Nutritional Information ℹ️
While this is definitely a celebratory dish, it’s helpful to know what’s in it! This nutritional breakdown is an estimate per serving (assuming 8 servings) and will vary based on the specific ingredients and brands you use.
Per Serving: Approximately 230 calories | 13g fat | 18g carbs | 7g protein
Remember, this is a side dish meant to be enjoyed as part of a balanced meal. The green beans provide fiber and nutrients like Vitamin C and K, while the cheese and milk offer calcium and protein. The panko topping adds that satisfying crunch and flavor, making vegetables the star of the show—which is always a win in my book!
Let’s Keep the Conversation Cooking! 💬
Well, my friends, there you have it—my all-time favorite way to make green bean casserole. It’s a dish that’s packed with flavor, texture, and so much love. I truly hope it becomes a new tradition in your home and brings as much joy to your table as it does to mine.
I’d love to hear how it turns out for you! Did you add bacon? Try a different cheese? Snap a picture of your beautiful creation and share it with me over on Instagram by tagging @TastyChow and using the hashtag #TastyChow. Seeing your kitchen creations absolutely makes my day.
Until next time, happy cooking, and remember: the best meals are the ones made with love (and a little bit of butter).
— Emily 🧑🍳💖