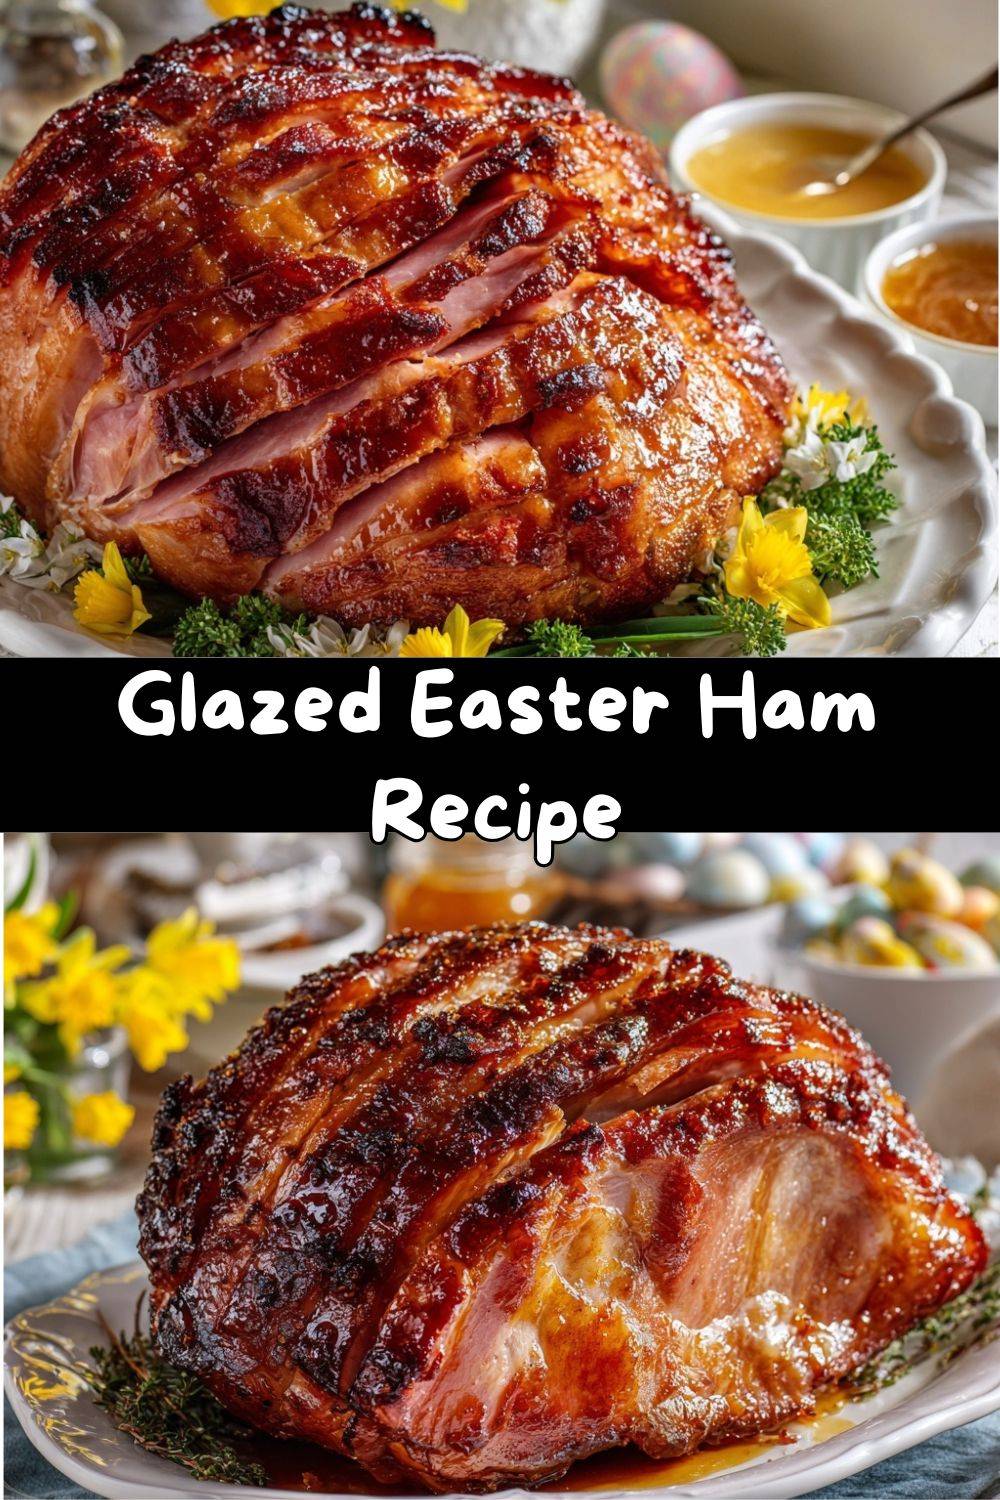
Glazed Easter Ham: Your New Holiday Tradition Awaits!
Hey, friend! Emily here. Can you smell it? That incredible, mouth-watering aroma of a sweet-and-savory ham roasting in the oven, filling your entire home with the promise of a fantastic feast. If your heart does a little happy dance at the thought of a gorgeous, glazed centerpiece on your Easter table, you’ve come to the right kitchen corner.
For years, I thought making a truly show-stopping, juicy, flavor-packed Easter ham was something only my grandma or fancy chefs could pull off. I’d stand in the grocery store, staring at those beautiful spiral-cut hams, feeling a mix of excitement and sheer panic. What if I dry it out? What glaze is the best? How do I make it taste like a memory? Sound familiar?
Well, grab your favorite apron (the one with the fun pattern, obviously), because we’re about to tackle those fears together. This recipe isn’t just about cooking a ham; it’s about creating a moment. It’s about gathering your people around a table, slicing into the most tender, juicy meat you’ve ever made, and watching everyone’s eyes light up. The secret? It’s way easier than you think. With a few simple ingredients and some classic Chef Emily tricks, we’re going to transform a fully-cooked ham into a masterpiece that balances smoky, sweet, and savory in every single bite. Let’s make this Easter deliciously unforgettable.
The Sweet Scent of Sundays: Why This Ham Feels Like Home
My love affair with Easter ham started not in culinary school, but in my Grandma Mae’s cozy, yellow-walled kitchen. Every year, without fail, she’d heft this giant, pink hunk of meat from the fridge, and the ritual would begin. I was her official “glaze stirrer,” perched on a step-stool, wooden spoon in hand, as she combined mustard, brown sugar, and the secret ingredient: a big splash of her morning orange juice.
The magic moment came when she’d pull the ham from the oven, its surface a sticky, caramelized map of deliciousness. She’d let it rest (impatiently guarded by me and our dog, Buster), and then my grandpa would do the honors, carving slices so thin you could almost see through them. That first bite—the salty, smoky meat with that sweet, tangy crust—was the taste of celebration, of family crammed around a too-small table, of laughter and sprung-spring hopes. This recipe is my homage to her. It’s that same heartwarming flavor, with just a few tweaks I’ve picked up along my own messy-apron journey, designed to give you that same “wow, I made this!” feeling.
Gathering Your Flavor Arsenal: A Closer Look at the Ingredients
Great cooking starts with understanding your ingredients. Here’s everything you’ll need and why each one plays a starring role.
- 1 fully cooked bone-in spiral ham (7–9 lbs): This is our MVP. “Fully cooked” means most of the work is done for us—we’re just heating and flavoring! “Bone-in” gives you incredible depth of flavor and juiciness (plus, hello, amazing soup bone for later!). The spiral cut is a genius timesaver, creating perfect slices and pockets for our glaze to seep into. Chef’s Insight: Don’t stress over “water-added.” A natural, minimally processed ham will have the best texture and flavor.
- 1/2 cup brown sugar: Our sweetness base. It melts into a gorgeous, sticky caramel that binds the glaze. Light or dark brown works—dark brown has a deeper molasses flavor for a richer glaze.
- 1/4 cup honey: Nature’s liquid gold. Honey adds a floral, complex sweetness and helps create that glossy, professional-looking finish. For a fun twist, try orange blossom or wildflower honey!
- 1/4 cup Dijon mustard: The flavor powerhouse! Dijon brings a tangy, sharp, and slightly sophisticated edge that cuts through the sweetness perfectly. It’s the “why is this so good?” secret. In a pinch, a good whole-grain mustard works too.
- 1/4 cup orange juice or pineapple juice: The acidic brightener. Orange juice adds a citrusy zing, while pineapple juice gives a tropical, classic ham vibe. This liquid also thins the glaze to a perfect brushing consistency. Freshly squeezed is lovely, but from the carton is absolutely fine!
- 1 tablespoon apple cider vinegar: Our secret weapon for balance. Just a splash lifts all the flavors and prevents the glaze from being cloyingly sweet. It’s a non-negotiable in my book!
- 1/2 teaspoon ground cloves (optional): The warm, nostalgic spice. Cloves scream “holiday ham” to many people. If you love that classic scent, add it! If you’re unsure or serving kids, you can skip it—the glaze is still phenomenal.
Let’s Get Cooking: Your Foolproof Step-by-Step Guide
Ready? Let’s turn those ingredients into magic. Follow these steps, and you’ll have a ham that’s the star of the show.
Step 1: Preheat & Prep. Fire up your oven to 325°F (165°C). Take your ham out of its packaging (discard any plastic caps or little discs!) and place it cut-side down in a large, shallow roasting pan. This positioning helps keep all those beautiful spiral slices moist and intact. Now, tent the pan loosely with aluminum foil. We’re creating a cozy steam room to gently heat the ham through without drying out the edges. Chef Hack: If your ham came with a glaze packet, feel free to save it for another use (like brushing on grilled chicken!), but we’re making a far superior one from scratch.
Step 2: The Low & Slow Bake. Slide that pan into the center of your preheated oven. Now, patience is key. We’re going to bake it for about 10-12 minutes per pound. For a 9-pound ham, that’s roughly 1.5 to 2 hours. The goal is to get the internal temperature (measured in the thickest part, avoiding the bone) to 140°F. Pro Tip: Use a digital meat thermometer! It’s the single best tool to prevent overcooking and ensures perfect, juicy results every single time.
Step 3: Whisk Up the Glaze. While the ham works its magic, let’s make the glaze. In a small saucepan, combine the brown sugar, honey, Dijon mustard, juice, apple cider vinegar, and cloves (if using). Whisk it over medium heat until it comes to a gentle simmer. Let it bubble happily for 5-7 minutes, whisking occasionally, until it thickens slightly—it should coat the back of a spoon. Chef’s Commentary: This is when your kitchen will start to smell absolutely insane. You’re welcome.
Step 4: The Glazing Glory! About 30 minutes before your ham is done (check that temp!), carefully remove the pan from the oven. Oven mitts are your best friend! Turn the oven up to 375°F. Uncover the ham and, using a silicone brush, paint a generous layer of glaze all over the top and sides. Get it into those spiral cuts! Return the ham, uncovered, to the oven. Repeat this glazing process every 10 minutes for the final 30 minutes. This builds up layers of flavor and creates that jaw-dropping, sticky, caramelized crust.
Step 5: The Crucial Rest. Once the ham hits 140°F and has that beautiful bronzed look, take it out of the oven. Transfer it to a cutting board or platter and let it rest for at least 15 minutes. I know, it’s torture! But this allows the juices, which have rushed to the surface during cooking, to redistribute throughout the meat. If you skip this, all those delicious juices will just run out onto the plate. Trust me, resting is what makes it supremely juicy.
Plating Your Masterpiece: How to Serve This Glorious Ham
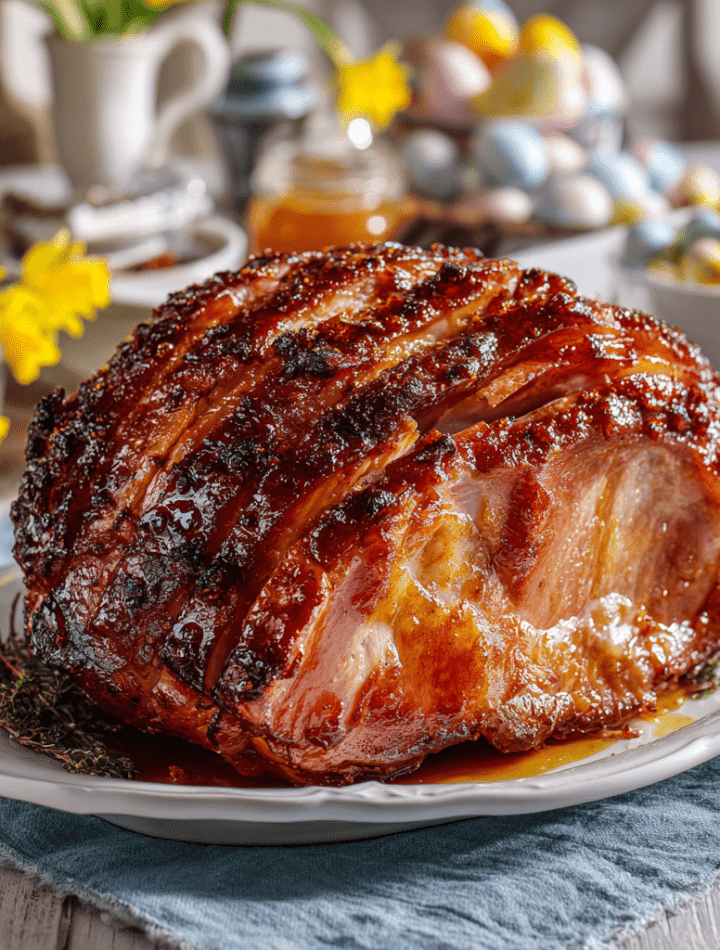
Presentation is part of the fun! Transfer your rested ham to a large, beautiful platter. Garnish is where you can get creative and add a springtime touch. I love tucking fresh rosemary sprigs and whole cloves around the base of the ham for a classic look. For a pop of color, surround it with bright orange slices (from the orange you juiced!) and fresh pineapple rings. You can even scatter some whole cranberries or pomegranate arils for a festive ruby red touch.
Carving is easy thanks to the spiral cut! Simply follow the natural lines, sliding your knife along the bone to release full, beautiful slices. Serve it with a little pitcher of any extra warmed glaze on the side for the true glaze enthusiasts at your table. Now, stand back and accept your compliments—you’ve earned them!
Make It Your Own: Delicious Twists on the Classic
Once you master the base recipe, the world is your oyster… or should I say, your ham? Here are some of my favorite ways to play with flavors:
- Maple-Bourbon Bliss: Swap the honey for pure maple syrup and add a tablespoon of bourbon to the glaze. Simmer a minute longer to cook off the alcohol, leaving behind an incredible smoky-sweet depth. Perfect for a grown-up gathering.
- Orange-Ginger Zing: Use fresh orange juice and add 1 tablespoon of finely grated fresh ginger and a teaspoon of orange zest to the glaze. It’s bright, zesty, and incredibly refreshing.
- Brown Sugar & Cola Glaze: A southern classic! Replace the juice with 1/4 cup of cola (not diet). The caramel notes in the cola pair magically with the brown sugar and mustard.
- Herbaceous & Savory: For a less sweet option, add 1 tablespoon of chopped fresh rosemary or thyme to the glaze. It creates a more sophisticated, savory crust that’s absolutely divine.
- Apricot-Glazed Ham: Substitute the honey and juice with 1/2 cup of apricot preserves. Warm it with the other ingredients until smooth. This gives a beautiful fruity flavor and a gorgeous amber color.
From My Kitchen to Yours: Chef Emily’s Notes
This recipe has been my holiday rock for years, but it wasn’t always perfect. One memorable Easter, I got distracted chatting with my sister and let the glaze reduce for too long. It turned into a sugary concrete in my pan! We had to quickly whip up a batch two while the ham waited. The lesson? Keep an eye on that simmer and remember: it will thicken more as it cools on the ham. A slightly runnier glaze is better than a scorched one!
Over time, I’ve learned that the quality of the ham itself makes a huge difference. I now seek out a good bone-in, spiral-cut ham from a local butcher or a trusted brand at the market. It’s worth the few extra dollars for that centerpiece moment. And always, always save that bone! Toss it in a freezer bag—it’s the secret start to the most incredible split pea or bean soup next week.
Your Questions, Answered: FAQs & Troubleshooting
Q: Can I make this glaze ahead of time?
A: Absolutely! You can whisk the glaze ingredients together (don’t cook them) up to 2 days in advance and store it in the fridge. When you’re ready, just simmer it in a saucepan until thickened.
Q: My glaze is burning in the oven during the last 30 minutes! What do I do?
A> Don’t panic! This can happen if your oven runs hot or the sugar content is high. Simply lower your oven temp back down to 325°F for the remaining glazing time. The ham is already cooked through, so we’re just focusing on flavor and color now.
Q: Help! I can only find a boneless ham. Will this recipe work?
A> It will, but watch your cooking time closely. Boneless hams are often denser and can heat faster. Start checking the internal temperature at the 10-minute-per-pound mark. Also, since there’s no bone to add flavor and moisture, be extra generous with your glazing to keep it juicy.
Q: What’s the best way to store and reheat leftovers?
A> Leftover ham is a gift! Slice it off the bone and store it in an airtight container in the fridge for up to 5 days. To reheat, place slices in a baking dish with a splash of water or broth, cover with foil, and warm at 325°F until heated through. This prevents drying out.
Nutritional Information*
*Please note: Nutritional information is an estimate based on the specific ingredients listed and standard calculations. Values can vary based on the exact ham and brand of ingredients used.
Per Serving (based on 12 servings):
Calories: 340 | Total Fat: 12g | Saturated Fat: 4g | Carbohydrates: 15g | Sugar: 13g | Protein: 38g | Sodium: 1250mg
While ham is a protein-rich centerpiece, it is also higher in sodium, as is typical for cured meats. The majority of the sugar and carbohydrates in this dish come from the sweet, caramelized glaze. To balance your holiday plate, I love serving this ham with plenty of fresh, vibrant spring vegetables and a big, green salad.
The Last Bite: Why This Recipe Belongs in Your Tradition
And there you have it, my friend—the path to a truly spectacular, no-stress Easter ham. This recipe is more than just a list of steps; it’s a framework for confidence. It’s about embracing the joy of feeding the people you love with something you made with your own two hands (and a little help from Grandma Mae’s spirit).
Remember, the best meals are seasoned with laughter, shared stories, and maybe a few spilled crumbs on the floor. Don’t strive for perfection; strive for connection and deliciousness. Whether this is your first ham or your fiftieth, I hope it turns out incredibly and becomes a part of your own family’s story. Now, go forth and roast! And be sure to tag me @TastyChow if you share a photo—I love celebrating your kitchen wins.
With love and a fully belly,
Emily