Glow-in-the-Dark Jello Shots (Non-Alcoholic): Spooky Fun for Everyone!
Hey there, my spook-tacular foodie friends! 👋 Chef Emily here, your partner-in-crime for all things deliciously fun. Picture this: It’s Halloween night. The jack-o’-lanterns are grinning, cobwebs drape the corners, and the air crackles with excitement. Suddenly… the lights go out. But instead of screams? Gasps of delight! Because glowing on the table are little jewel-toned treats that look like they’ve been plucked straight from a mad scientist’s lab. That’s the magic of these **Glow-in-the-Dark Jello Shots** – and the best part? They’re completely non-alcoholic, so ghosts and goblins of ALL ages can join the party! 🎃✨
Forget everything you think you know about jello shots. We’re ditching the booze and doubling down on pure, spooky spectacle. These wobbly wonders harness the science-y superpower of tonic water (yep, the stuff in your gin & tonic!) to literally GLOW under a black light. It’s kitchen magic that feels like a party trick, and trust me, seeing your guests’ faces light up (pun totally intended!) when these little guys start glowing? Pure. Joy. Whether you’re hosting a haunted house soiree, a kid’s monster mash, or just want to add some eerie elegance to movie night, these are your ticket to becoming the coolest chef on the block. So grab your favorite spooky apron (mine’s covered in glow-in-the-dark bats!), and let’s make some luminous memories together!

Gummy Eyeballs & Grandma’s Wisdom
This recipe actually has its roots in a slightly less glamorous (but way funnier) kitchen fail. Years ago, pre-culinary school Emily tried making “adult” jello shots for a Halloween bash. Let’s just say… the proportions were… ambitious. Let’s just say the texture resembled alien goo more than dessert, and the glow effect? Non-existent. Cue a minor meltdown and a frantic call to my ever-calm Grandma Mabel. Between chuckles, she reminded me of two things: 1) Cooking disasters make the best stories later, and 2) Real magic in the kitchen comes from joy, not just precision. “Make it fun, Emmy Lou,” she’d say, wiping flour from her cheek. “Make it something everyone can enjoy.”
That stuck with me. Years later, hosting my niece’s first big Halloween party, I remembered her words. The kids wanted something “spooky and special,” but obviously, no booze! I recalled tonic water’s glow trick and started experimenting. After a few batches (some still hilariously wobbly!), we nailed it. The moment we turned off the lights and the black light hit those first glowing green shots, stuffed with candy eyeballs? The kids SCREAMED with delight. My niece declared me the “Coolest Aunt Chef Ever” (a title I fiercely protect!). That messy, joyful moment, channeling Grandma Mabel’s spirit of inclusive fun, is baked right into every batch of these glow shots. It’s not just a treat; it’s a little vessel of shared wonder.
Your Ghoulish Grocery List
Gathering your potion ingredients is half the fun! Here’s what you’ll need to conjure up these luminous delights:
- 1 cup Tonic Water (THE Glow Star!): This is non-negotiable for the glow! It MUST contain “quinine.” Brands like Schweppes or Canada Dry work perfectly. Quinine is the magic molecule that fluoresces under black light! Chef’s Tip: Don’t sub club soda or sparkling water – they lack quinine and won’t glow. Want extra glow? Use a bit more tonic, but balance it with flavor (see below!).
- 1 box (3 oz) Flavored Gelatin (Jello!) OR 2 tbsp Unflavored Gelatin + Your Fave Juice/Soda: This is your flavor and color base! Berry blue, lime green, grape purple, or orange are classic spooky picks. Using unflavored gelatin? Mix it with 1 cup of flavorful liquid like cranberry juice, orange soda, or even blue raspberry drink! Chef’s Tip: Clear or light-colored liquids yield the brightest glow! Darker juices (like grape) will glow less intensely but still look fab.
- ½ cup Cold Water or Juice: Helps cool the mixture quickly. Use cold water for simplicity, or match the juice you used if going the unflavored gelatin route. Chef’s Insight: Using cold juice instead of water intensifies the flavor without diluting it.
- Candy Eyeballs or Small Gummy Shapes: The spooky surprise inside! Find candy eyeballs in baking aisles or online. Gummy worms, bats, or spiders chopped small work too! Chef’s Fun Sub: Freeze-dried raspberries look like bloody little surprises!
- Plastic Shot Cups (2 oz size) or Small Cups: Your glowing vessel! Clear plastic works best to see the glow. Optional: Use glow-in-the-dark plastic cups for DOUBLE the eerie effect! Chef’s Must: Ensure they’re food-safe!
Let’s Brew Some Luminous Magic!
Ready to play mad scientist? Don your apron (the messy one, obviously!), and let’s get wiggling! These steps are simple, but the results are spellbinding.
- Heat the Tonic Potion: Pour 1 cup of tonic water into a small saucepan. Place it over medium heat. Bring it just to the point where tiny bubbles form around the edges – a near boil (about 180-190°F). Chef’s Crucial Hack: DO NOT let it boil vigorously! Boiling can destroy some of the quinine and reduce the glow power. Gentle heat is key! You should see steam rising and those shy little bubbles.
- Awaken the Gelatin: If using flavored gelatin: Empty the powder into a heatproof bowl (glass or metal works great). Carefully pour the steaming hot tonic water over the powder. If using unflavored gelatin + juice/soda: Sprinkle the 2 tbsp unflavored gelatin evenly over ½ cup of your COLD juice/soda in the bowl. Let it sit for 1-2 minutes to “bloom” (it will look wrinkly and absorb the liquid). Then, add the steaming hot tonic water. Chef’s Whisper: Pouring hot liquid onto unflavored gelatin that’s already bloomed helps it dissolve smoothly and prevents lumps!
- Stir Until Crystal Clear: Grab a whisk or fork and stir, stir, stir! You want everything completely dissolved – no gritty bits or gelatin granules. This takes about 2-3 minutes of patient stirring. Chef’s Pro Tip: If you see any stubborn specks, strain the mixture through a fine-mesh sieve into another bowl. Super smooth jelly is the goal!
- Cool It Down (Just a Bit!): Stir in your ½ cup of COLD water or juice. This lowers the temperature so it won’t melt your candy surprises when you pour! Give it another good stir. Chef’s Insight: The mixture should feel warm but not hot to the touch now. Perfect for the next step!
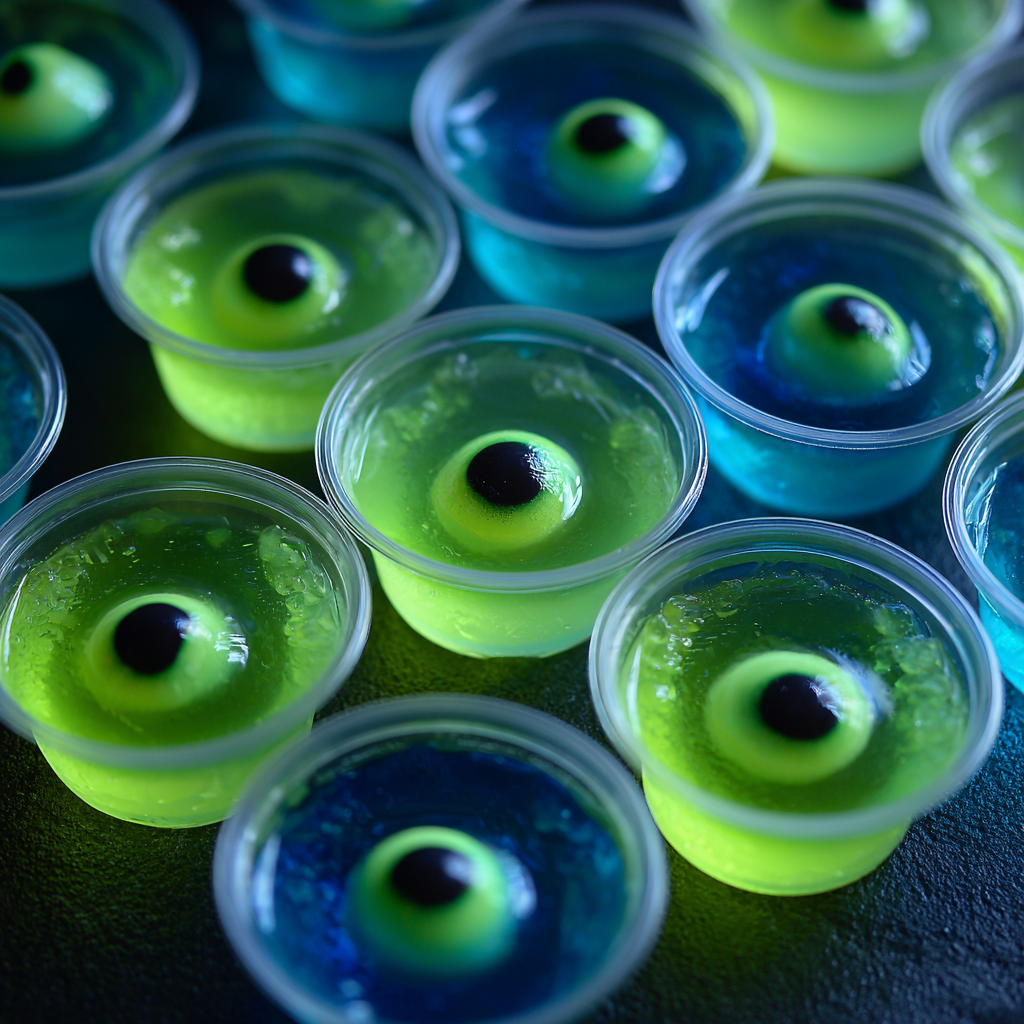
- Assemble Your Mini Monsters: Place your plastic shot cups on a small tray or baking sheet (this makes moving them to the fridge MUCH easier). Now, the fun part: Drop 1-3 candy eyeballs (or a few small gummy pieces) into the bottom of each cup. Chef’s Story Time: My niece loves making “cyclops shots” with one giant eyeball! Work quickly but carefully for even distribution.
- Pour the Glowing Elixir: Slowly and carefully pour the warm gelatin mixture over the candies in each cup, filling them almost to the top. Chef’s Hack for Neatness: Use a small liquid measuring cup with a spout or even a turkey baster for super controlled pouring! Avoid splashing the sides.
- Chill Until Spookily Set: Gently transfer the tray of filled cups to the refrigerator. Let them chill undisturbed for at least 2-3 hours, or until completely firm and wobbly. Chef’s Patience Tip: Resist the urge to poke them! Overnight is even better for maximum set and flavor. Cover loosely with plastic wrap if chilling longer than 3 hours.
- Unleash the Glow! When the party starts, turn off the lights and flip on your black light! Watch as your creations transform into eerie, glowing orbs. The candy eyes lurking inside will look extra spooky! Chef’s Crowd-Pleasing Move: Hand them out in a darkened room for maximum “WOW!” factor.
How to Serve Up the Spook
Presentation is everything with these little glow bombs! Keep the lights dimmed and let the black light do its magic. Arrange the shots on a simple dark platter or tray – the contrast makes the glow POP. For extra drama, place them on a bed of dry ice “fog” (use caution and keep it food-safe!). Or, get thematic: line them up on a plastic “laboratory” tray or a vintage-looking dish. Provide small spoons (glow-in-the-dark ones are fun!) or let guests slurp them straight from the cup. The key is the reveal – make turning off the lights a moment of shared anticipation! “Ready… set… GLOW!”
Get Creative: Spooky Twists & Swaps!
Don’t be afraid to experiment! Here are some fun spins:
- Flavor Fright Night: Mix gelatin flavors! Try layering lime & berry for a “toxic sludge” effect (let first layer set slightly before pouring next). Use pineapple Jello + tonic for a “ectoplasm” greenish glow.
- Vegan Vortex: Swap regular gelatin for agar-agar powder (check package for equivalent setting power, usually about 1 tbsp). Use clear fruit juice (like apple or white grape) and vegan gummies.
- Sugar-Free Specter: Use sugar-free flavored gelatin and diet tonic water. The glow still works!
- Grown-Up Ghoul (Optional Boozy): For an adult party, replace *part* of the cold water/juice (about 2-3 tbsp per shot) with chilled vodka or rum. The glow still works, but the texture might be slightly softer.
- Creepy Crunch: Add a thin layer of crushed Oreo “dirt” or blue pop rocks “crackling energy” at the bottom of the cup before adding candy and gelatin.
Emily’s Extra Spooky Sprinkle
Okay, confession time: The first time I tested these, I got SO excited about the glow that I forgot the cold water/juice step. Poured that hot mixture right over the poor candy eyeballs. Let’s just say… I created melting zombie eyeballs instead of cute ones! 🧟♀️ It was a hilarious (and slightly horrifying) mess. Lesson learned: Patience, grasshopper! Let the mix cool slightly!
This recipe has become my absolute go-to for Halloween, but honestly? We bust it out for glow-themed birthday parties, summer “neon nights,” and even New Year’s Eve! It’s evolved from a simple novelty to a way I connect with people – seeing the pure delight and wonder on faces, young and old, never gets old. It reminds me that cooking isn’t just about feeding bodies; it’s about creating moments of shared magic and a little bit of harmless, glowing mischief. So embrace the wobble, laugh at the occasional kitchen oops, and most importantly, have FUN with it! That’s the real secret ingredient.
Glow Guru: Your Questions, Answered!
Let’s troubleshoot those spooky specs!
- Q: Help! My shots aren’t glowing very brightly under the black light! What went wrong?
A: Don’t panic, ghost host! First, double-check your tonic water contains quinine (it should be listed). Second, ensure you didn’t boil the tonic water vigorously – gentle heating is key! Third, darker-colored gelatin (like deep purple grape) will naturally glow less than lighter colors (lime, lemon, berry blue). Try a clearer flavor next time. Fourth, your black light might be weak – use a strong UV black light for best results. Finally, the glow is subtle in normal light; true magic happens in DARKNESS! - Q: Can I make these ahead of time? How long do they last?
A: Absolutely! They are perfect make-aheads. Once fully set, cover the tray tightly with plastic wrap. They’ll keep beautifully in the fridge for 3-4 days. The texture might start to get slightly less perfect after day 2, but the glow and flavor hold up! - Q: My candy eyeballs floated to the top! How do I keep them sunken?
A: Ah, the buoyant eyeball dilemma! Two tricks: 1) Make sure your gelatin mixture has cooled significantly (warm, not hot) before pouring. Hot liquid melts the candy coating slightly, releasing air bubbles that make them float. 2) Pour the gelatin slowly over the back of a spoon held just above the candy. This gently disperses the liquid without disturbing them too much. If a few still rebel, poke them down gently with a clean toothpick right after pouring. - Q: Can I use regular Jello instead of unflavored gelatin + juice?
A: You sure can! That’s actually the first option listed in the ingredients. Using a box of flavored Jello (like Berry Blue or Lime) with the tonic water is super simple and gives great flavor and color. The unflavored gelatin + juice route just gives you more flexibility to create custom flavors!
Quick Bite Info
-
Servings: ~12 shots (2 oz each)
-
Prep Time: 10 minutes
-
Chill Time: 2–3 hours (or overnight)
-
Total Time: About 3 hours
-
Skill Level: Easy
-
Special Equipment: Black light for glowing effect
-
Dietary Notes: Non-alcoholic, kid-friendly, gluten-free (check candy/gelatin brand)

Glow-in-the-Dark Jello Shots (Non-Alcoholic)
- Total Time: 2–3 hrs
- Yield: 12 small cups 1x
Description
Turn out the lights and turn up the fun with these Glow-in-the-Dark Jello Shots! Made with tonic water and unflavored gelatin, these eerie little treats glow under black light and hide candy eyeballs inside. Perfect for Halloween parties — no booze needed, just spooky vibes!
Ingredients
1 cup tonic water (must contain quinine for glow effect)
1 box flavored gelatin (or 2 tbsp unflavored + juice or soda for flavor)
½ cup cold water or juice
Candy eyeballs or gummy shapes
Optional: glow party cups or plastic shot cups
Instructions
Heat tonic water: In a saucepan, bring 1 cup tonic water to a near boil.
Mix gelatin: Pour hot tonic water over flavored gelatin (or unflavored with added juice). Stir until fully dissolved.
Add cold liquid: Stir in ½ cup cold water or juice to cool the mixture slightly.
Assemble: Drop a candy eyeball into each plastic shot cup. Pour gelatin mixture on top.
Chill: Refrigerate for 2–3 hours, or until fully set.
Glow time: Serve under a black light to see them come alive with a ghoulish glow!
- Prep Time: 10 minutes
- Chill Time: 2–3 hrs
Nutrition
- Calories: 30 / cup
Final Thoughts
If Halloween has a flavor, it’s a little sweet, a little wobbly, and—if you ask me—a whole lot glowing. These Glow-in-the-Dark Jello Shots aren’t just party treats; they’re pure theater in a cup. They’re the kind of recipe that turns a dimmed room into a stage, with guests leaning in, grinning, and whispering, “How did you DO that?” And you get to be the magician who winks and says, “Kitchen sorcery.”
I love that they’re completely non-alcoholic, which means everyone from sugar-fueled kiddos to costume-clad grandparents can join in the fun. They’re proof that a little food science, a handful of pantry staples, and a sprinkle of imagination can create moments people remember long after the decorations are packed away.
So grab your tonic water, fire up that black light, and let your kitchen double as a mad scientist’s lab for a night. The best Halloween parties aren’t just about the candy—they’re about the moments of shared surprise and joy. And these little glowing gems? They’re your guaranteed spark. 🌌🎃💡