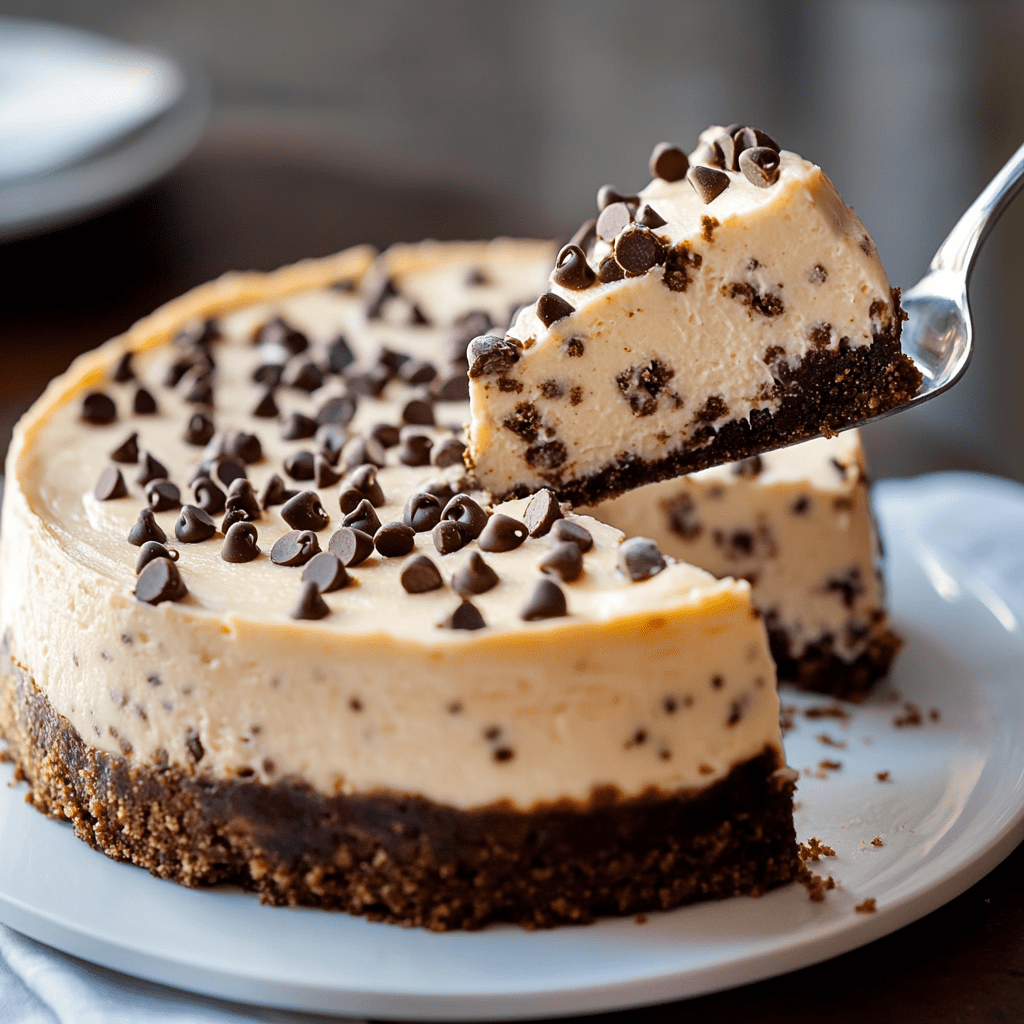
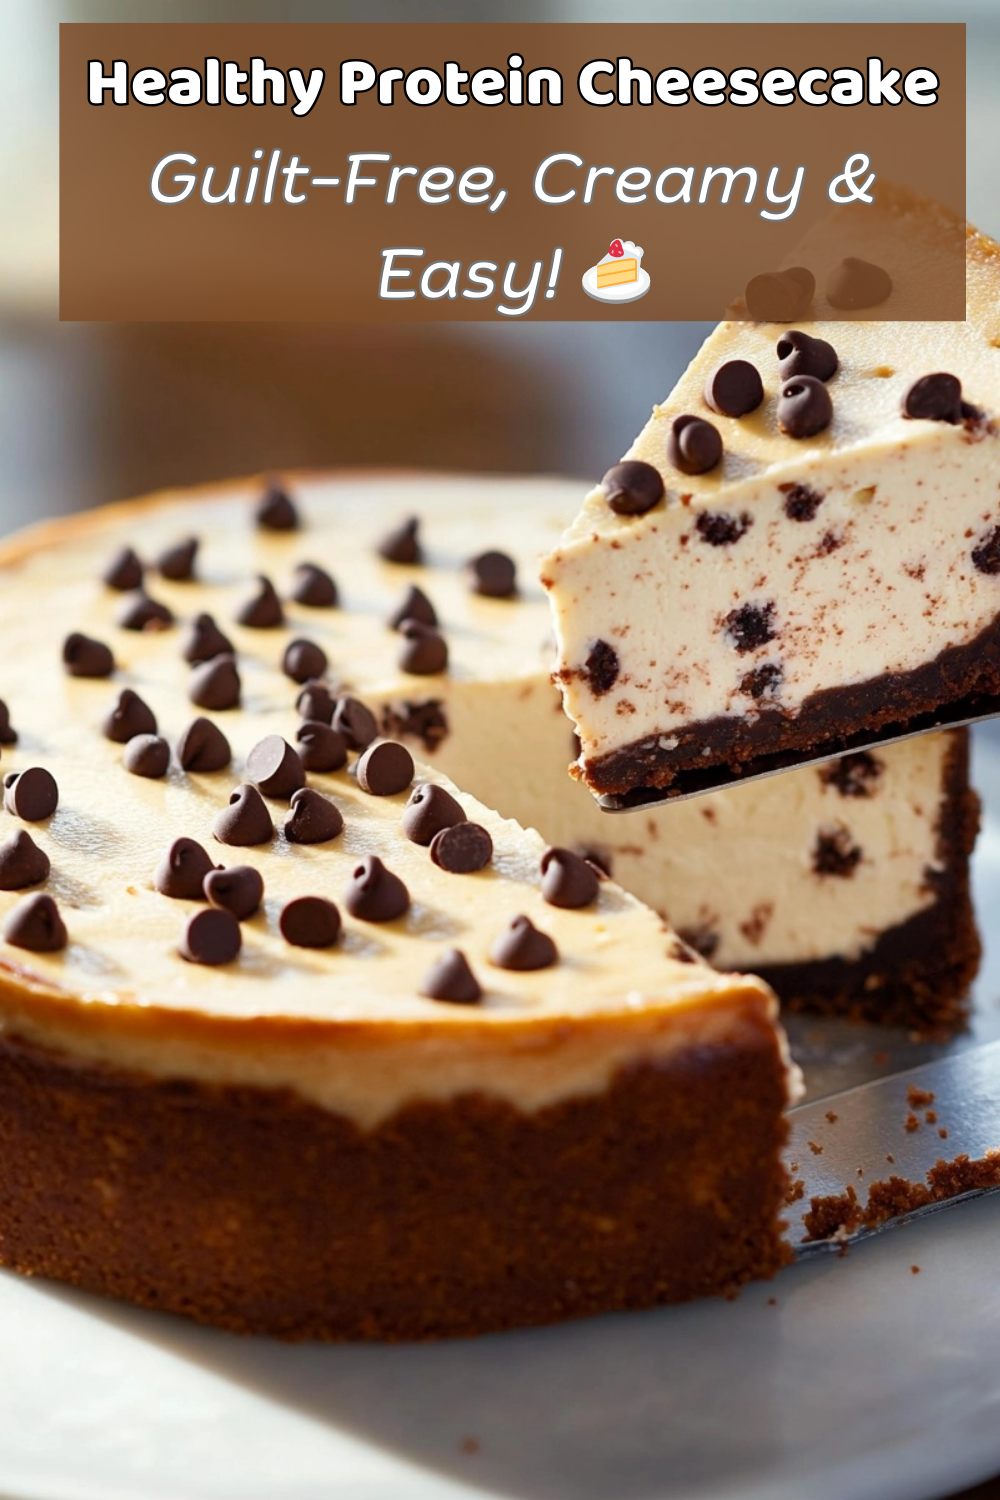
🍰 Guilt-Free Cheesecake Recipe That Tastes Like a Dream! (Protein-Packed & Delicious!)
Ahhh, cheesecake—it has a special way of bringing everyone around the table. For me, cheesecake always takes me back to Sunday dinners at grandma’s house, cousins playing outside, and the irresistible aroma of freshly baked cheesecakes filling the air. There’s laughter, joy, storytelling—and always that deliciously sweet anticipation for that perfect creamy slice to close out the meal.
But as much as I love indulgent treats, sometimes my goals (and waistline!) ask me to reign in the sugar and boost my protein intake. So, what’s a cheesecake-loving chef like me to do?
Fear not, foodie friend! It’s totally possible to satisfy your cheesecake cravings without throwing your healthy habits overboard. Say hello to my favorite kitchen creation yet: A dreamy, creamy protein cheesecake that’s just as silky and indulgent as the one grandma made—but totally guilt-free and seriously nourishing.
Ready to whip up this deliciously satisfying dessert that fuels your body AND your sweet tooth? Let’s get cooking!
👩🍳 A Cheesecake Flashback (My Personal Cheesecake Story)
One of my fondest memories of cheesecake dates back to when I became a chef-in-training. It was my sister’s birthday, and naturally, I volunteered to handle dessert. I decided to test out a cheesecake recipe I had seen in culinary school—but with my own healthy spin. Nervous yet excited, I prepared this secretly protein-packed cheesecake and placed it center stage at the dessert table.
Would my cheesecake withstand the scrutiny of traditional cheesecake fanatics? Spoiler alert: YES!
And guess what? Nobody even guessed that my delectable cheesecake was secretly packed with muscle-fueling protein. Since then, it’s become a family-favorite—I can’t show up to any family gathering without it. Now, I’m sharing this winning recipe with you, so you can wow your family and friends with a dessert they’ll feel great about eating.
Ready to dive into cheesecake heaven?
🛒 Ingredients You’ll Need:
(Serves 8–12 happy cheesecake lovers!)
Cheesecake Filling:
– 24 oz cream cheese (or vegan cream cheese if going dairy-free)
– 2 cups Greek yogurt (or dairy-free alternative for extra protein and creamy texture)
– ½ cup protein powder (vanilla or unflavored works best)
– ⅔ cup sweetener of your choice (stevia, monk fruit, erythritol—pick your fave!)
– 2½ tsp pure vanilla extract (trust me: don’t skip the vanilla)
Optional Crust Choices (this is where it gets personal!):
– Want that classic cheesecake crunch? Use crushed graham crackers mixed with a dash of melted coconut oil or butter.
– Low-carb hero? Try almond flour mixed with a hint of coconut oil or butter as an awesome Keto-friendly option.
– Feeling adventurous? Blend oats with dates and nuts for a hearty, wholesome crust.
🥣 Let’s Make This Dreamy Protein Cheesecake!
Step 1: Set the Stage
Preheat your oven to 350°F. To give our cheesecake that perfect creamy filling without cracks, fill a baking dish about ⅔ full with water and place it on the lower oven rack. Steam action means silky perfection coming up!
Step 2: Treat the Cream Cheese Right
The key to velvety cheesecake filling? Room-temperature cream cheese. Set your cream cheese on the countertop about 30 minutes before starting (patience pays off here!). Cream cheese at room temp mixes smoothly and creates a luscious, creamy texture.
Step 3: Magic the Crust
If you’re using one, prep your favorite cheesecake crust (graham crackers, almond flour, or your own creation) and press firmly into the bottom of a 9-inch springform pan. Chill it in the fridge while you whip up the filling.
Step 4: Cheesecake Transformation Time
Grab a blender or a food processor (your trusty kitchen buddies here). Toss in the room-temp cream cheese, creamy Greek yogurt, protein powder, sweetener, and pure vanilla extract. Blend until super-smooth, creamy, and no lumps remain.
Step 5: Bake to Perfection
Pour your glorious cheesecake batter gently onto your prepared crust. Smooth the top slightly, then pop into the oven (on the rack above your water-filled tray).
Bake for 30 minutes—DO NOT (I repeat: DO NOT!) open the oven door no matter how eager you are. After 30 glorious minutes, resist temptation a little longer and simply turn off the heat, leaving your cheesecake undisturbed in the warm oven for another 5 minutes. (I’m cheering you on!)
Step 6: Cool and Chill (The Waiting Game)
Remove your cheesecake from the oven and set it on the countertop. Allow it to cool down to room temperature before placing it in the refrigerator. Now’s the hardest part—waiting at least 6 hours (overnight’s even better!) for your cheesecake to set completely. Patience, friend—your creamy, protein-packed cheesecake is about to become next-level delicious.
⏰ Timing Breakdown (Be patient, it’s worth it!):
– Prep time: 30 mins
– Bake time: 30 mins
– Chill time: 6 hours minimum (your patience deserves rewards!)
– Total: about 7 hours
🍴 Serving Suggestions & Delicious Finishing Touches
This protein cheesecake tastes fantastic on its own, but why stop there? Feel free to customize and top it with:
– Fresh berries (blueberries, strawberries, raspberries—the sky’s the limit!)
– Sugar-free chocolate drizzle (a personal fave)
– Dollops of whipped coconut cream or Greek yogurt on top for extra yum-factor
– Crunchy toasted nuts or granola for some texture magic
– A sprinkle of cinnamon or a squeeze of fresh lemon for a zesty twist
🔑 Pro Tips from Your Cheesecake Bestie:
– Don’t skip the water bath trick—it helps give your cake that dreamy, silky texture and prevents cracks.
– Allowing your cake to come to room temperature naturally before refrigeration means a creamier, fluffier final texture.
– Experiment with different protein powder flavors (vanilla, chocolate, even strawberry protein) for entirely new cheesecake experiences.
– Slice your cheesecake with a warm knife for clean, Instagram-worthy slices. Be sure to rinse and rewarm the knife before each cut.
🥑 Nutritional Awesomeness:
Depending on your sweetener, protein powder, and crust choices, most slices contain around 15g–20g protein, significantly less sugar than traditional cheesecakes, no refined flours involved (depending on your crust!), and healthy body-loving fats. Hello, dessert you’ll actually feel good about eating!
🎉 Final Serving of Cheesecake Wisdom:
Cheesecake is more than just dessert—it’s memories, joy, and bringing people together. Being able to offer friends and family something that’s both tasty and nourishing? Total win-win! Whether you’re watching macros, following a lower-carb plan, or just want to indulge without guilt, this Protein Cheesecake strikes an incredible balance of deliciousness and nourishment.
Now you’ve got your hands on my prized cheesecake recipe, friend, go create some sweet (healthy!) memories in the kitchen. I promise one bite and your taste buds will thank you!
Got questions or want to share YOUR cheesecake success story? Leave a comment below—I’d love to hear from you!
Happy Cooking (and Eating!),
Your Cheesecake-Loving Chef Pal 🍰❤️
Print
Guilt-Free Cheesecake That Tastes Like a Dream!
- Total Time: 7 hrs
- Yield: 8–12 slices 1x
Ingredients
24 oz cream cheese or vegan cream cheese
2 cups Greek yogurt or dairy-free alternative
½ cup protein powder
⅔ cup sweetener of choice
2½ tsp pure vanilla extract
Optional: crust of your choice (graham cracker, almond flour, etc.)
Instructions
Preheat oven to 350°F. Fill a baking pan ⅔ full with water and place it on the lower oven rack.
Bring cream cheese to room temp.
Prepare your crust in a 9-inch springform pan, if using.
Blend all ingredients until smooth and pour into the pan.
Bake for 30 minutes. Do not open the oven—just turn off the heat and let sit 5 more minutes.
Let cool on the counter, then refrigerate for at least 6 hours to firm up.
- Prep Time: 6 hrs 30 mins (mostly chilling)
- Cook Time: 30 mins