Hash Brown Waffles: Your New Secret Weapon for the Best Brunch Ever
Hey there, friend! Let me paint you a picture. It’s Saturday morning. The sun is streaming in, you’ve got your comfiest pajamas on, and your stomach is doing that hopeful little growl that whispers, “pancakes… or maybe bacon?” But then you open the fridge and see that lonely bag of shredded potatoes. The classic hash browns routine feels a little… predictable. Sound familiar?
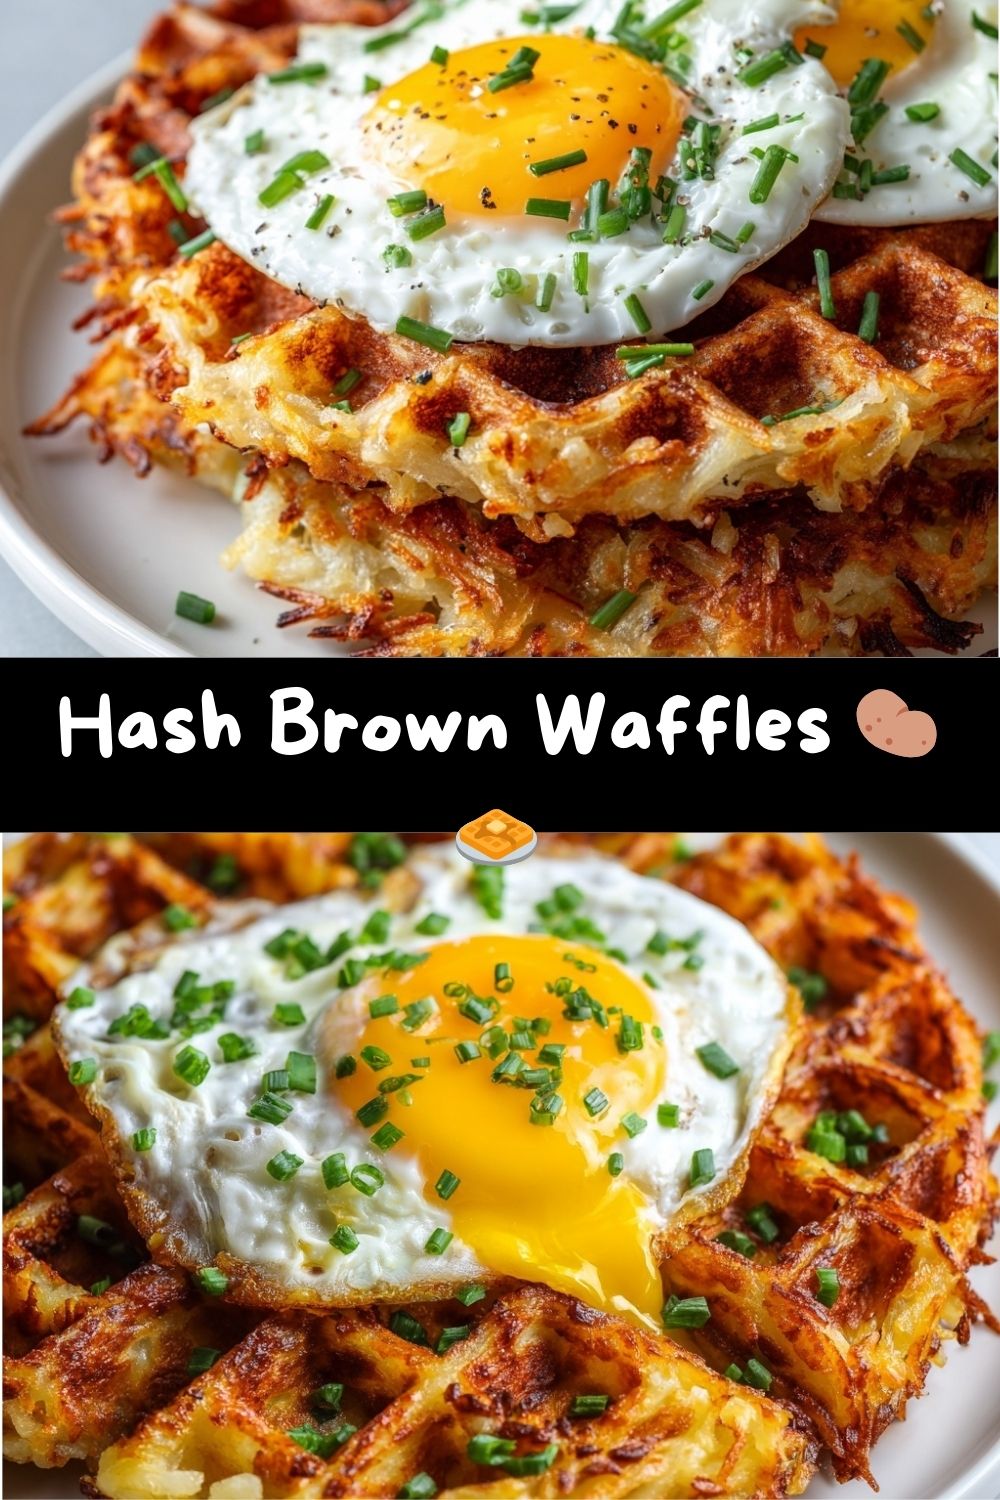
Well, get ready to have your mind (and your taste buds) utterly blown. Today, we’re taking those humble spuds on a joyride straight to Waffle Town. That’s right—we’re making Hash Brown Waffles. Imagine everything you love about diner hash browns—the incredible crispy edges, the tender middle—but shaped into a glorious, deep-pocketed waffle that’s just begging for toppings. No careful flipping, no spatters of oil, just press, cook, and create your masterpiece.
This isn’t just a recipe; it’s a breakfast revolution. It’s the answer to “What’s for brunch?” that will make you feel like a certified kitchen genius. They’re crispy, golden, and made for topping with everything from a drippy fried egg to a dollop of cool sour cream. So, tie on that apron (the messy one is totally fine—mine is!), and let’s turn that potato potential into something magical.
The Little Kitchen That Could: My Grandma’s Hash Brown Epiphany
My love affair with transforming simple ingredients started long before culinary school, in my grandma’s warm, always-smelling-like-something-good kitchen. She was the queen of “making do,” turning leftovers into feasts and basics into celebrations. One sleepover morning, she caught me eyeing her ancient, heavy waffle iron with curiosity. “That’s not just for pancakes, sweet pea,” she’d winked.
She pulled out leftover shredded potatoes from dinner, a lone egg, and a nub of cheddar. With a sprinkle of this and a dash of that, she pressed that concoction into the hot iron. What emerged was pure sorcery: a giant, crispy, potato cake with perfect little squares to catch all the maple syrup from our pancakes (yes, we had both—it was a grandkid’s dream). That moment of crunchy, salty-sweet bliss stuck with me. It was a lesson in kitchen playfulness I carry with me every day at Tasty Chow. This recipe is my homage to her—a simple, joyful twist that turns the ordinary into the extraordinary. Every time I hear that satisfying *sizzle*, I’m right back at her linoleum table, filled with wonder.
Gathering Your Crispy Crew: Ingredients & Why They Matter
Here’s the beautiful part: you only need a handful of simple ingredients to create these waffle wonders. Each one plays a starring role in building that perfect texture and flavor. Let’s break it down:
- 3 cups shredded potatoes: This is your foundation! You can use fresh russets (peeled and shredded) or the ultimate timesaver—thawed frozen hash browns. Chef’s Insight: If using fresh, squeeze out every drop of excess moisture with a clean kitchen towel. This is the non-negotiable secret to maximum crispiness. Wet potatoes steam instead of fry.
- 1 large egg: Our binder. It holds the potato shreds together in glorious, waffle-shaped harmony.
- 1/4 cup shredded cheese: I love sharp cheddar for its punch, but Swiss, Gruyère, or even pepper jack are fantastic. Substitution Tip: For a dairy-free version, just omit it or use a vegan shred. The waffles will still be deliciously crisp.
- 1 tablespoon all-purpose flour: A little flour helps absorb any last bits of moisture and adds to the structural integrity. Chef’s Swap: For a gluten-free hash brown waffle, use a 1:1 GF flour or even a tablespoon of cornstarch.
- Salt and freshly ground black pepper: Season from the inside out! Don’t be shy here. Potatoes need love.
- Optional Flavor Boosters: This is where you make it yours! A tablespoon of chopped green onions, a pinch of garlic powder, a smoky whisper of paprika, or even some diced cooked bacon or ham.
For Serving (The Fun Part!):
Fried or poached eggs, sour cream or Greek yogurt, hot sauce, sliced avocado, fresh chives, crumbled sausage… let your cravings lead the way!
Let’s Get Cooking: Your Step-by-Step Roadmap to Crispy Perfection
Ready to see the magic happen? Follow these steps, and you’ll be a hash brown waffle pro in no time. I’m walking you through every bit!
- Preheat and Prep: Fire up your waffle iron to a medium-high setting. Let it get fully hot—this gives you an instant crispy sear. Generously coat both the top and bottom plates with non-stick spray or brush with oil. Trust me, this is a crucial step for a clean release! Chef’s Hack: Even if your iron is non-stick, do this. Potatoes are naturally sticky, and we want zero drama when we open that lid.
- The Big Mix: In a large bowl, combine your squeezed-dry potatoes, egg, cheese, flour, salt, pepper, and any add-ins. I like to get my hands in there (clean hands, of course!) and mix until everything is evenly distributed. You’ll see the egg and cheese start to coat all those potato shreds.
- Portion and Press: Scoop about 1/2 to 3/4 cup of the mixture onto the center of the bottom waffle plate. Use a fork or spoon to gently spread it out towards the edges, but don’t worry about perfect coverage—the press will do the work. Little Tip: Leave a tiny border; the mixture will slightly expand as it cooks.
- The Press & The Sizzle: Close the lid and press down firmly. You’ll hear that glorious *ssssizzle*—that’s the sound of crispiness being born! Now, here’s the hard part: DON’T PEEK. Let it cook for a solid 8-10 minutes before you even think about lifting the lid. Steam is your enemy here; we need it to escape to get crunchy.
- Check for Golden Glory: After about 8 minutes, take a quick peek. You’re looking for deep, golden brown color and a surface that looks set. If it needs more time, give it another 2-4 minutes. Crispy takes time! These aren’t fluffy pancakes; they need a longer cook to dehydrate and crisp up properly.
- The Grand Reveal: Once perfectly golden, gently use a fork or silicone-tipped tongs to lift the waffle out. It should release easily if you properly greased the iron. Place it on a wire rack (this keeps the bottom from getting soggy) while you cook the rest. Then, it’s TOPPING TIME!
How to Serve Your Masterpiece: Let’s Build a Brunch Bowl!
This is where the party starts! A hash brown waffle is the ultimate edible plate. Here are a few of my favorite ways to serve them:
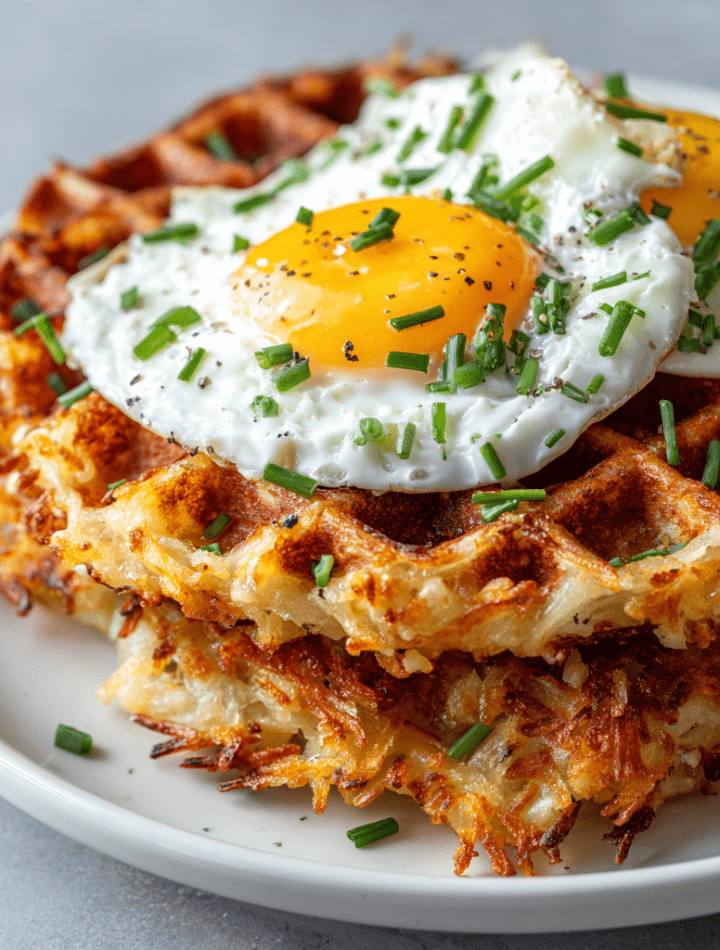
- The Classic Comfort: Place a crispy waffle on a plate. Add a sunny-side-up egg (let that yolk be your sauce!), a dollop of sour cream, and a sprinkle of chopped chives and cracked black pepper. Simple, perfect, iconic.
- The Loaded Brunch Beast: Go all out! Layer on a slice of melted cheese, a couple of slices of crispy bacon or crumbled sausage, that fried egg, a handful of baby arugula, and a drizzle of sriracha or hollandaise. This is a fork-and-knife situation, and I’m here for it.
- The Lighter & Brighter: Top with a big spoonful of creamy avocado or a simple tomato-basil salsa, a poached egg, and a squeeze of lime. It’s fresh, satisfying, and feels a little fancy.
Serve immediately while they’re hot and supremely crunchy. I promise, the “oohs” and “aahs” will be worth every second.
Make It Your Own: 5 Tasty Twists on Hash Brown Waffles
The basic formula is just the beginning. Once you’ve mastered the classic, try these fun variations to keep your brunch game strong!
- “Everything Bagel” Waffle: Mix 1 tablespoon of everything bagel seasoning into the potato mixture. Top with scallion cream cheese and lox for the ultimate savory waffle.
- Vegan & Delicious: Swap the egg for a “flax egg” (1 tbsp ground flax + 2.5 tbsp water, let sit 5 mins). Use vegan cheese or omit it, and ensure your waffle iron is well-oiled. Top with sautéed mushrooms and spinach.
- Southwest Fiesta: Add 1/4 cup of diced green chiles, 1/2 tsp cumin, and a handful of shredded pepper jack to the mix. Serve with black beans, pico de gallo, and a lime crema.
- Herb Garden Special: Stir in 2 tablespoons of fresh, finely chopped herbs like dill, parsley, and chives. This creates a wonderfully aromatic waffle that’s stunning with smoked salmon and a drizzle of dill sauce.
- Sweet Potato Swap: Use shredded sweet potatoes instead of russets! They’re a bit more delicate, so pack them firmly. The natural sweetness pairs amazingly with a fried egg and a spicy chorizo crumble.
Chef Emily’s Kitchen Confidential Notes
This recipe has become a weekend ritual in my house, and it’s evolved from that first childhood memory. I’ve learned that a Belgian waffle iron gives you those fantastic deep wells for holding toppings, but a classic thin waffle iron makes an extra-crispy, almost latke-like version that’s equally awesome. My biggest “oops” turned into a hack: once, I forgot to squeeze my fresh potatoes. The result was a sad, steamed potato patty that fell apart. Now, I sometimes even use a salad spinner after grating—it works like a charm! The recipe is forgiving, so play with your add-ins. My husband loves diced ham in his, and I’m a green onion gal through and through. The beauty is on your plate and in the making.
Your Questions, Answered: Hash Brown Waffle FAQ
Q: My waffle is soggy/not crispy. What did I do wrong?
A: 99% of the time, this is due to excess moisture. Did you squeeze those potatoes bone-dry? Was your waffle iron fully preheated? Also, make sure you’re cooking it long enough—they need a full 8-12 minutes to really crisp up. Cooking on too low a heat can also cause sogginess.
Q: The waffle stuck to my iron! Help!
A: Don’t worry, it happens! For next time: be generous with the oil or non-stick spray on BOTH plates. Ensure the iron is fully preheated before adding the potatoes. If it’s stuck now, let the iron cool completely; the waffle will often release easier once it contracts.
Q: Can I make the batter ahead of time?
A: I don’t recommend it, as the salt will draw out more moisture from the potatoes, making them wet and prone to browning. For meal prep, you can shred and dry your potatoes the night before, store them wrapped in the fridge, and then mix in the morning.
Q: Can I freeze cooked hash brown waffles?
A: Absolutely! Let them cool completely on a wire rack, then freeze in a single layer on a baking sheet before transferring to a freezer bag. Reheat straight from the freezer in a toaster, toaster oven, or air fryer to bring back the crunch.
Nutritional Information (A Friendly Estimate)
Hey, I’m a chef, not a dietitian, but I believe in having a general idea of what’s on your plate! The following is an approximate estimate for one plain hash brown waffle (without toppings), based on the ingredients listed and yielding 4 waffles. Values can vary based on specific ingredients and brands used.
- Calories: ~200
- Protein: 7g
- Carbohydrates: 20g
- Dietary Fiber: 2g
- Total Fat: 10g (varies with cheese type)
Remember, this is a canvas! Topping with veggies like avocado or a poached egg adds healthy fats and protein, while loading up on bacon and cheese will change the profile. It’s all about balance and joy.
Final Thoughts from My Kitchen to Yours
And there you have it, my friend—your ticket to the most fun, crispy, and satisfying brunch you’ll make all year. These hash brown waffles are more than a recipe; they’re a reminder that the best kitchen moments often come from playing with our food and looking at familiar ingredients in a brand-new way.
These Hash Brown Waffles remind me why I love cooking so much in the first place. They’re playful. They’re a little unexpected. And they prove that you don’t need fancy ingredients or complicated techniques to make something that feels special. Sometimes, all it takes is looking at a familiar food from a different angle—and having the courage to press it into a waffle iron.
Whether you’re serving these for a big, laughter-filled brunch, whipping them up for breakfast-for-dinner, or just treating yourself to something crispy and comforting on a quiet morning, I hope they bring a little joy to your table. Let them be messy. Let the yolk run. Let everyone build their own perfect waffle with whatever toppings make their heart happy.
That’s the magic of brunch—it’s relaxed, it’s generous, and it’s meant to be shared.