Healthy Protein Cheesecake Jars
Hey there, fellow food lovers! 👋 Have you ever found yourself at the crossroads of craving something rich and decadent while also staying mindful of your health? If so, you’re in for an absolute treat! Today, I’m all about introducing you to my ultimate obsession: Healthy Protein Cheesecake Jars. These delightful little jars are not just a feast for the eyes but also a guilt-free indulgence that’ll tickle your taste buds and nourish your body.
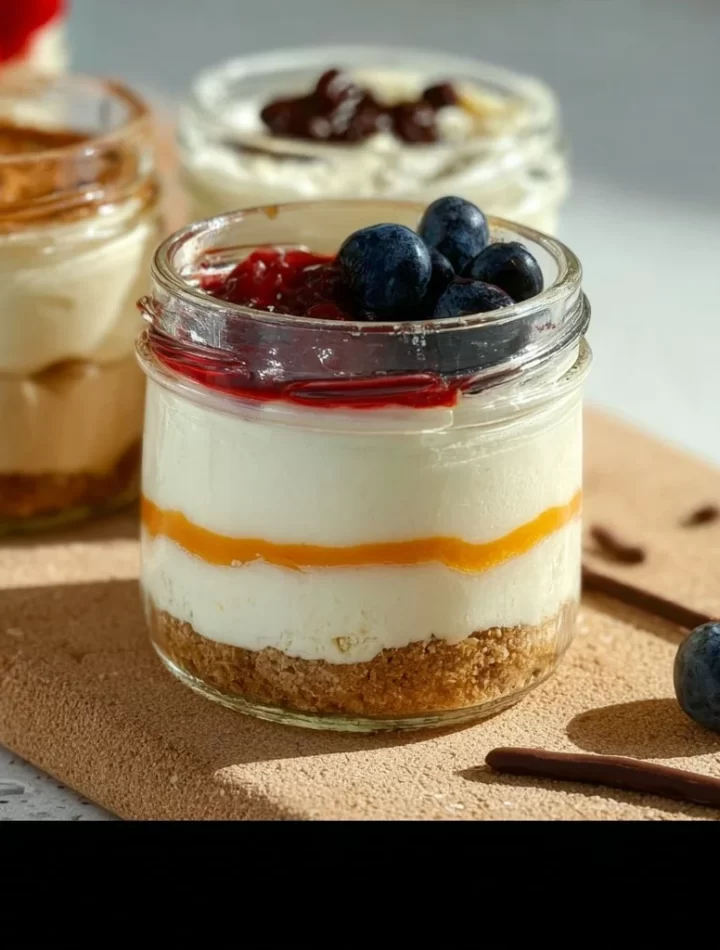
Picture this: creamy layers of protein-packed cheesecake filling, a buttery graham cracker crust, and a splash of vibrant fruit or chocolate drizzle on top. Sounds dreamy, right? Well, the best part is that these jars are incredibly easy to make, meaning you can whip them up for a snack, a fancy dessert for guests, or even a healthy breakfast-on-the-go. Plus, they’re portable, making them perfect for meal prep!
Now, before we dive into the recipe, let me share a little story about what inspired this creation. Grab a comfy seat, and let’s reminisce about those sweet moments in the kitchen.
Personal Story
I remember the first time I tasted cheesecake. I was at my grandma’s house, and she had just pulled a beautiful, creamy cheesecake from the oven. The smell of vanilla and cream cheese wafted through the air, and I was instantly mesmerized. My grandma sliced the cake, and as I took my first bite, I felt like I had just entered dessert heaven. It’s funny how one dish can leave such a lasting impression, right?
Years later, during my culinary adventures, I wanted to recreate that memory, but with a twist. I started playing around with lighter ingredients, protein powders, and no-bake methods. After several trials (and a few hiccups along the way), I struck gold with my Healthy Protein Cheesecake Jars. Not only do they remind me of those special moments in my grandma’s kitchen, but they also allow me to savor that rich cheesecake flavor without all the guilt.
Ready to embark on this delightful journey with me? Let’s gather our ingredients and make some magic happen!
Ingredients
Here’s what you’ll need to create your own Healthy Protein Cheesecake Jars:
-
Cream Cheese (8 oz): The star of the show! For a lighter option, look for reduced-fat cream cheese. You can substitute it with Greek yogurt for a tangy flavor, though it’ll change the texture a bit.
-
Greek Yogurt (1 cup): This adds creaminess and protein! Use full-fat or low-fat. If you’re dairy-free, try coconut yogurt for a tropical twist.
-
Protein Powder (1 scoop): Choose an unflavored or vanilla protein powder to complement the cheesecake. If you have a favorite plant-based protein, feel free to swap it in!
-
Honey or Maple Syrup (1/4 cup): For sweetness! Adjust according to your taste. Agave syrup works too if you’re looking for a vegan alternative.
-
Vanilla Extract (1 tsp): A little burst of flavor! Always opt for pure vanilla extract for the best taste. If you’re in a pinch, vanilla essence will do.
-
Graham Crackers (1 cup, crushed): This forms the crust. You can use whole wheat or gluten-free crackers if that fits your dietary needs.
-
Butter (4 tbsp, melted): Gives the crust that rich flavor. You can use coconut oil for a dairy-free option!
-
Fresh Fruits (berries, bananas, or chocolate sauce for drizzling): This is where you can get creative! Choose seasonal fruits or your favorites to top off your jars.
Step-by-Step Instructions
Let’s get cooking! Follow these straightforward steps to achieve perfect Healthy Protein Cheesecake Jars:
-
Prepare the Crust:
- In a bowl, combine the crushed graham crackers with melted butter. Mix until the crumbs are well coated. Here’s a fun hack: If you want a really fine crust, throw the crackers into a food processor before mixing in the butter.
-
Set the Base:
- Divide the graham cracker mixture evenly into the bottom of your jars. Use the back of a spoon or your fingers to pack it down firmly. This ensures a sturdy base for our cheesecake filling.
-
Mix the Filling:
- In a separate mixing bowl, combine the cream cheese, Greek yogurt, protein powder, honey, and vanilla extract. Use an electric mixer for a super smooth finish—easy peasy! No mixer? No worries! Just whisk vigorously until combined, but it may take a little longer.
-
Layer It Up:
- Spoon the cheesecake filling over the crust layer in each jar, filling them to about three-quarters full. You can get fancy here and use a piping bag to avoid mess, or just go rustic with your spoon!
-
Refrigerate:
- Place your jars in the fridge for at least 2 hours (or overnight for the best results). This is key for letting the cheesecake set properly. The longer you wait, the more the flavors deepen.
-
Top It Off:
- Once set, get creative with your toppings! Add fresh berries, sliced bananas, or a drizzle of chocolate sauce. You can also sprinkle some crushed nuts for added crunch. YUM!
Serving Suggestions
These Healthy Protein Cheesecake Jars are as fun to serve as they are to eat! Here are a few serving ideas to elevate the experience:
-
Elegant Affair: Serve the jars on a wooden or slate board alongside a small cluster of fresh berries and a mint sprig for a pop of color and a touch of class. Your guests will be blown away!
-
Family Fun: Make a dessert bar by setting out various toppings like crushed cookies, fruit, and sauces. Let everyone customize their cheesecake jars as they desire—it’s a fun interactive experience!
-
Meal Prep Pro: Layer them in mason jars for week-long breakfasts or snacks. Just remember to put a layer of parchment paper or a lid on the jars to keep them fresh.
Recipe Variations
Now that you have the basic recipe down, here are a few creative twists to keep things exciting:
-
Chocolate Delight: Substitute the vanilla protein powder with chocolate protein powder and add cocoa powder to the filling for a rich chocolate flavor.
-
Fruity Fiesta: Blend some fresh fruit into the cheesecake filling. Think strawberries or mango for a refreshing touch. Adjust the sweetener to match the fruit’s flavor.
-
Nutty Crunch: Toss in some finely chopped nuts, like almonds or walnuts, to the crust mixture for an extra crunchy texture.
-
Spiced Pumpkin: In the fall, swap in pumpkin puree (about 1/2 cup) and add pumpkin pie spice for a seasonal treat that captures all the cozy vibes!
-
Mango Coconut Bliss: Use coconut yogurt and top with fresh mango chunks and shredded coconut for a tropical treat.
Chef’s Notes
As a self-proclaimed cheesecake aficionado, I’ve made my fair share of cheesecakes in every conceivable way. This protein-packed version has earned a permanent spot in my kitchen not just because it’s healthier, but it also holds nostalgia for me. It reminds me of childhood memories in my grandma’s kitchen while being perfect for today’s busy lifestyle. I can whip it up quickly and feel good about indulging!
FAQs and Troubleshooting
1. Can I use a different kind of sweetener?
Absolutely! Feel free to experiment with stevia, monk fruit, or any other sweetener that fits your dietary needs. Just remember to adjust the quantity since they can be sweeter than honey or maple syrup.
2. My cheesecake jars didn’t set properly. What went wrong?
If they didn’t set, it’s mostly likely that they need a longer chill in the fridge. Let them sit longer, and they should thicken up quite nicely.
3. Can I freeze these jars?
Yes! These jars can be frozen. Just make sure to leave some space at the top of the jar as the filling may expand when frozen. Thaw them in the fridge overnight before enjoying.
4. What if I don’t have graham crackers?
No problem! You can use crushed oatmeal cookies, digestive biscuits, or even almond flour mixed with a little cocoa powder for a chocolate crust!
Nutritional Info
One serving of these delightful Healthy Protein Cheesecake Jars (without additional toppings) contains approximately:
- Calories: 200-250
- Protein: 15-20g
- Carbs: 18-25g (depending on the sweetener & crust)
- Fat: 8-10g
These jars are not only a sweet indulgence but also boost your protein intake and keep you feeling satisfied for longer!
Final Thoughts
There you have it, friend! Your new go-to recipe for Healthy Protein Cheesecake Jars is ready to delight your taste buds without derailing your health goals. Whether you’re treating yourself, impressing guests, or meal prepping for the week, these jars bring joy and nourishment all in one.
Whether it’s crafting memories in your kitchen or sharing these delightful treats with loved ones, remember it’s all about enjoying the process. So grab those ingredients and get to it! I can’t wait to hear how your cheesecake jars turn out. Until next time, keep cooking, keep smiling, and most importantly—keep eating delicious food!
Happy baking! 🥄💖
Print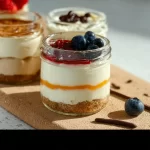
Healthy Protein Cheesecake Jars
- Total Time: 120 minutes
- Yield: 4 servings 1x
- Diet: Healthy, High Protein
Description
Guilt-free indulgence with creamy layers of protein-packed cheesecake filling and a buttery graham cracker crust.
Ingredients
- 8 oz Cream Cheese (reduced-fat optional)
- 1 cup Greek Yogurt (full-fat or low-fat)
- 1 scoop Protein Powder (unflavored or vanilla)
- 1/4 cup Honey or Maple Syrup (adjust as needed)
- 1 tsp Vanilla Extract (pure preferred)
- 1 cup Graham Crackers (crushed)
- 4 tbsp Butter (melted, coconut oil optional)
- Fresh Fruits (berries, bananas, or chocolate sauce for topping)
Instructions
- Prepare the Crust: In a bowl, mix crushed graham crackers with melted butter until well coated. Press the mixture into the bottom of your jars.
- Set the Base: Divide the crust mixture into jars and pack down firmly.
- Mix the Filling: Combine cream cheese, Greek yogurt, protein powder, honey, and vanilla extract in a mixing bowl. Use an electric mixer for smoothness or whisk until combined.
- Layer It Up: Spoon the cheesecake filling over the crust in each jar, filling them about three-quarters full.
- Refrigerate: Chill jars in the fridge for at least 2 hours (or overnight for better results).
- Top It Off: Once set, add toppings like fresh berries, sliced bananas, or chocolate sauce. You can also sprinkle nuts on top.
Notes
These jars can be frozen; just leave space at the top for expansion and thaw overnight in the fridge before enjoying.
- Prep Time: 15 minutes
- Cook Time: 0 minutes
- Category: Dessert
- Method: No-Bake
- Cuisine: American
Nutrition
- Serving Size: 1 jar
- Calories: 225
- Sugar: 10g
- Sodium: 150mg
- Fat: 9g
- Saturated Fat: 4g
- Unsaturated Fat: 5g
- Trans Fat: 0g
- Carbohydrates: 22g
- Fiber: 1g
- Protein: 18g
- Cholesterol: 30mg
Keywords: cheesecake, protein, healthy dessert, no-bake cheesecake, meal prep