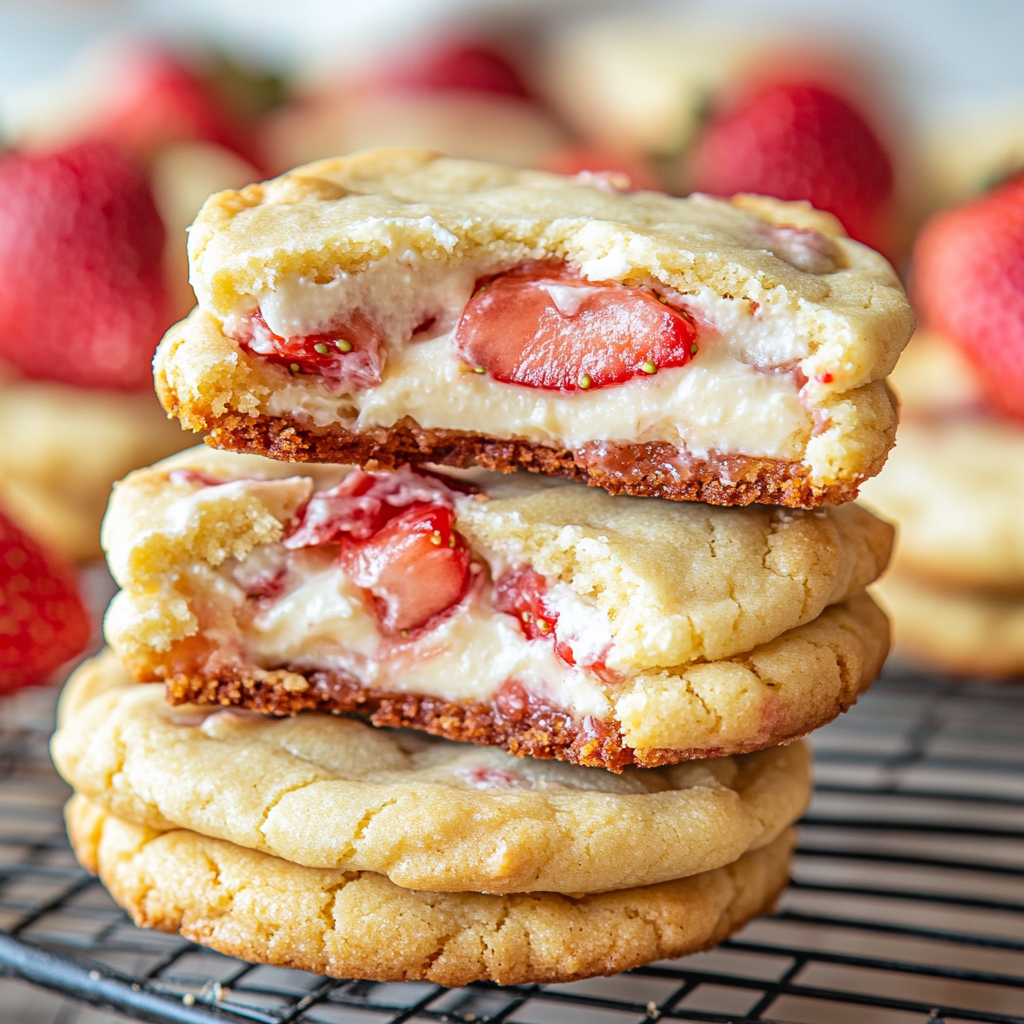
Heart-Shaped Strawberry Shortbread Cookies: Buttery, Jam-Filled & Perfectly Sweet
Hey there, my fellow food lover! Grab a cup of coffee and pull up a stool. Have I got a little piece of edible joy to share with you today. We’re talking about my Heart-Shaped Strawberry Shortbread Cookies. Just saying the name makes me smile.
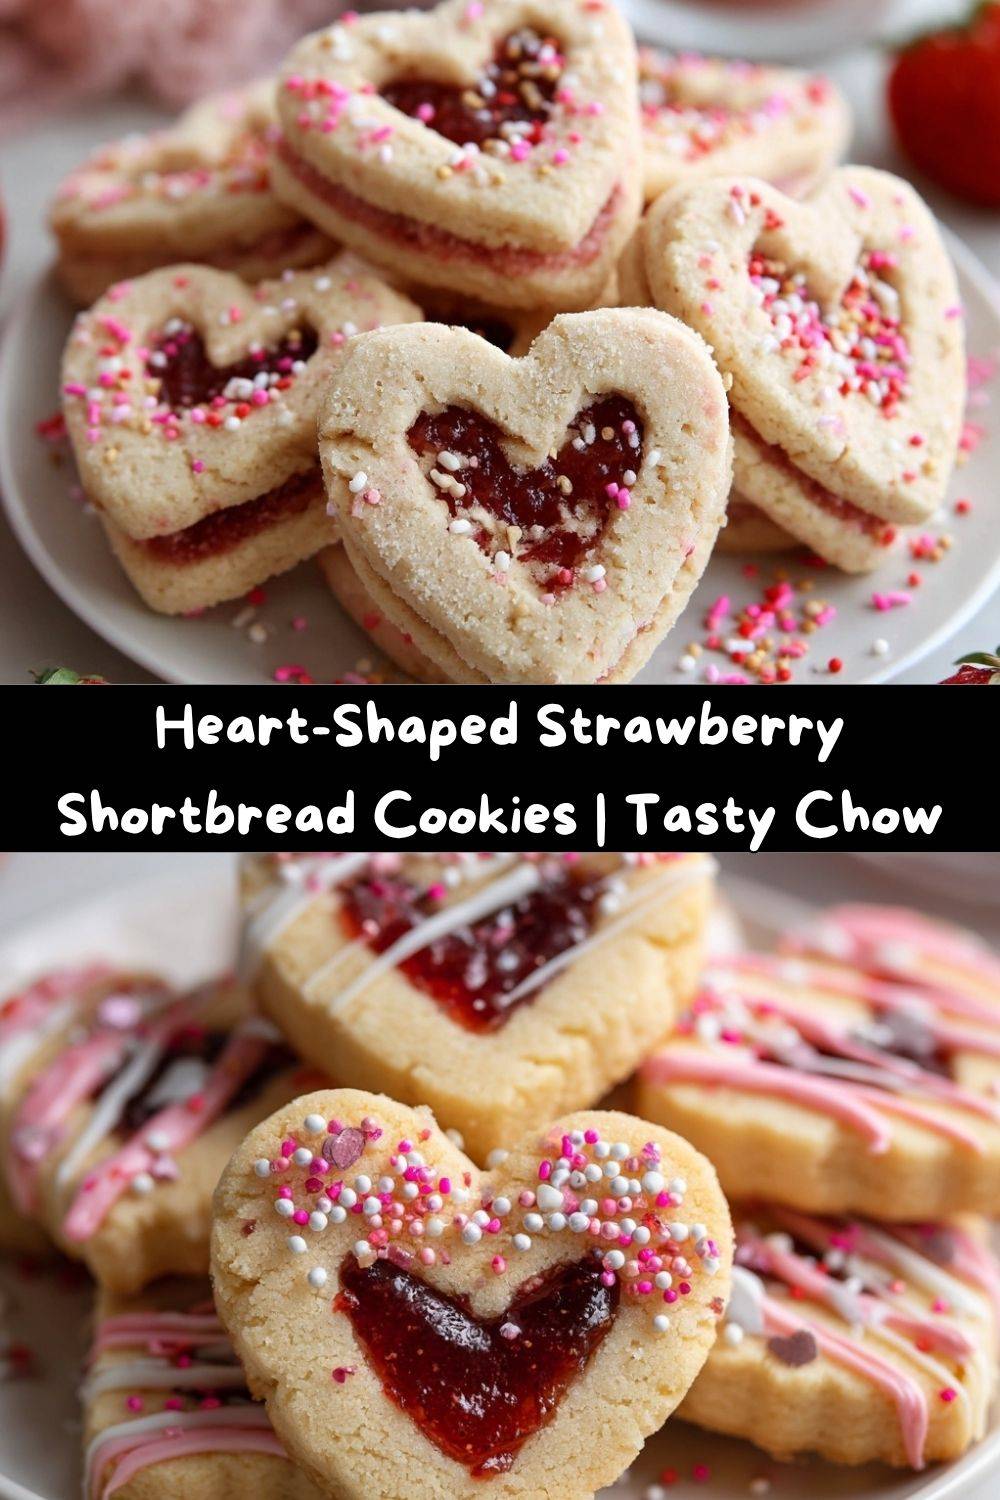
Imagine this: a cookie so buttery it practically melts on your tongue the second it hits your lips. It has this delicate, sandy texture that’s just *chef’s kiss*. Now, infuse that with a subtle, romantic pink hue and the faint, fruity whisper of real strawberries. But we’re not stopping there. We’re sandwiching two of these beauties together with a dollop of sweet-tart strawberry jam, creating a gorgeous little stained-glass window to your cookie-loving heart.
These aren’t just cookies; they’re tiny, buttery love letters. They’re perfect for Valentine’s Day, sure, but let’s be real—love is worth celebrating on a random Tuesday in July, too. They’re a hit at bridal showers, baby showers, or just as a “hey, you’re awesome” gift for a friend. They’re fun to make, absolutely gorgeous to look at, and even better to eat. So, are you ready to make your kitchen smell like a happy, buttery paradise? Let’s get baking!
The Story Behind the Cookie: A Messy Apron and a Full Heart
This recipe takes me right back to my grandma’s linoleum-tiled kitchen. She wasn’t a fancy baker, but oh, could she make a mean shortbread. Her recipe was simple: butter, sugar, flour. No frills. But she always, *always* made them with love, often pressing her thumb into the center to hold a dab of whatever jam she had put up that summer.
One year, for my birthday, which is dangerously close to Valentine’s Day, I wanted to help. I was covered in flour, my little apron a mess, but I felt so important. We didn’t have a heart-shaped cutter, so we used a knife and carefully, painstakingly, carved out wobbly, lopsided hearts. They were imperfect, and the jam bubbled out the sides, but to me, they were the most beautiful things I’d ever seen. That’s the spirit I want you to bring to this recipe. It’s not about perfection; it’s about the joy of creating something delicious with your own two hands. That’s the real secret ingredient.
Gather Your Ingredients: A Baker’s Blueprint for Love
Here’s everything you’ll need to create these delightful little sandwiches. I’ve included some of my favorite chef-y insights and substitutions so you can bake with confidence!
For the Shortbread Cookies:
- 1 cup (2 sticks) unsalted butter, softened: This is the soul of your shortbread. Using high-quality butter makes a world of difference. Pro-Tip: “Softened” means cool to the touch but your finger can leave a gentle indent. Too soft/melted and your cookies will spread!
- ⅔ cup powdered sugar: Powdered sugar gives shortbread its signature fine, melt-in-your-mouth crumb, unlike the chew you get from granulated sugar.
- ½ tsp vanilla extract: A splash of vanilla enhances all the other flavors. Feel free to use almond extract for a different, equally lovely twist!
- ¼ tsp salt: Don’t skip this! Salt is the flavor superhero that makes the buttery, sweet notes pop.
- 2 cups all-purpose flour: The trusty structure-builder. Spoon and level your flour into the measuring cup to avoid dense, dry cookies.
- ¼ cup freeze-dried strawberries, finely ground: This is our magic trick! It gives a gorgeous natural pink color and a true strawberry flavor without adding any liquid. You can find these in the snack or dried fruit aisle. Substitution: In a pinch, you can omit these, but you’ll lose the color and fruity flavor in the cookie itself.
For Filling & Decoration:
- ¼ cup strawberry jam: Use a good-quality jam you love! I prefer one with seeds for a bit of texture, but seedless works perfectly too. For a less messy option, try a thicker strawberry preserves or even a strawberry fruit spread.
- ½ cup white chocolate chips or melting wafers (optional): For that beautiful drizzle. Melting wafers are designed to set with a nice snap, but chocolate chips work if you add a tiny splash of coconut oil when melting.
- Pink or red sprinkles (optional): Because a little sparkle never hurt anybody! Heart-shaped sprinkles would be absolutely adorable here.
Let’s Get Baking: Your Step-by-Step Cookie Journey
Alright, apron on, let’s do this! I’ll walk you through every step. Read through the whole process once before you start—it’s my number one kitchen hack for success.
- Cream the Butter and Sugar: In a large bowl, beat the softened butter and powdered sugar together on medium speed until it’s light, pale, and wonderfully smooth. This should take about 2-3 minutes. Chef’s Hack: Don’t rush this step! Creaming incorporates air, which gives your cookies a lovely tender texture.
- Add the Flavor: Scrape down the sides of the bowl with a spatula (another good habit!). Beat in the vanilla extract and salt until just combined.
- Incorporate the Dry Ingredients: In a separate bowl, whisk together the flour and your finely ground freeze-dried strawberries. This ensures the strawberry powder is evenly distributed. With your mixer on low, gradually add the flour mixture to the butter mixture. Mix only until the dough just comes together and no dry streaks of flour remain. Overmixing is the enemy of tender shortbread!
- Chill Out (The Dough, Not You!): Turn the dough out onto a piece of plastic wrap. Gently shape it into a flat disk—this makes rolling it out later much easier. Wrap it tightly and chill in the refrigerator for at least 1 hour, or up to 2 days. Why This Matters: Chilling firms up the butter, which prevents your cookies from spreading into puddles in the oven. It also allows the flour to fully hydrate, giving you a better texture.
- Roll and Cut with Love: Preheat your oven to 350°F (175°C). Line your baking sheets with parchment paper. On a lightly floured surface, roll your chilled dough out to about a ¼-inch thickness. Use a 2- to 3-inch heart-shaped cutter to cut out your cookies. Now, for half of them, use a smaller heart-shaped cutter (or even a knife) to cut a small heart “window” out of the center. These will be your tops!
- Bake to Golden Perfection: Carefully place the cookies on your prepared baking sheets, about an inch apart. Bake for 12-15 minutes. You’re looking for the edges to be just barely, lightly golden. They might still look a little soft in the center—that’s perfect! They will firm up as they cool. Pro-Tip: Bake the “window” tops on a separate tray if you can, as they might bake a minute or two faster.
- The Most Important Step: Cool Completely! Let the cookies cool on the baking sheet for 5 minutes before transferring them to a wire rack to cool completely. I know it’s tempting, but if you try to assemble them while they’re warm, they’ll crumble and the jam will melt everywhere. Patience, my friend!
- Assemble Your Masterpieces: Once completely cool, spread a teaspoon (or so) of strawberry jam on the flat side of each solid bottom cookie. Gently press a “window” top cookie onto the jam. Ah, look at that beautiful reveal!
- Drizzle and Decorate (Optional, but so Fun!): If you’re using white chocolate, melt it in short bursts in the microwave, stirring frequently. Drizzle it over the assembled cookies with a fork or a small piping bag. Immediately add sprinkles before the chocolate sets. Let the chocolate fully harden before storing.
How to Serve These Little Love Bugs
Presentation is part of the fun! I love stacking these cookies on a beautiful cake stand or a vintage plate for a real “wow” factor. They look stunning arranged in a circle with the “windows” facing out.
For gifting, place them in a cellophane bag tied with a pretty pink ribbon, or carefully layer them in a festive tin between sheets of parchment paper. They make the most thoughtful homemade gift. Serve them with a glass of cold milk for the ultimate classic combo, or with a flute of bubbly prosecco for a truly celebratory treat. They’re also a wonderful, sweet ending to a romantic dinner at home.
Get Creative! Fun Flavor Twists & Swaps
Once you’ve mastered the classic, the world is your oyster… or, well, your cookie! Here are a few of my favorite ways to mix it up:
- Raspberry Rendezvous: Swap the freeze-dried strawberries for freeze-dried raspberries and use raspberry jam for a vibrant, tangy alternative.
- Lemon Love: Omit the strawberries entirely. Add the zest of one lemon to the butter-sugar mixture and use a thick lemon curd for the filling. So bright and sunny!
- Chocolate-Dipped Dream: Instead of a jam filling, dip half of each assembled cookie in melted dark or semi-sweet chocolate. Let the chocolate set for a decadent treat.
- Gluten-Free Goodness: You can easily use a 1:1 gluten-free all-purpose flour blend. Just be sure your blend doesn’t contain xanthan gum already, or if it does, the results should still be great!
- “Gal-entine’s” Version: Use different shapes and jam colors! Try circles with blueberry jam, or stars with apricot preserves. It’s a fantastic way to use what you have on hand.
Chef Emily’s Notebook: A Few Parting Thoughts
This recipe has evolved so much since those first wobbly hearts with my grandma. The addition of the freeze-dried fruit was a total “aha!” moment I had in culinary school, and it completely changed the game. No more artificial food coloring for me!
I have to laugh, though—the first time I made these for my now-husband, I was so nervous I over-chilled the dough. I actually *bent* my cookie cutter trying to press it through! We had to let the dough sit on the counter for a few minutes to warm up just a touch. It was a good reminder that baking is a dance, not a race. Listen to your dough, and don’t be afraid to get a little messy. The best things in life—and the kitchen—usually are.
Your Questions, Answered!
Over the years, I’ve gotten a few common questions about this recipe. Here’s the scoop to help you troubleshoot!
Q: My dough is too crumbly and won’t hold together when I try to roll it. Help!
A: No worries! This usually means it’s a bit too dry or too cold. Try kneading it with your hands for a few seconds—the heat from your palms will warm the butter slightly and help it bind. If it’s still crumbly, add a teaspoon of cold water at a time until it comes together.
Q: Can I make the dough ahead of time?
A: Absolutely! This is a fantastic make-ahead recipe. The dough disk can be wrapped tightly and refrigerated for up to 2 days, or even frozen for up to 3 months. Just thaw it overnight in the fridge before rolling.
Q: My cookies spread too much in the oven. What happened?
A: The most likely culprit is butter that was too soft. Make sure your butter is just softened, not melty. Also, double-check that you chilled the dough for the full hour—it’s a crucial step!
Q: The jam is leaking out the sides. How can I prevent this?
A. To create a “dam” for the jam, you can pipe a thin border of royal icing or the melted white chocolate around the edge of the bottom cookie before adding the jam in the center. It’s an extra step, but it keeps things neat!
A Quick Note on Nutrition & Details
While these are definitely a treat, I believe in transparency! Here’s a general breakdown per sandwich cookie (approximate and will vary based on specific ingredients used).
- Calories: ~160
- Sugar: ~10g
- Fat: ~8g
- Dietary Note: These cookies are naturally vegetarian.
Prep Time: 20 minutes (+ 1 hour chilling)
Cook Time: 15 minutes
Total Time: ~35 minutes active, ~1 hr 35 minutes total
Servings: 24 beautiful sandwich cookies
Final Thoughts from My Kitchen to Yours
Well, my friend, we’ve reached the end of our buttery, jam-filled journey. I hope you feel inspired and excited to bake a batch of these Heart-Shaped Strawberry Shortbread Cookies. More than that, I hope you feel the joy and love that baking can bring.
Remember, it’s not about creating a picture-perfect cookie for Instagram (though these certainly will be!). It’s about the process—the feel of the dough under your hands, the smell that fills your kitchen, and the smile on the face of someone you share them with. That’s the real magic.
So, go on. Preheat that oven, get your hands a little dusty with flour, and make something delicious. And when you do, I’d love to see it! Tag me @TastyChow online so I can celebrate with you.
Happy baking, and all my love from my messy kitchen to yours,
— Emily