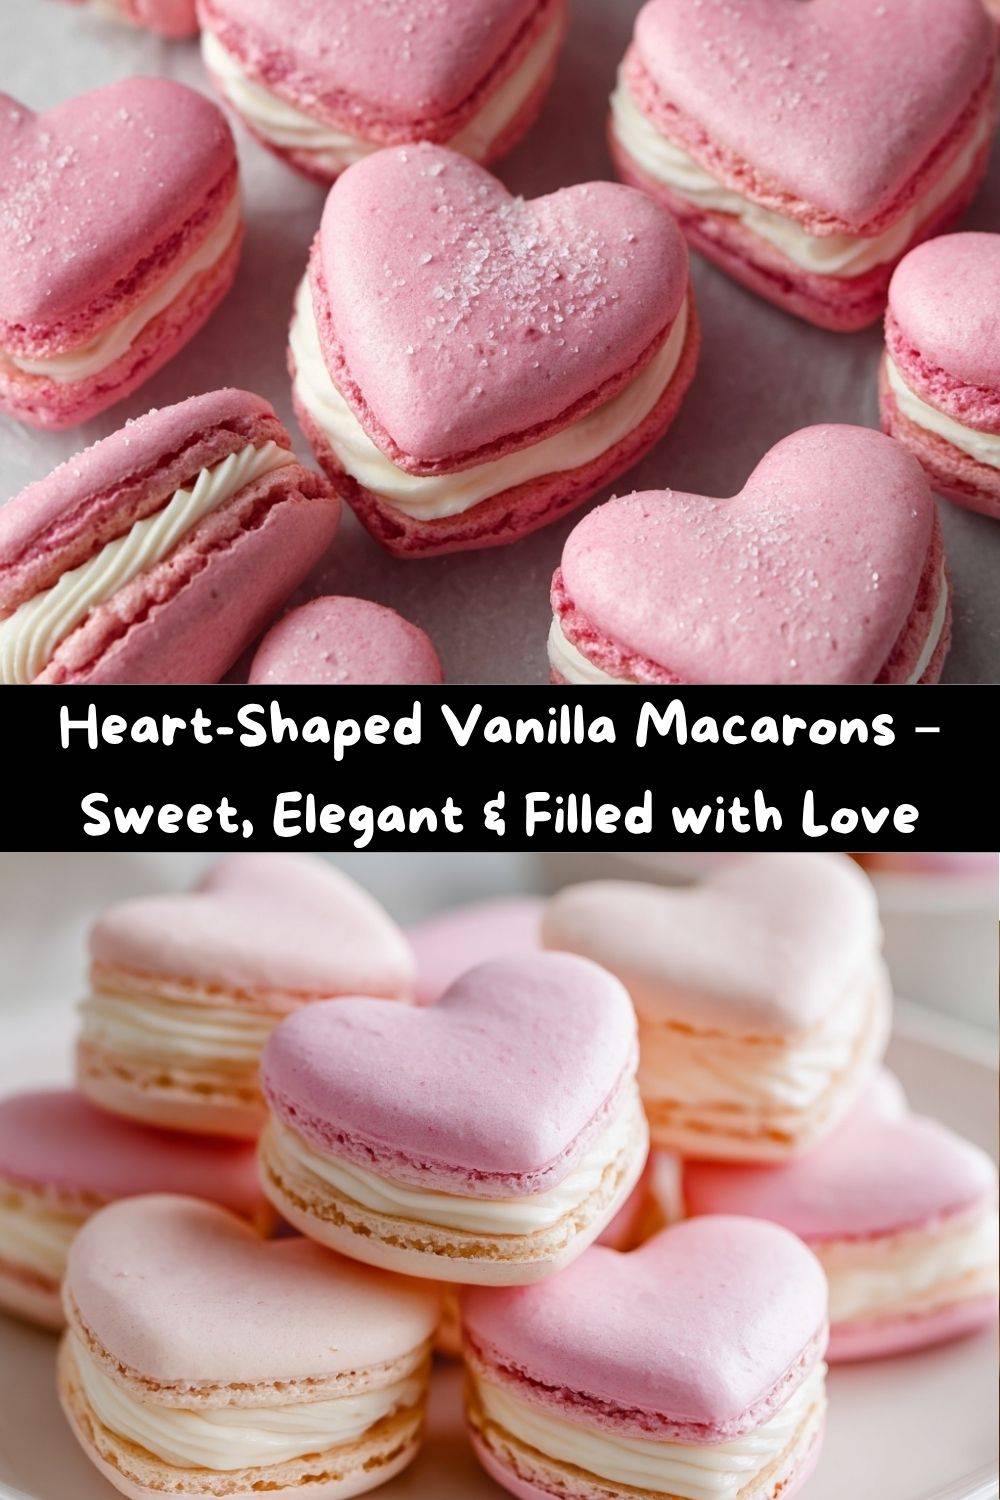
Heart-Shaped Vanilla Macarons: A Little Love in Every Bite
Hey there, my fellow food lover! Chef Emily here, coming to you from my flour-dusted kitchen with a recipe that’s equal parts adorable and absolutely delicious. Today, we’re tackling a baking project that might seem a little fancy, but I promise, it’s totally within your reach: Heart-Shaped Vanilla Macarons.
I know, I know. Macarons have a reputation. They’re the divas of the cookie world, known for their finicky feet and perfect, smooth tops. But hear me out! What if we approached them not with fear, but with a sense of playful curiosity? What if we turned them into sweet, heart-shaped symbols of love, perfect for Valentine’s Day, anniversaries, or just a Tuesday when you want to spread a little joy?
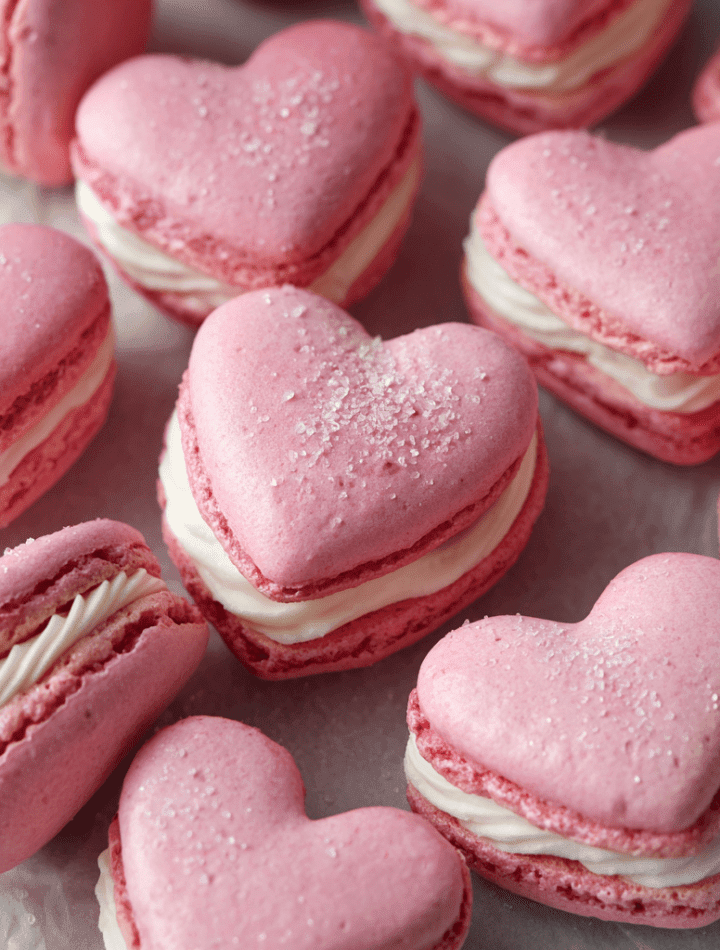
These aren’t just any cookies. They’re tiny edible hugs. Imagine a crisp, delicate shell that gives way to a soft, chewy interior, all wrapped around a cloud of luscious, homemade vanilla buttercream. They’re a total showstopper, the kind of treat that makes people’s eyes light up. And the best part? You made them. With your own two hands. So, tie on that apron (the messy one is always the best), and let’s create some magic together. I’ll be with you every step of the way, sharing all my tips and tricks for bakery-style macarons, right in your own kitchen.
The Macaron That Started It All
My love affair with macarons didn’t start in a fancy Parisian patisserie. Nope. It started with a spectacular, glorious, and hilarious failure. It was my first year in culinary school, and I was determined to impress my pastry chef instructor. I decided to make a batch of lavender macarons. I followed a recipe I’d found online to the letter—or so I thought.
I piped what were supposed to be perfect circles, but they came out looking more like amoebas. I didn’t let them rest long enough, so they cracked in the oven. And I think I used enough purple food coloring to dye a small elephant. The result? Flat, footless, vibrant purple puddles that tasted… interesting. My classmates kindly called them “abstract art.” I called them a lesson in humility.
But that failure lit a fire in me. I became obsessed. I practiced, I researched, I ate more macarons than I’d care to admit. And when I finally, *finally* pulled a tray of perfect, feet-having, beautifully domed macarons out of my tiny apartment oven, I did a victory dance that probably looked ridiculous. That moment taught me that the most rewarding recipes are often the ones that challenge us. And now, I get to share that hard-won knowledge with you, so you can skip right to the victory dance (ridiculous or not!).
Gathering Your Macaron-Making Magic
Before we start, let’s get our mise en place ready—that’s just a fancy chef term for having all your ingredients measured and ready to go. Precision is your best friend when making macarons! Here’s what you’ll need for these sweet little heart sandwiches.
For the Cookie Shells:
- 3 Egg Whites: You’ll want these at room temperature! This helps them whip up to a greater volume, giving you those lovely, fluffy meringues. Pro tip: Separate your eggs when they’re cold (it’s easier), then let the whites sit on the counter for about 30 minutes.
- 1½ cups Almond Flour: The heart of the macaron! Using a super-fine almond flour is non-negotiable for that smooth, classic top. Give it a quick sift with the powdered sugar to get rid of any lumps.
- ½ cup Granulated Sugar: This is what we’ll add to the egg whites to create a stable, glossy meringue. It sweetens the shell and gives it structure.
- 1 cup Powdered Sugar: Also known as confectioner’s sugar, this adds sweetness and helps create that delicate, melt-in-your-mouth texture.
- 1 tsp Vanilla Extract: Pure vanilla extract gives us that warm, classic flavor. For a little extra oomph, you could scrape the seeds from half a vanilla bean pod!
- ¼ tsp Cream of Tartar: This little powerhouse helps stabilize the egg whites, making your meringue stronger and less likely to deflate. If you don’t have any, a tiny pinch of salt can work in a pinch.
- Food Coloring (optional): Gel or powder food coloring is best here, as liquid coloring can alter the consistency of your batter. A few drops of pink or red will make our hearts extra romantic!
For the Vanilla Buttercream:
- ¼ cup Softened Butter: Use unsalted butter so you control the saltiness. Make sure it’s truly softened at room temp for a smooth, lump-free frosting.
- 1 cup Powdered Sugar: The base of our simple, sweet, and dreamy filling.
- ½ tsp Vanilla Extract: Doubling down on that wonderful vanilla flavor.
- 1 tsp Milk or Heavy Cream: This just loosens the buttercream to the perfect piping consistency. Add it slowly—you can always add more!
Let’s Make Some Hearts: A Step-by-Step Guide
Okay, friends! This is where the fun begins. Follow these steps, read my little chef hacks along the way, and you’ll be on your way to macaron mastery.
- Prep Your Station: Line two baking sheets with parchment paper or silicone macaron mats. If you’re using parchment, you can even trace little heart shapes on the backside as a guide—just flip the paper over so you’re not piping directly onto the ink! Chef’s Hack: A tiny dot of batter under each corner of the parchment will help it stick to the pan and not slide around while you pipe.
- Sift, Sift, Sift! In a medium bowl, whisk together the almond flour and powdered sugar. Then, sift the mixture through a fine-mesh sieve. I know it feels like a fussy step, but this is the secret to that perfectly smooth macaron top. If you have a few larger bits of almond left in the sieve, just discard them.
- Whip the Meringue: In a scrupulously clean, dry glass or metal bowl, beat the room-temperature egg whites on medium speed until they’re foamy. Add the cream of tartar. Now, gradually add the granulated sugar, about a tablespoon at a time, while the mixer is running. Increase the speed to high and whip until you have stiff, glossy peaks. This means when you lift the beaters out, the meringue stands straight up. Chef’s Hack: The meringue should feel thick and smooth between your fingers—if you can still feel sugar granules, keep whipping!
- Add Color and Flavor: Now, add your vanilla extract and food coloring (if using) to the meringue. Beat for just another 10-15 seconds on low to fully incorporate everything.
- The Macaronage: This is the most crucial step! Add about one-third of your dry ingredients to the meringue. Gently fold them in using a spatula, making sweeping motions from the bottom of the bowl up and over the top. Once incorporated, add the next third. We’re deflating the meringue just enough so the batter flows. You’re looking for a lava-like consistency—the batter should ribbon off your spatula and slowly melt back into the rest in the bowl. Chef’s Hack: To test, draw a figure-eight with the batter dripping off your spatula. If you can complete the eight without the stream breaking, it’s ready! Do not overmix.
- Pipe the Hearts: Transfer the batter to a piping bag fitted with a round tip (a #12 or #10 works well). Hold the bag perpendicular to the baking sheet and pipe your hearts. Start by piping a small round for the bottom two lobes of the heart, then drag a tiny bit of batter up to create the V at the top. Chef’s Hack: If you have a peak at the top of your heart, just dip a finger in water and gently press it down.
- Release the Bubbles: Firmly tap the baking sheets on your counter 3-4 times. This releases any trapped air bubbles and helps prevent cracked shells. Use a toothpick to pop any remaining bubbles you can see.
- The Resting Period: This is where the magic of the “macaron feet” happens! Let the piped hearts sit at room temperature for 30-40 minutes. You’ll know they’re ready when you can gently touch the surface and it feels dry and not sticky. This forms a skin, which forces the steam in the oven to push out the bottom, creating those iconic ruffled feet.
- Bake to Perfection: While the macarons are resting, preheat your oven to 300°F (150°C). Bake one sheet at a time in the center of the oven for 12-15 minutes, rotating the tray halfway through. They’re done when they look set and don’t wiggle when you gently nudget the top. Chef’s Hack: Oven temperatures can vary. If you’re unsure, bake one or two test macarons first to nail the time.
- Cool Completely: Let the macarons cool completely on the baking sheet before you even think about moving them. They are very delicate when warm! Once cool, they should peel off the parchment easily.
- Make the Buttercream: While the shells cool, make the filling! In a medium bowl, beat the softened butter until it’s smooth and pale. Gradually add the powdered sugar, then the vanilla and milk. Whip it for 2-3 minutes until it’s light and fluffy.
- Assemble the Sandwiches: Pair up your macaron shells by size. Pipe a dollop of buttercream onto the flat side of one shell and gently sandwich it with its partner. Voilà!
How to Serve Your Edible Masterpieces
You’ve done it! You’ve created a batch of beautiful, heart-shaped macarons. Now, let’s make them look as stunning as they taste.
For a simple, elegant presentation, arrange them on a beautiful white or pastel-colored platter. They are the stars of the show, so they don’t need much else! You could dust them with a very light sprinkling of edible glitter for a touch of sparkle.
If you’re giving them as a gift, a clear cellophane bag tied with a pretty ribbon makes them look professional and thoughtful. Or, place them in a small gift box lined with parchment paper—they’re almost too pretty to eat! (I said almost.)
And here’s a little secret from my kitchen: macarons are actually even better the next day. This is called “maturation.” Once assembled, store them in an airtight container in the fridge for 24 hours. This allows the shells to soften slightly and absorb the flavor of the filling, making them even more delicious and chewy. Just let them come to room temperature for about 15 minutes before serving for the best texture and flavor.
Get Creative! Flavor Twists & Swaps
Once you’ve mastered the classic vanilla, the world of macarons is your oyster! Here are a few of my favorite ways to mix things up.
- Chocolate-Dipped Strawberry: Add 2 tablespoons of cocoa powder to the dry ingredients for chocolate shells. For the filling, mix a tablespoon of freeze-dried strawberry powder into your buttercream for a fruity, vibrant pink center.
- Lemon Raspberry: Omit the vanilla from the shells and add a few drops of yellow food coloring and a teaspoon of lemon zest. Fill with a simple raspberry jam or a buttercream flavored with a spoonful of jam.
- Funfetti: For a birthday celebration, fold a tablespoon of rainbow sprinkles into the macaron batter right at the end of the macaronage stage. The colorful dots are so festive!
- Dairy-Free/Different Nut: You can make these with aquafaba (the liquid from a can of chickpeas) instead of egg whites! Use 90g of aquafaba in place of the 3 egg whites. For a nut-free version, try using sunflower seed flour. Just be aware it can turn green over time due to a chemical reaction—still tasty, just a different look!
Chef Emily’s Notebook
This recipe has been a labor of love, tweaked and perfected over countless batches. My biggest lesson? Don’t stress about the weather! Humidity is a macaron’s nemesis. If it’s a rainy day, your resting time might be longer. If it’s very dry, it might be shorter. Trust the “touch test” more than the clock.
And please, be kind to yourself. My first successful batch was followed by a second batch that was a complete flop. It happens to all of us! Every single batch teaches you something new. The “macaron graveyard” (the ones that crack or have no feet) still happens in my kitchen from time to time. I just call them “chef’s treats” and enjoy them with a cup of coffee. They still taste incredible!
Macaron FAQs & Quick Fixes
I’ve gotten so many questions about macarons over the years. Here are the most common ones, answered just for you.
Q: Why are my macarons hollow?
A: Hollow shells are often due to over-whipped meringue or an oven temperature that’s a bit too high. Try reducing your oven temp by 10-15 degrees next time and make sure you’re stopping at stiff, not “clumpy,” peaks.
Q: Why did my macarons crack and have no feet?
A: This is almost always because they didn’t rest long enough to form a proper skin. That dry skin is what traps the steam and forces the feet to push out the bottom. Be patient, my friend!
Q: My batter was too runny! What happened?
A: You likely overmixed during the macaronage stage. It’s a delicate balance! Remember the figure-eight test. If it becomes too runny, unfortunately, there’s no going back—but you can use it to make delicious macaron “truffles” by crumbling the baked shells and mixing them with the buttercream.
Q: Can I freeze macarons?
A: Absolutely! They freeze beautifully. Assemble them, then place them in a single layer in an airtight container. They’ll keep for up to a month. Thaw in the fridge overnight.
Nutritional Information (For Your Info!)
Here’s a general breakdown for one heart-shaped macaron sandwich (two shells + buttercream filling). Keep in mind, exact numbers will vary based on size, ingredients, and how generous you are with the filling (no judgment here!).
-
Calories: ~95 kcal
-
Total Fat: ~4 g
-
Saturated Fat: ~1.5 g
-
-
Carbohydrates: ~12 g
-
Sugars: ~10 g
-
-
Protein: ~2 g
-
Fiber: <1 g
-
Sodium: ~15 mg
These little beauties may be dainty, but they pack big joy in every bite. 🍬 If you’d like to make them a touch lighter, you can:
-
Swap half the butter in the filling for light cream cheese or Greek yogurt.
-
Use a lower-sugar buttercream (or reduce powdered sugar slightly).
-
Keep the portion size small (but honestly, who can stop at one?).
From My Kitchen to Yours: Final Thoughts
And there you have it — a batch of Heart-Shaped Vanilla Macarons that look like they came straight from a Parisian bakery, but were made with your own two hands (and maybe a little powdered sugar on your nose). 💕
The first bite will always get you: that delicate crunch giving way to the soft, chewy center and a swirl of creamy vanilla buttercream. It’s the kind of treat that makes time slow down for a second — the moment when you realize that baking isn’t about perfection; it’s about joy, patience, and the tiny victories that make your heart swell just like these little cookies.
So don’t stress if a few shells crack or if one heart looks a little more “abstract art” than “Instagram perfect.” That’s the charm of homemade baking — every imperfection is a little love note from your kitchen.
Share them with someone you adore, or tuck a few away just for you (chef’s privilege!). However you enjoy them, I hope these sweet hearts remind you that love, like baking, is always better when it’s made from scratch. ❤️