Why Buy the Box When You Can Bake the Best?
Hey, snack squad! Emily here, coming to you from a kitchen that currently smells like toasted cheddar and pure happiness. Let’s talk about a universal truth: the sound of a cracker snapping. That crisp, decisive *SNAP* that promises something salty, cheesy, and utterly delicious is about to happen. It’s a sound I’ve loved since I was a kid, rummaging through the pantry for a late-afternoon treat.
But here’s my chef confession: as much as I adore that sound, I’ve always wished the crackers making it had a little more… oomph. More real cheese flavor, less mystery powder. A buttery richness that doesn’t just vanish. A snack I can feel good about handing to my kiddos or setting out for friends.
That’s where these homemade cheese crackers come in, and friends, they are a game-changer. We’re talking about a dough that comes together in minutes, bakes into golden, crispy perfection, and delivers a serious punch of sharp cheddar in every single bite. They’re dangerously snackable, ridiculously easy, and they have this magical power to make any occasion—from a solo Netflix binge to a fancy party platter—feel just a bit more special.
So, tie on your favorite apron (the messy one is always the best), and let’s turn your kitchen into a mini artisan cracker factory. I promise, once you taste these, that boxed stuff will be a distant memory.
The Cheese Whisperer: My Grandma Vi’s Secret
My love for these crackers is 100% genetic, passed down from my Grandma Vi. She was the original cheese whisperer. Her famous “cheese pennies” were the stuff of legend at every family gathering. She didn’t use a food processor; she’d grate a mountain of orange cheddar by hand, her knuckles dusted with flour, muttering about the “right consistency” like it was a sacred text.
I’d sit at her linoleum table, “helping” by stealing pinches of the crumbly dough (she always pretended not to notice). The smell of them baking was our family’s dinner bell. When she pulled the tray from the oven, we’d all hover, trying to sneak a hot one, and she’d swat our hands away with a dish towel. “Let ‘em crisp up!” she’d say, a twinkle in her eye.
My version is a slight modernization of hers—a food processor saves our wrists, and I’ve played with the spices—but the soul is identical. It’s the soul of shared moments, of simple ingredients made extraordinary with care, and of the profound belief that a homemade snack is an act of love. Every time I make these, I think of her, and I know she’d approve of the extra pinch of paprika.
Gathering Your Cracker Crew: The Ingredients
Beautifully simple, high-quality ingredients are the key here. Each one plays a starring role:
- 2 cups sharp cheddar cheese, shredded: This is the flavor MVP. Use a block of cheese and shred it yourself—the pre-shredded stuff has anti-caking agents that can make your dough greasy. The sharper the cheddar, the bigger the flavor punch. For a fun twist, try a mix of white and orange cheddar!
- 4 tablespoons (½ stick) unsalted butter, cold and cubed: Cold butter is non-negotiable. It creates little pockets of steam as it bakes, which is part of what gives these crackers their fabulous flakiness and snap. Unsalted lets you control the salt level perfectly.
- 1 cup all-purpose flour: The trusty structure-builder. If you need a gluten-free swap, a 1:1 GF blend works like a charm.
- ½ teaspoon salt: Don’t skip this! It balances the richness of the cheese and butter. I use fine sea salt.
- ¼ teaspoon garlic powder or smoked paprika (optional): My chef’s hack for a flavor boost. A smidge of garlic powder adds a savory depth, while smoked paprika gives a subtle smokiness and gorgeous color. Choose your adventure!
- 2–3 tablespoons ice water: The magical binder. The key word is ice-cold. We add just enough to bring the dough together without making it sticky, ensuring our crackers stay crisp.
Let’s Get Rolling: Your Foolproof Cracker Blueprint
Ready to see some kitchen magic? Follow these steps, and you’ll be a cracker pro in no time.
- The Pulse Party: In the bowl of your food processor, combine the shredded cheese, cold cubed butter, flour, salt, and your chosen optional spice. Pop on the lid and pulse in short bursts until the mixture looks like coarse, crumbly sand. You should see tiny pebbles of butter and cheese throughout—this is perfect!
- Bringing It Together: With the processor running on low, start drizzling in the ice water. Add just 1 tablespoon at a time. Stop as soon as the dough begins to clump together and form larger crumbles. It might not look like a single ball of dough, and that’s okay! If you pinch a bit, it should hold together. Pro-Tip: Over-watering is the enemy of crisp crackers. Less is more here.
- Chill Out: Dump the crumbly dough onto a clean surface or a piece of plastic wrap. Use your hands to gently press and shape it into a flat disc (this makes rolling easier later). Wrap it tightly and let it chill in the fridge for a solid 30 minutes. This step re-firms the butter, making the dough easier to roll, and guarantees our crackers won’t spread into a cheesy puddle in the oven.
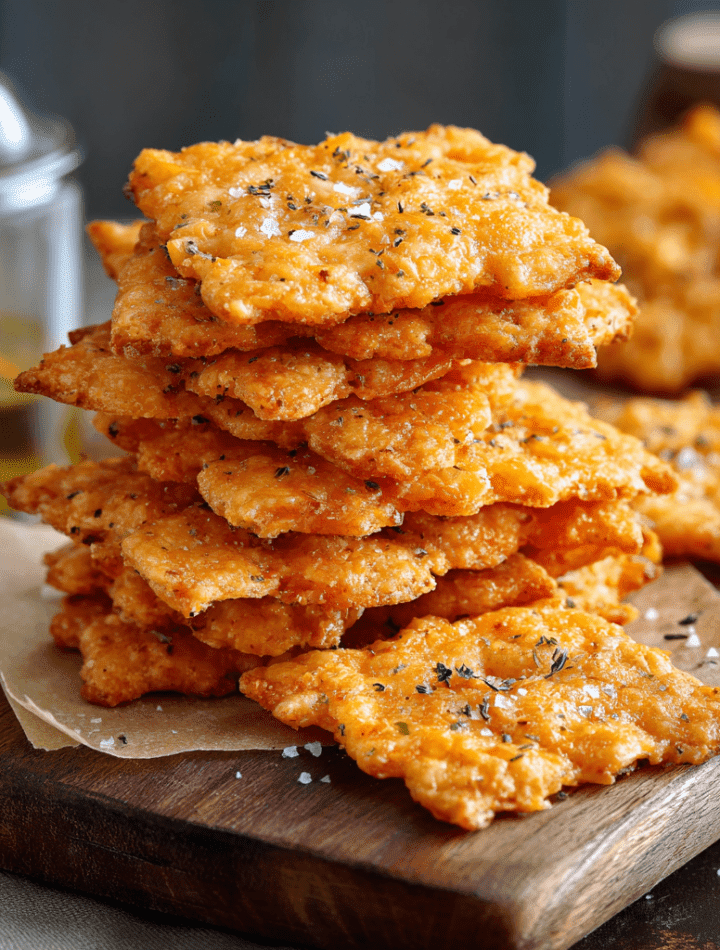
- Roll Call: Preheat your oven to 375°F (190°C) and line a baking sheet with parchment paper. On a lightly floured surface, roll your dough out nice and thin—aim for about ⅛ of an inch thick. This is the secret to that satisfying snap! If the dough cracks at the edges, just press it back together.
- Cut & Poke: Use a pizza cutter, sharp knife, or fun-shaped cookie cutters to cut the dough into 1-inch squares (or any shape you love!). Transfer them to your prepared baking sheet. Here’s the classic touch: use a toothpick, skewer, or the end of a chopstick to poke a hole in the center of each cracker. This isn’t just for looks; it helps them bake evenly and prevents puffing.
- Bake to Perfection: Bake for 12-15 minutes. You’re looking for the edges to be a light, golden brown. They’ll firm up even more as they cool, so don’t wait for them to get dark. Watch them like a hawk near the end—oven temperatures can vary!
- The Cool Down: This is the hardest part! Let the crackers cool on the baking sheet for 5 minutes, then transfer them to a wire rack to cool completely. They’ll crisp up beautifully as they do. Now, try not to eat half the batch before they’re cool. I believe in you.
Serving Up the Snackery
Okay, they’re baked, they’re crisp, they’re irresistible. Now what? The possibilities are endless!
The Straight-Up Snack: Honestly, a bowl of these on the counter disappears faster than you can say “cheddar.” They’re perfect for mid-afternoon munchies.
The Ultimate Lunchbox Star: Pack a handful in a small container. They’re sturdier than you think and will make you the most popular lunch-packer in the house.
Chef-Worthy Charcuterie Board: Elevate your snack spread! Arrange these crackers alongside slices of salami, fresh grapes, apple slices, a dollop of grainy mustard, and some creamy brie or tangy goat cheese. Watch your guests’ eyes light up.
Soup’s Best Friend: Crumbled over a steaming bowl of tomato soup or butternut squash bisque? Pure comfort food heaven. They add the perfect salty, crispy contrast.
Make It Your Own: Flavor Twists & Swaps
Once you’ve mastered the classic, the kitchen playground opens up! Here are a few of my favorite riffs:
- Everything Bagel Bliss: After poking the holes, brush the crackers very lightly with water or a beaten egg white and sprinkle generously with everything bagel seasoning before baking.
- Spicy Sriracha Cheddar: Add 1 tablespoon of Sriracha (or your favorite hot sauce) to the food processor along with the ice water. You’ll get a gorgeous rosy color and a sneaky, delicious heat.
- Rosemary & Sea Salt: Add 1 teaspoon of finely chopped fresh rosemary to the dry ingredients. After baking, while still warm, sprinkle with a tiny bit of flaky sea salt.
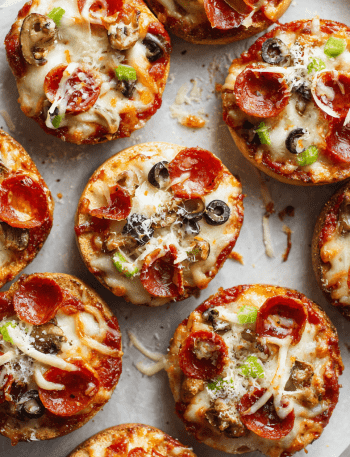
- Pepperoni Pizza: Add ¼ cup of finely chopped pepperoni and ½ teaspoon of dried oregano to the dough. You’ll feel like you’re eating a crispy, cheesy pizza slice!
- Dairy-Free Delight: Use a high-quality vegan cheddar shred and vegan butter. The texture is slightly different but you still get that wonderful cheesy, savory flavor.
Emily’s Kitchen Notes
This recipe has been my trusty sidekick for years, and it’s evolved with me. I once tried to rush the chill time (we’ve all been there) and ended up with crackers that spread into one giant, lacy, delicious—but definitely not cracker-like—sheet. We just broke it into pieces and called it “cheese brittle.” No regrets!
The dough freezes beautifully, too. Make a double batch, wrap the second disc tightly, and freeze for up to 3 months. Thaw in the fridge overnight and you’re ready for a fresh-baked snack anytime a craving strikes. It’s my secret weapon for last-minute guests.
Most of all, have fun. Get the kids involved with the cutting and poking. Use weird-shaped cutters. It’s not about perfection; it’s about the joy of making something real and delicious with your own two hands.
Your Cracker Questions, Answered!
Q: My dough is too crumbly and won’t come together. Help!
A: No panic! This usually means it needs a touch more moisture. Add another ½ tablespoon of ice water and pulse again. Do this very gradually until it just holds together when pinched.
Q: Why did my crackers puff up like little pillows?
A> They’re still delicious! This happens if the steam gets trapped. Next time, make sure you’re poking a clean hole all the way through the dough with your skewer, and that your oven is fully preheated before baking.
Q: Can I make these without a food processor?
A> Absolutely, just like Grandma Vi! Use a box grater on the cheese, and then cut the cold butter into the dry ingredients using a pastry cutter or two forks until it resembles coarse crumbs. Then mix in the water with a fork until a shaggy dough forms.
Q: How do I store them to keep them super crisp?
A> Let them cool COMPLETELY. Then, store them in an airtight container at room temperature for up to a week. A small piece of parchment paper in the container helps. If they soften a bit, a quick 5-minute warm-up in a 300°F oven will crisp them right back up.
Nutritional Information*
*Please note: These values are estimates provided for informational purposes based on a standard recipe calculator. Your specific ingredients may cause variations.
Per Serving (approx. 10 crackers):
Calories: ~160 | Total Fat: 11g | Saturated Fat: 7g | Cholesterol: 30mg | Sodium: 220mg | Total Carbohydrates: 10g | Dietary Fiber: 0g | Sugars: 0g | Protein: 5g
While these are definitely a treat, I love that you can pronounce every single ingredient in them. You’re getting real cheese, real butter, and real flavor without any additives or preservatives. As part of a balanced diet, I believe in enjoying wholesome, homemade snacks like this that satisfy a craving completely.
The Last Bite
And there you have it, friends—your ticket to homemade snack nirvana. These crackers are proof that the simplest things, made with care, are often the most extraordinary. They connect us to memories, to the people we share them with, and to the simple pleasure of a job (deliciously) well done.
I hope this recipe brings as much fun and flavor to your kitchen as it has to mine. When you make them, I’d love to see your creations! Tag me on social @TastyChow so I can cheer you on.
Now, go forth and bake up a storm! Your snack time will never be the same. Until next time, keep your whisks busy and your hearts full.
— Emily 🧀✨